So you just finished video editing and are thrilled about it. The file is all good, but when you try to open it back on your computer, you realize there’s some issue, the file is now corrupted! What do you do? It can be quite frustrating because your efforts have just gone in vain.
A video file on your computer may get corrupted due to several reasons: Viruses, damage from power surges, errors in the recording itself, etc. These issues can make it difficult to play a video file and sometimes even impossible. If you want to repair these corrupted video files, you can use different software and methods to save your files from being damaged irreparably.
The article shows how you can repair corrupted video files. We will discuss different methods to increase the chances of recovering your files. So, let’s begin.
How to Repair Corrupted Video Files with 4DDiG File Repair
4DDiG File Repair is one of the best video file repair tools to help you repair corrupted videos, which can repair from your corrupted SD card, USB flash drive, or other storage devices. It has a powerful function to scan both internal hard disk and external storage devices for damaged files.
The program can easily find the source of data corruption on your computer and repair it automatically so that you can view and edit the recovered files.
4DDiG File Repair is a very simple and easy-to-use video file repair software. It can help you to recover and repair the corrupted video files on your Windows computer.
Follow these three simple steps to use 4DDiG File Repair:
- Run 4DDiG File Repair after downloading and installing it on your computer. The software interface will show two options. Click on Video Repair to proceed.
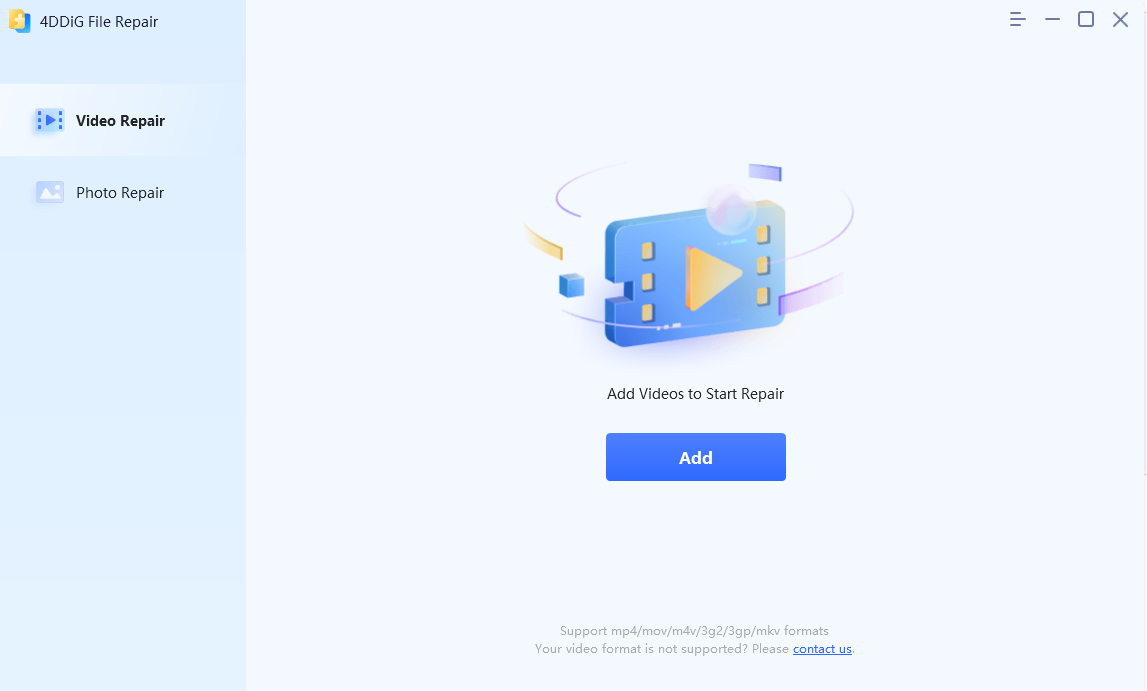
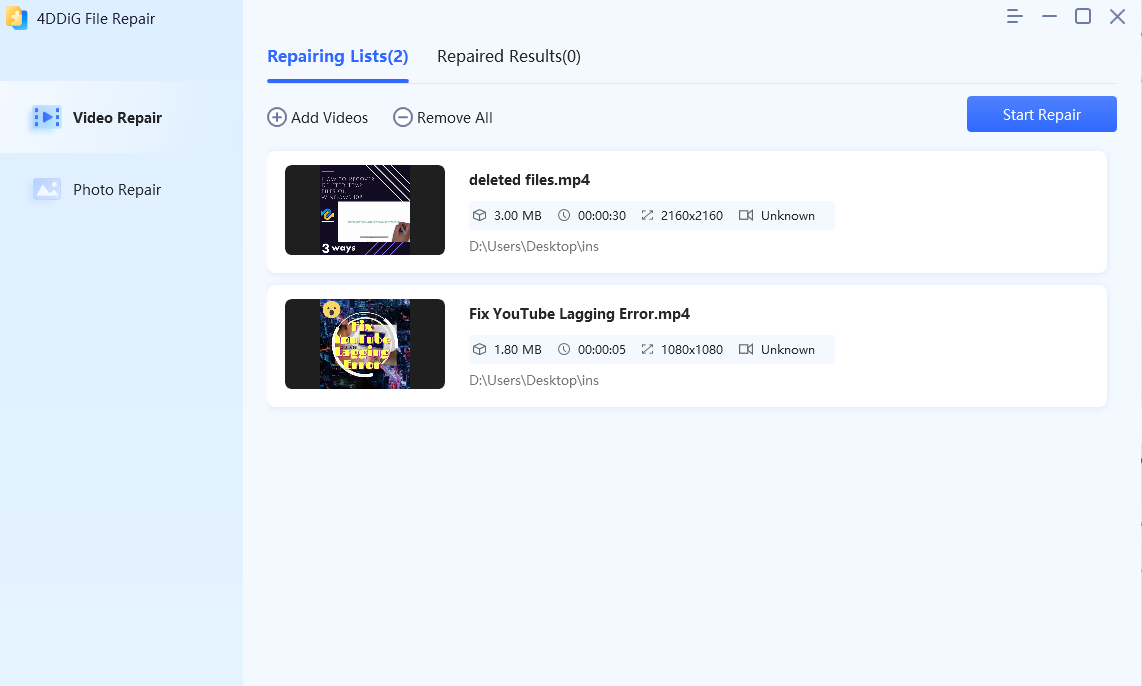
- Click the ‘Add’ button to import corrupted videos and then click “Start Repair” to start repairing them.
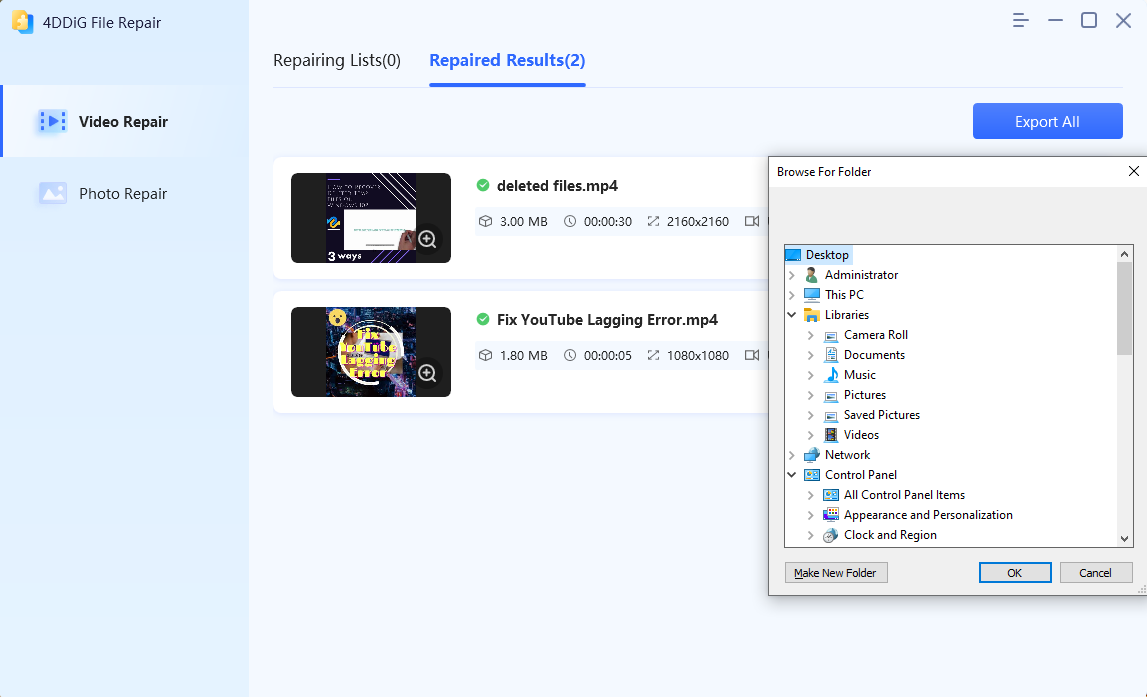
- You can preview the repaired videos and then export them to a safe location.
Repairing Corrupted Videos Without Software
Here are some methods that you can try to repair corrupted videos without using dedicated video repairing software.
Solution 1: Automatic MP4 File Repair with VLC
The VLC Media Player performs multiple tasks at the same time. Besides letting you play multimedia files, it can fix minor corruption issues. The software has a built-in index repair feature that allows you to repair movie file indexes instantly.
In VLC, one can manually enable or disable the option to fix AVI video files. As a result, we will try to fix the MP4 file automatically using VLC by changing the format of the corrupt MP4 video file.
Let’s see how it works exactly:
- Right-click the corrupt MP4 video file and select the “Rename” option.
- Change the file format to “.avi” and confirm to make the change.
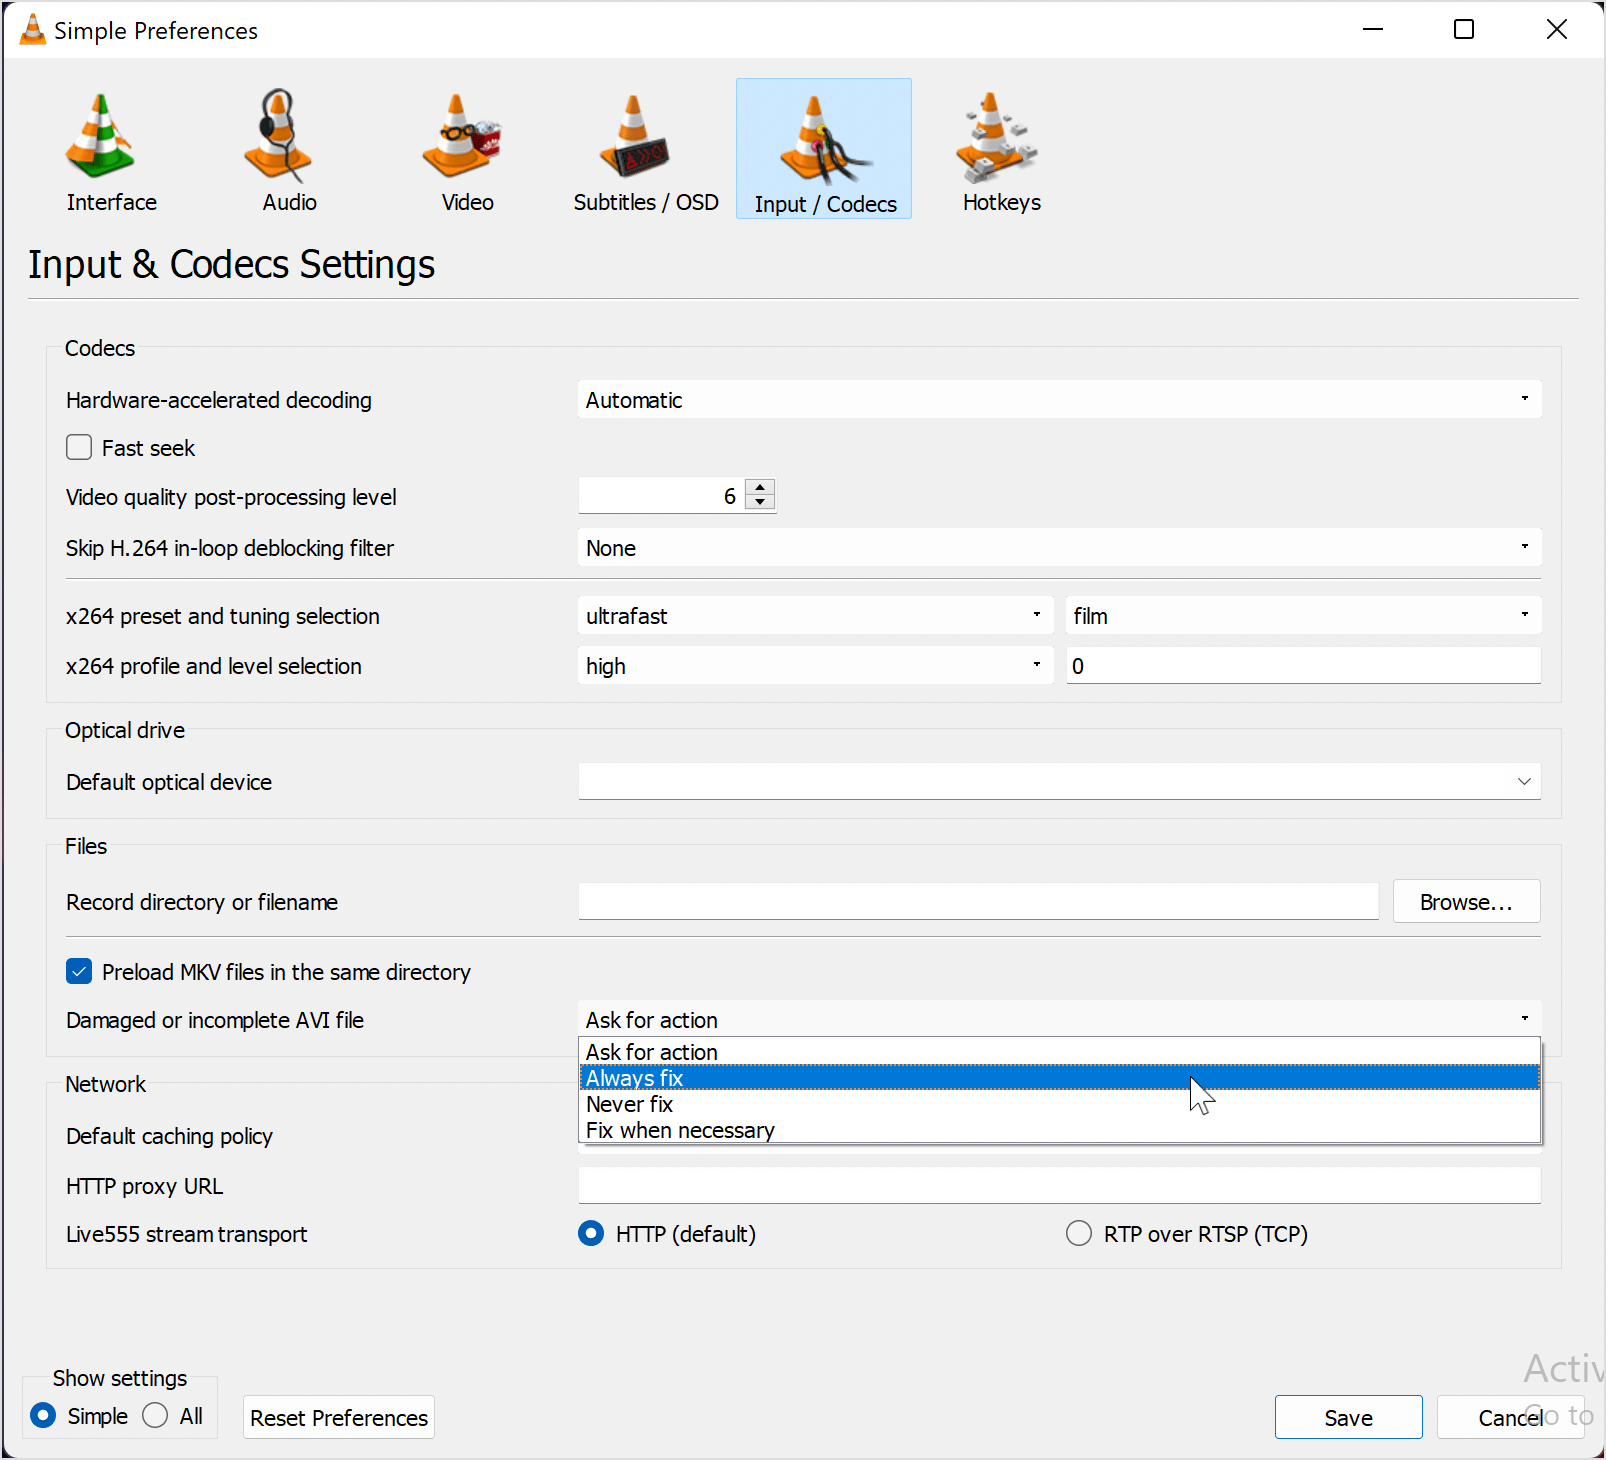
- Then open VLC, go to Tools, and select Preferences.

- On the Preferences screen, click the “Input/Codecs” tab.
- Open the drop-down menu for ‘Damaged or incomplete AVI file’, select “Always fix” and click Save.
- Now try to play the video using VLC and see the results.
Solution 2: Transcoding MP4 using VLC
You can play MP4 files on unsupported media players by transcoding them in the VLC player. The following is a step-by-step guide on how to transcode MP4 using VLC.
- Launch VLC Media Player.
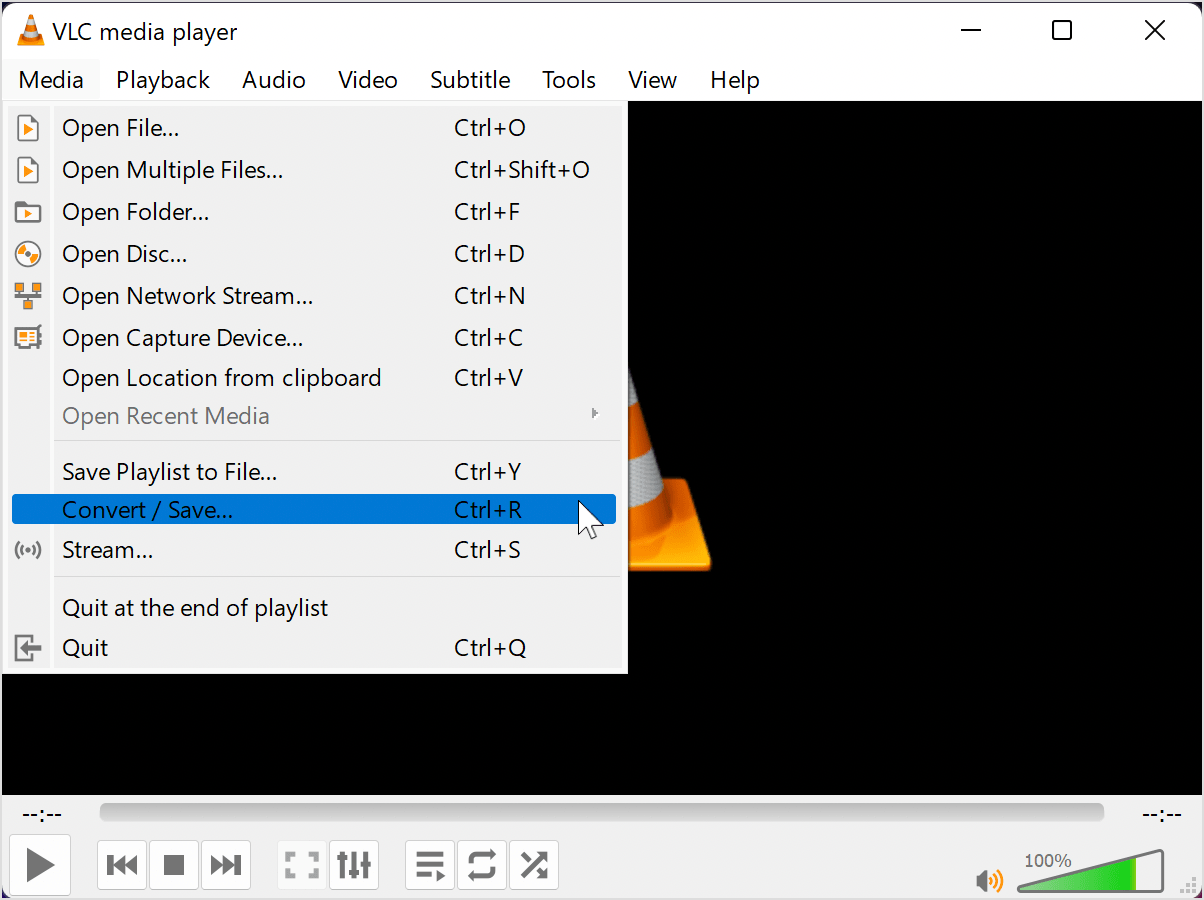
- Open the Media menu and select “Convert / Save…”.
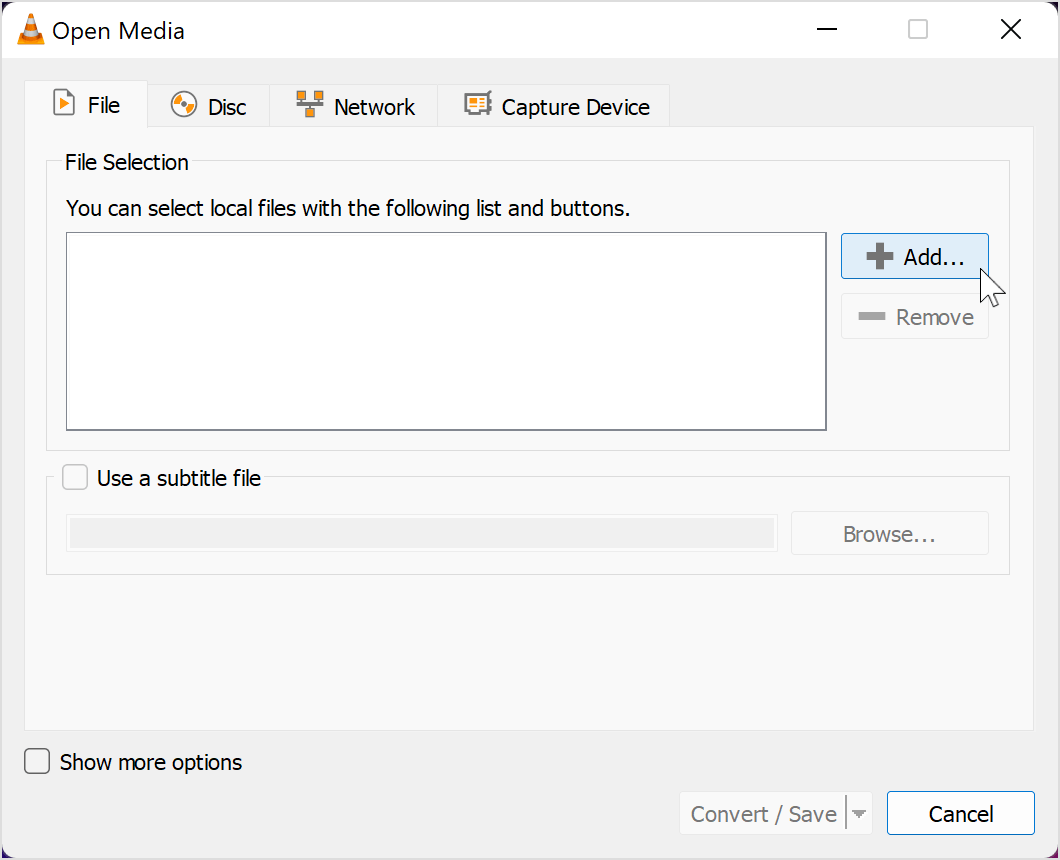
- Click the ‘Add’ button to add MP4 videos that you want to transcode.
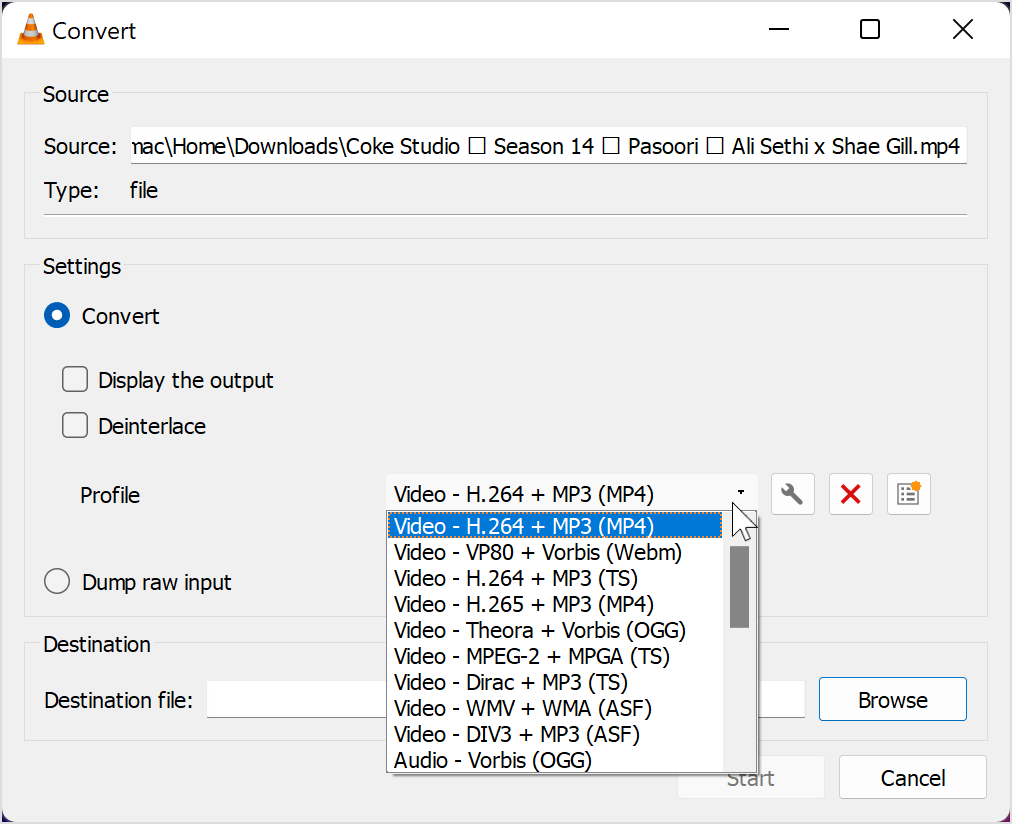
- After selecting the files, click on ‘Convert / Save’. You can choose the file’s name and the file’s location within the Convert window. Open the ‘Profile’ menu and select the input codecs you want for your video file. Optionally, tap the ‘tool’ icon to edit the selected profile. You can also create a new profile or delete an existing profile.
- Choose a destination for the file and click “Start.”
Using this method, you can fix corrupt MP4 files for incompatibility within the media player. After successful transcoding, play the video using VLC or other players.
Solution 3: Increase the Cache Value of VLC
Using this method, you can fix MP4 files that have been damaged, showing signs of lag or stutters.
To increase the cache value in VLC,
- In VLC Player, go to Tools and select Preferences.
- You will see two options in the Show Settings option: Simple and All. Select “All.”
- Click Input/ Codecs from the list in the left pane.
- Scroll down to the Advanced section in the right pane.
- Increase the cache value of File Caching (ms) to 1000.

- Click on Save and restart VLC.
Solution 4: Adjust the Output Settings of VLC
You can easily fix your MP4 video by changing the Video Output Settings in the VLC Media Player. To do so,
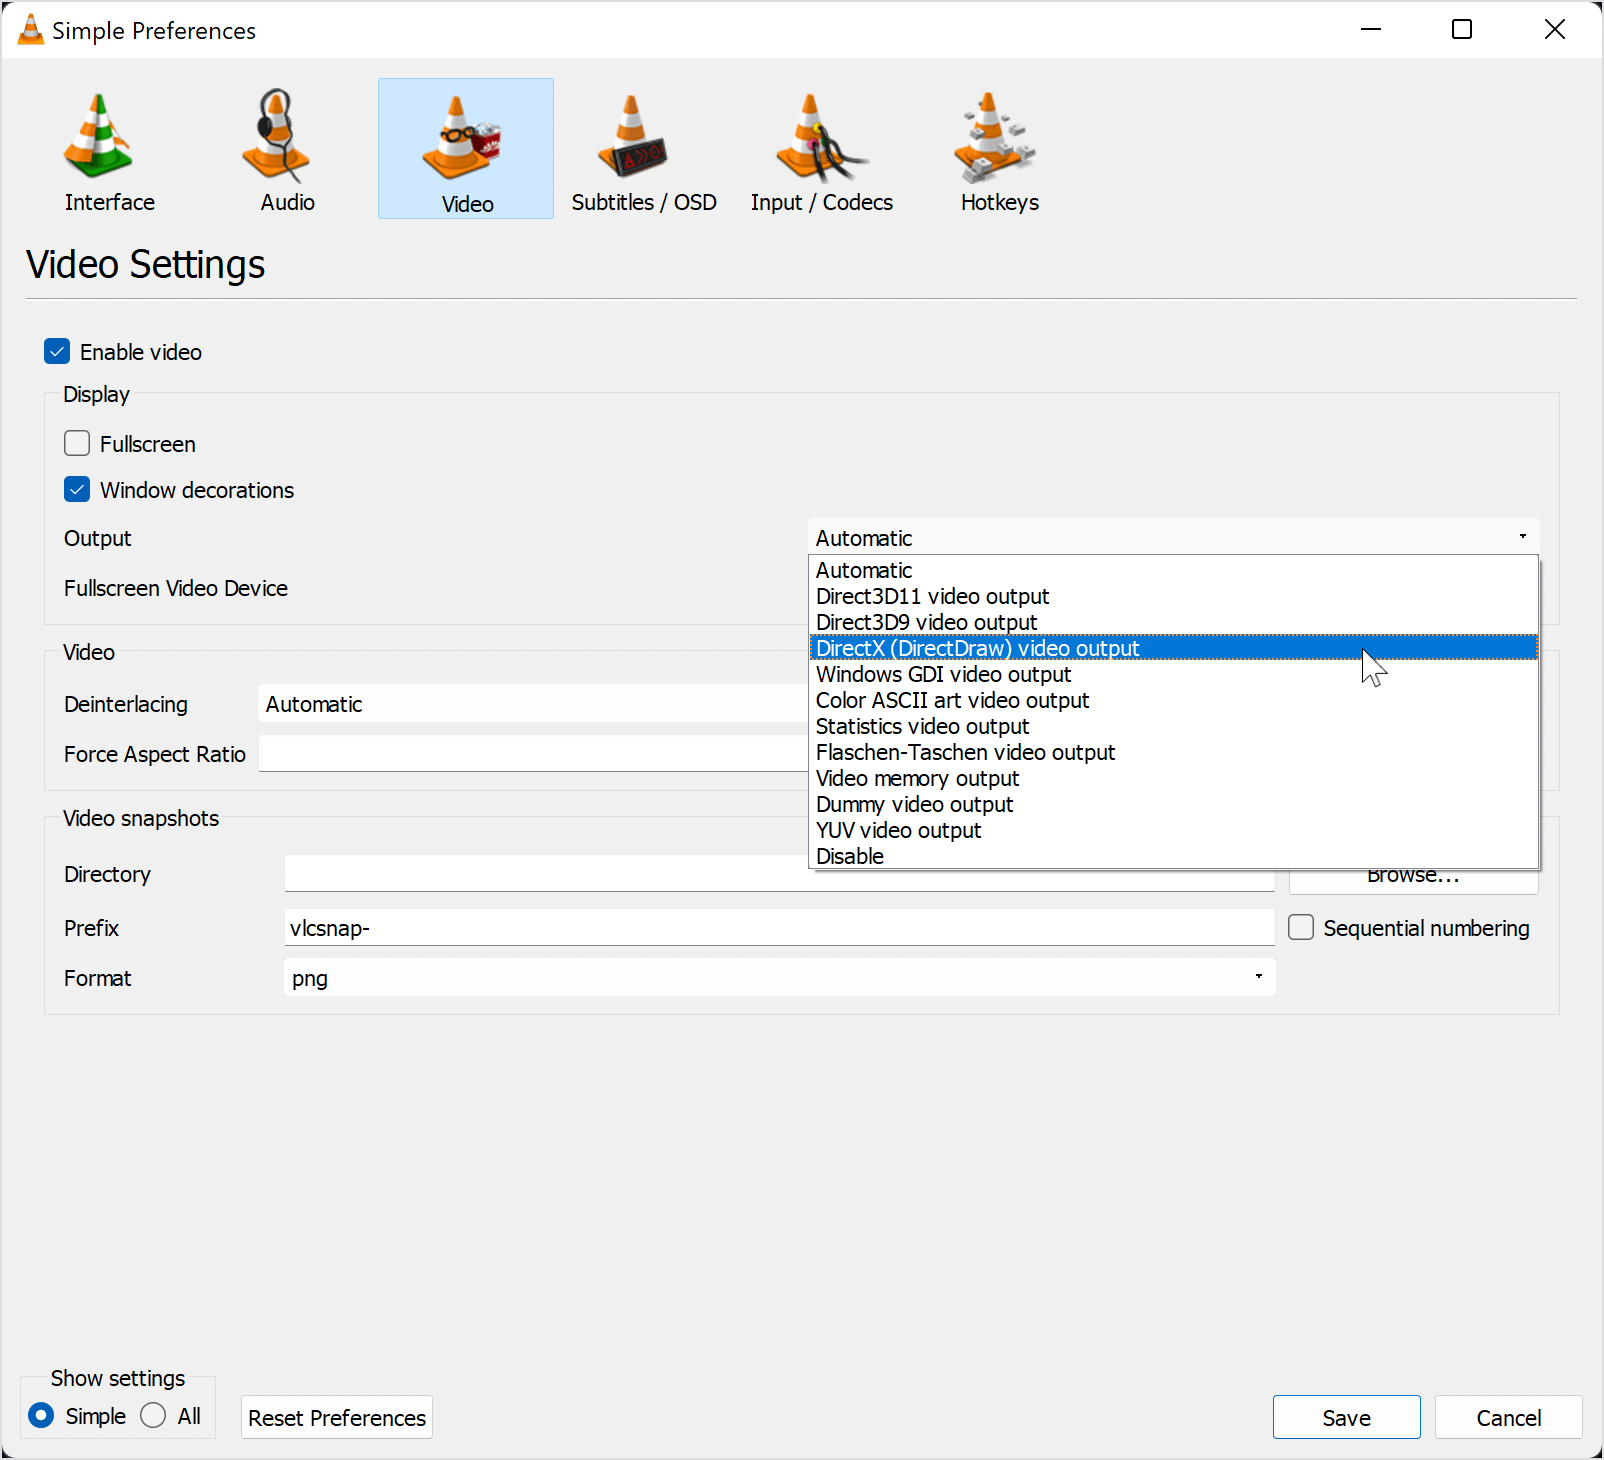
- Go to Tools > Preferences in VLC Media Player.
- In the Preferences window, click the ‘Video’ tab.
- Select “DirectX (DirectDraw) video output” as Output under the Video Settings.
- Hit Save and restart the VLC player.
Solution 5: Use a Free Online Video Repair Tool
If you don’t want to download software to repair your corrupted video files, then you can use the Tenorshare 4DDiG online video repair tool. This tool is meant for people who cannot download software on their system.
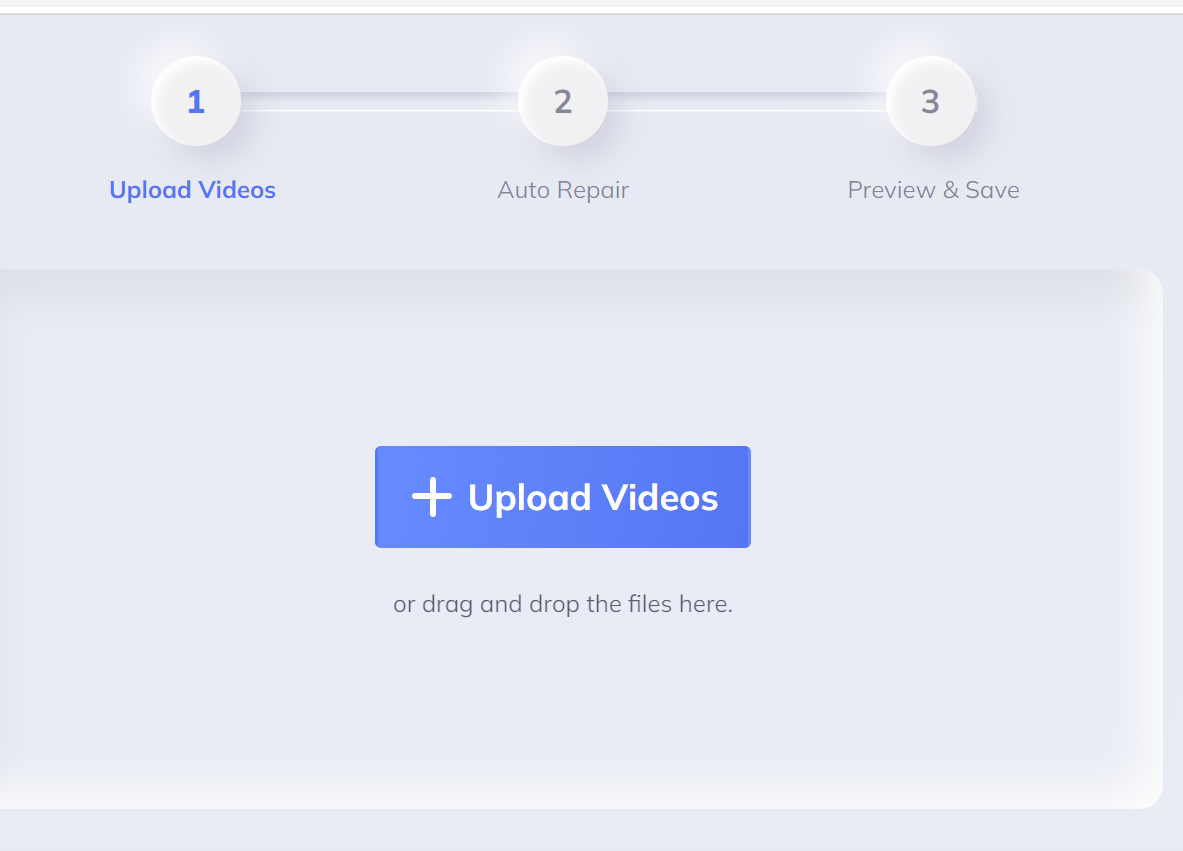
Follow the steps below to repair corrupted videos online files using the Tenorshare 4DDiG Free Online Video Repair tool:
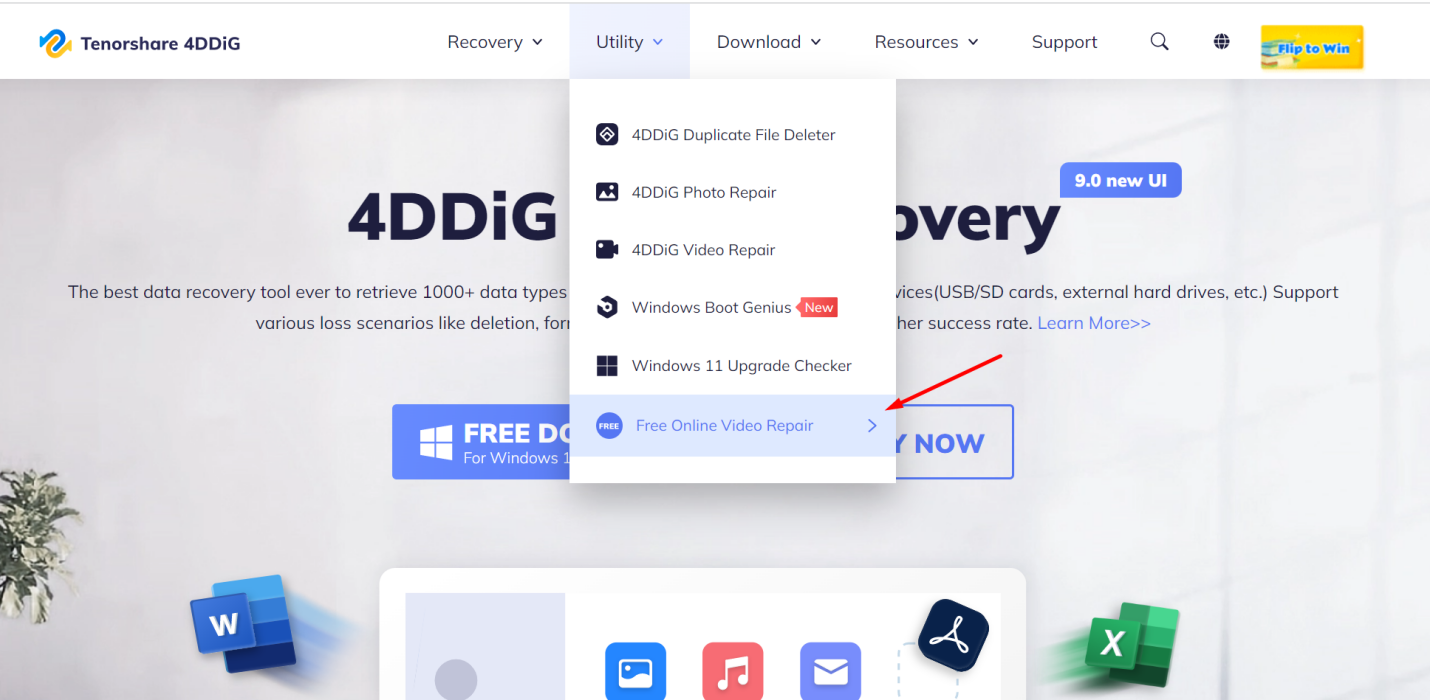
- Visit the Tenorshare 4DDiG website, go to Utility, and select “Free Online Video Repair”.
- Click the “+ Upload Videos” button and select the corrupted video file(s) from your computer.
- In the next step, the tool will automatically start repairing your video. It can take a few minutes, so wait patiently.
- Once the video is repaired, you can preview it online and save it to your computer.
Tips to prevent video file corruption
To prevent future MP4 video files from corruption, one must keep the following points in mind.
- Always make a backup before making any changes to the video file.
- Maintain a consistent electrical connection and continuous supply for your computer or laptop.
- Update your OS regularly and always install antivirus software.
- Besides other locations, always keep a backup on USB drives, DVDs, CDs, and cloud storage. This way you can easily restore a video file in case your hard drive gets corrupted.
Conclusion
As you can see, repairing a video file may seem easier than it really is. However, there are tools available that make the process simpler. Tenorshare 4DDiG HD Video Repair Program may be one of the best options to help you repair your videos. It’s certainly worth a closer look. So why Tenorshare 4DDiG? Because it is easy and safe to use. With this reliable video repair tool, you can easily fix media file issues caused by virus attacks, damaged data files, and so on. Give it a try!


