Developed by Microsoft, AVI, also known as Audio Video Interleave is a file format used for storing audio and video data. It’s popularly known to be one of the most reliable formats to store digital video files and can be opened using either Windows Media Player, VLC, DivX Player, or Kodi.
However, just like many other file formats, AVI files are prone to corruption, which causes video and audio content to get damaged. If you have damaged AVI files, this article will show you possible ways to repair an AVI file without requiring advanced knowledge.
Reasons that cause AVI video corruption
Before diving into the techniques to repair AVI files, let’s discuss some possible reasons why video files could get corrupted.
- Corruption of video storage path:
AVI video files can become corrupt if the storage path where they are saved becomes corrupted or damaged. This can happen due to a variety of reasons such as sudden power failure, system crash, or physical damage to the storage device. In such cases, it is important to repair the storage path or move the AVI video file to a different storage device to avoid further corruption.
- Bad sectors in the hard drive:
AVI video files can also become corrupt due to bad sectors in the hard drive. Bad sectors are physical damage on the surface of the hard drive, which can result in the loss of data or corruption of files.
- CODEC Issues:
We all know CODEC (Coder/Decoder) is responsible for encoding and decoding digital video files. So, if the CODEC used to encode an AVI file is not compatible with the media player used to play the file, it can cause corruption or playback issues. This is why it’s always advisable to use compatible CODECs when encoding or decoding AVI video files.
- Virus or Malware Attack:
Virus or malware attacks can cause video files to become corrupt or even delete them entirely. It is important to use reliable antivirus software to scan and remove any potential threats from the system to prevent corruption and data loss.
- Error During File Transfer:
AVI files can corrupt if there are errors during the transfer process. This can happen if there is a sudden interruption in the transfer, such as a power failure or system crash. To avoid this, it is recommended to transfer them using a reliable and stable transfer method.
- Power Failure or System Crash:
Power failure or system crashes can also corrupt AVI video files. This is because such events can cause the system to shut down suddenly, without giving enough time to properly close open files.
3 Methods to Repair Corrupted AVI Videos on Computer
We’ve devised the three most efficient methods to fix corrupted AVI files on a computer, from using advanced video repair software to converting the video from one format to another and using VLC media player. Read on to find out how these methods work.
Method 1 – Use Wondershare Repairit Video Repair
Our first recommendation to repair AVI files is to use the Wondershare Repairit Video Repair software. This is a top-leading video repair tool that offers the best video repair solution. It does not matter whether you have an AVI file with bad sectors, virus attacks, corruption, or more, this tool got you covered with all you need to restore your video with high quality.
Wondershare Repairit also supports different repair modes, including Quick repair and Advanced repair, with the advanced repair mode being the best option to fix videos with severe damage.
Key Features
- Simultaneously repair more than one AVI file within a few clicks.
- Easily repair AVI files using either Quick Repair mode or Advanced Repair mode.
- Repair damaged videos in 15+ video formats, including AVI, MOV, MP4, etc.
- Repair damaged videos with all levels of corruption, such as video not playing, video having no sound, header corruption, missing video codec, etc.
- Compatible with both Mac and Windows computers.
Here’s how you can repair an AVI file using the Wondershare AVI Repair Tool.
Step 1. Install the latest version of Wondershare Repairit on your computer and launch the app.
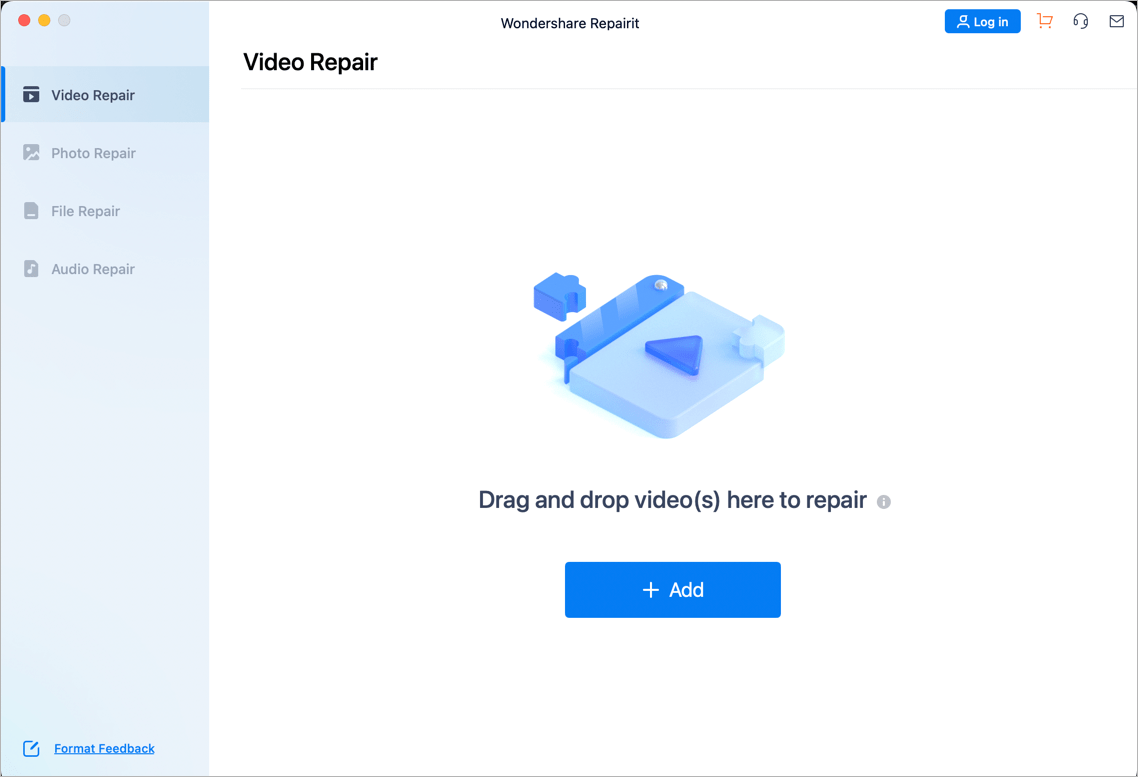
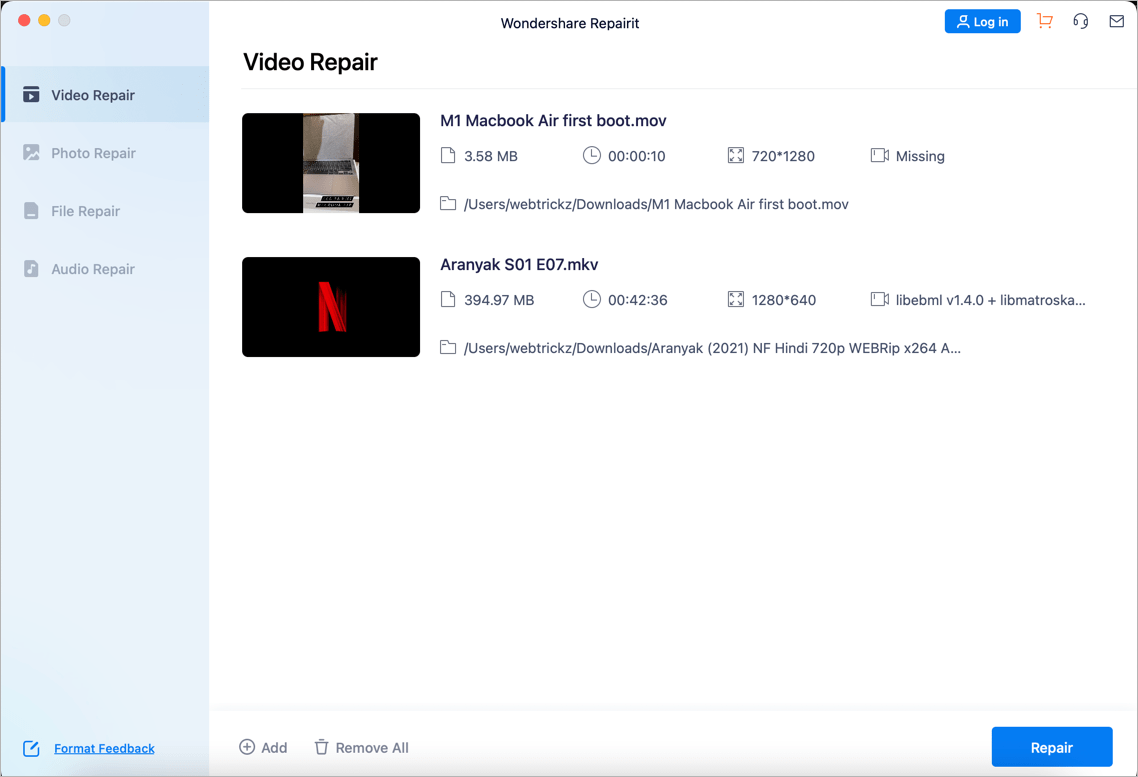
Step 2. From the left sidebar, select Video Repair. Then, click the “Add” button to upload the AVI file(s).
Step 3. Click the Repair button to start repairing the video.
Step 4. The software should repair your AVI file within a few minutes.

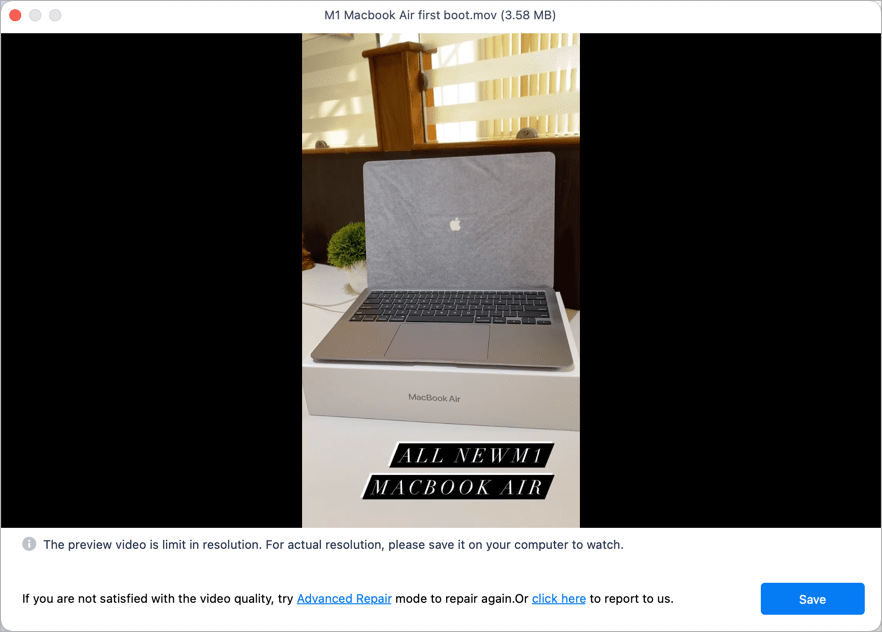
Step 5. Afterward, Preview the repaired video and Save it to your computer.
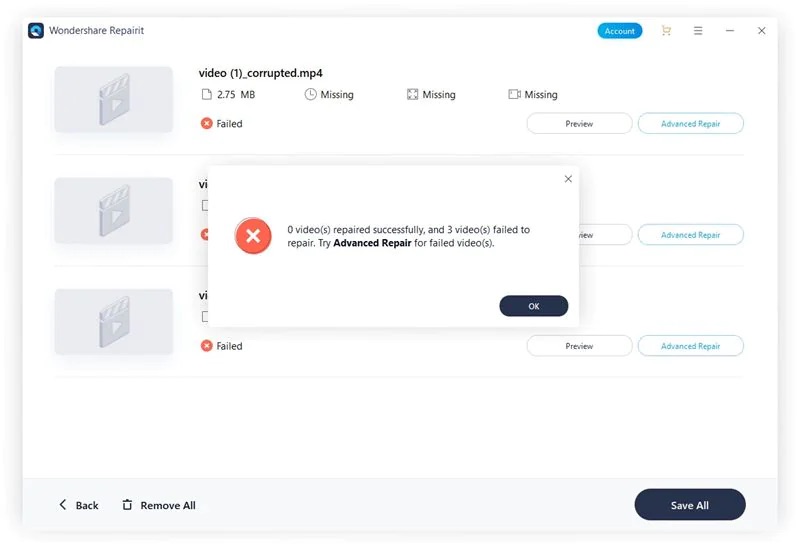
The above steps let you perform a Quick Repair using Repairit. In case you want to fix a video that is badly blurry, you need to use the Advanced Repair mode. The steps to do that are outlined below:
Advanced Repair
Step 1. Click the “Advanced Repair” button.
Step 2. A pop-up like the one shown in the image below should appear on your screen. Click the folder icon to upload a sample video of your AVI file.
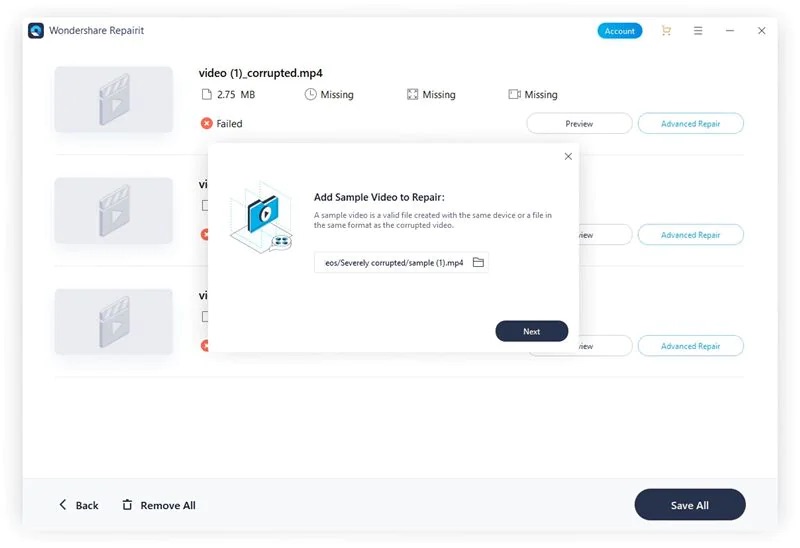
Step 3. Repairit should automatically check your video once you upload it. Then, click Repair to start the video repair operation.
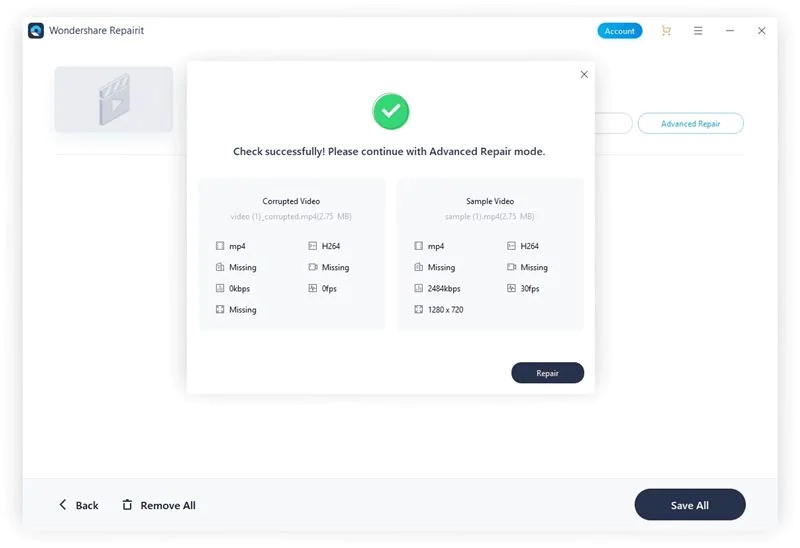
Step 4. The repair process should take only a few minutes. After that, click Save to save the video to your computer.
Method 2 – Change the Video Format to Another One
Changing the corrupt AVI video file to another format is another reliable way to get rid of errors in it. All you need is a reliable video converter. Here, we’ve explained this method using the built-in video conversion function in VLC Media Player.
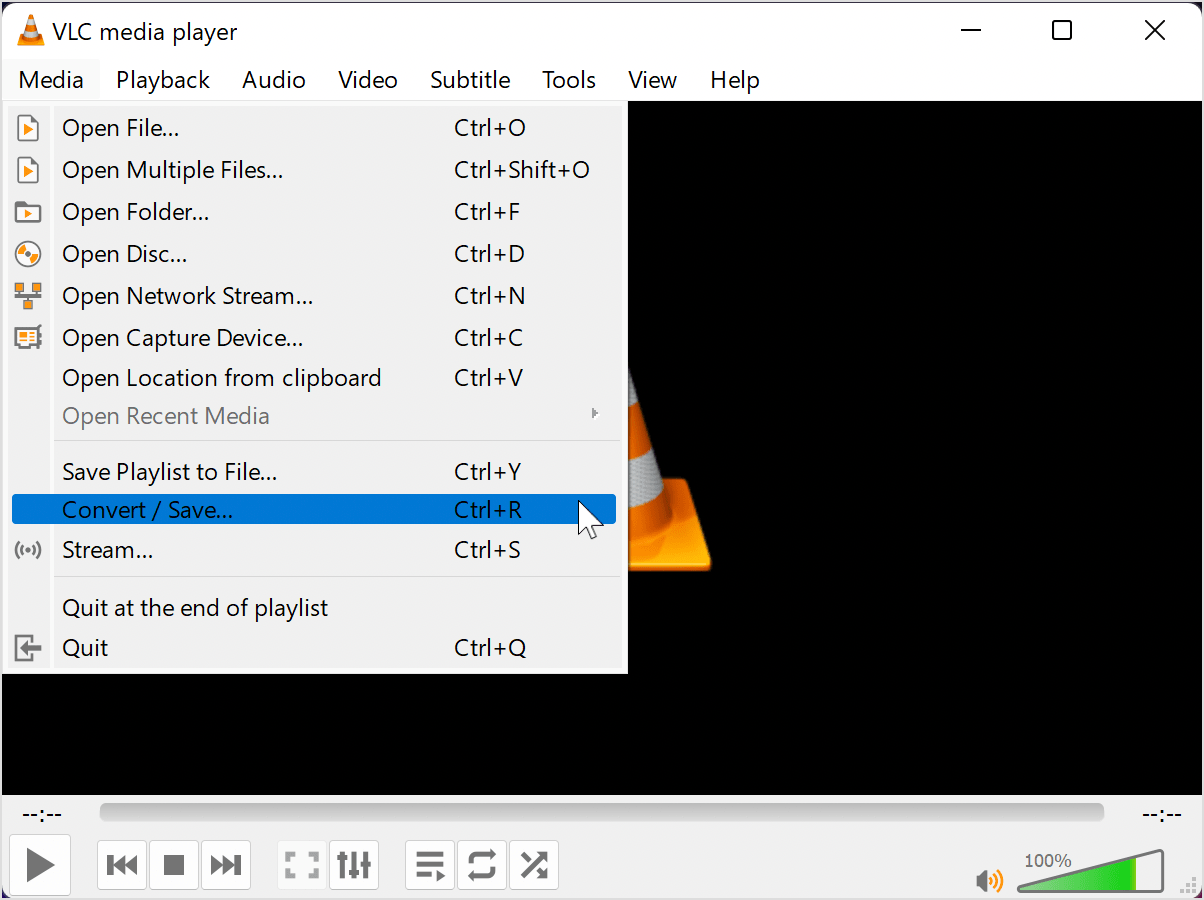
- Launch VLC on your Mac or Windows PC.
- Click Media from the menu bar and select Convert/Save.
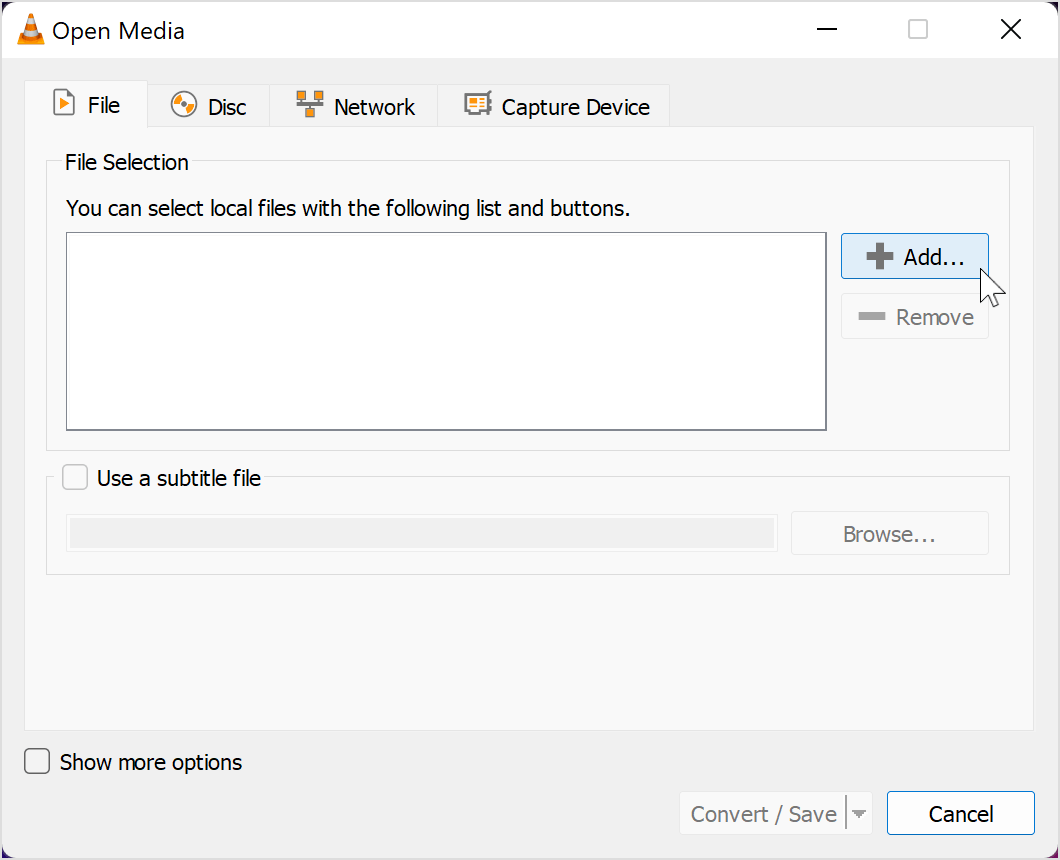
- Click Add in the ‘Open Media’ window to upload the AVI file. Then, click Convert/Save again.
- Up next, choose a path to save your file. Then, click the ‘Profile‘ drop-down menu and select some other video format for your video file.
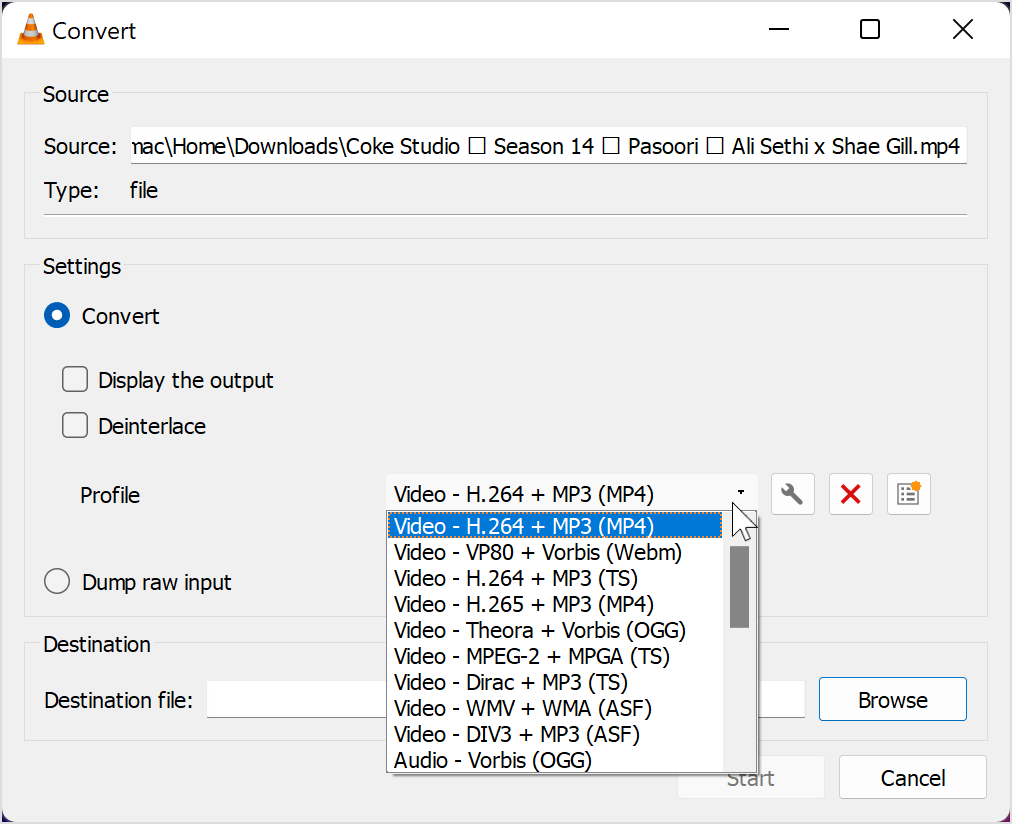
- Finally, click Start to begin the conversion process.
Method 3 – Use VLC Media Player
You can also use VLC Media Player to automatically repair AVI files. Yes, the tool supports a built-in function that allows you to automatically repair damaged files without requiring advanced knowledge. You just need to turn the feature on and upload the corrupt AVI file, and it’ll automatically repair your video instantly. See how it works in the steps below:
- Open VLC and click Tools from the menu bar. Then, select Preferences.

- Click the Input/Codecs tab. Then, click the drop-down icon next to ‘Damaged or incomplete AVI file’ and select ‘Always fix’.
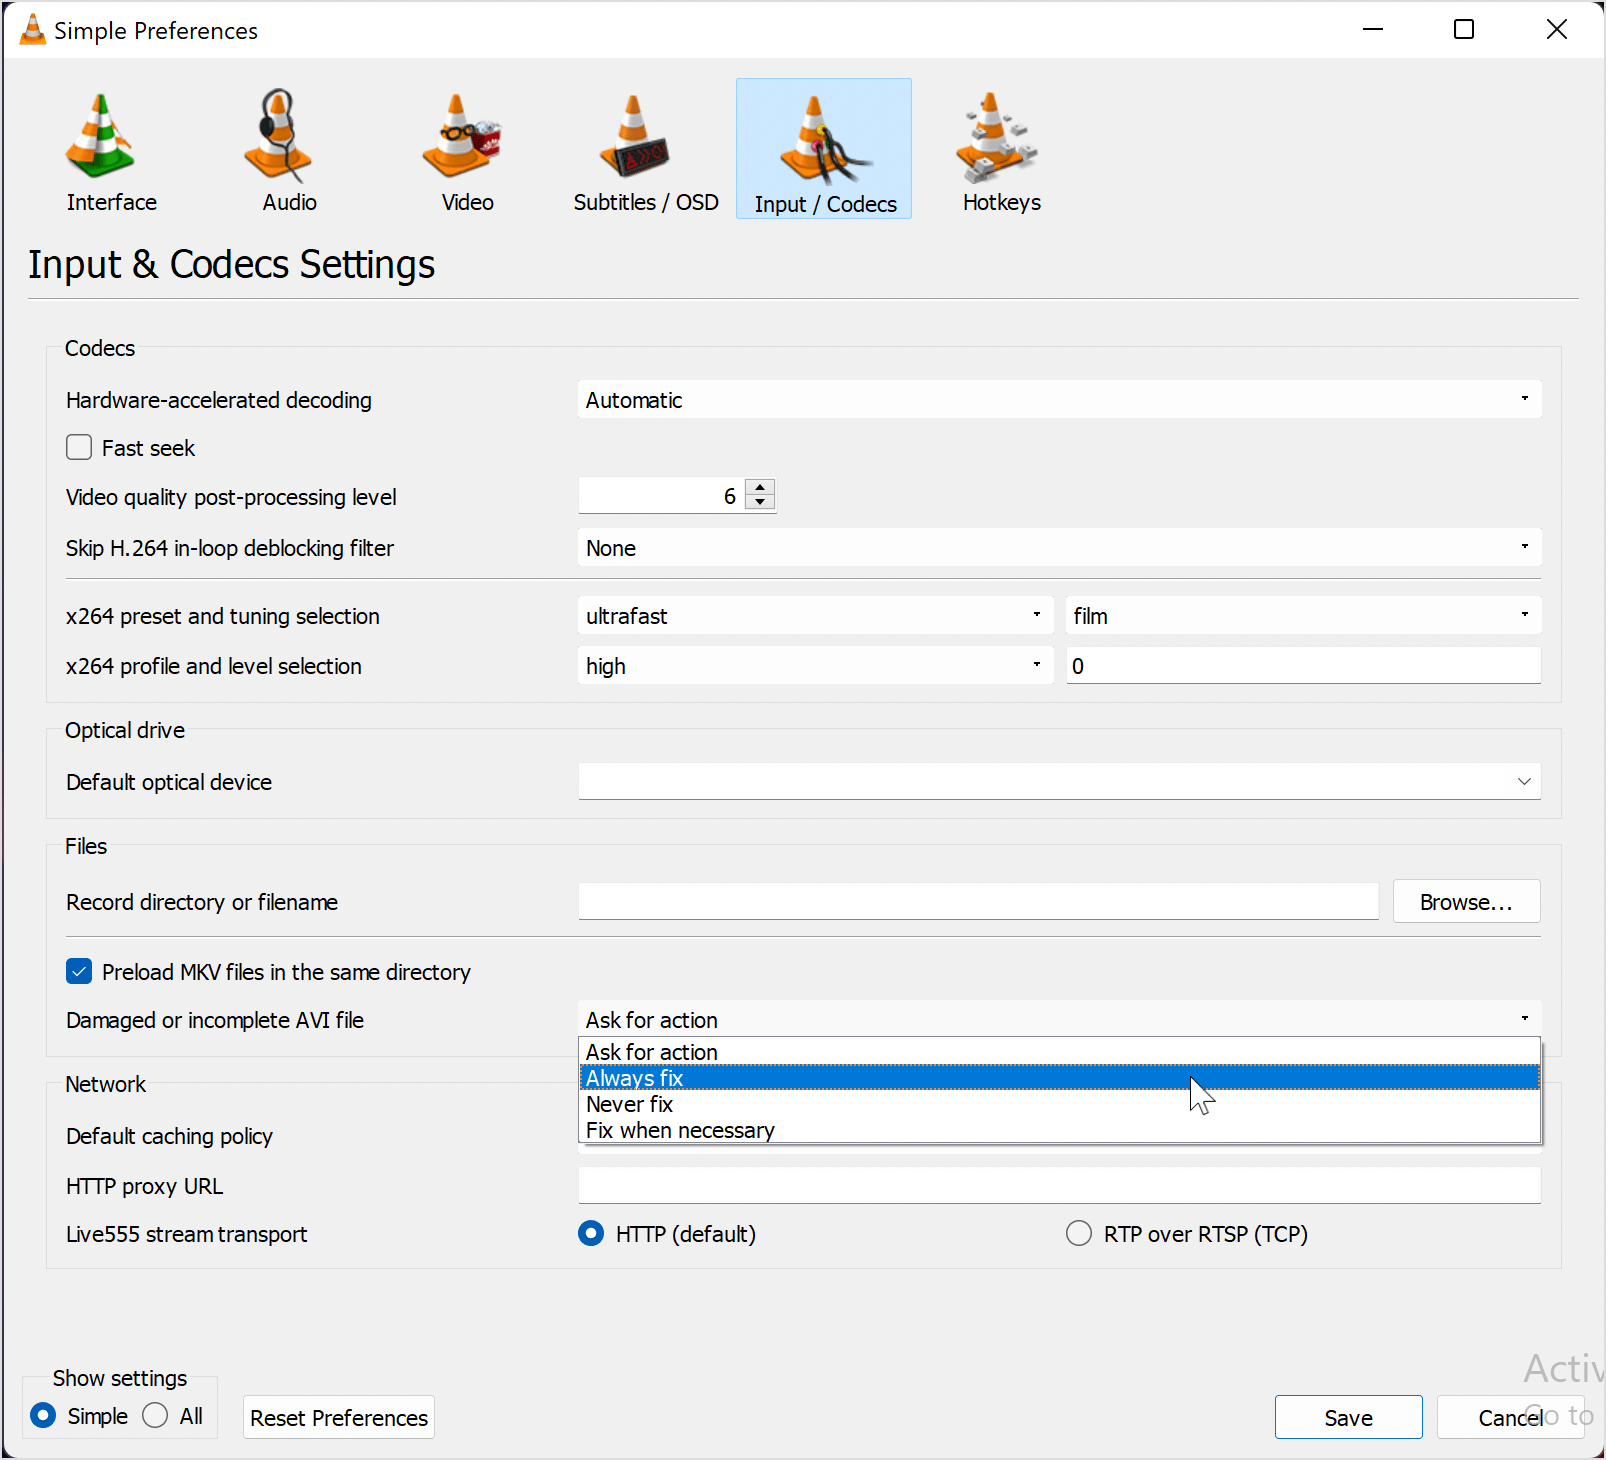
- Click the Save button to finish the operation.
Now open the corrupt AVI file using VLC and it should automatically fix errors in the file.
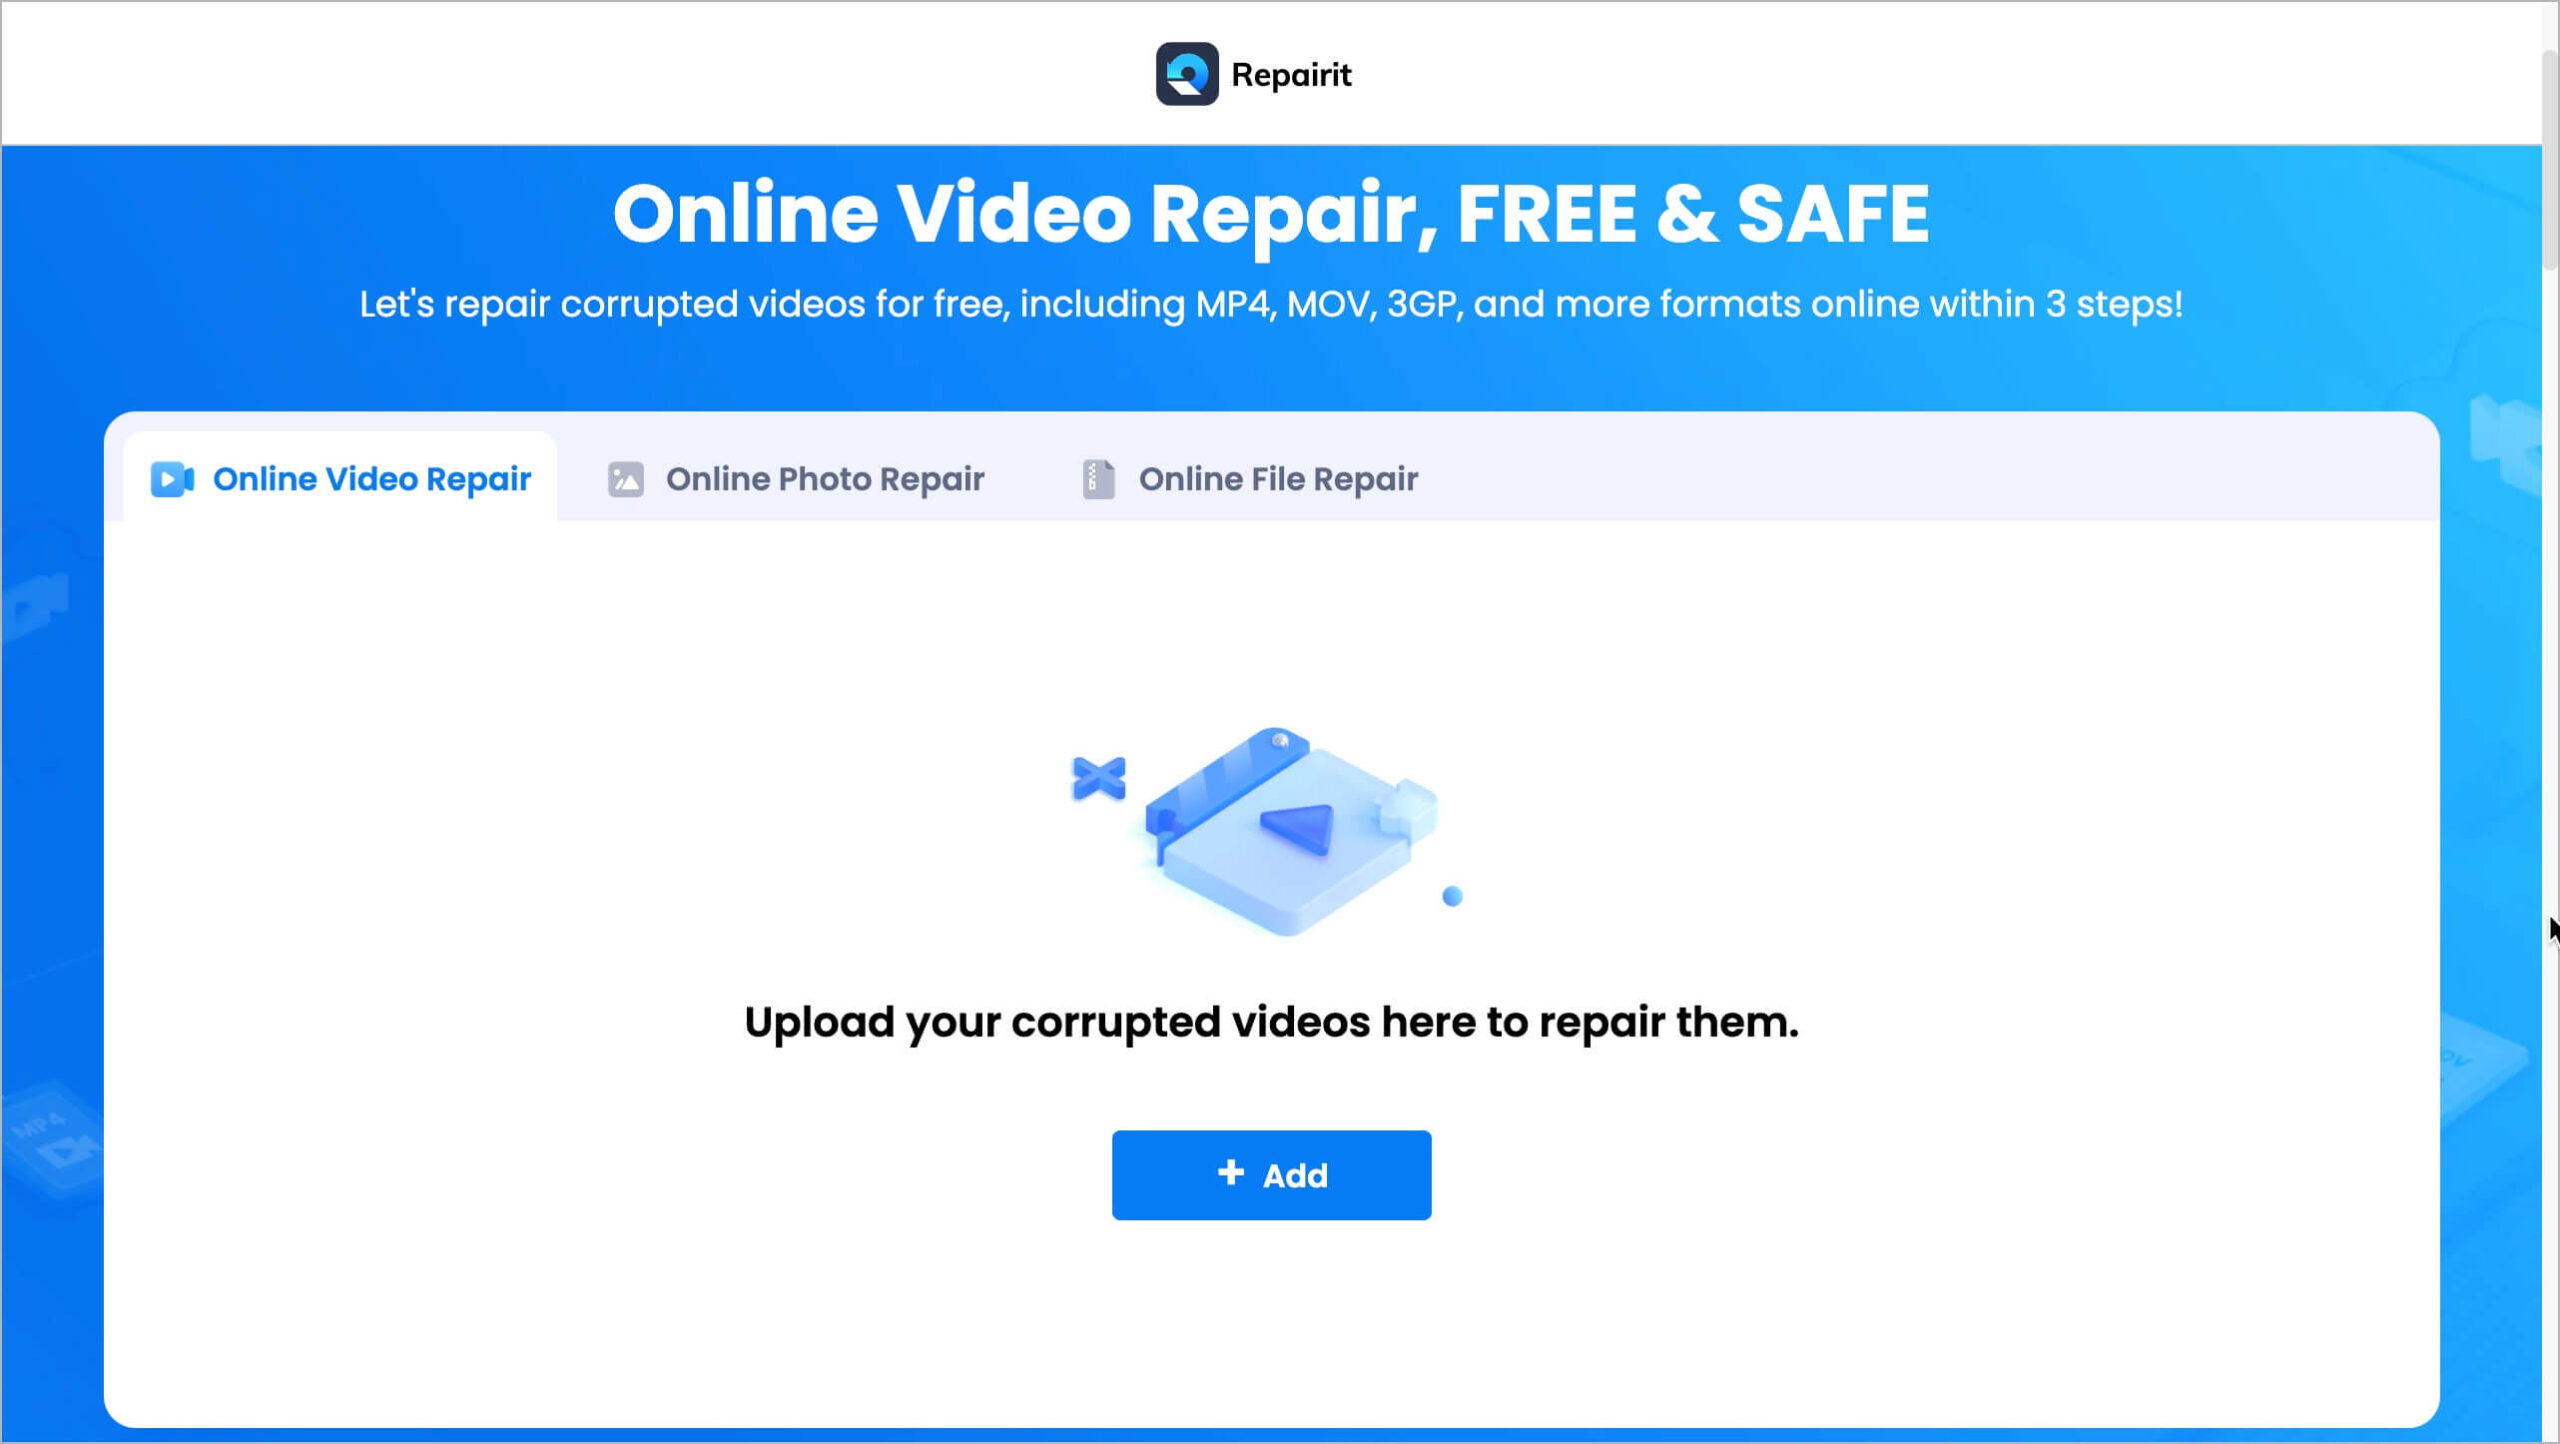
How to Repair AVI Files Online for Free?
Besides the methods discussed above, you can also repair AVI files online using Wondershare Repairit Online Video Repair and it’s 100% free. It’s a powerful AVI repair tool that allows you to upload and repair damaged AVI videos automatically. Thanks to its simple user interface, you don’t need to be tech-savvy to operate it.
Here’s how Repairit Online Video Repair works.
- Visit Wondershare Online Video Repair in a web browser and upload the AVI file using the ‘Add‘ button.
- You’ll be asked to upload a sample video. Click on ‘Upload Sample Video‘ and upload a good and playable version of your AVI file created with the same device or the same format.
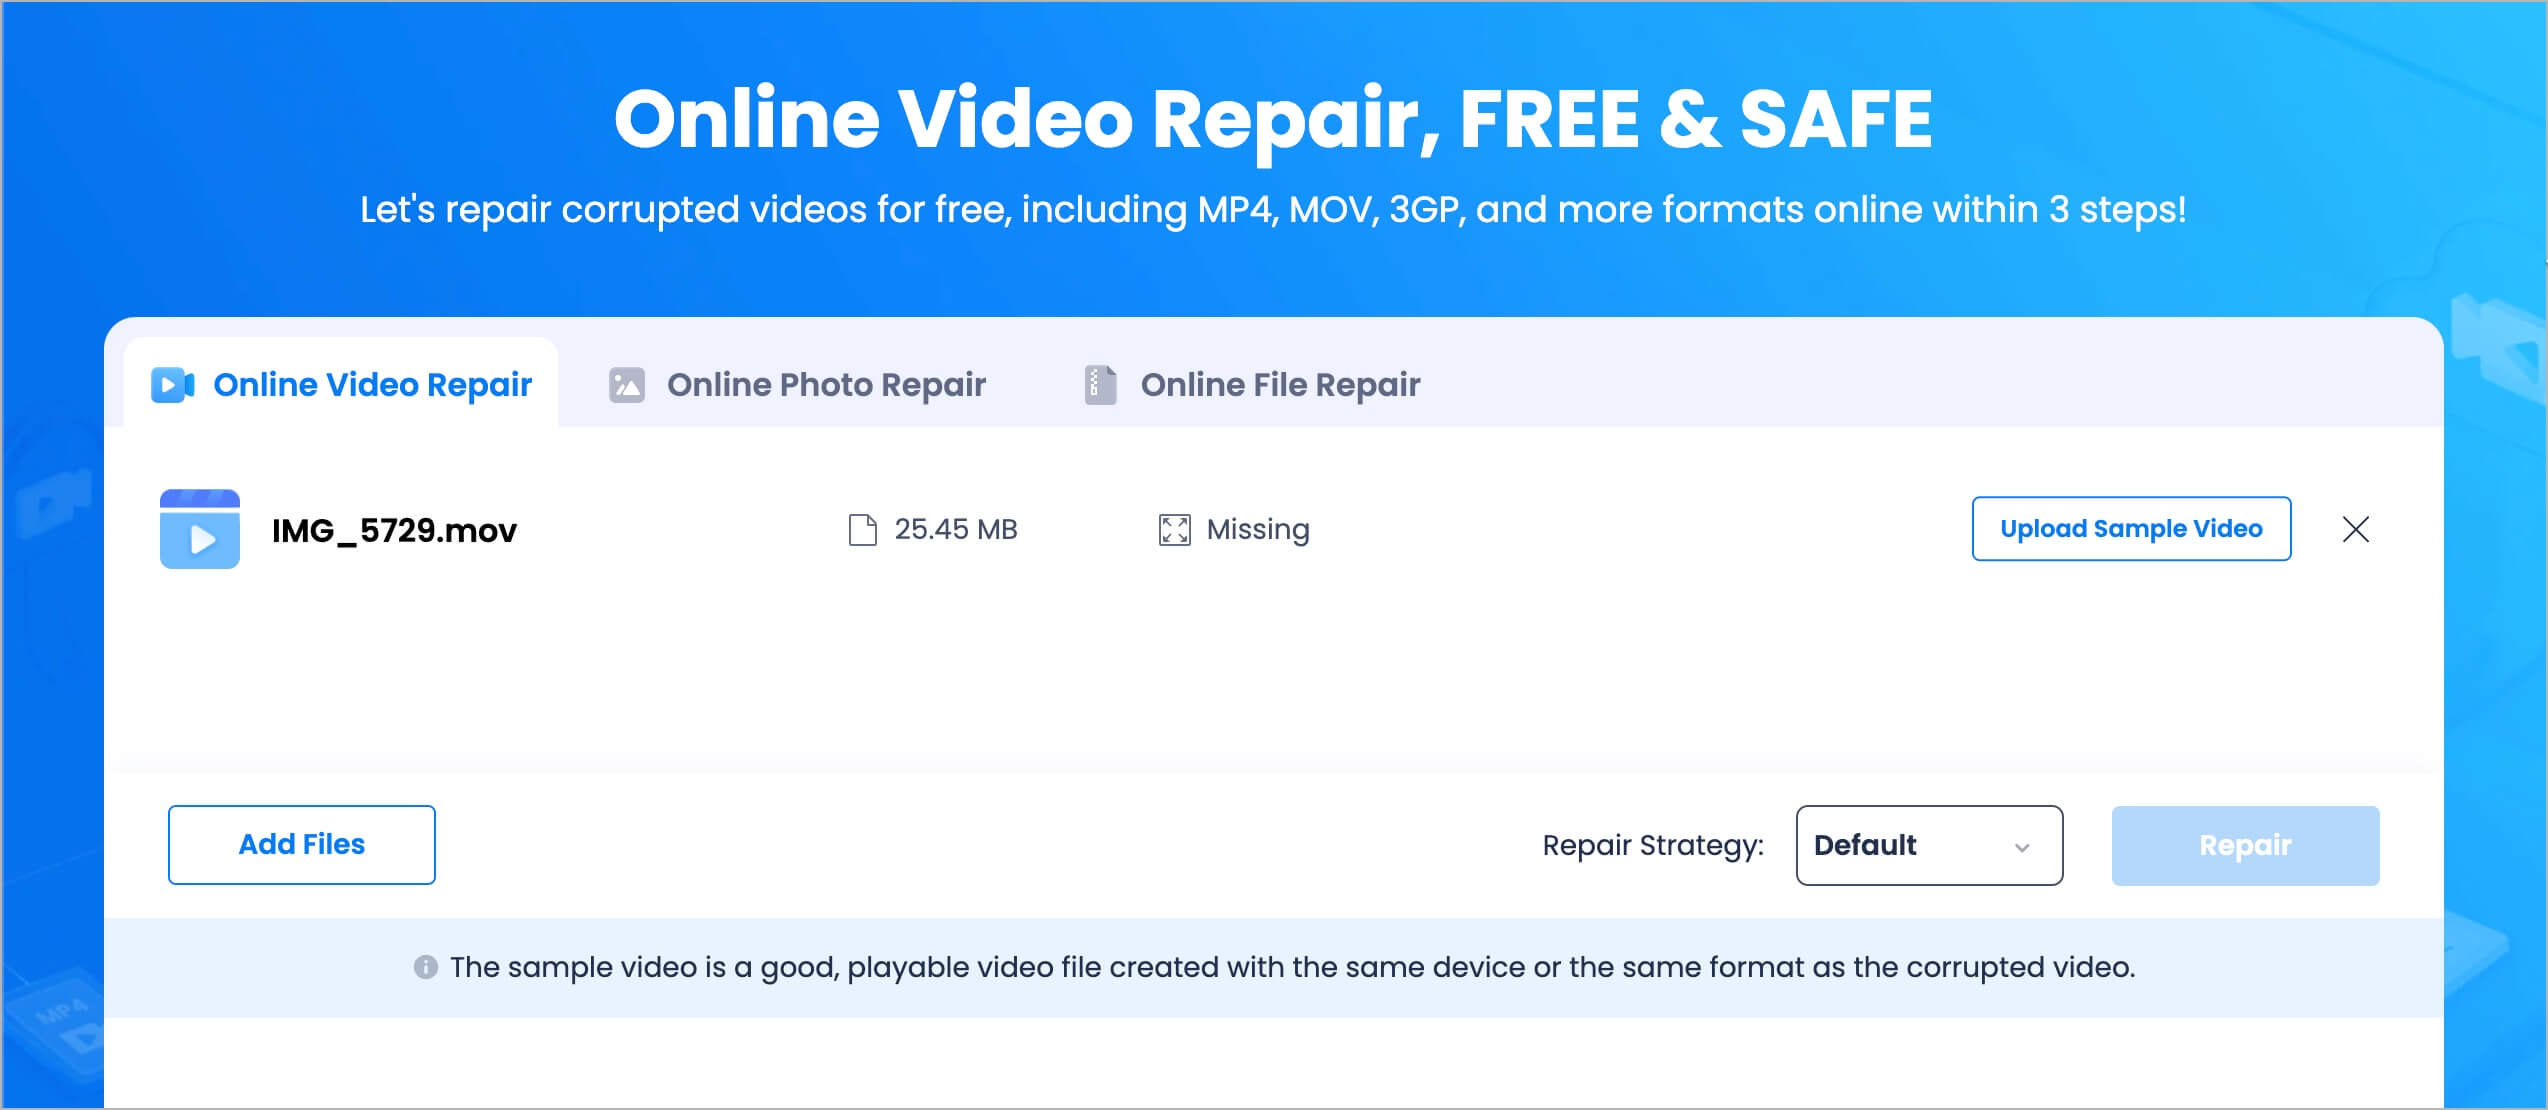
- Click the Repair button to start repairing. After that, download the repaired file.
NOTE: With the free plan of Repairit Online, you can repair one corrupted video (at a time) of up to 50MB in size.
Conclusion
Repairing AVI files can be quite tricky. But the methods outlined above should get the job done within a few clicks. You simply need to choose an AVI file repair method that suits your requirements. We suggest you try the Wondershare Repairit Video Repair program, as it does the job faster and more efficiently.
RELATED: How to Fix Corrupted MP4 Video Files using Repairit


