
Cloudflare has announced its own DNS service 1.1.1.1, claiming it to be the fastest and privacy-first consumer DNS service. Though alternatives like Google DNS and Open DNS already exist, Cloudflare is mainly focussing on the privacy problem. Built with a partnership between Cloudflare and APNIC, the 1.1.1.1 DNS resolver supports both DNS-over-TLS and DNS-over-HTTPS for enhanced security. Cloudflare’s DNS currently ranks fastest with a global response time of 14ms, compared to 20ms for Open DNS and 34ms for Google DNS. You can read detailed info on the announcement blog post and the official 1.1.1.1 site.

Cloudflare DNS uses 1.1.1.1 and 1.0.0.1 for IPv4 and 2606:4700:4700::1111 and 2606:4700:4700::1001 for IPv6 connections. Perhaps, if you wish to switch from your default ISP DNS or any other custom DNS to Cloudflare then you can do so across different platforms. Let’s see how to do so on iOS and Android.
How to add Cloudflare DNS on iPhone & iPad
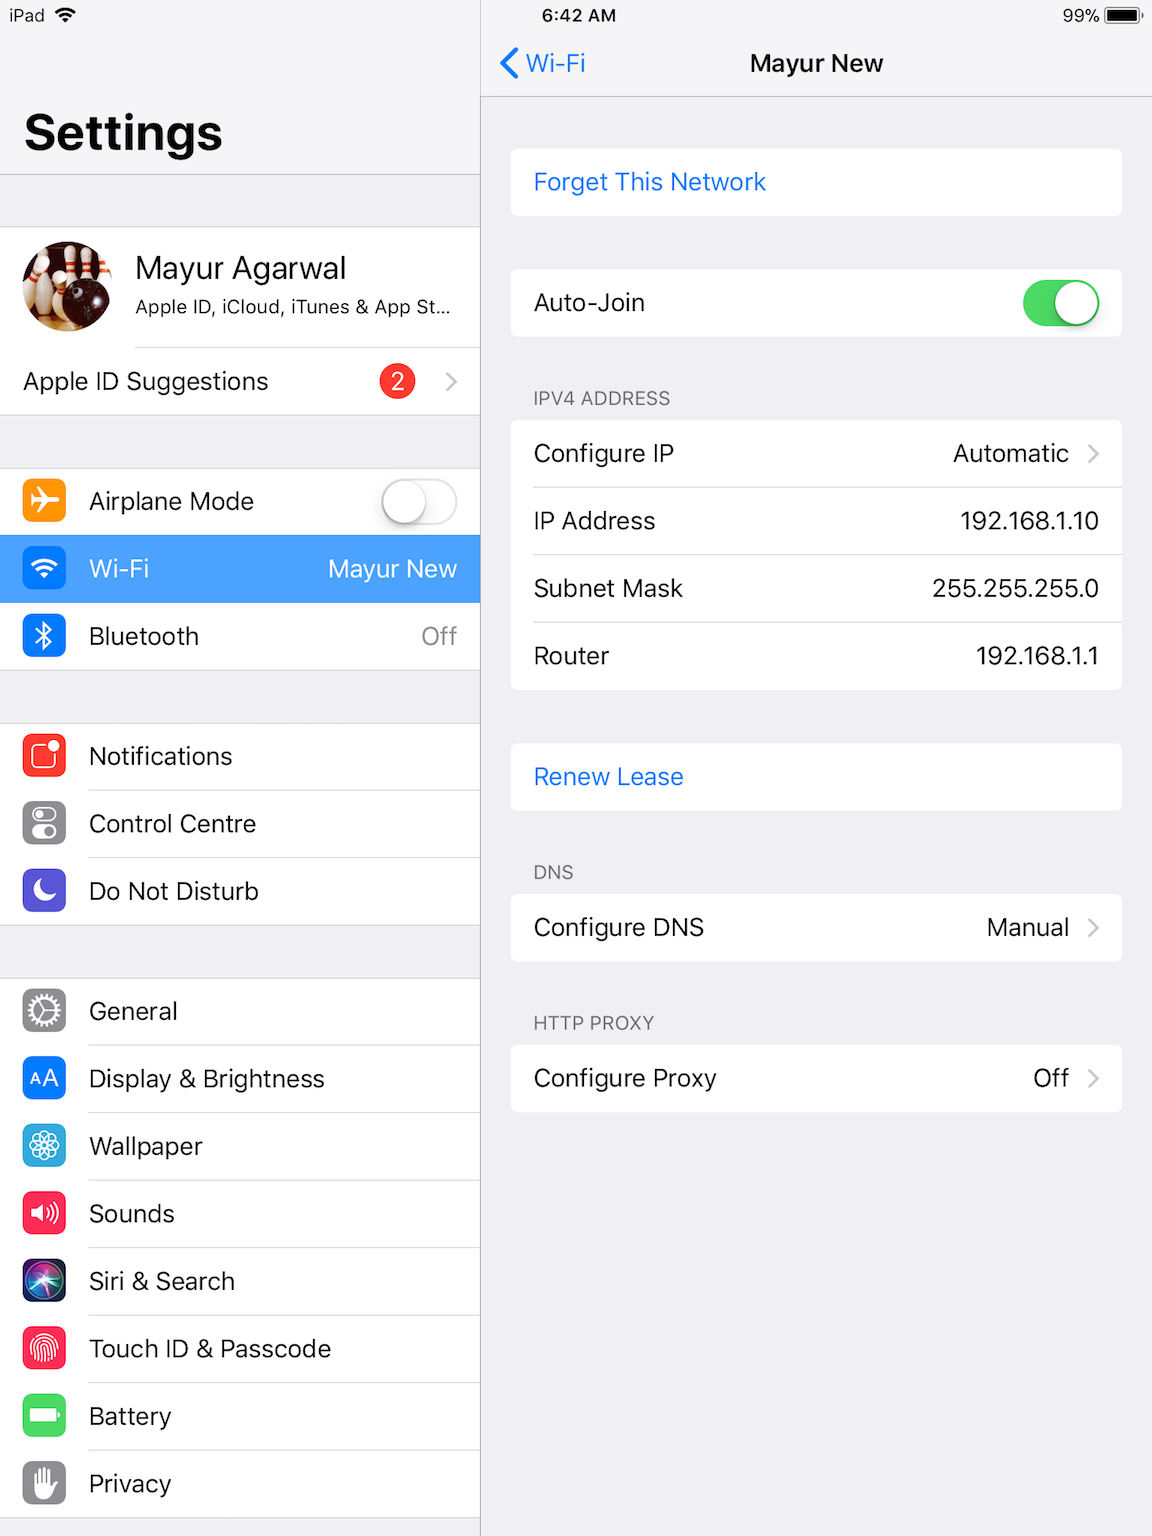
- Go to Settings > Wi-Fi and tap on the preferred Wi-Fi network.
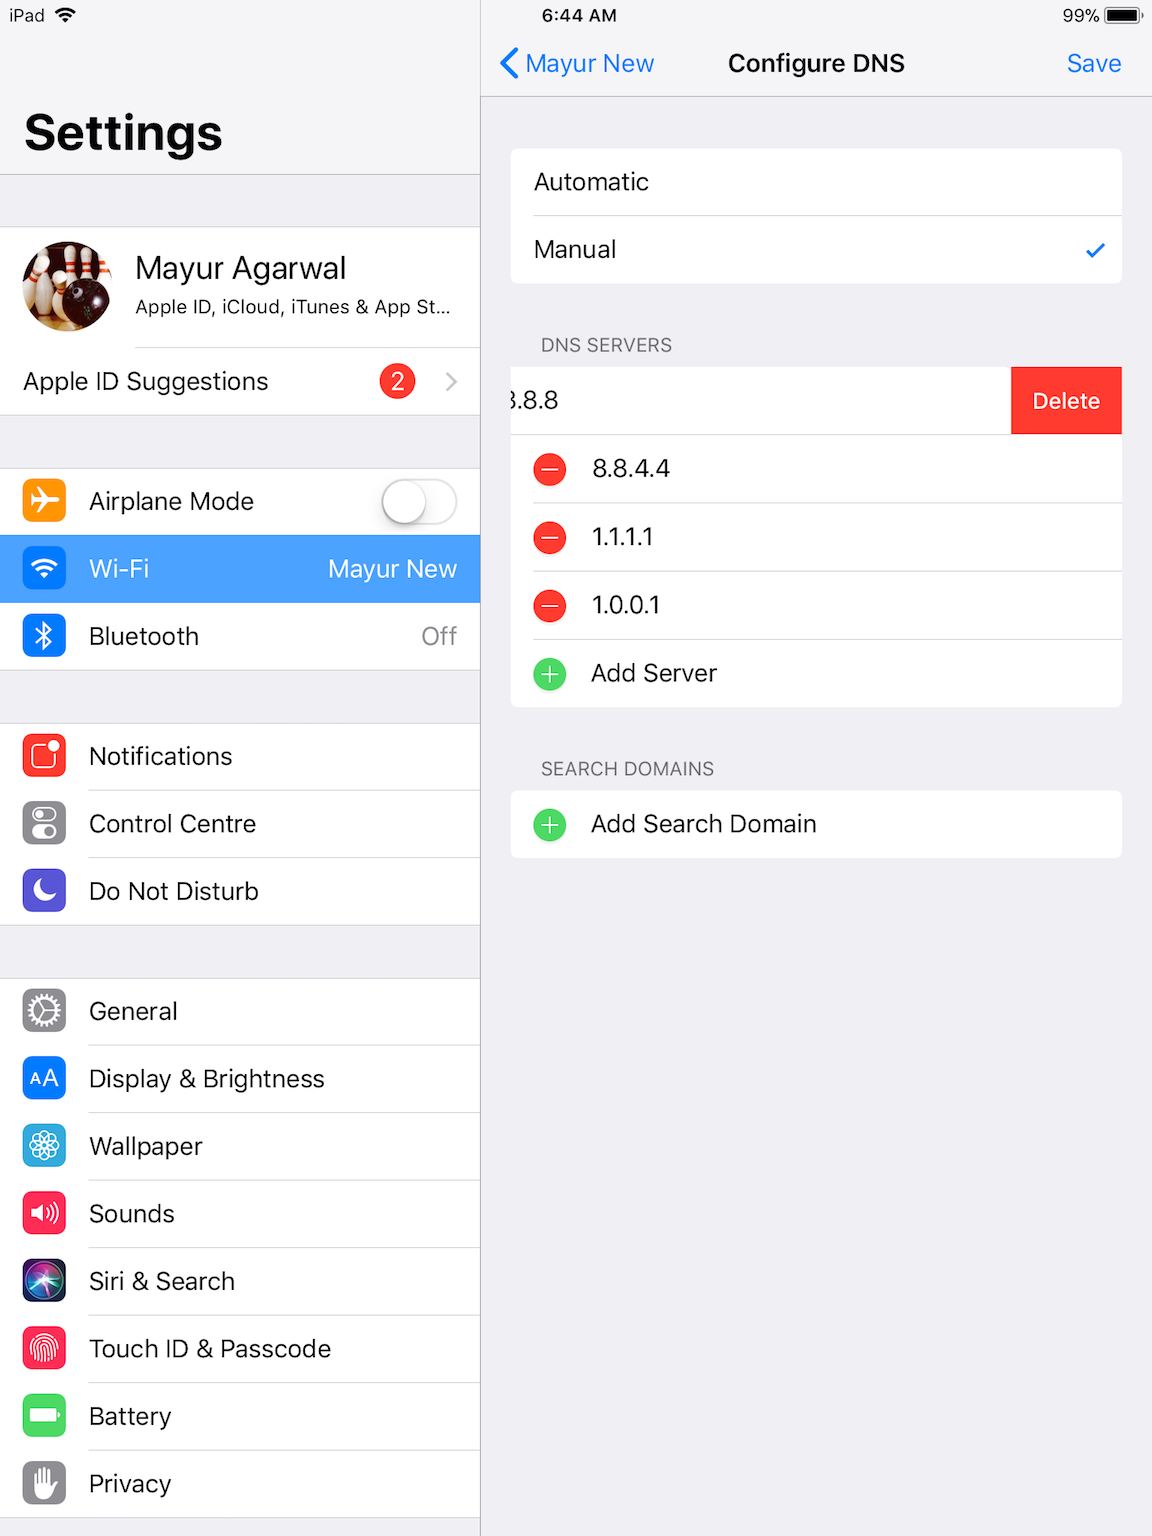
- Tap on Configure DNS and select Manual.
- Under DNS Servers, delete any existing entries if any by tapping the red minus button.
- Tap on Add Server and type 1.1.1.1.
- Tap on Add Server again and type 1.0.0.1.
- Tap the Save button on the top right.
Add Cloudflare DNS on Android
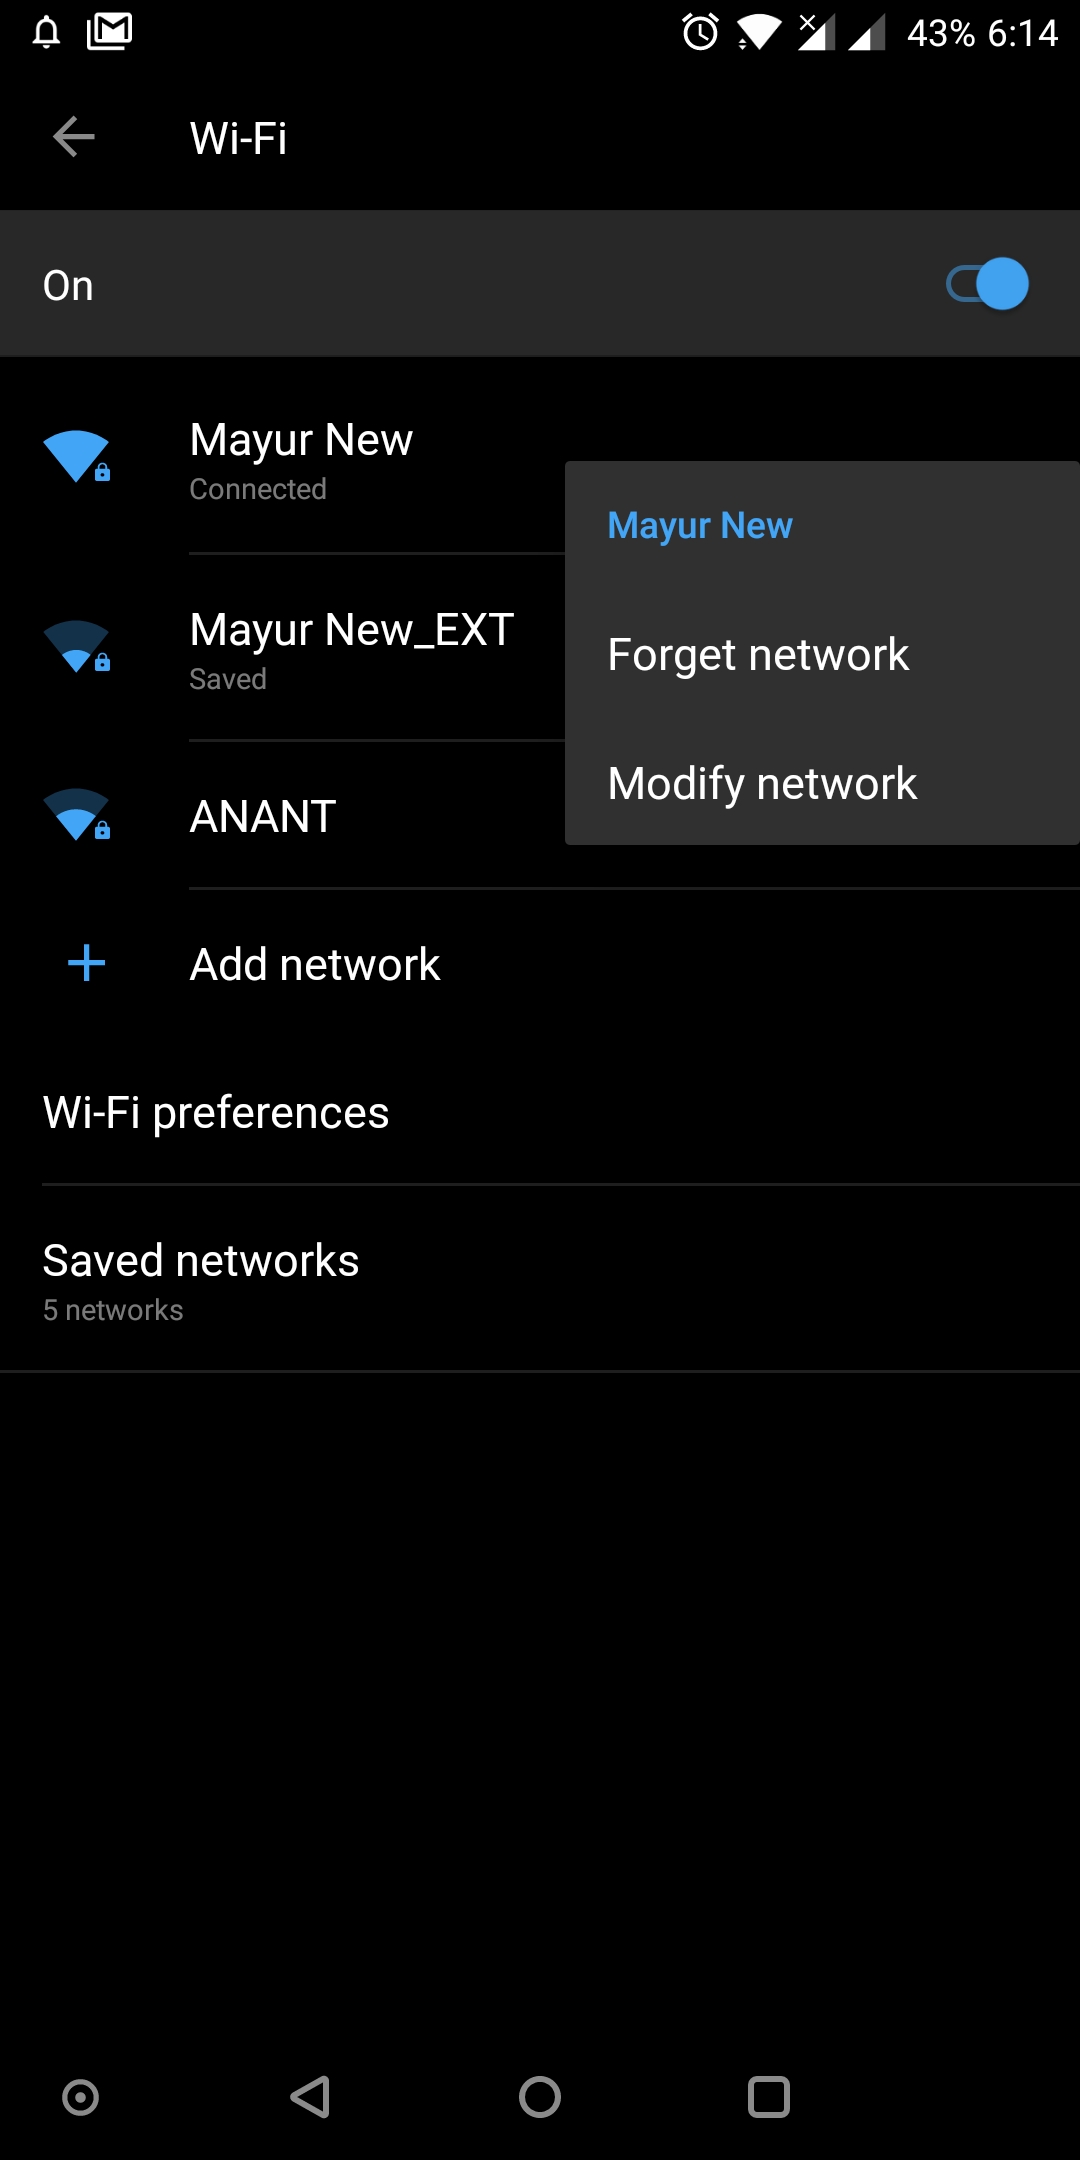
- Go to Settings > Wi-Fi and long tap on the connected network.
- Select Modify network.
- Tap on Advanced options and change IP settings to Static.
- Scroll down and type 1.1.1.1 in DNS 1 and 1.0.0.1 in DNS 2 tab. Tap Save.

That’s it! You’ve switched to Cloudflare DNS on your mobile device. Now enjoy faster and more private DNS servers. Do note that the changes apply only to the specific Wi-Fi connection and not to other wireless connections that you might be using. You have to manually add the DNS for all the desired Wi-Fi networks in that case. Moreover, the DNS will be active only for Wi-Fi connections and not while accessing the Internet over 3G or 4G LTE.
Alternatively, you can rather configure your router’s DNS to make sure all the connected devices on that network run on Cloudflare DNS. This way you don’t have to manually configure the DNS for all the devices individually.


Wow, thanks for nice tips to change DNS server. Now I easily change my android DNS server and I used Cloudflare DNS. It gives me more secure with private. Thanks, Mayur.
Thanks for your simple steps. Finally, I added Cloudflare DNS to my Android Device. I feel that internet speed is increased than previous.
Great Post, I Have successful setup using this post.Thanks, the buddy for such a great content.It’s also improvement in speed
good post bro, now I\’m going to try this
Thanks for the detailed one. It is very easy to follow. 🙂
I was forced to add a little ip and gateway address then I could save. After that I had no internet connection. It didn\’t work.
HELLO,
tHANKS FOR great article, I have applied this method on my Android device working Fit, thanks buddy keep it up updating the useful article,,Regards