Life has entirely changed for millions of people across the globe, including office-goers, students, and working professionals even since the COVID-19 pandemic. While vaccines are out to help people get back to normal life, social distancing is here to stay. Most people are still working from home, students are attending online classes, and birthdays are being celebrated virtually over video chats.
Video conferencing apps such as Zoom, Google Hangouts Meet, Microsoft Teams, and Houseparty have also seen a huge surge in demand amid the Coronavirus outbreak. While most of these platforms natively offer the ability to record online meetings, classes, and presentations. You may still find the need to record the screen of your computer or laptop at some point in time. For instance, when you want to record a live interview session, capture gameplay, create a video tutorial, and so on.
That’s when you need screen recording software at your disposal.
Built-in screen recorder on Mac
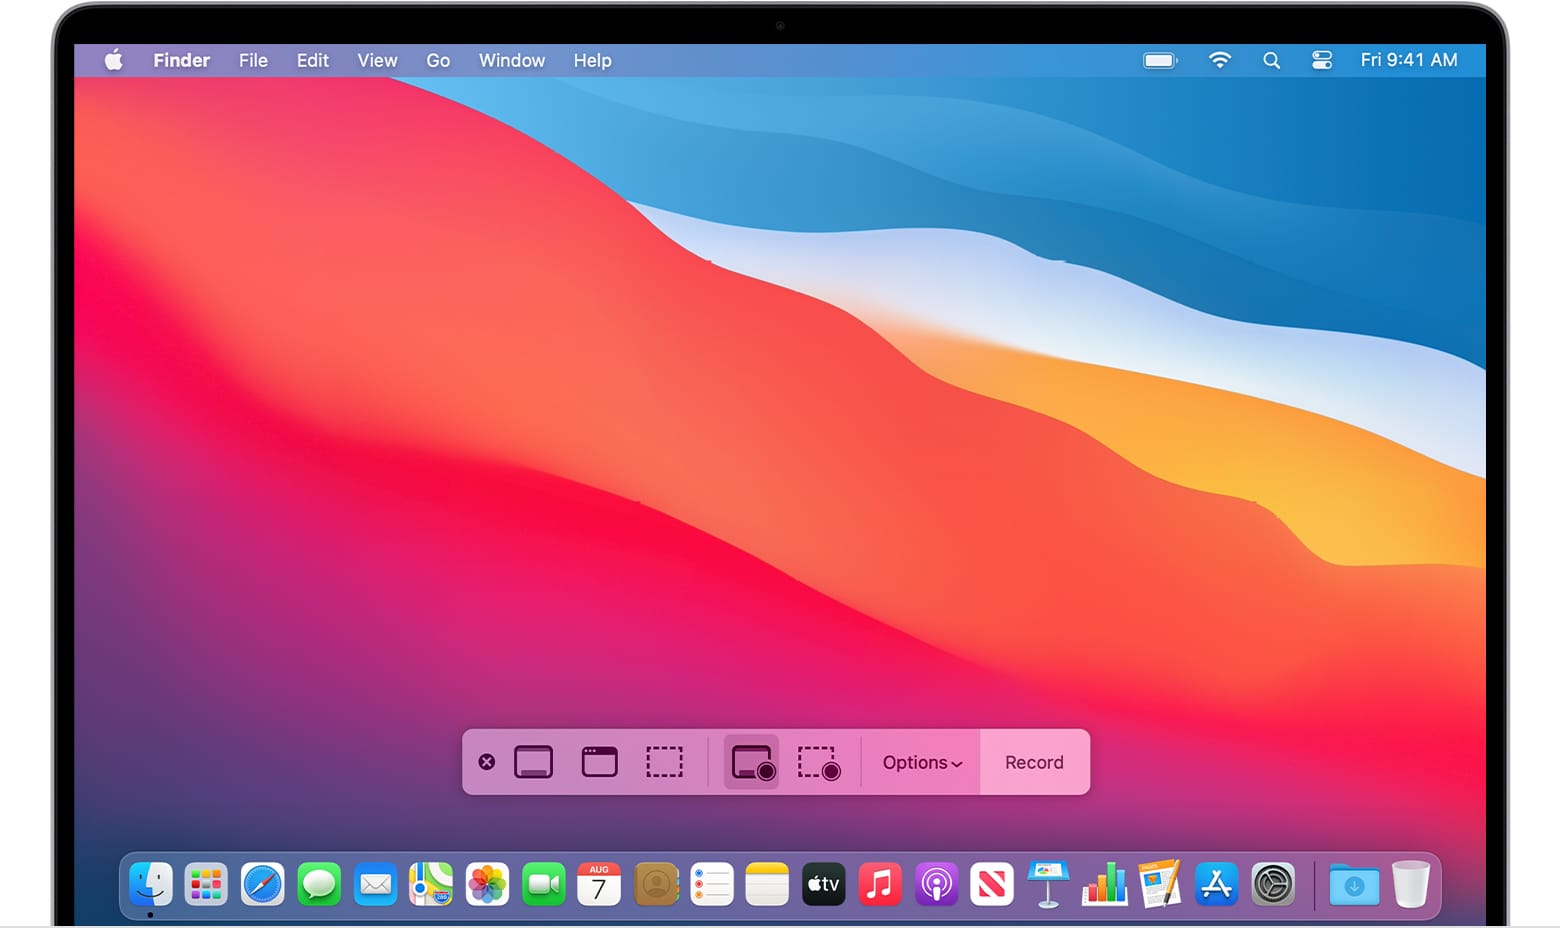
While macOS Mojave or later features a built-in Screenshot toolbar to record the screen on your Mac with ease. However, unlike iOS, you cannot record internal audio with the built-in recorder on Mac. You can record external audio though to record any sound coming through the microphone. Also, some apps like the built-in DVD Player on Mac won’t let you record the screen video.
Meet VideoProc Recorder
To remove such limitations and enjoy more customization options, you would require a third-party app. VideoProc is one such multi-purpose program by Digiarty that packs a 4K video converter, screen recorder, online video downloader, and video editor. The tool also lets you backup your old DVDs to a computer in the most popular video formats. VideoProc is available for both Windows and Mac.
Speaking of VideoProc’s Screen Recorder tool, it is more powerful than the stock recording utility on macOS. With VideoProc, one can record full-screen, webcam video, and even record webcam and screen at the same time on Mac. Moreover, it supports the recording of system sound (internal audio) via an add-on that you need to install separately. In addition, there are options to choose the video quality (High, Medium, and Low) and max framerate. The tool can also record iPhone’s screen but that’s something you can directly do on your iPhone.
Without further ado, let’s see how to take screen recording on your Mac with VideoProc.
How to Record Screen on Mac using VideoProc
- Download and install VideoProc on your system.
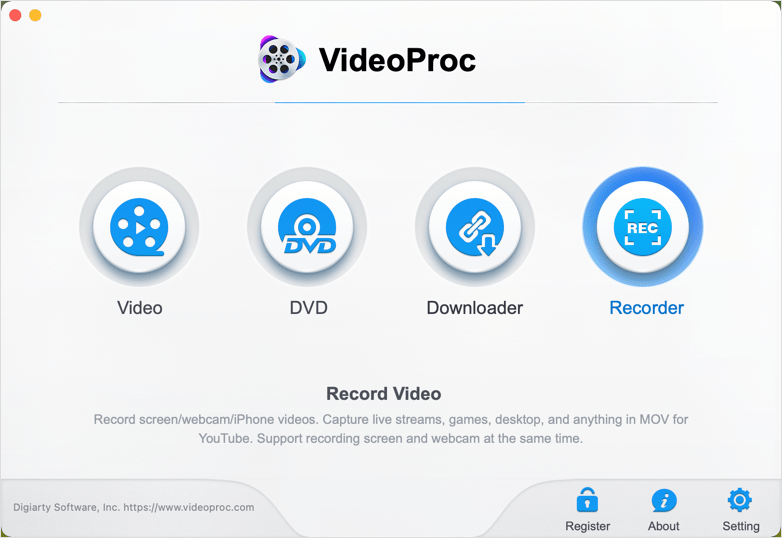
- Run VideoProc and click on “Recorder”.
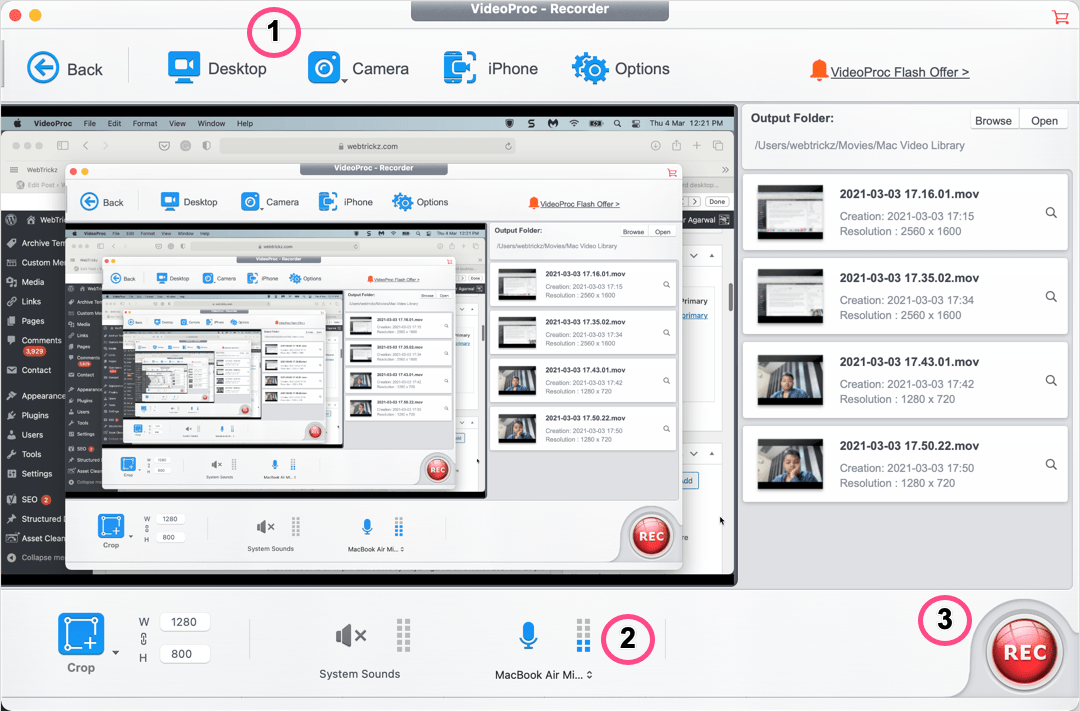
- Select Desktop from the top menu and click the Rec button at the bottom right.
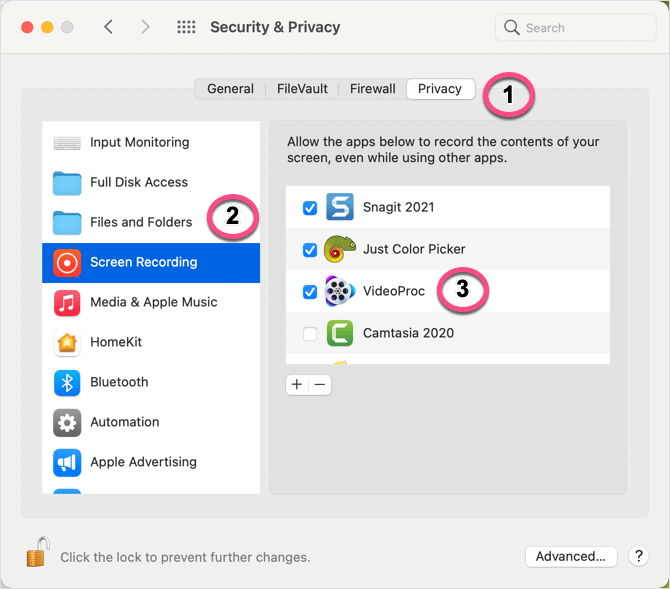
- Allow VideoProc to record your computer’s screen – Go to System Preferences > Security & Privacy > Privacy. Select “Screen Recording” from the left pane and click the lock at the bottom to make the changes. Tick mark the “VideoProc” app to grant it the required permissions to work.
- Quit and reopen VideoProc.
3 Screen Recording Modes
Record Full Screen
To record the entire screen, select the “Desktop” option. VideoProc will now show a preview of the desktop screen to be recorded. Before starting the recording, you can turn off the external mic and enable System Sounds if required. One can also change the location of the output folder.
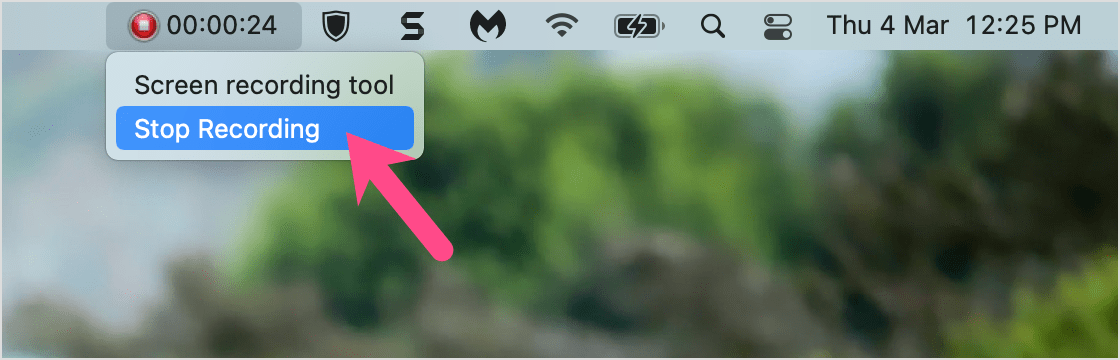
Then click the Record button to start the recording. The recording will begin after a 3-second countdown and you can see the progress in real-time from the menu bar. To stop recording, click the red button at the top and select Stop Recording or hit the Stop button in VideoProc.
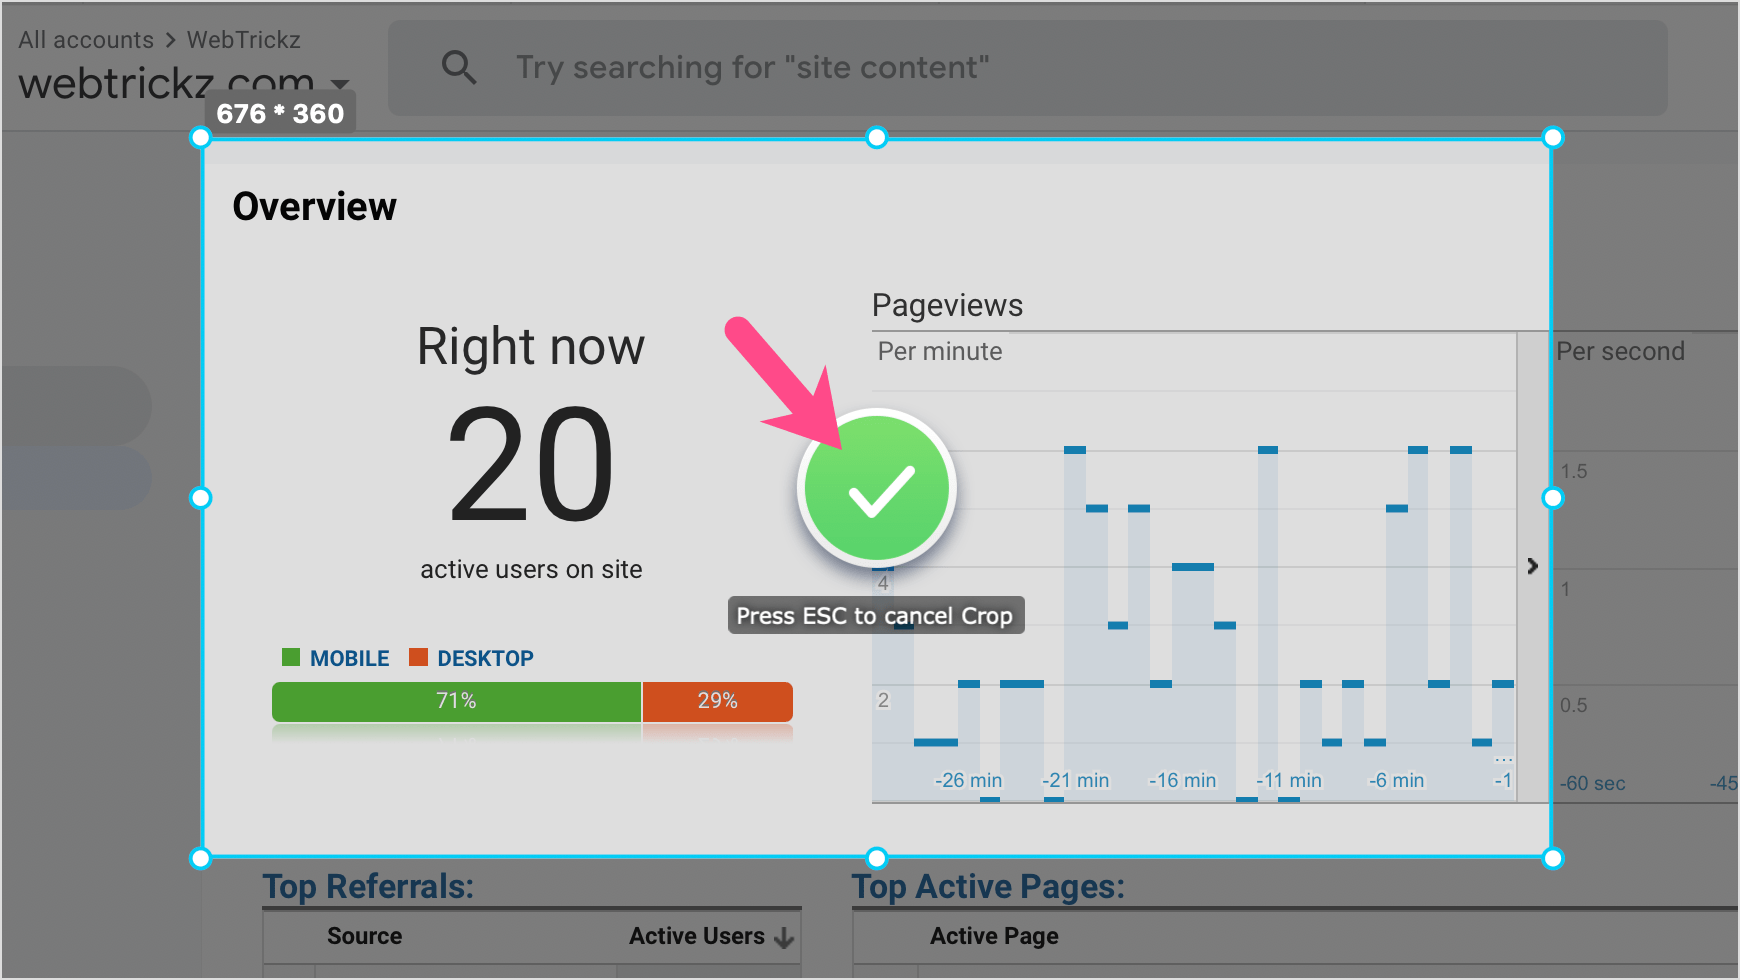
Crop Screen – The Crop option lets you record a selected portion of the screen. To use it, click Crop and select the particular area or window on your device screen that you want to record. Then click the round green button (icon with a tick mark) and hit the Rec button or press ESC to cancel Crop.
Record both screen and webcam
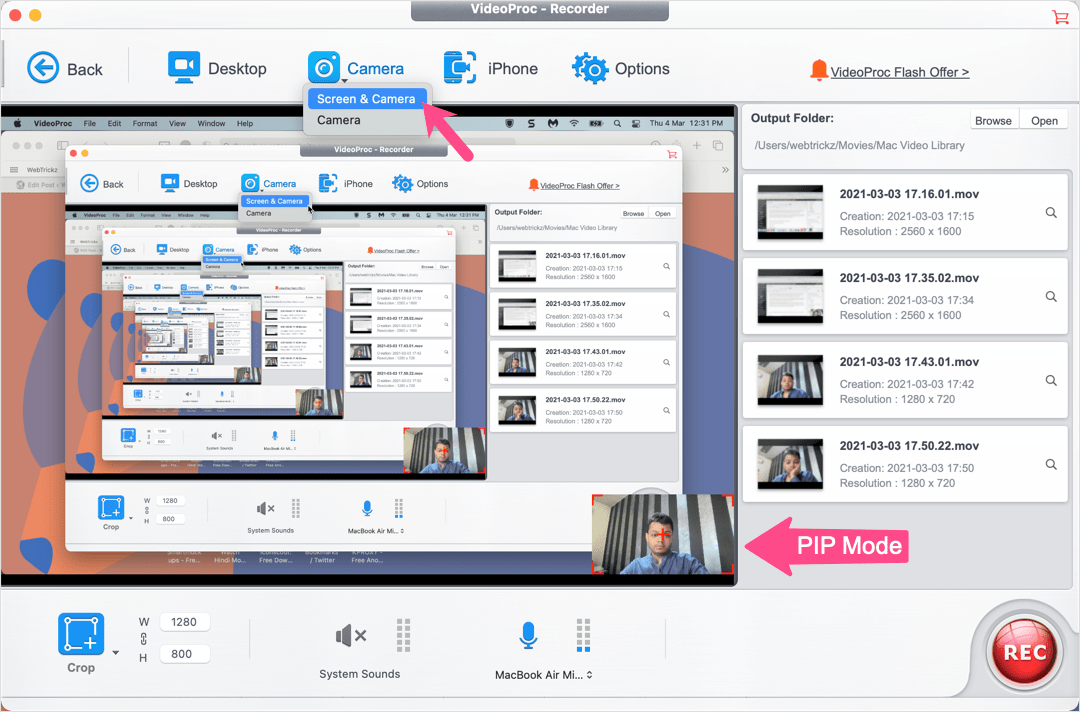
To record the screen and webcam simultaneously, select the “Camera” option. Now adjust your sitting position as per the webcam preview window (in the bottom right on VideoProc), such that your face is clearly seen. This comes in handy to record PowerPoint presentations and gameplays showing your face. If you want to add a voice narration then make sure the microphone is enabled. Click record to start. The only downside here is that you won’t be able to see the webcam window while recording.
Record Webcam
To record the webcam, click the tiny down arrow icon seen alongside the Camera option and select “Camera”. You can now see yourself in the preview screen on VideoProc. Enable the device microphone to record your voice. This mode is particularly useful when you want to record a video of yourself talking without screens. Hit Record to begin. The shortcoming here is that you cannot keep a track of time for webcam video recording.
NOTE: VideoProc saves all the recordings in MOV video format, supported by the default QuickTime Player on Mac. You can use VideoProc itself to convert these video files to MP4 if required.
Our Thoughts
VideoProc is a good solution if you want more control when creating screencasts, demos, tutorials, etc. It does (the Mac version at least) lack a few basic features such as keyboard shortcuts to start/stop recording, custom recording format, and timer for webcam videos.
Although VideoProc is compatible with M1 Mac, the program went unresponsive quite a few times. This issue could be related to our device since the M1 chip is new and advanced, so it might have some bugs. During our testing, I wasn’t able to record system sounds too since the required sound card
It’s worth noting that the trial version of VideoProc lets you use the recorder function after a 3-second wait time and carries a 5-minute time limit for individual videos.
Do try out VideoProc and share your views in the comments below.
