The consumption of video content has increased vastly across social media and various OTT platforms in the past few years. In addition, a majority of users now shoot videos in 4K with their GoPro, Drone, iPhone, and other similar devices. While 4K is the primary choice of most users because of its unmatched quality, it isn’t easy to manage unless you have the necessary resources and hardware. That’s where video editing software like VideoProc comes into action.
Meet VideoProc – A fast, reliable, and efficient video editor
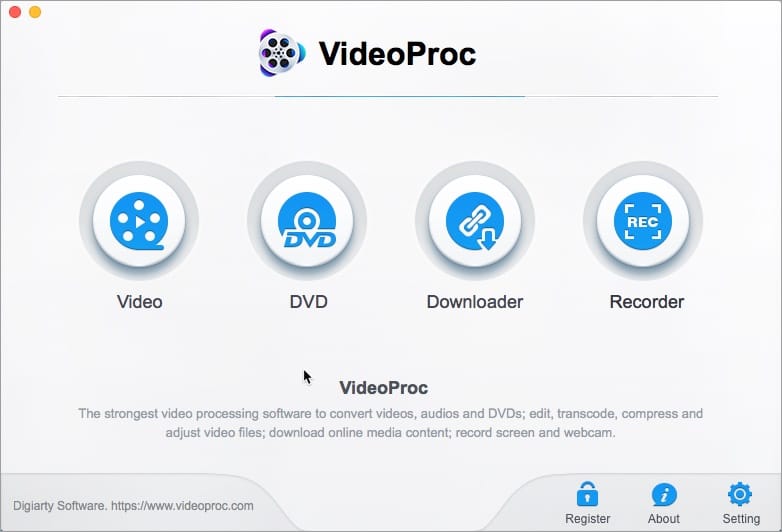
VideoProc is a feature-packed program for Windows and Mac that allows end users to convert and compress their videos including 4K to a format supported by their device. It combines the functionality of several different programs into a single software and hence eliminates the need to install individual applications. The app is a perfect choice for beginners who don’t want to spend a fortune on highly professional and complicated apps like Final Cut Pro X.
The program offers a host of pro features as well as advanced editing tools that you won’t find in free programs such as iMovie. It includes a built-in 4K video converter, screen recorder, online video downloader, and a powerful video editor. VideoProc can also be used to backup old DVDs to a computer in the most popular video formats.
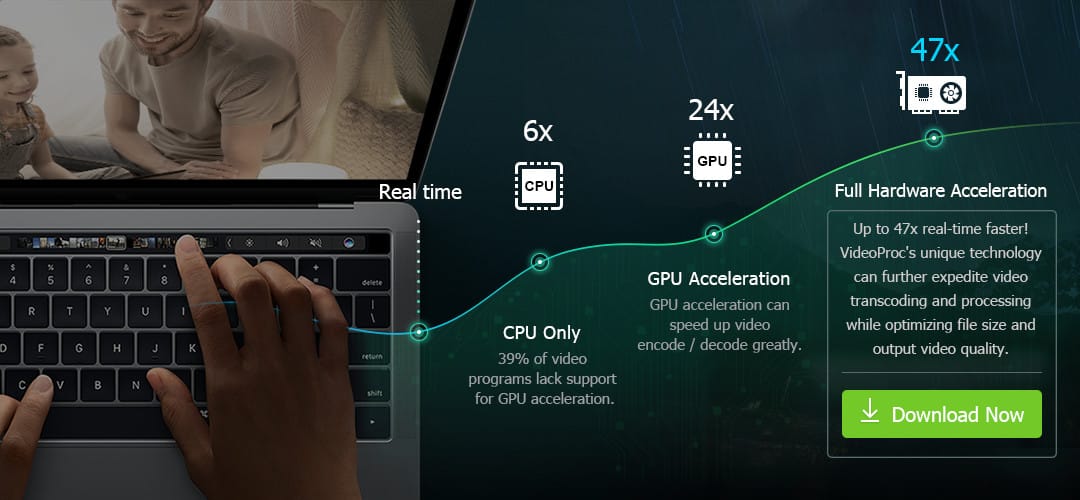
What’s noteworthy is the fact that VideoProc utilizes full GPU acceleration for 4K video processing. This particular technology results in up to 47x real-time boost in video processing speed while lowering CPU usage by up to 40% and without compromising the image quality.
In the rest of the article, we will guide you through the steps to download, convert, edit, and record videos using VideoProc.
Save Videos (non-copyright) Offline with VideoProc
The built-in downloader allows users to save videos in high quality from over 1000 sites including Facebook, YouTube, Dailymotion, Vimeo, and Instagram. Unlike similar programs, VideoPro’s online video downloader is capable of saving videos in 4K as well as 8K resolution. To save a video,
- Run VideoProc on your system and click on “Downloader”.
- Click on “Add Video”.
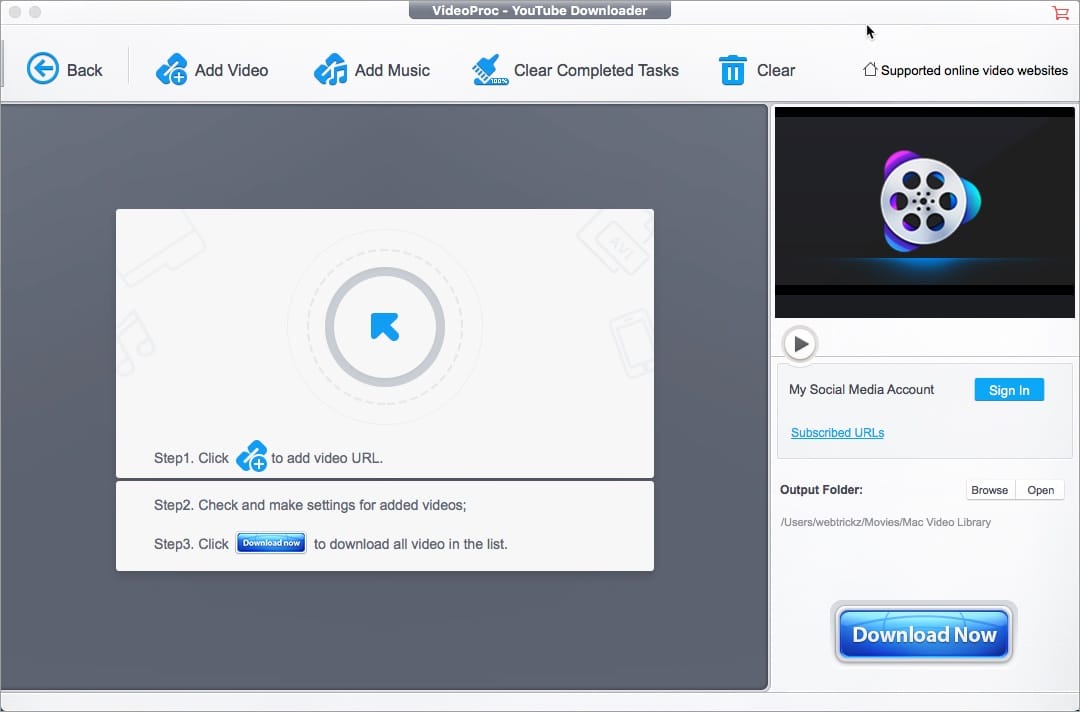
- Copy the video URL from the browser and select “Paste & Analyze” in the app.
- Click on Show All to see all the available resolutions.
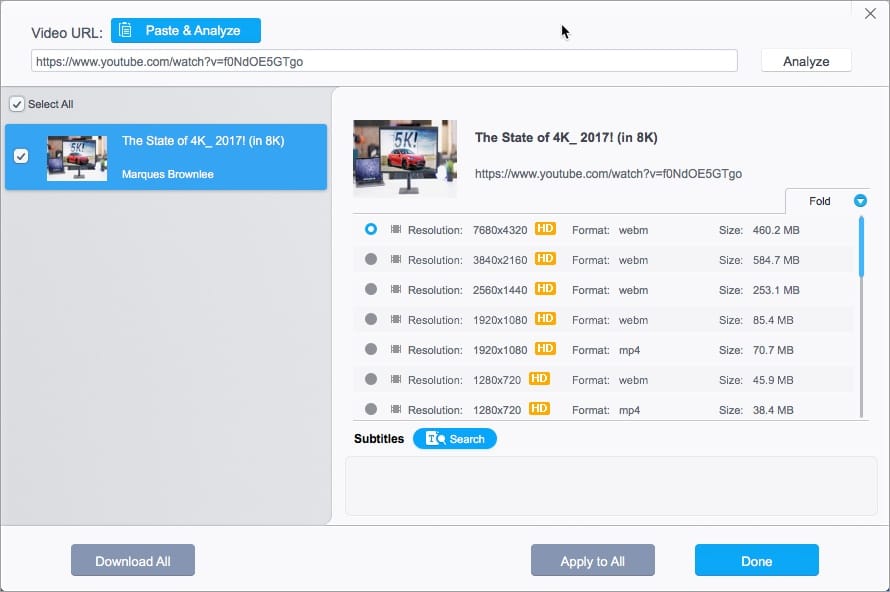
- Select the specific resolution that you want to download. You will find the video format and size listed next to it.
- Click on Done and then hit the “Download Now” button.
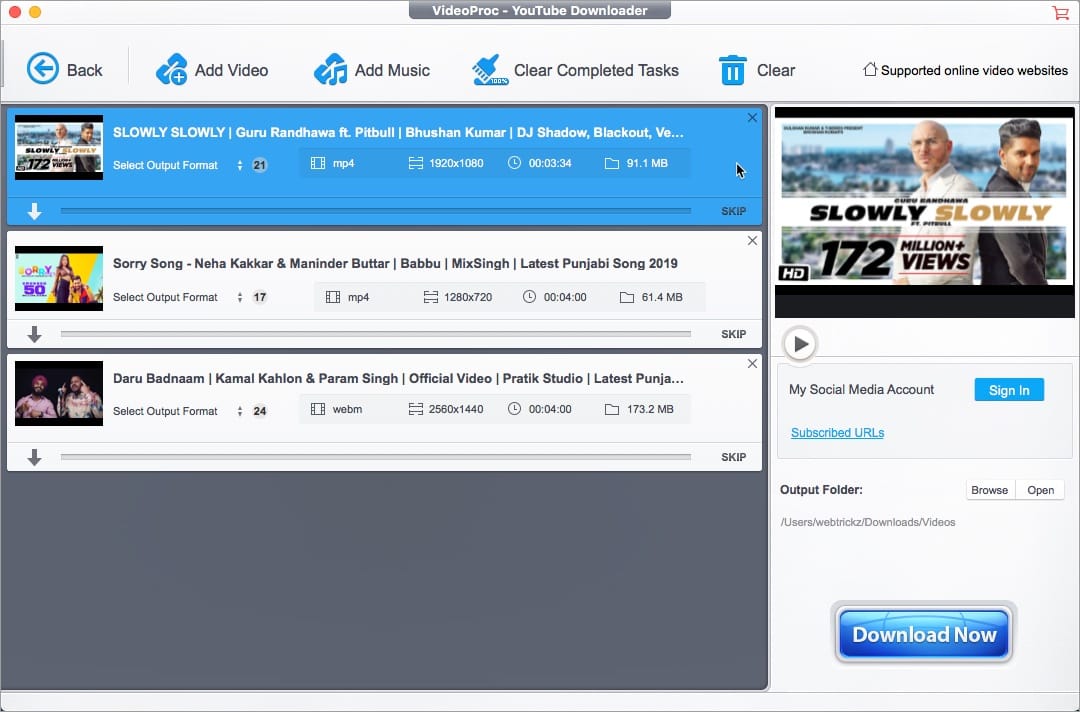
Tip: Similarly, you can add multiple videos to the download queue to download all of them in one go. It supports concurrent downloading and you can preview the videos using the built-in media player before downloading them.
It also supports the ability to save an entire YouTube playlist and selected videos from a certain playlist.
Convert Videos with VideoProc
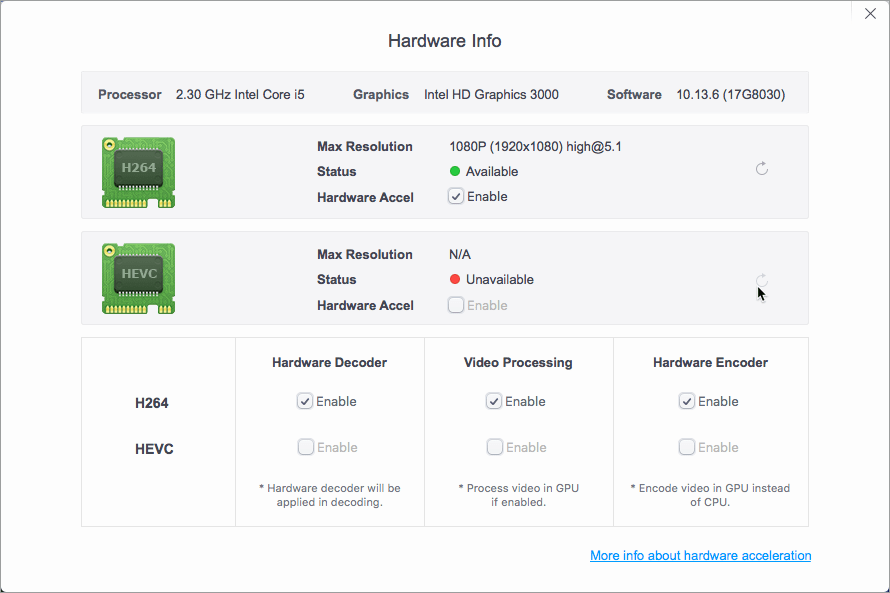
For faster and smooth processing of 4K Ultra HD videos, you must ensure that Level-3 Hardware Acceleration is enabled in VideoProc. To do so, open the program, go to Setting and click on Options. Then enable hardware acceleration for all the listed codecs such as H264 and HEVC.
Follow the steps below to convert a video.
- Run the program and select Video.
- Click +Video to import a video.
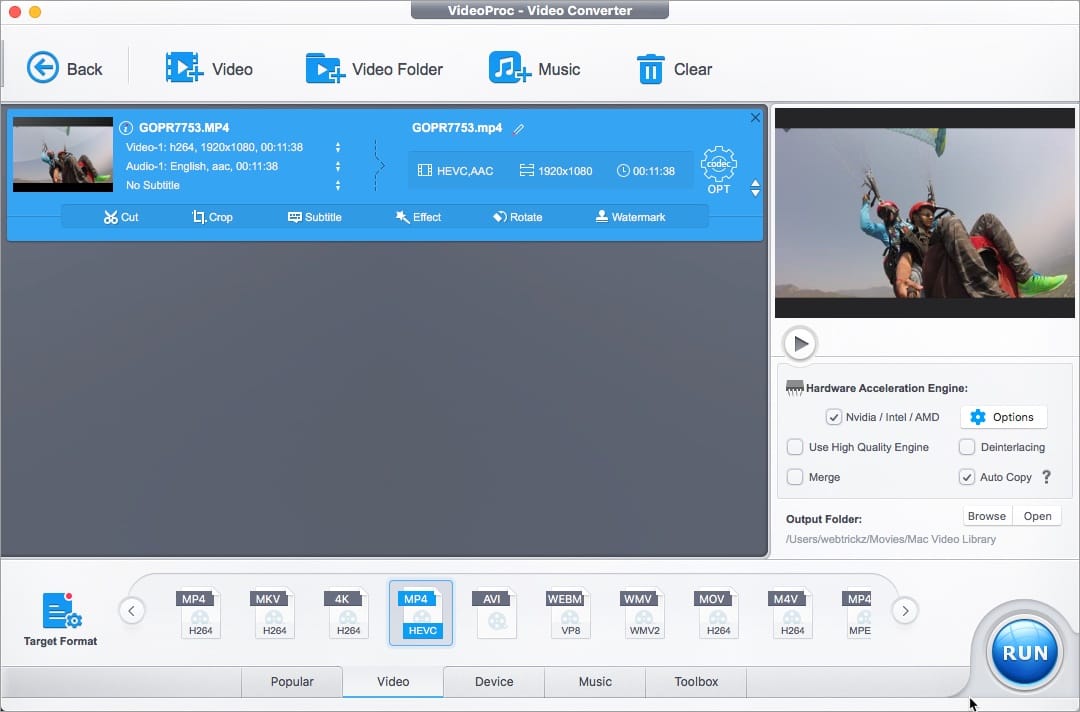
- To simply convert a video without editing, click the Video tab at the bottom.
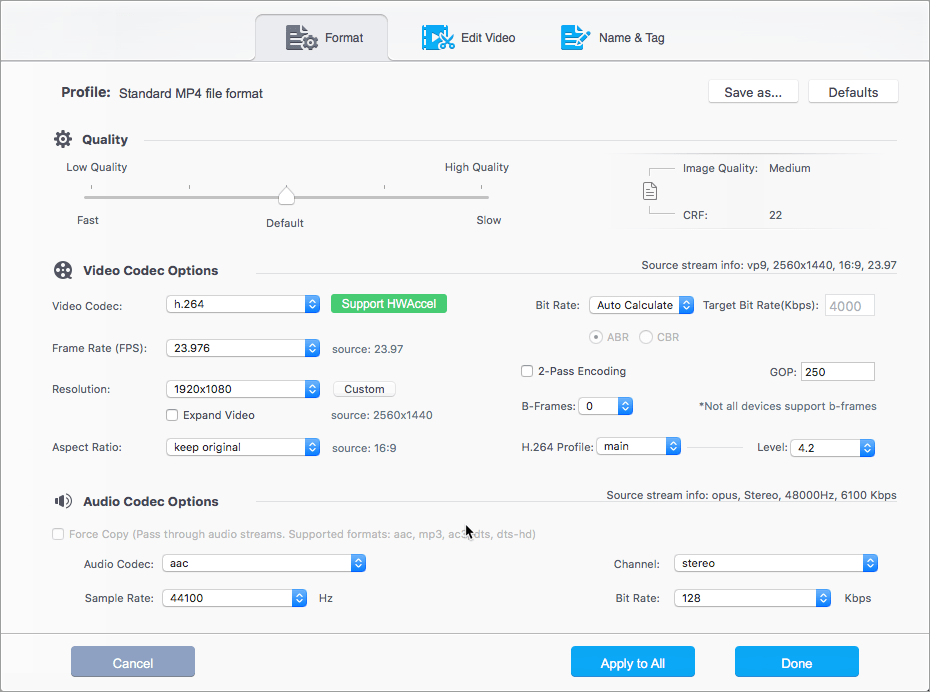
- Select the desired output video format such as MP4, MKV, or WebM. Alternatively, you can click the “Target Format” button and select the appropriate profile.
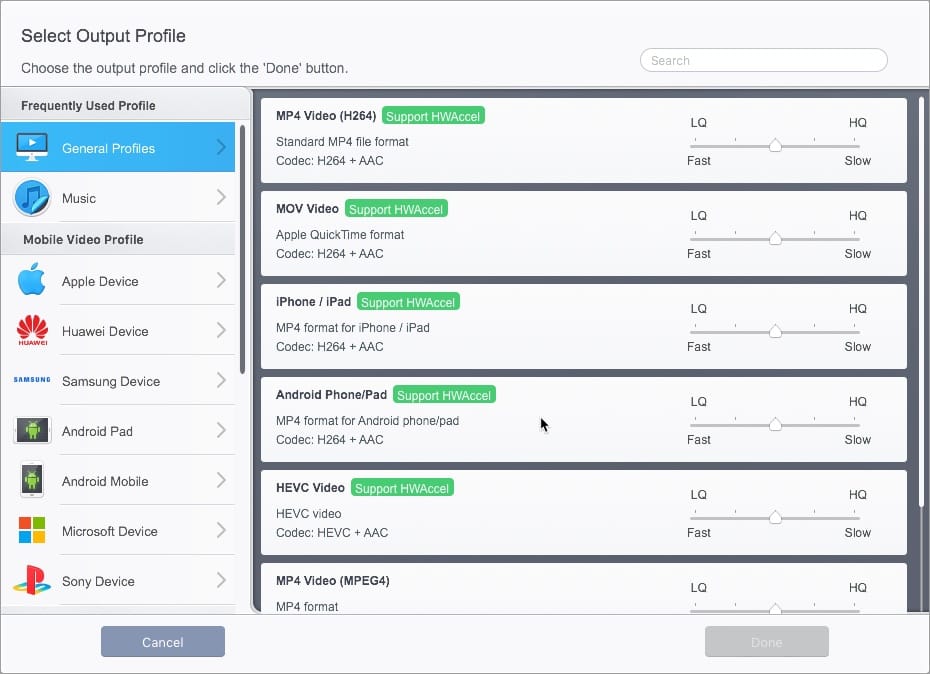
- Optional – Double-click the selected video format to further customize the output file parameters. This way you can alter the video codec, bitrate, resolution, aspect ratio, FPS as well as image quality. You can also save the custom profile and use it later on.
- Click on Browse to set a new output directory.
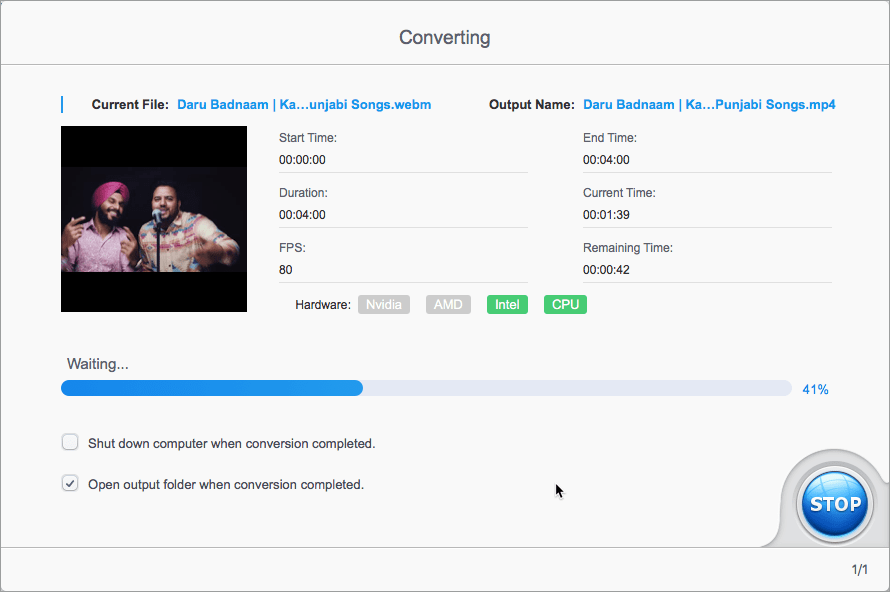
- Hit Run to start the video conversion.
How to Edit Videos using VideoProc
Go through the short tutorials below if you want to edit a video before converting it to your preferred format.
Cut unwanted parts
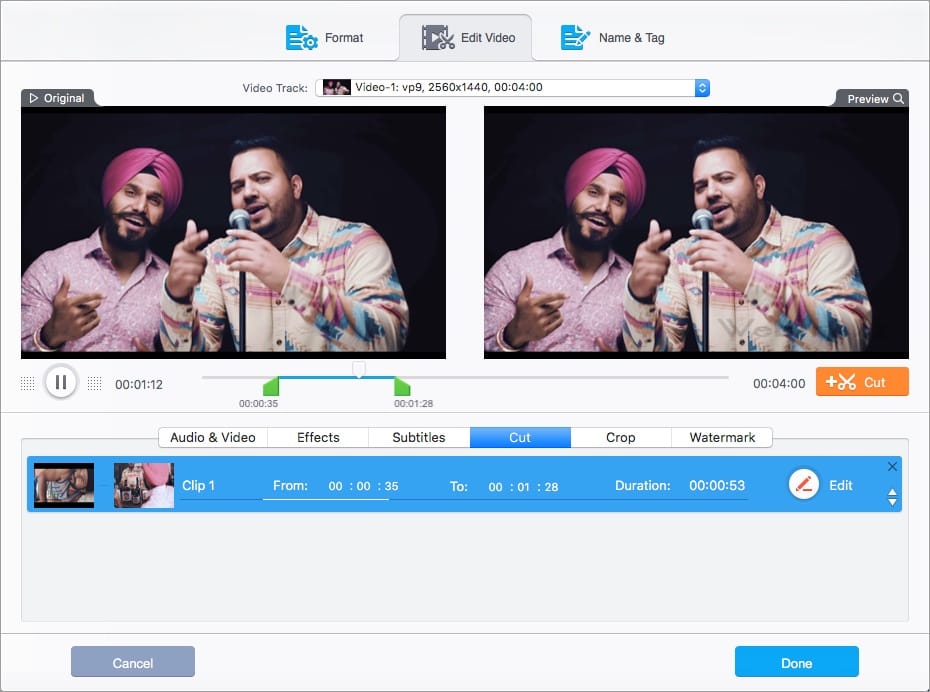
Go to Video > Add a video and select Cut from the toolbar. Drag the green sliders to set a start and endpoint. Click the Cut button at the right to trim a portion of the footage. You can also adjust the start and end time using the Edit option. Click on Done. Select the output format and hit Run.
Crop Video
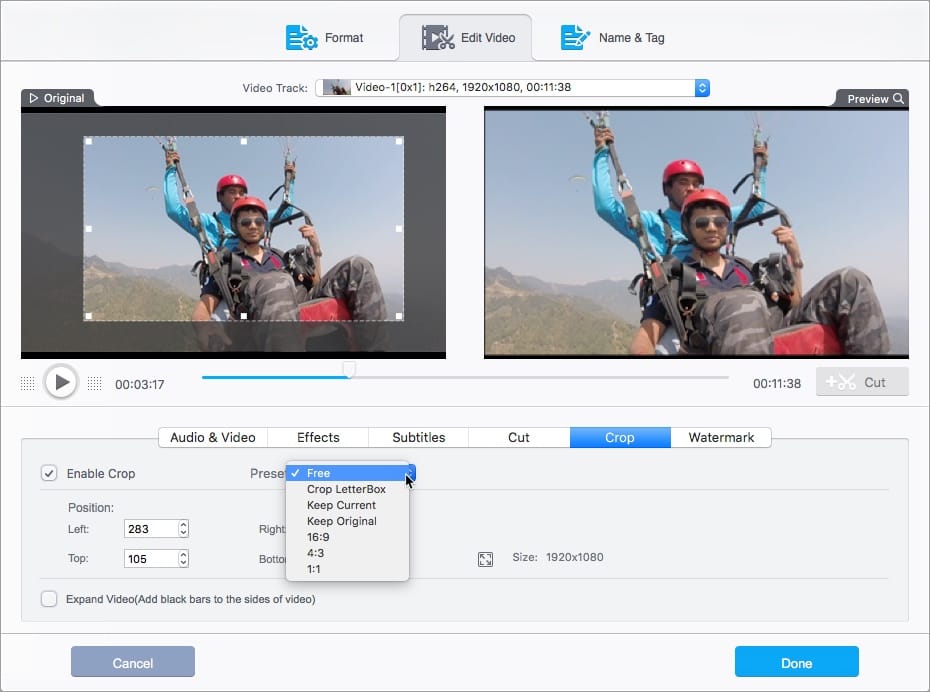
Add a video and select the Crop option. Tick mark the “Enable Crop” option and choose a pre-defined preset. Choose the “Free” preset to crop a specific area or highlight a special moment in a video clip. Drag the dotted lines to select an area and see the cropped result in the preview window. Click Done > Run to export the cropped video.
Adjust the colour balance and add effects
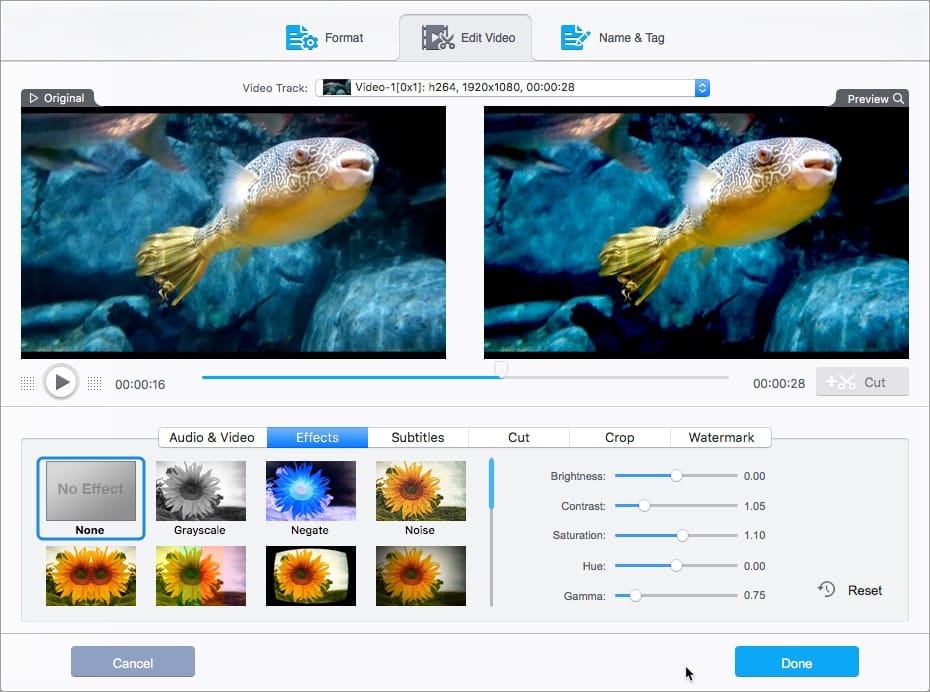
In case the recorded video has faded colours, then simply adjust the colour balance manually to make it lively. Alternatively, you can apply one of the pre-defined effects to a video. To do so, add a video and select Effect. Then choose an effect or manually tone the brightness, contrast, and saturation of the video. Select Done and hit the Run button.
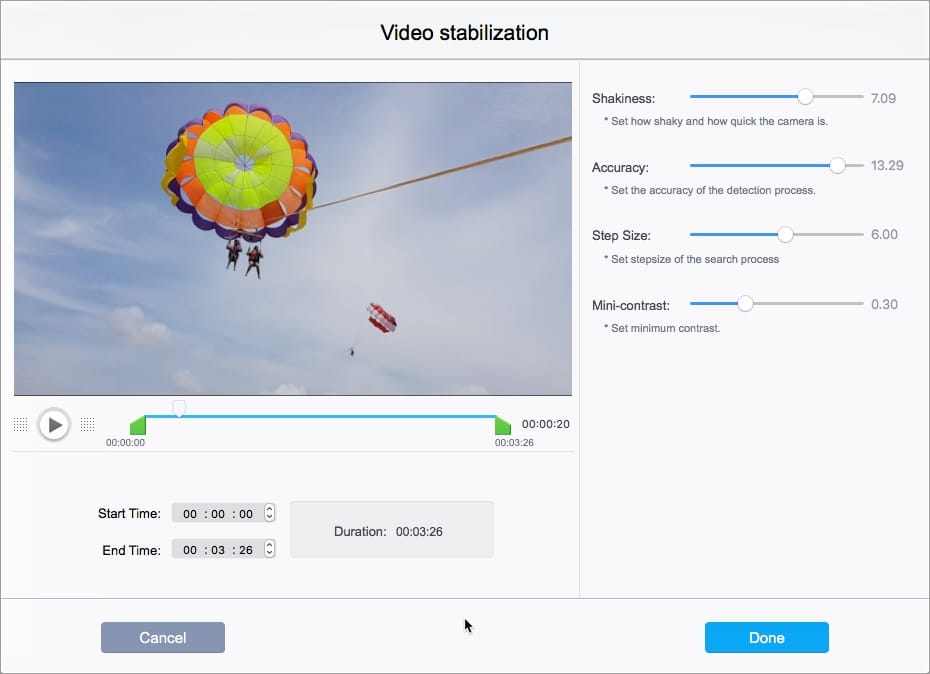
Stabilize a shaky video
Videos captured during adventurous trips using GoPro are usually not stabilized and have a lot of shakiness. While you can’t get rid of shakiness completely, you can, however, fix it up to a certain extent with the help of Deshake feature. To stabilize shaky video footage, add the video and select the Deshake option from the Toolbox.

Double-click the setting to manually adjust the shakiness, accuracy, step size, and minimum contrast.
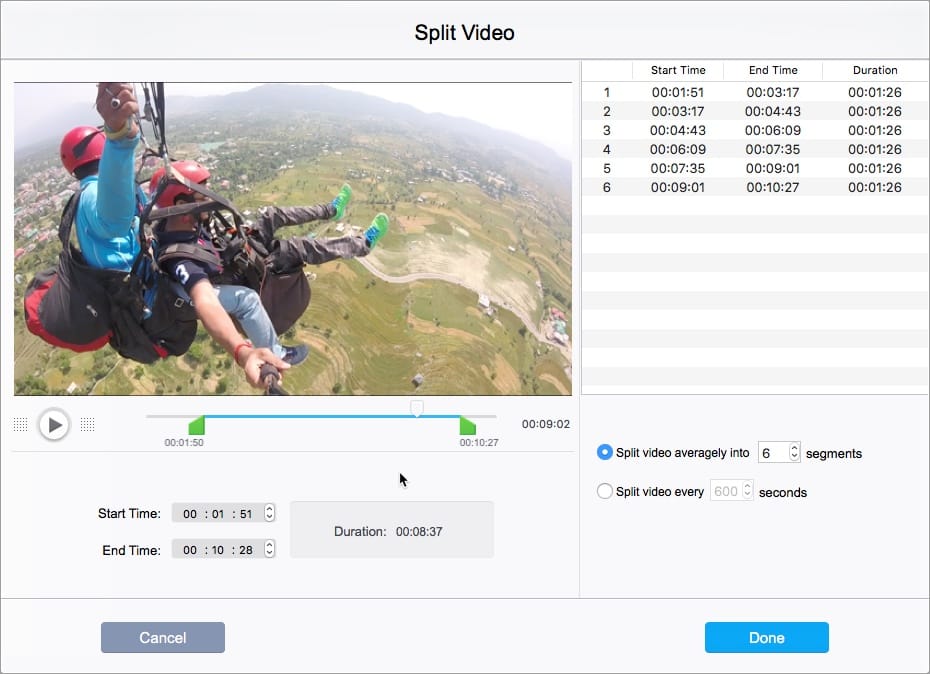
Split and Merge Videos
The split option comes in handy when you want to split a large video into small parts. To split a video, click the Toolbox tab at the bottom and double-click the Split button. Select the start and end time if needed. Then either choose the number of segments or the time interval in which you want to split the video. The app will automatically split the video into multiple parts having the same duration. Select Done and export the video.
With Merge, you can combine multiple video clips into one video. What’s interesting is that you can merge videos of different formats and resolutions into a single video. To merge, import the video files from your computer. Then select the Merge option from the Toolbox and hit Run.
Other features – In addition to the above editing tools, the app lets you add a watermark, add subtitles, rotate and flip video, convert video to GIF, reduce background noise (Denoise), adjust playback speed, and so on.
Record Screen
VideoProc featuring a built-in screen recording function is a good alternative to programs like Snagit. It comes in handy when you want to record screencasts, live streaming of a sport, capture gameplay, record tutorial, or a Skype video call. It offers three modes to record your desktop or iOS screen, record from a web camera, or record both camera and screen in picture-in-picture mode.

To start recording, open Recorder and select either desktop, camera, or iPhone. Hit the record button to begin recording. You can record in full-screen mode or use the crop option to record a custom area or window. The device microphone can be disabled if needed or you can use it to add a voiceover.
Our Thoughts
VideoProc is our preferred choice for entry-level users looking for a simple yet efficient video editor. Its easy-to-use and intuitive interface make it a go-to tool for beginners. Besides featuring full hardware acceleration for decoding and encoding tasks, the app includes support for hundreds of codecs. It works great as a 4K video editor and is a decent alternative to GoPro Studio.
Priced at $29.95 for a year license, VideoProc undoubtedly offers a lot for its price. There is also a lifetime license with a free lifetime upgrade that costs $42.95. To try it out, you can install the free trial version that allows users to convert 5 minutes of a video without any watermark.
Interestingly, VideoProc is currently being offered for free as a part of a software giveaway. You can download the program and grab a free license code of VideoProc from this page for editing iPhone videos.


