The much-awaited MIUI 8 Global Beta ROM was released around a week back for Xiaomi devices such as Mi 3, Mi 4, Redmi Note 3 (Both Qualcomm Snapdragon & MediaTek variants), Mi Max, and several other Mi devices. The MIUI 8 Beta aka Developer ROM with build version 6.7.5, based on Android 5.1.1 Lollipop is available for download from the MIUI downloads portal. Those interested can try out the latest OS by installing the ROM manually, while those looking for a completely stable build will have to wait until August 16 for the release of global Stable ROM.
In this guide, we will be installing the MIUI 8 Beta ROM on the Indian version of Xiaomi Redmi Note 3 powered by a Snapdragon 650 processor. The process should remain the same for other supported Mi devices except for the ROM file. In case you’re not satisfied, you can always switch back to the stable MIUI 7 on your device.
NOTE: Installing the Developer ROM won’t void the device warranty. Here we’ve updated Indian Redmi Note 3 from Stable MIUI v7 to official MIUI v6.7.5 (MIUI 8) Developer ROM. In this process, the internal storage data which includes your photos, documents, media, etc. WON’T be wiped but all the user-installed apps, call logs, messages, contacts, and settings WILL BE ERASED. So before proceeding, it’s highly recommended to backup your important data.
To easily backup Redmi Note 3 system settings, contacts, messages, apps (along with their data), just go to Settings > Additional settings > Backup & reset > Local backups > Back up. Make sure to copy the backup file from your phone to your computer just for extra caution. The backup file is stored in the MIUI > Backup > AllBackup folder on phone storage.

Updating Redmi Note 3 (Snapdragon) to MIUI 8 Developer ROM
Installing Developer ROM is really easy as you neither need to root your phone/ unlock bootloader nor require a computer to do the desired task. As it’s a Global ROM, therefore Play Store and Google Play services are included in it by default.
Installing MIUI Developer ROM directly via System Update –
1. Download Developer Full ROM pack v6.7.5 (MIUI 8) for Redmi Note 3 Qualcomm Global (Indian version) – File size: 1.2GB
2. Place the downloaded ROM file in the Download folder on internal storage.
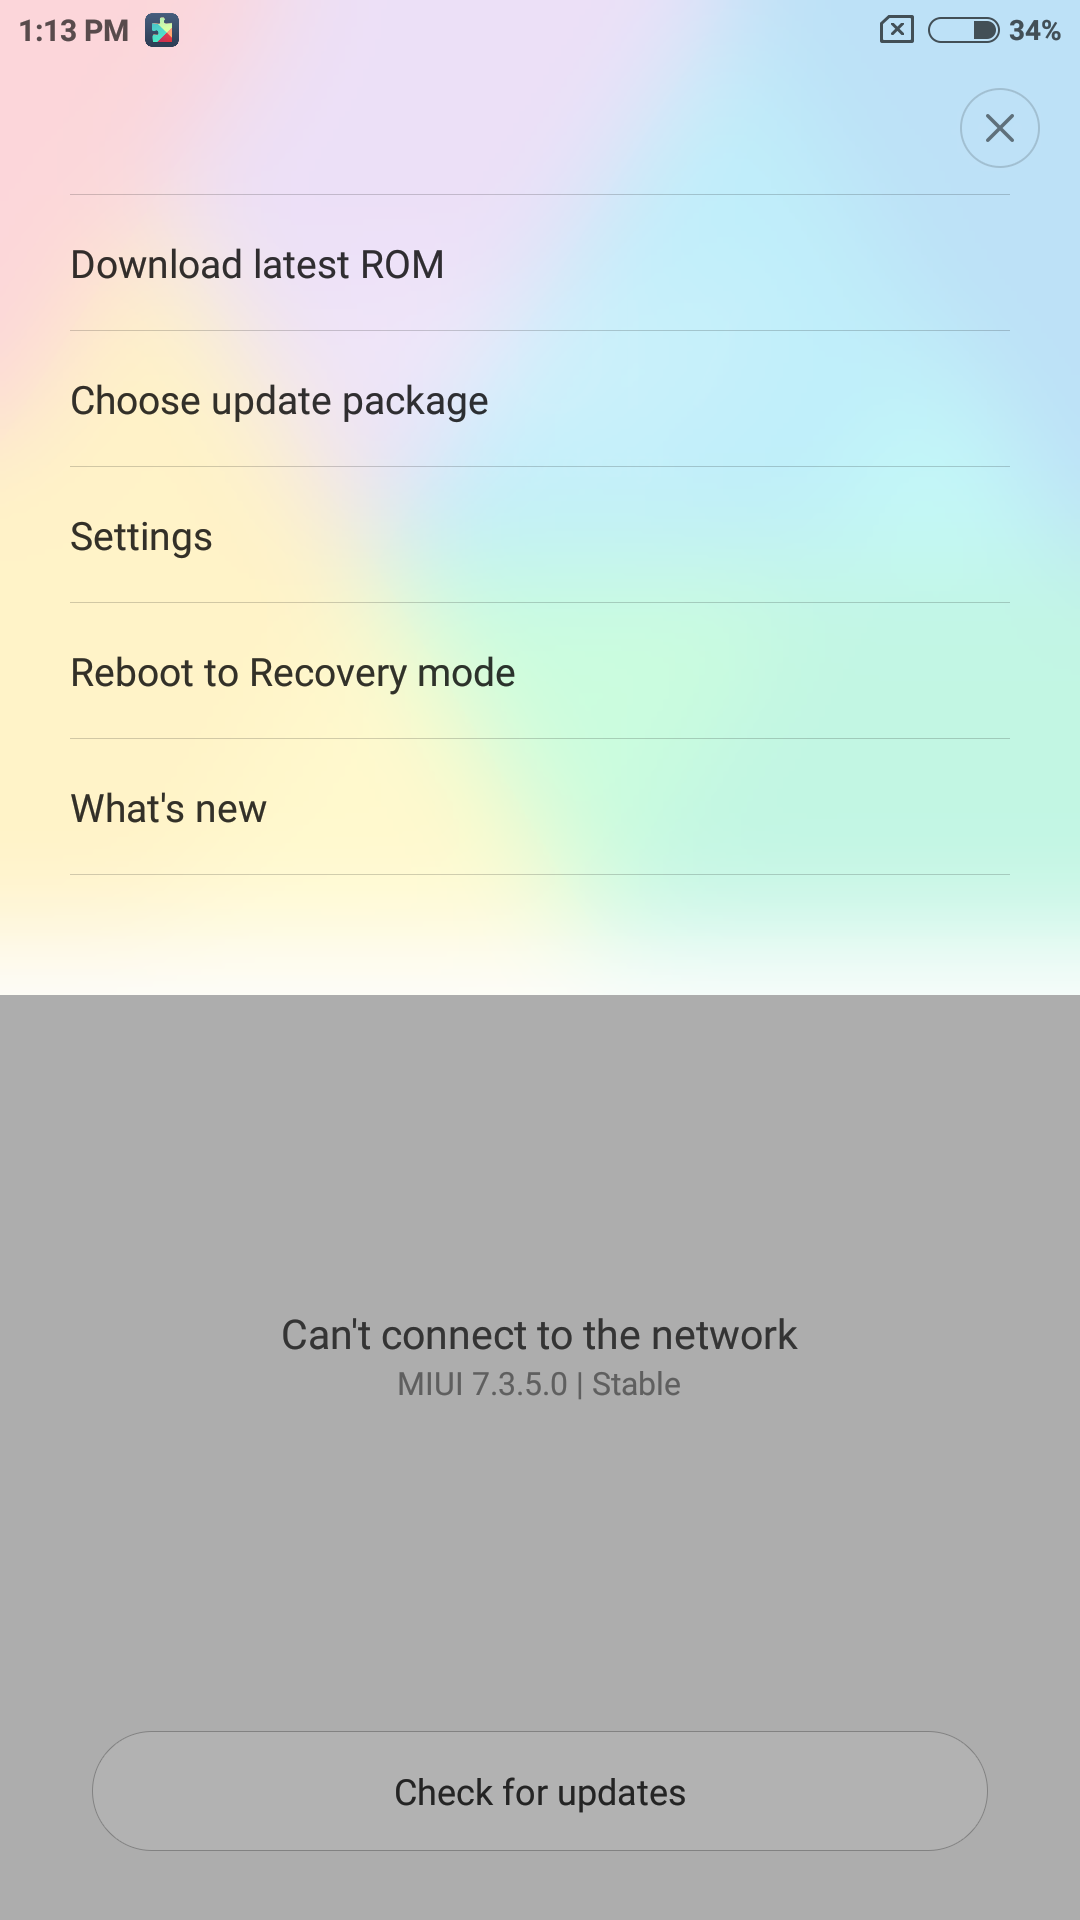
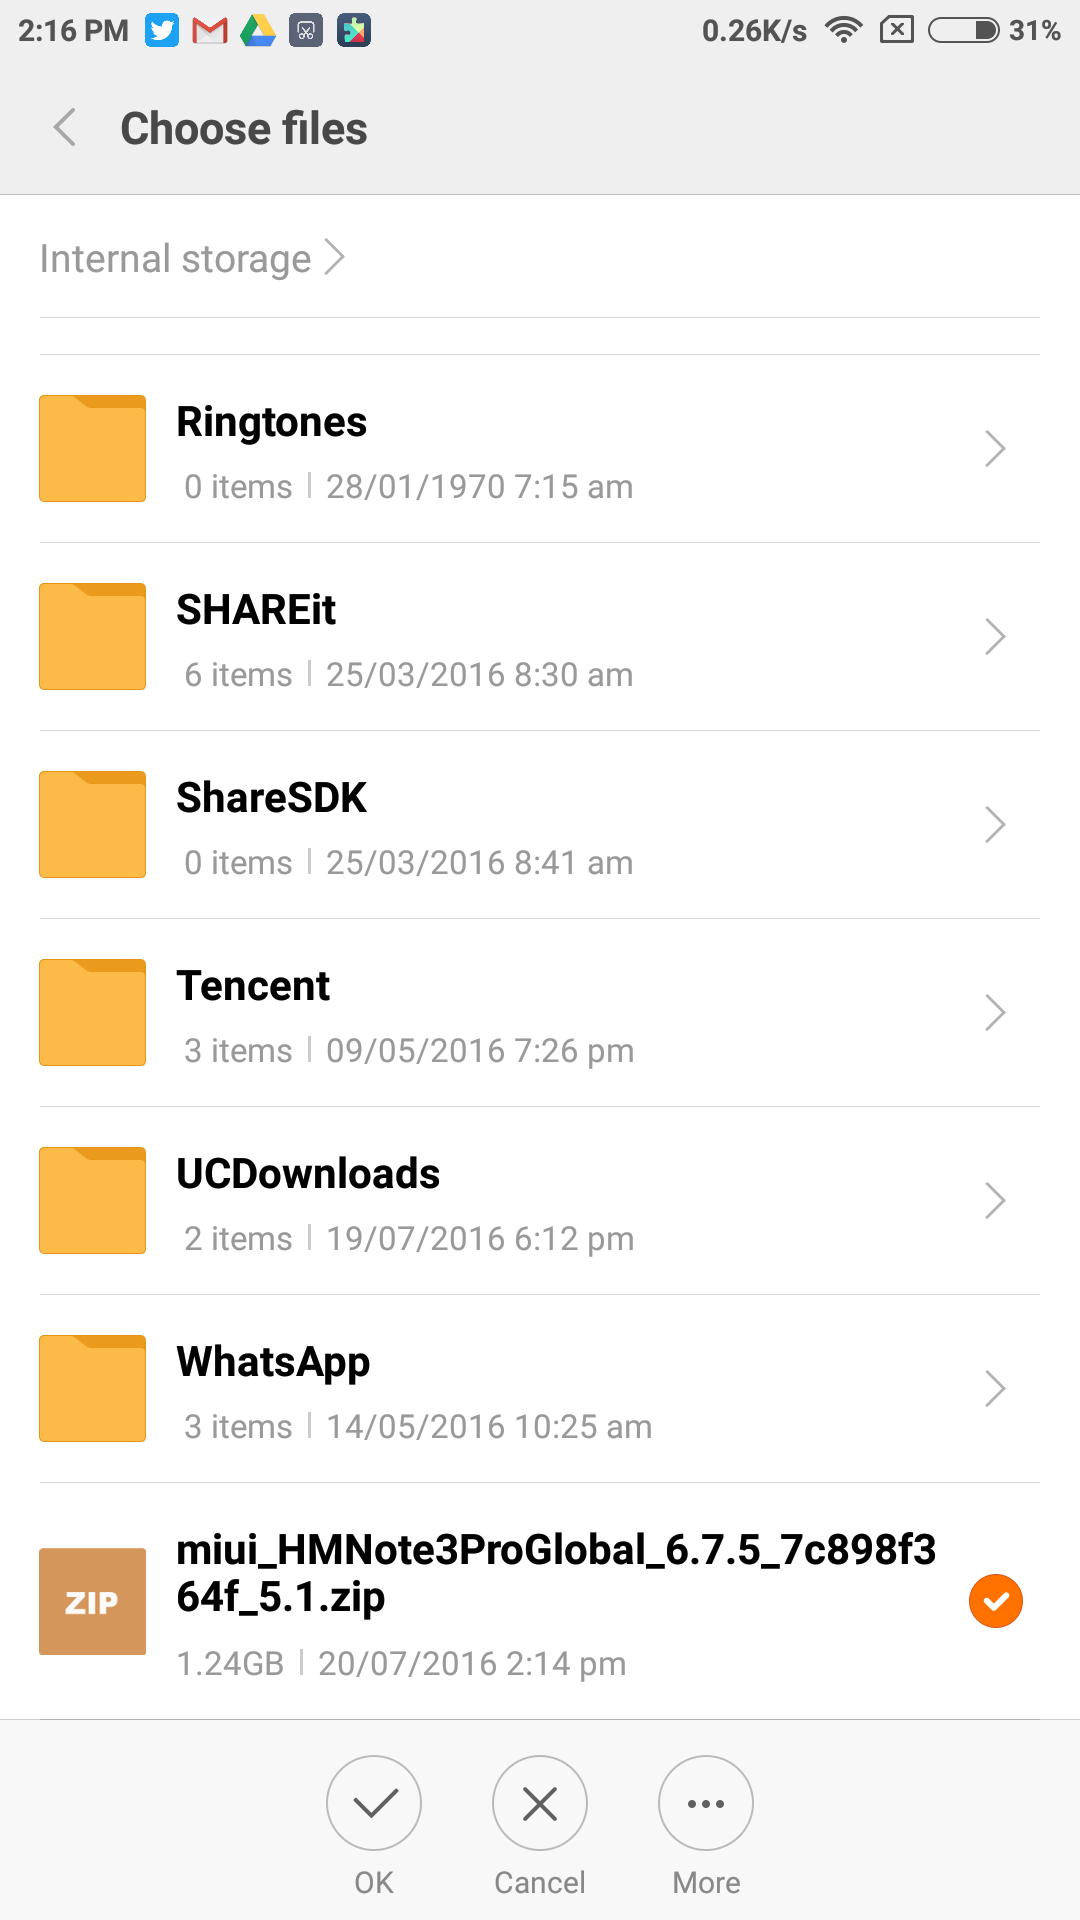
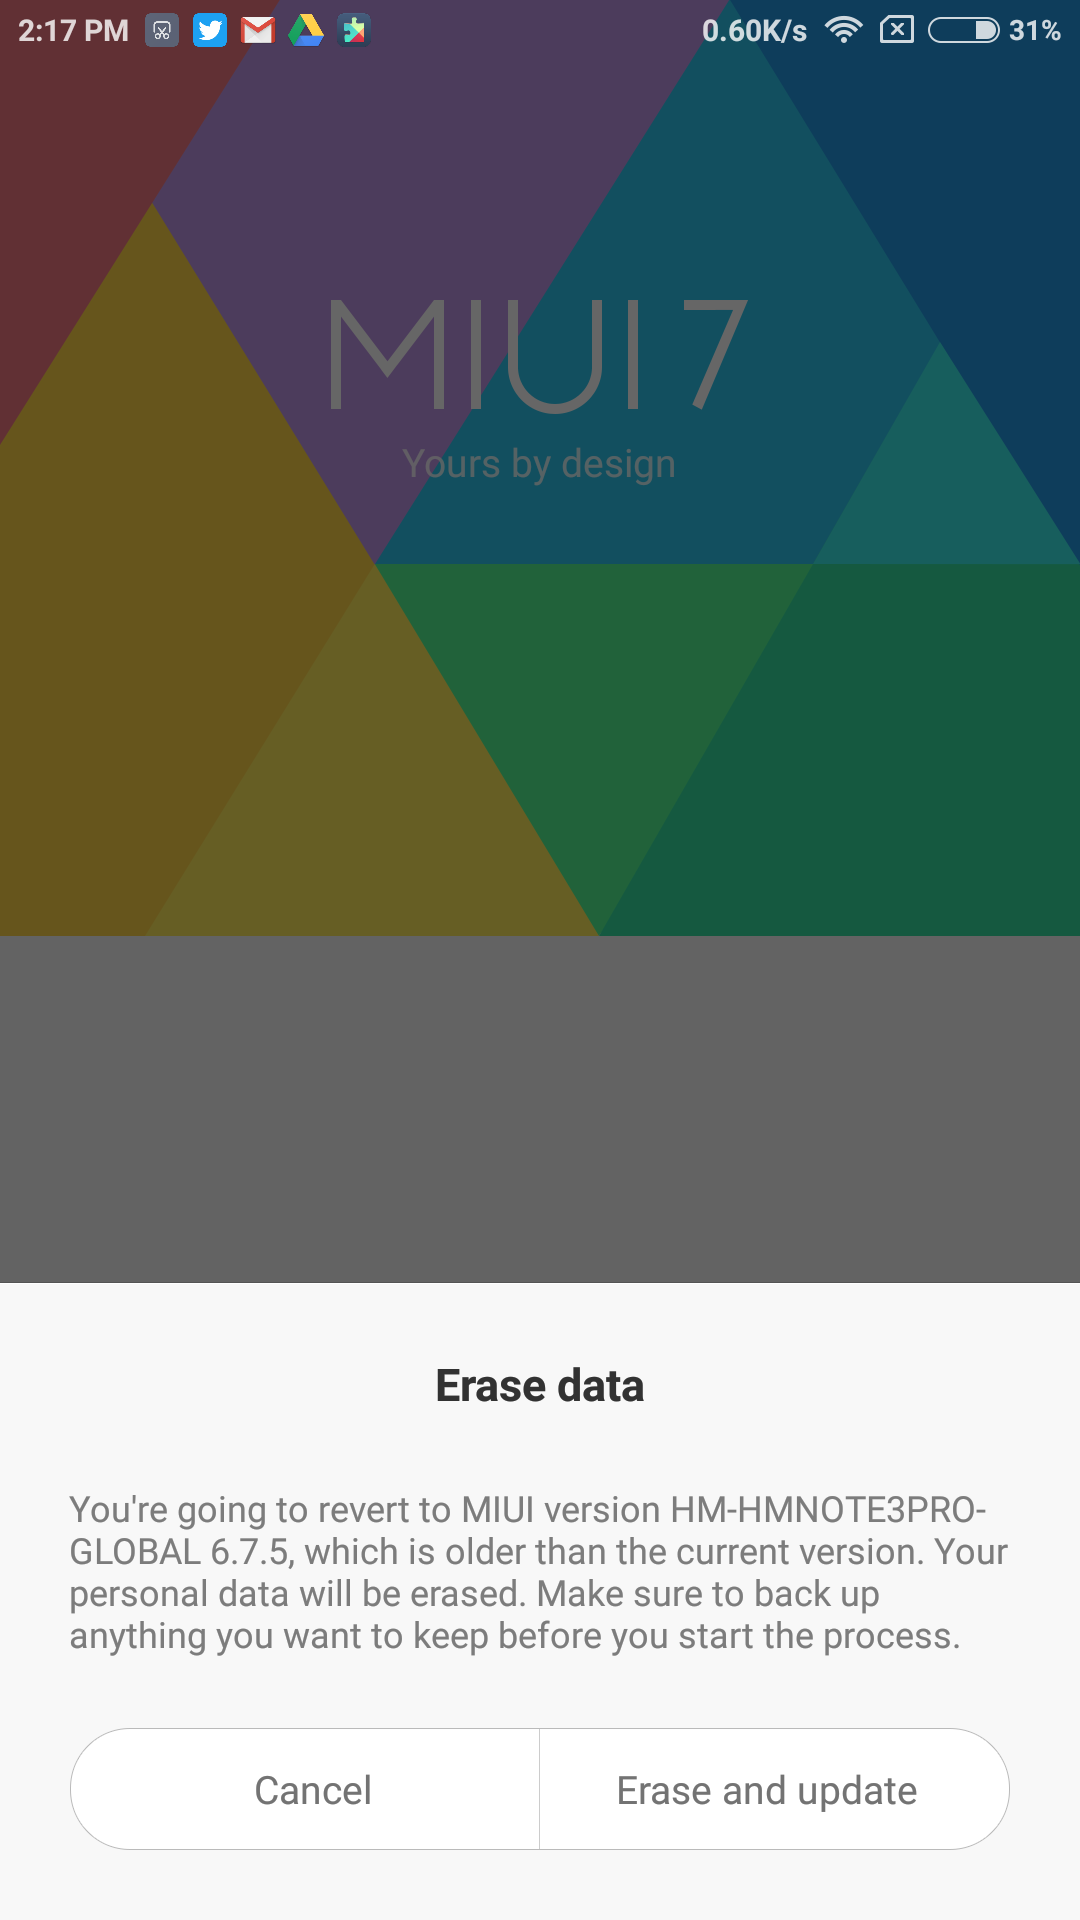
3. Open the Updater app, press the Menu button. Then tap on the ‘Choose update package’ option and choose the downloaded ROM (miui_HMNote3ProGlobal_6.7.5_7c898f364f_5.1.zip). Click Ok and then select ‘Erase and update’ (ignore the warning which says you’ll be reverted to an older version). Now wait for the update to complete and the device will reboot automatically.
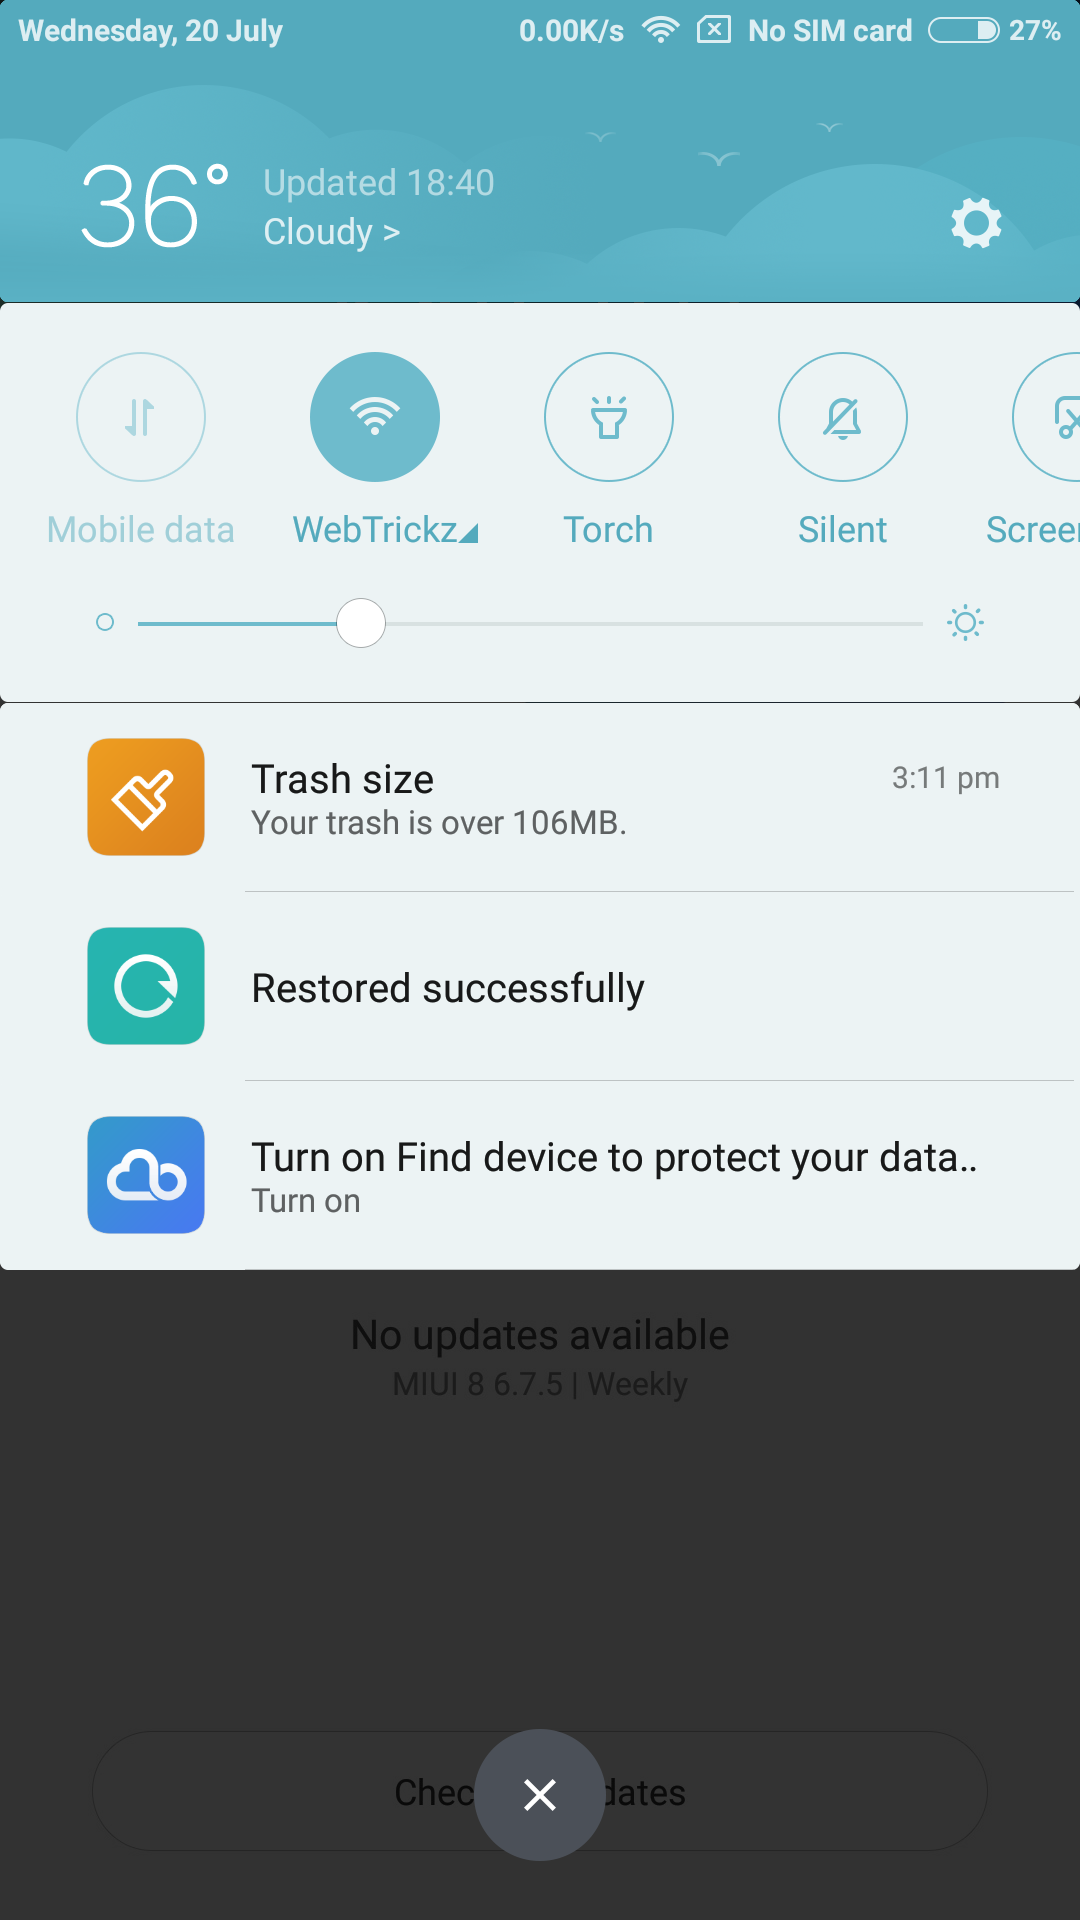
Voila! After rebooting your Redmi Note 3 should load up with MIUI 8. Setup the device and Restore the backup (that you might have created) from the Backup & reset option in Settings.
Some of the exciting new features in MIUI 8 include:
- Improved Notifications with Weather widget and revised Quick Toggles –
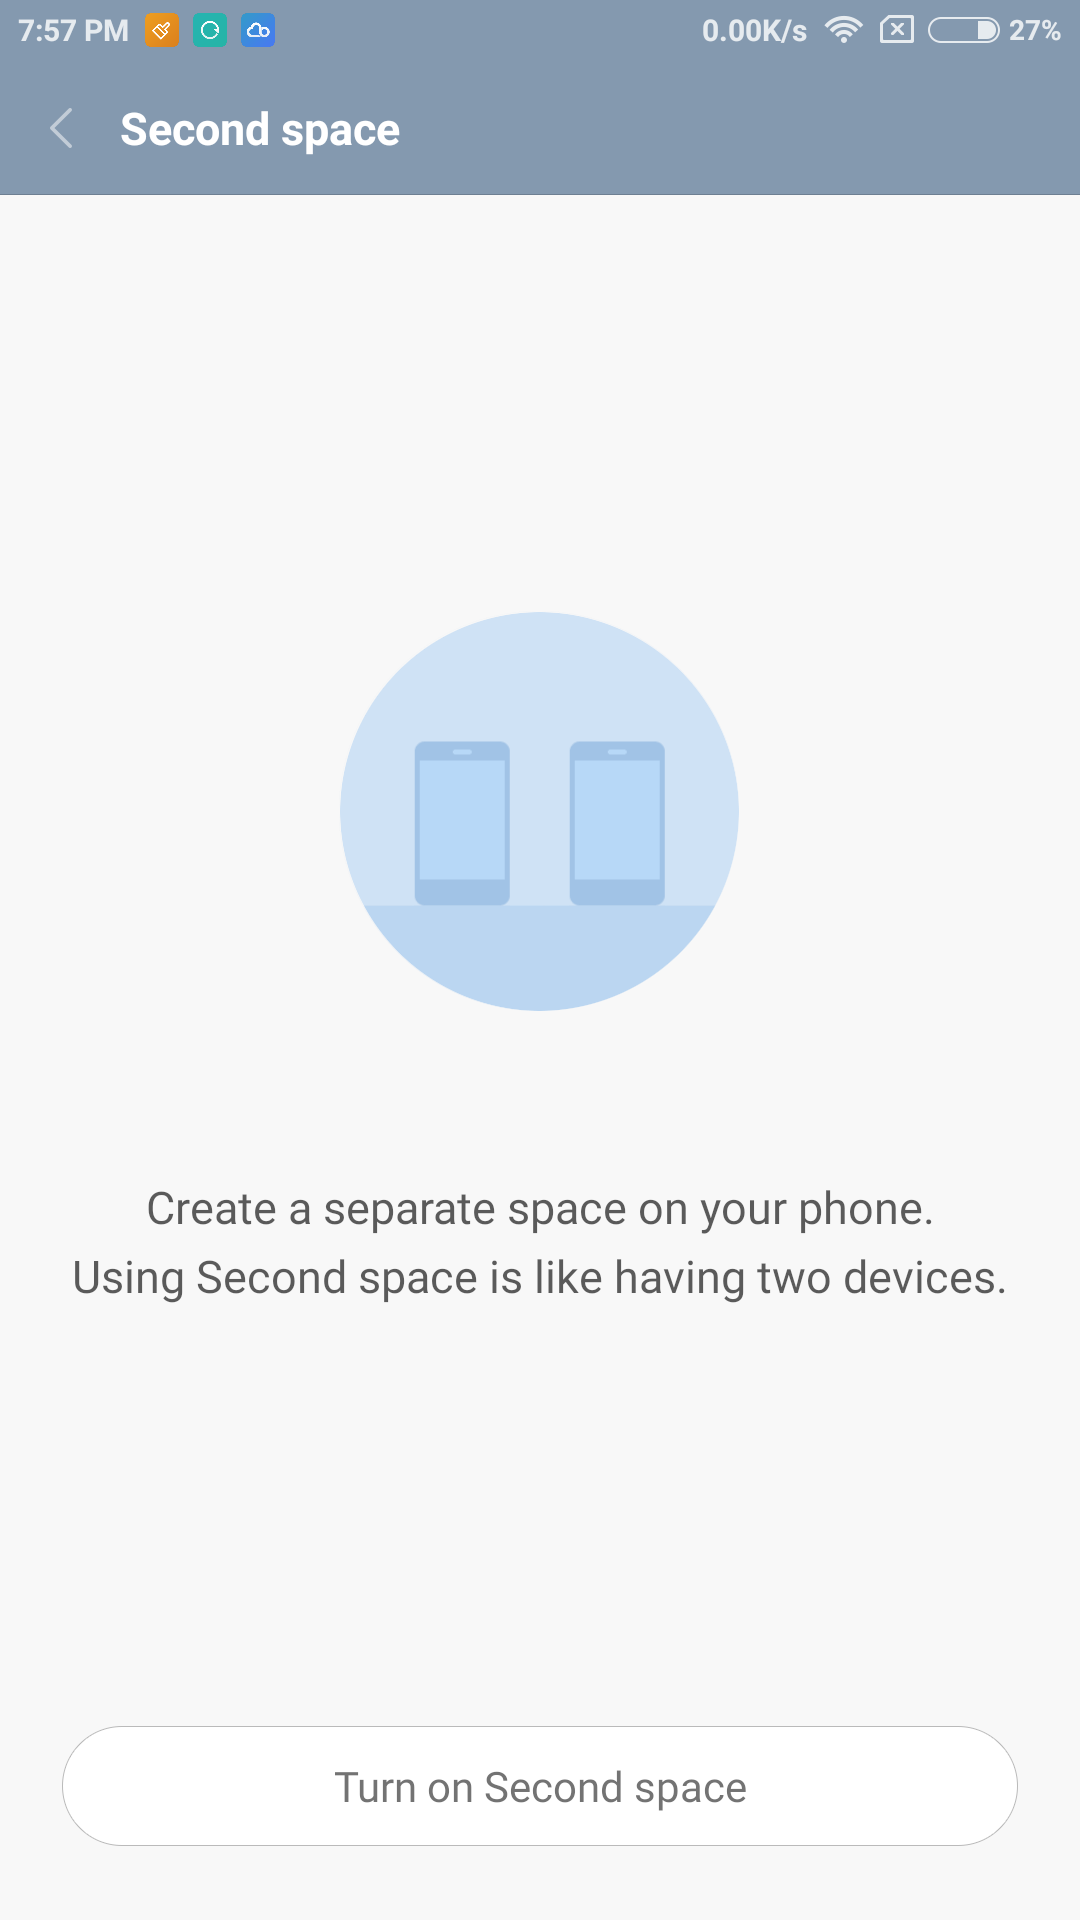
- Second space – Separate Personal & Professional profile
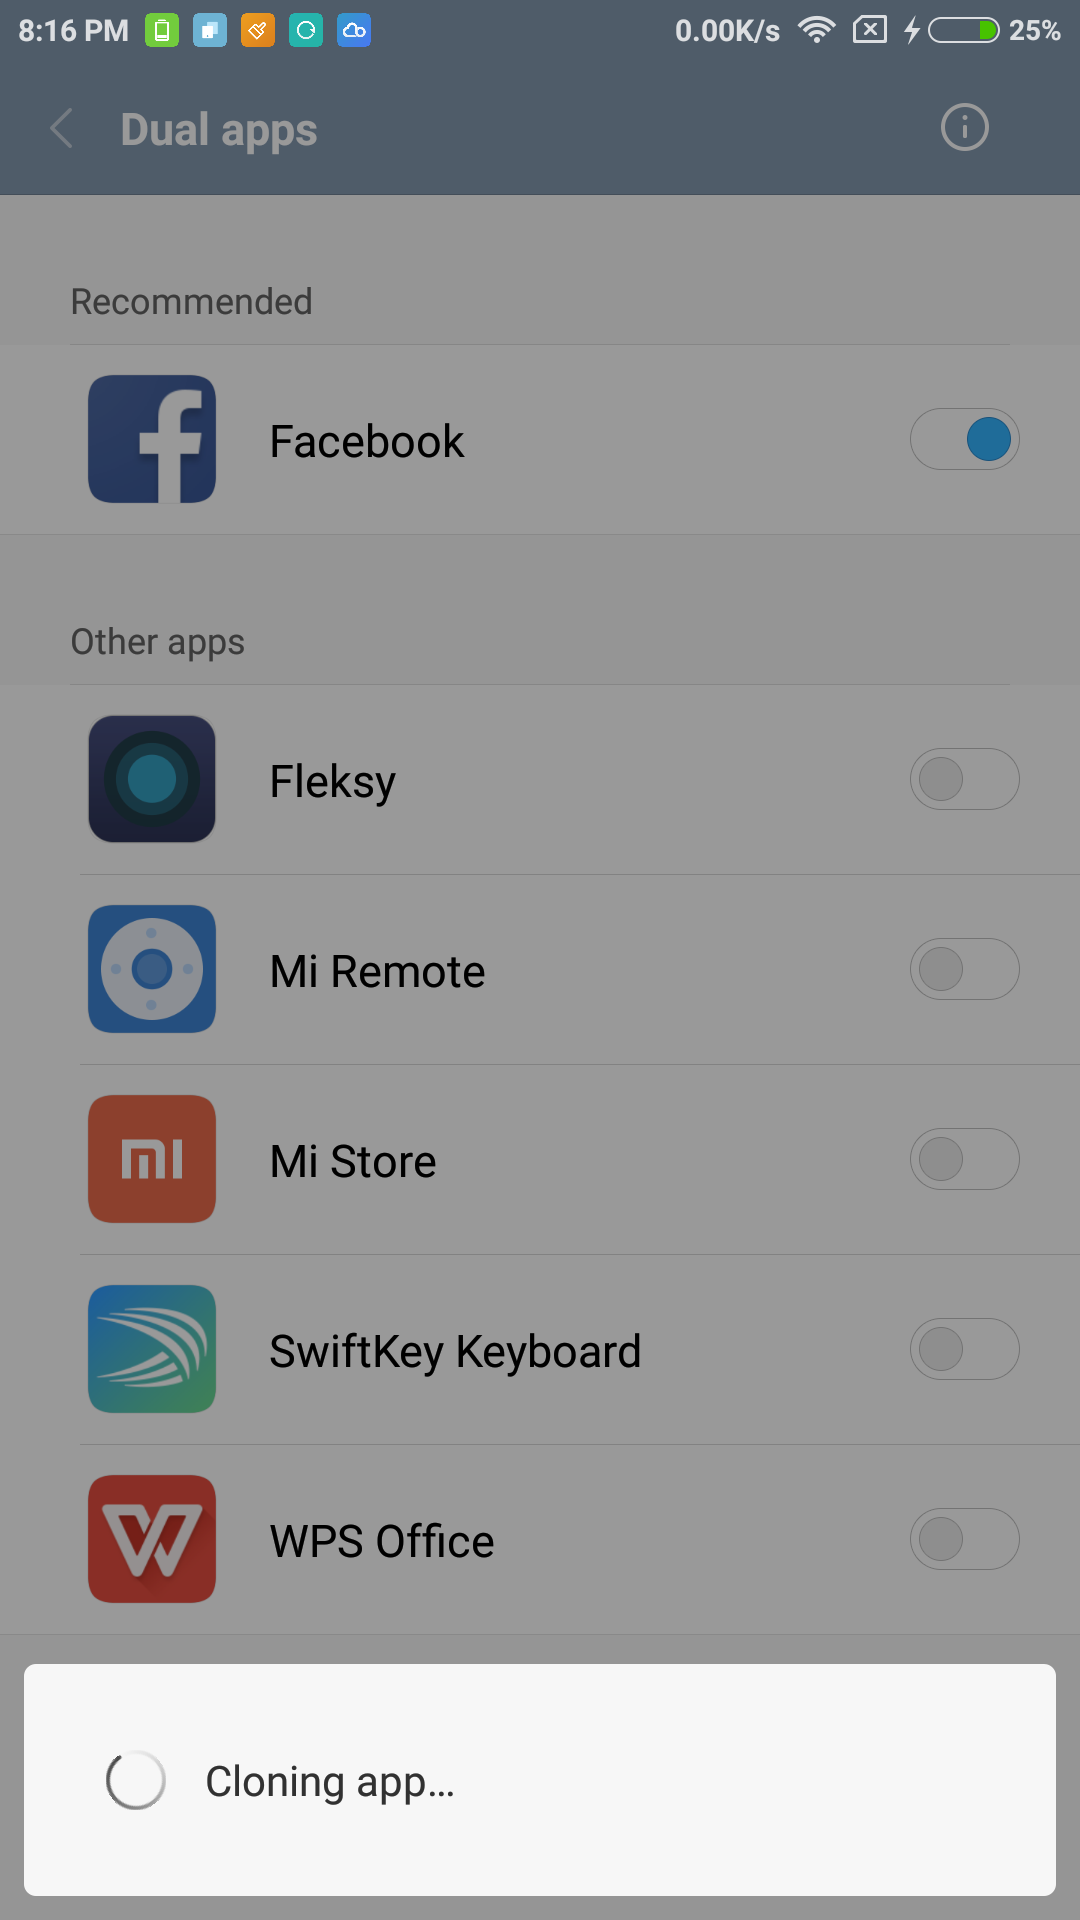
- Dual App support – For apps such as Facebook, WhatsApp
- Long screenshots
- New Calculator
- Quick ball
- New templates for Notes
- Redesigned Gallery
- New App lock – Unlock all apps at once
The beta ROM was installed without any issues and seems to work fine as we didn’t encounter any app crashes or force closes yet.

will i lose all my data during this process? am on MIUI 7 Stable Indian ROM at the moment and want to move to Dev rom for MIUI 8
Hi Cosmic, as mentioned “the internal storage data which includes your photos, documents, media, etc. WON’T be wiped but all the user installed apps, call logs, messages, contacts, and settings WILL BE ERASED.” 🙂
My Redmi note 3SD was unlocked Abd tried this method but it shows\”couldn\’t verify\” and is not allowed to upgrade to unofficial Rom. Suggest anything
Yar poore internet pe ni mil raha solution(if i have to switch only to miui rom rather it\’s stable /developer global,Chinese global/stable without breaking ota despite having zcx twrp with an official way then it\’s possible to ignore mi flash tool for flashing miui rom during switch to developer of (model Chinese variant/Qualcomm doesn\’t matter) ………….. 1.in wipe section:internal and sd card should be ticked for full clean after a full backup(except user data)? 2.would internal storage be removed after ticking and my 26gb storage wouldn\’t be mounted more 3.in wipe section we should do a factory reset or go into advance wipe or do a format data for full cleaning of corrupted rom and installation of same stable rom(I\’m using 8.1.1.0 MHOMIDG on Redmi note 3 pro) or for installation of global developer rom without breaking ota…
Kahin v inke answer ni mil parahe///
Dude, i tried for like 1000 times, but still it didn\’t work. Is it beause i am on the latest version of Global stable? If so then does it mean that i have to roll back to the older version?