NEW: Guide to Install Ubuntu Touch Developer Preview on Nexus 7 using Windows
Ubuntu 13.04 (Raring Ringtail) for Google Nexus 7 was announced in late October, where Jono Bacon stated that they will run the stock Ubuntu Desktop on the Nexus 7 tablet while focussing on the core of Ubuntu.
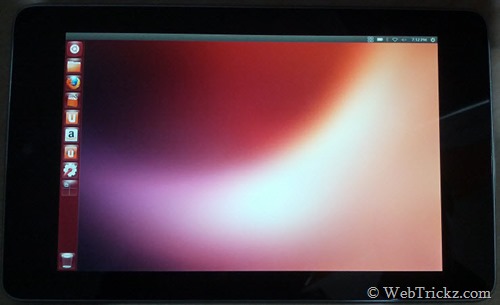
According to Jono –
A core goal for Ubuntu 13.04 is to get Ubuntu running on a Nexus 7 tablet. To be clear, this is not going to be a tablet Unity interface running on the 8/16GB Nexus 7, but instead will focus on getting the current Ubuntu Desktop running on the Nexus so that we can ensure pieces such as the kernel, power management and other related areas are working effectively on a tablet device.
Canonical provides a native installer called ‘Ubuntu Nexus 7 Desktop Installer’ to help developers and interested users easily install Ubuntu on Nexus 7 through a graphical interface, where the latest image is downloaded automatically and flashed accordingly. However, the only limitation is that the Ubuntu Nexus 7 desktop installer requires Ubuntu 12.04 LTS or later, hence making it difficult for non-Ubuntu users to install it. Though Ubuntu Wiki has listed a manual procedure to flash Ubuntu on Nexus 7. However, that requires Ubuntu as well, thus offering no choice for plenty of Windows users out there.
Our guide is the first of its kind offering the procedure to flash Ubuntu on Asus Nexus 7 through Windows OS. 🙂
Disclaimer: Try this guide at your own risk! We wont be responsible in case your device gets bricked. This may also void your warranty.
Note: This is a developer preview image, not intended for general users. This process will replace your existing Android OS on Nexus 7 with Ubuntu 13.04. To revert to Android, you need to flash the official Android 4.2.1 factory image on your Nexus 7.
- This process requires unlocking the bootloader which Completely Wipes your device including /sdcard. So make a backup first.
- This procedure is meant only for Nexus 7 Tablet (8GB, 16GB, or 32GB).
How to Manually Install Ubuntu 13.04 on Nexus 7
Step 1 – This is an important step. You need to install and configure the drivers on your Windows system. Refer to our guide: How to Install ADB and Fastboot Drivers for Nexus 7 on Windows 7 & Windows 8
Step 2 – Download and Extract all the required files.
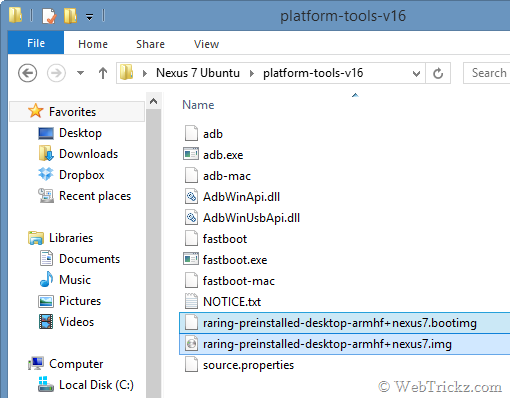
– Download Ubuntu 13.04 (Raring Ringtail) Daily Build (boot.img & img.gz) from http://cdimage.ubuntu.com/daily-preinstalled/current. (Only download these 2 files: ‘raring-preinstalled-desktop-armhf+nexus7.bootimg’ and ‘raring-preinstalled-desktop-armhf+nexus7.img.gz’). Then extract the img.gz file and change the file extension of the extracted file from .raw to .img.
– Download platform-tools-v16. Extract the zip file to the folder ‘platform-tools-v16’ on your desktop. Then move the above two .img files into the same folder such that all the required files are placed in one folder. Refer to image:
Step 3 – Proceed with Unlocking Bootloader and Flashing Ubuntu
- Turn off Nexus 7. Then boot it into bootloader/fastboot mode by holding the Volume Up + Volume Down key and power key simultaneously.
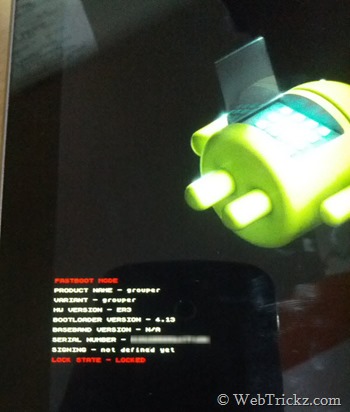
- Connect the tab to the computer using a USB cable.
- Now Right-click the folder ‘platform-tools-v16’ while holding down the Shift key and click on ‘Open command window here’.
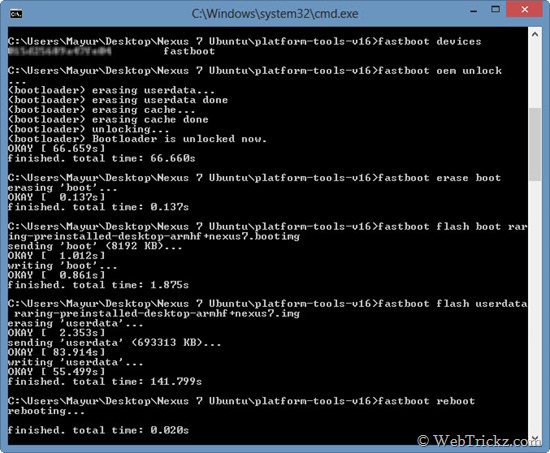
- The command prompt window will open up. Type fastboot devices to confirm that your device is recognized while it’s in fastboot mode.
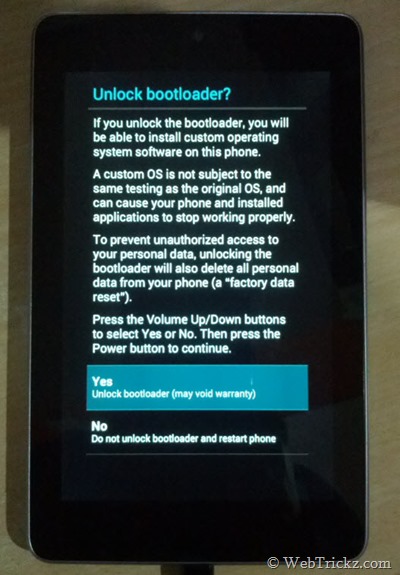
Unlock Nexus 7 Bootloader – Unlocking the bootloader will wipe the entire data on your device including the SD card. So, make sure you’ve taken a backup of important files.
In CMD, enter the command fastboot oem unlock. Then a screen titled ‘Unlock bootloader?’ will appear on your device. Select ‘Yes’ to unlock (use the volume keys to navigate and the power key to make your selection.) The lock state should say Unlocked.
Flashing Ubuntu 13.04 Manually on Nexus 7 –
When your device is in fastboot mode, enter all the below commands step-by-step in the stated order (use copy-paste in CMD to input the command).
Note: Make sure to wait for the “finished.” notification in CMD before entering the next command. The userdata file takes a few minutes to flash.
fastboot erase boot
fastboot erase userdata (Not required if you just unlocked before flashing)
fastboot flash boot raring-preinstalled-desktop-armhf+nexus7.bootimg
fastboot flash userdata raring-preinstalled-desktop-armhf+nexus7.img
fastboot reboot
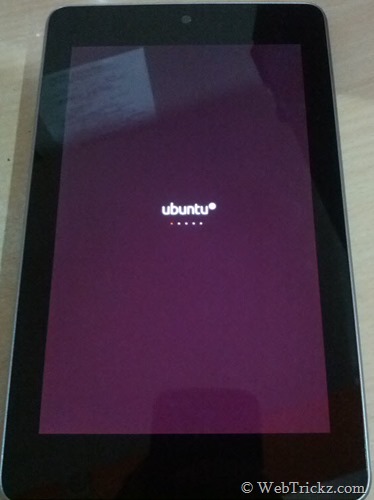
That’s it! Nexus 7 will now reboot and boot into the Ubuntu installer. It will initially take a few minutes to prepare the root file system, so stay patient.
Video Tutorial –
Source: Ubuntu Wiki




Hey, I followed all your instructions and everything goes well. Until the Very last part when the Installer is suppose to run through My Nexus 7 Screen does this ; https://lh4.googleusercontent.com/-aC83yuJAnYs/UOkZmtRAseI/AAAAAAAAAQQ/HM3z9pcccDg/s720/photo.JPG
yeah this didn’t work. Maybe its the build, but I get a black screen once it boots up and nothing more.
i always get just errors and app crash on win 7 x64