The much-awaited Ubuntu Touch developer preview for Android is finally available for Google’s flagship Nexus devices (Galaxy Nexus, Nexus 4, Nexus 7, and Nexus 10). Ubuntu for Phones by Canonical was earlier demonstrated on the Galaxy Nexus smartphone and recently a tablet version of Ubuntu was demoed on the Nexus 10 as well.
Ubuntu for Android is a beautiful and unified OS, that brings the power of a PC to your phone by offering the ability to run both Ubuntu and Android at the same time on one mobile device. Ubuntu for Android magically adapts the full desktop interface and transforms your phone into a PC when connected to a monitor, mouse, and keyboard. When docked, one can access the Android apps, and make and receive calls/SMS from the Ubuntu Desktop.
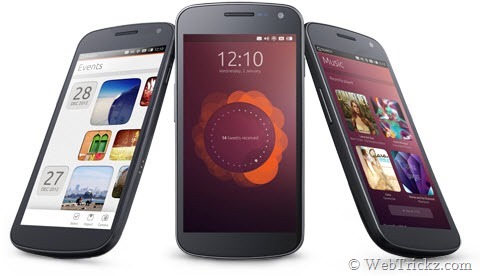
Perhaps, if you’re amazed seeing the demonstration video of Ubuntu for Android then you probably want to try it on your supported Nexus device. However, it should be noted that this developer preview image is intended for developers and Android enthusiasts. It does not provide all of the features and services of a retail phone and cannot replace your current handset. Please carefully follow the step-by-step instructions below:
Supported devices:
- Samsung Galaxy Nexus (GSM) – maguro
- Nexus 4 – mako
- Nexus 7 – grouper
- Nexus 10 – manta
NOTE: This process requires unlocking the bootloader which Completely Wipes your device including /sdcard. So make a backup first.
This process will replace your existing Android OS with Ubuntu. To revert back to Android, you need to flash the official Android (4.2.2) factory image on your Nexus.
Device-Specific Issues (Check Release Notes)
Nexus 4 – In rare circumstances, the Nexus 4 may get into a state where it may not boot at all after the battery is drained ( even into recovery ). If this happens, the only way to restore it is to disassemble the back of the phone and unplug/plug the battery connector.
Mobile data is not supported, data is available via Wi-Fi only.
Step-by-Step Procedure to Flash Ubuntu on Nexus devices in Windows OS –
Step 1 – This is an important step. You need to install and configure the ADB and Fastboot drivers on your Windows system. Refer to our guide: New Method – Installing ADB and Fastboot Drivers for Galaxy Nexus on Windows 7 & Windows 8. Guide for Nexus 7
Step 2 – Take a backup of your installed apps (with data) and SD card contents. Check our article, [How to Backup Galaxy Nexus Apps & Data without Rooting]. Taking a backup of apps is optional but it’s recommended to manually backup your SD card data.
Step 3 – Download all the required files for the corresponding Nexus device.
Link:
Example: For Galaxy Nexus, download all the below-listed files from the above webpage.
- quantal-preinstalled-armel+maguro.zip
- quantal-preinstalled-phablet-armhf.zip (Common file for all devices)
- quantal-preinstalled-boot-armel+maguro.img
- quantal-preinstalled-recovery-armel+maguro.img
- quantal-preinstalled-system-armel+maguro.img
– Download TWRP custom recovery v2.4.1.0 – maguro | mako | grouper | manta
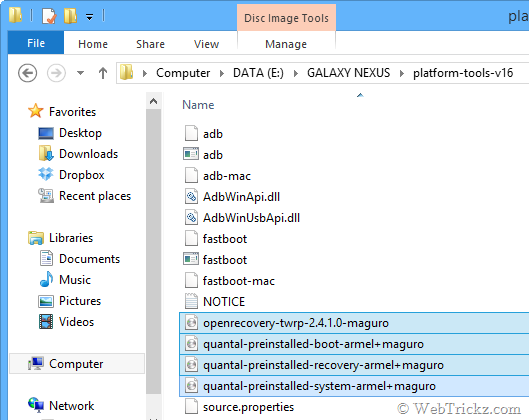
– Download platform-tools-v16. Extract the zip file to the folder ‘platform-tools-v16’ on your desktop. Then move the three quantal .img files and TWRP recovery.img file into the same folder such that all the required files are placed in one folder. Refer image:
Step 4 – Proceed with Unlocking Bootloader and Flashing Ubuntu
- Turn off your phone. Then boot it into bootloader/fastboot mode by holding the Volume Up + Volume Down key and power key simultaneously.
- Connect the phone to the computer using a USB cable.
- Now Right-click the folder ‘platform-tools-v16’ while holding down the Shift key and click on ‘Open command window here’.
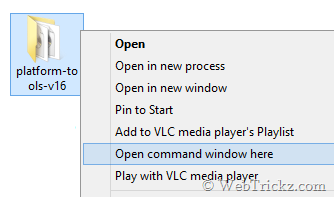
- The command prompt window will open up. Type fastboot devices to confirm that your device is recognized while it’s in fastboot mode.
Unlock Bootloader – Unlocking the bootloader will wipe the entire data on your device including the SD card. So, make sure you’ve taken a backup of your important files.
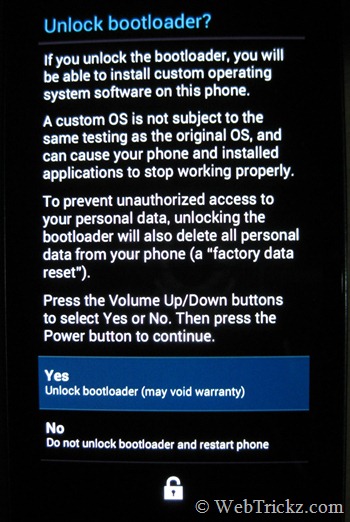
In CMD, enter the command fastboot oem unlock . Then a screen titled ‘Unlock bootloader?’ will appear on your phone. Select ‘Yes’ to unlock (use the volume keys to navigate and the power key to make your selection.) The lock state should say Unlocked.
Step 5 – Start your phone and copy these Flashable Ubuntu for Android Zip files to your phone/tablet sdcard.
- quantal-preinstalled-armel+maguro.zip
- quantal-preinstalled-phablet-armhf.zip
Step 6 – Flashing Ubuntu preview image manually using Windows –
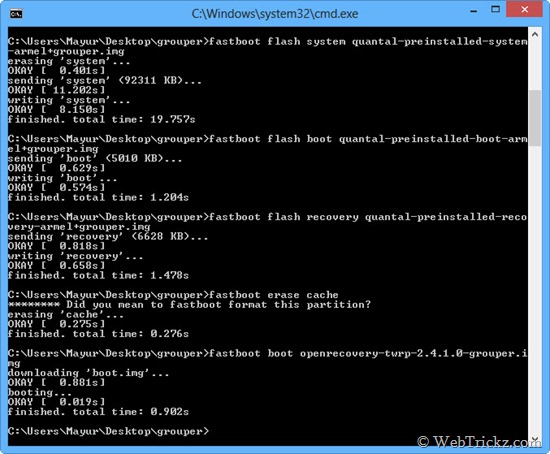
Now boot into the bootloader and open CMD (refer to Step 4). When your device is in fastboot mode, enter all the below commands step-by-step in the stated order (use copy-paste in CMD to input the command).
Note: Make sure to wait for the “finished.” notification in CMD before entering the next command. Don’t forget to change the below file names accordingly.
fastboot flash system quantal-preinstalled-system-armel+maguro.img
fastboot flash boot quantal-preinstalled-boot-armel+maguro.img
fastboot flash recovery quantal-preinstalled-recovery-armel+maguro.img
Step 7: Temporarily Boot into TWRP Custom Recovery
fastboot boot openrecovery-twrp-2.4.1.0-maguro.img
~ To flash the recovery permanently, use the below command.
fastboot flash recovery openrecovery-twrp-2.4.1.0-maguro.img
The device will now boot into TWRP recovery.
Step 8: Flashing the .zip files in TWRP recovery –
– Wipe > Factory Reset
– Wipe Cache and Dalvik cache
– Install > quantal-preinstalled-armel+maguro.zip
– Install > quantal-preinstalled-phablet-armhf.zip
– Reboot System
That’s it! The device should now boot up normally with the brilliant and neat Ubuntu.
Disclaimer: Try this guide at your own risk! We wont be responsible in case your device gets bricked. This may also void your warranty.
Update – Flashing Ubuntu easily on Nexus using Custom Recovery
Required: The device bootloader should be unlocked and have a custom recovery installed.
1. Download the appropriate zip files and paste them to the root of your /sdcard.
– Galaxy Nexus (maguro) | Nexus 4 (mako) | Nexus 7 (grouper) | Nexus 10 (manta)
– quantal-preinstalled-phablet-armhf.zip (Common zip for above devices)
2. Reboot into custom recovery. (CWM or TWRP)
3. Make a Nandroid backup. (Optional)
4. Wipe data/factory reset
– Wipe cache partition
– Wipe Dalvik Cache
5. Install the device .zip (quantal-preinstalled-armel+xxxxx.zip)
6. Install the ‘quantal-preinstalled-phablet-armhf.zip’
7. Reboot System




WOW! Cool.
Now, I can have Ubuntu on My Nexus 4. Thanks for sharing this full detailed article.
Does unlocking ‘platform-tools-v16’ work with android 4.2.2?
Thanks for the nice article , its super tech
Can the same technique be applied for installation in android 4.4?
Wow! Thank you! I constantly wanted to write on my site something like that. Can I take a portion of your post to my website?