Some users prefer a clean and uncluttered desktop without any icons. On Windows, the Recycle Bin icon sits on the desktop by default and you can’t hide or delete it using the hidden attribute setting.
Although, Windows 11, 10, 8.1, and 7 feature a personalization option to hide Recycle Bin from the desktop. That said, users cannot remove Recycle Bin from their desktop on Windows 11 via the traditional method unless their Windows PC is activated. That’s because the ‘Desktop icon settings’ menu (under Personalization > Themes) is inaccessible on the non-activated version of Windows.
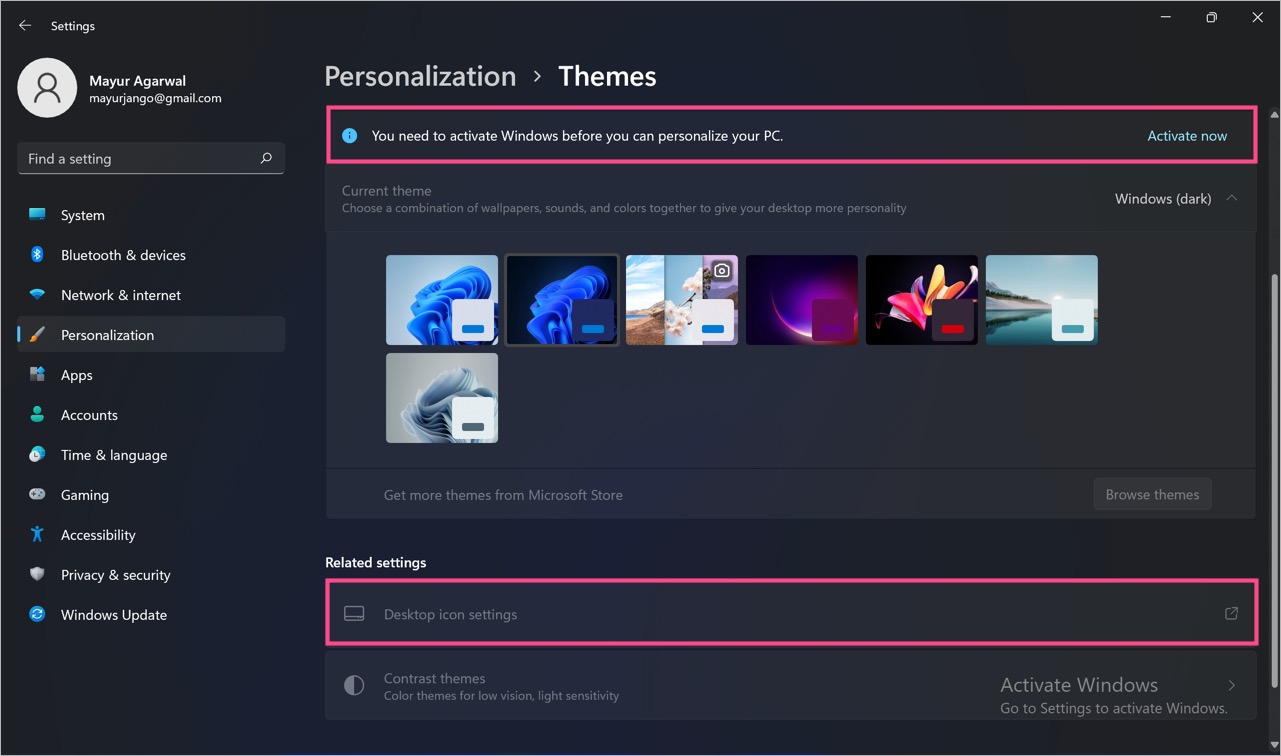
Worry not, there are a few workarounds to easily remove Recycle Bin from the desktop without activating Windows. By doing so, you can get rid of the recycle bin on your desktop and hide its contents so no one can view or access your deleted files.
Now let’s see how you can hide or remove Recycle Bin from the Windows 11 desktop without activation.
How to Remove Recycle Bin Icon from Desktop Without Activation
Using the Run command (Easiest Way)
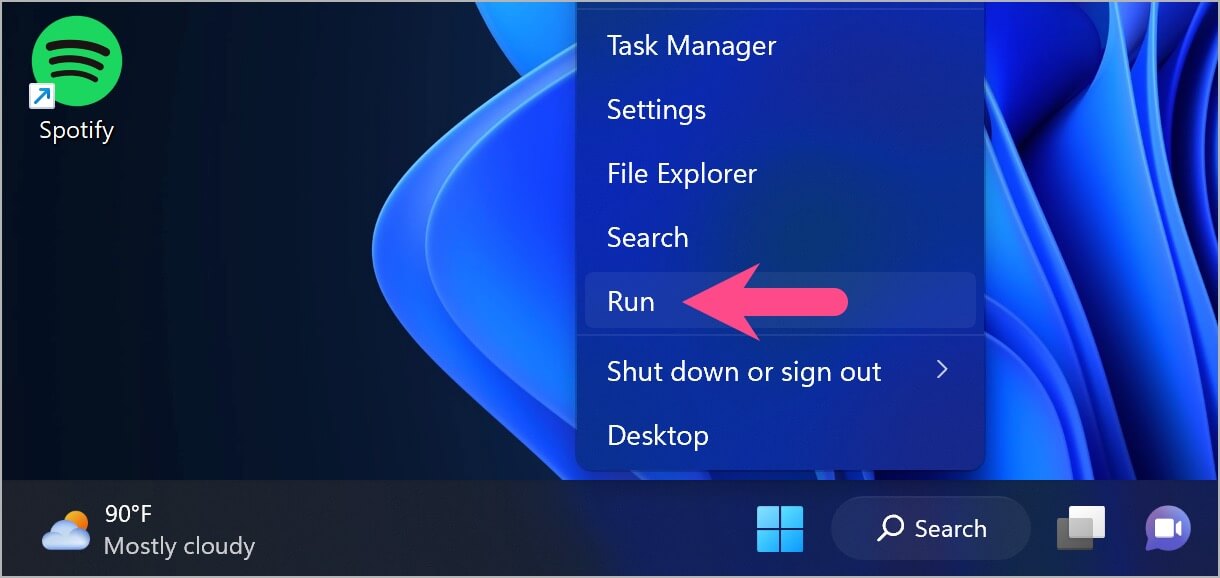
- Open the Run command in Windows 11. To do so, press the Windows + R hotkey or right-click the Start menu icon (in the taskbar) and select the Run option. You can also search for the Run app in Windows Search.
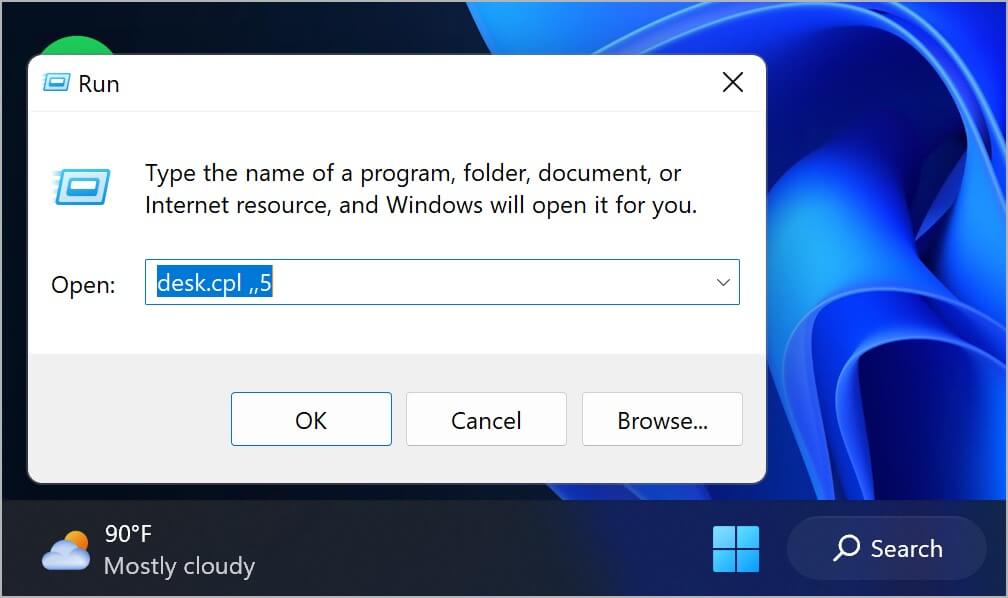
- In the Run app, enter the command desk.cpl ,,5 and hit OK.
- The ‘Desktop Icon Settings’ window will now open, which is otherwise locked on unactivated Windows.
- Untick the checkbox next to ‘Recycle Bin’ and click OK.
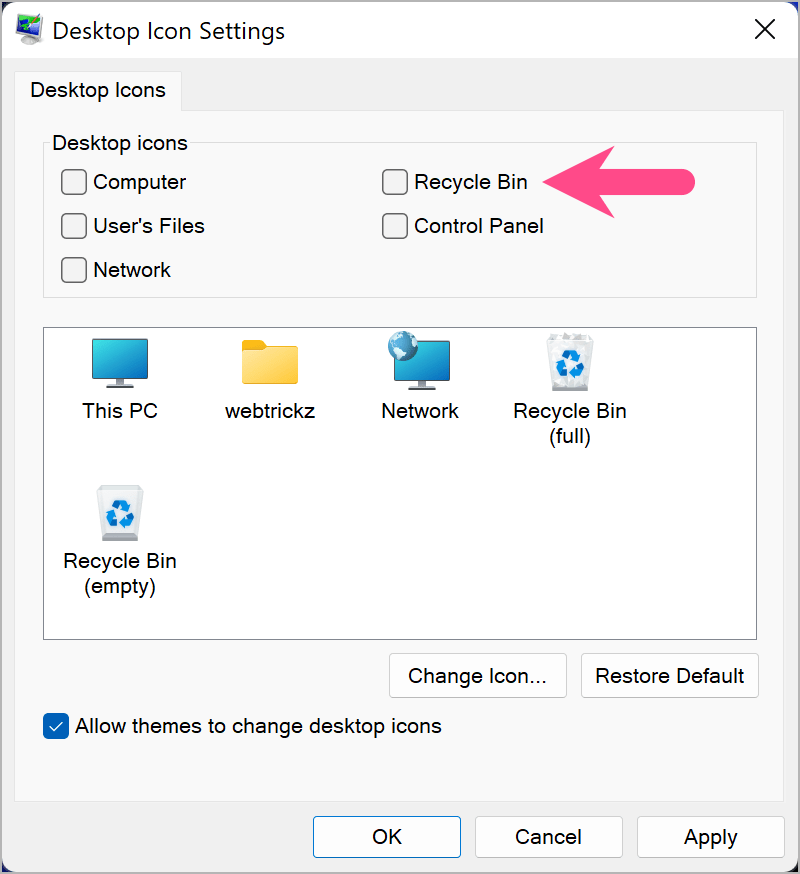
That’s it. The Recycle Bin icon will immediately disappear from your desktop.
Using Group Policy Editor
This is an alternate method to remove the Recycle Bin from your desktop without activating Windows 11. It involves using the Local Group Policy Editor and should also work on Windows 10 and previous versions of Windows.
Follow the steps below to remove Recycle Bin from your desktop using Group Policy.
- Press the Windows + R keyboard shortcut to open the Run command.
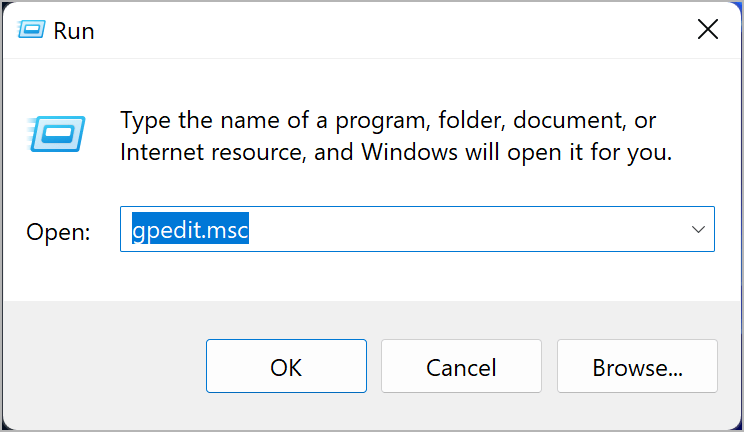
- In the Run app, type gpedit.msc and click OK.
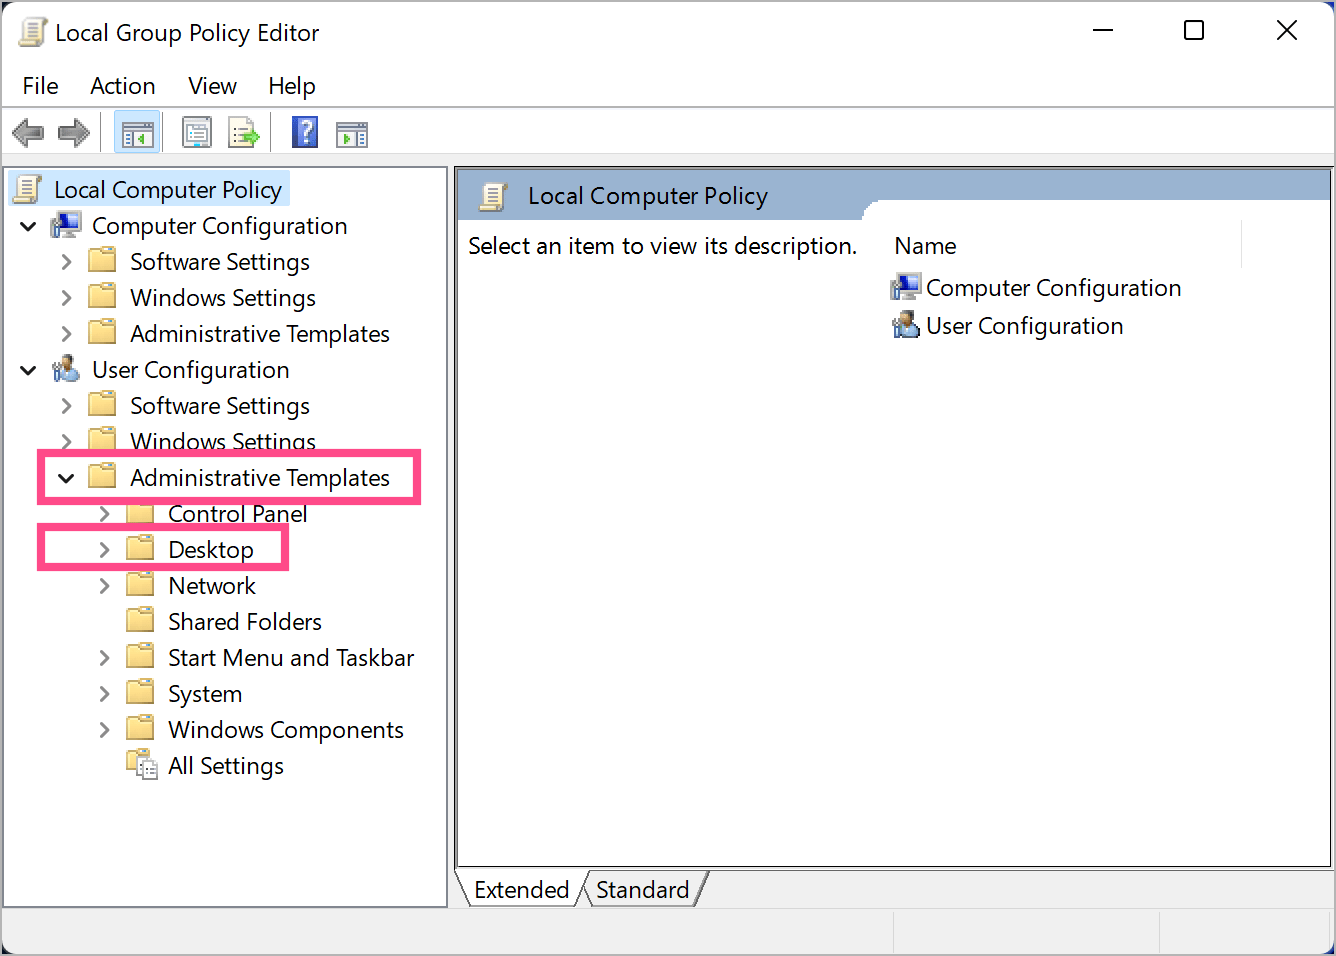
- In the left-sidebar, expand the ‘Administrative Templates’ dropdown menu (under User Configuration) and select ‘Desktop’.
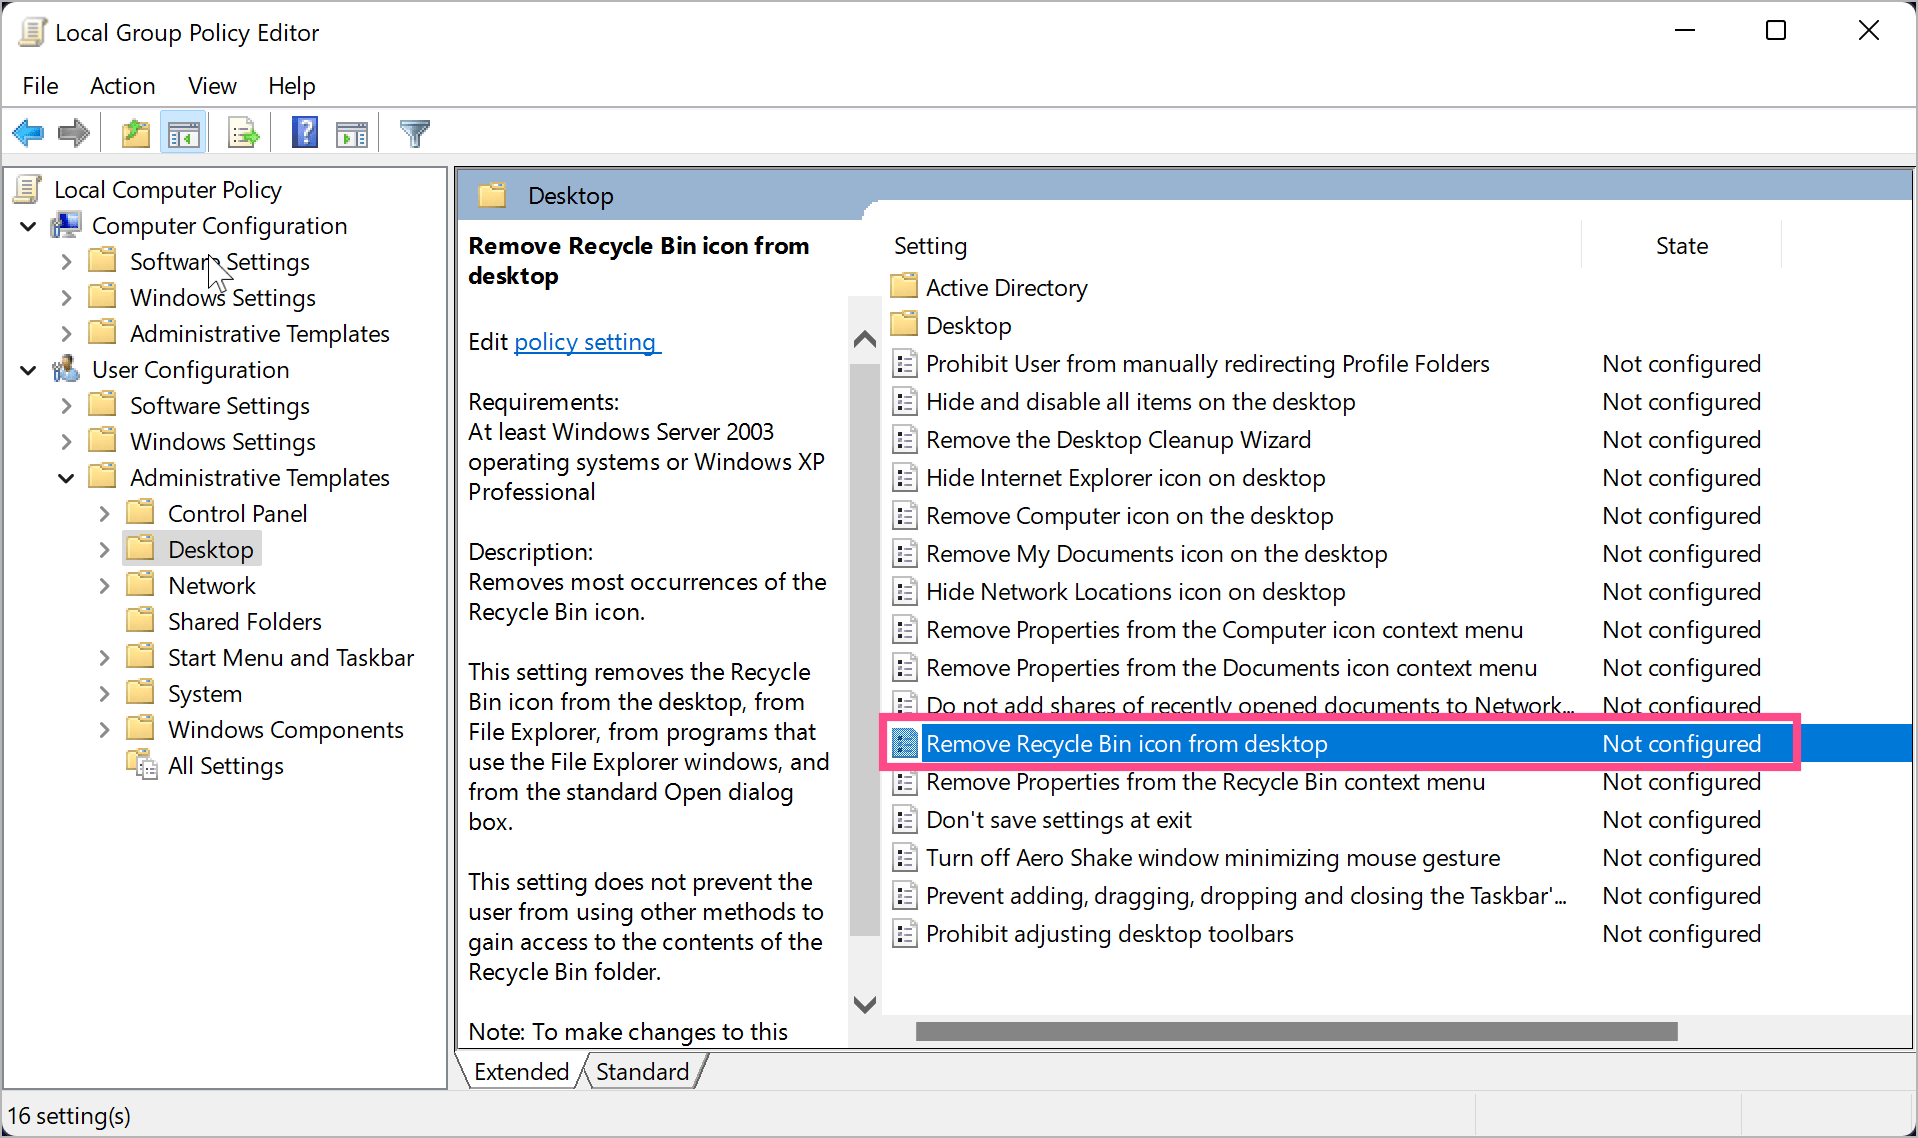
- Under Desktop, find and double-click the ‘Remove Recycle Bin icon from desktop’ setting.
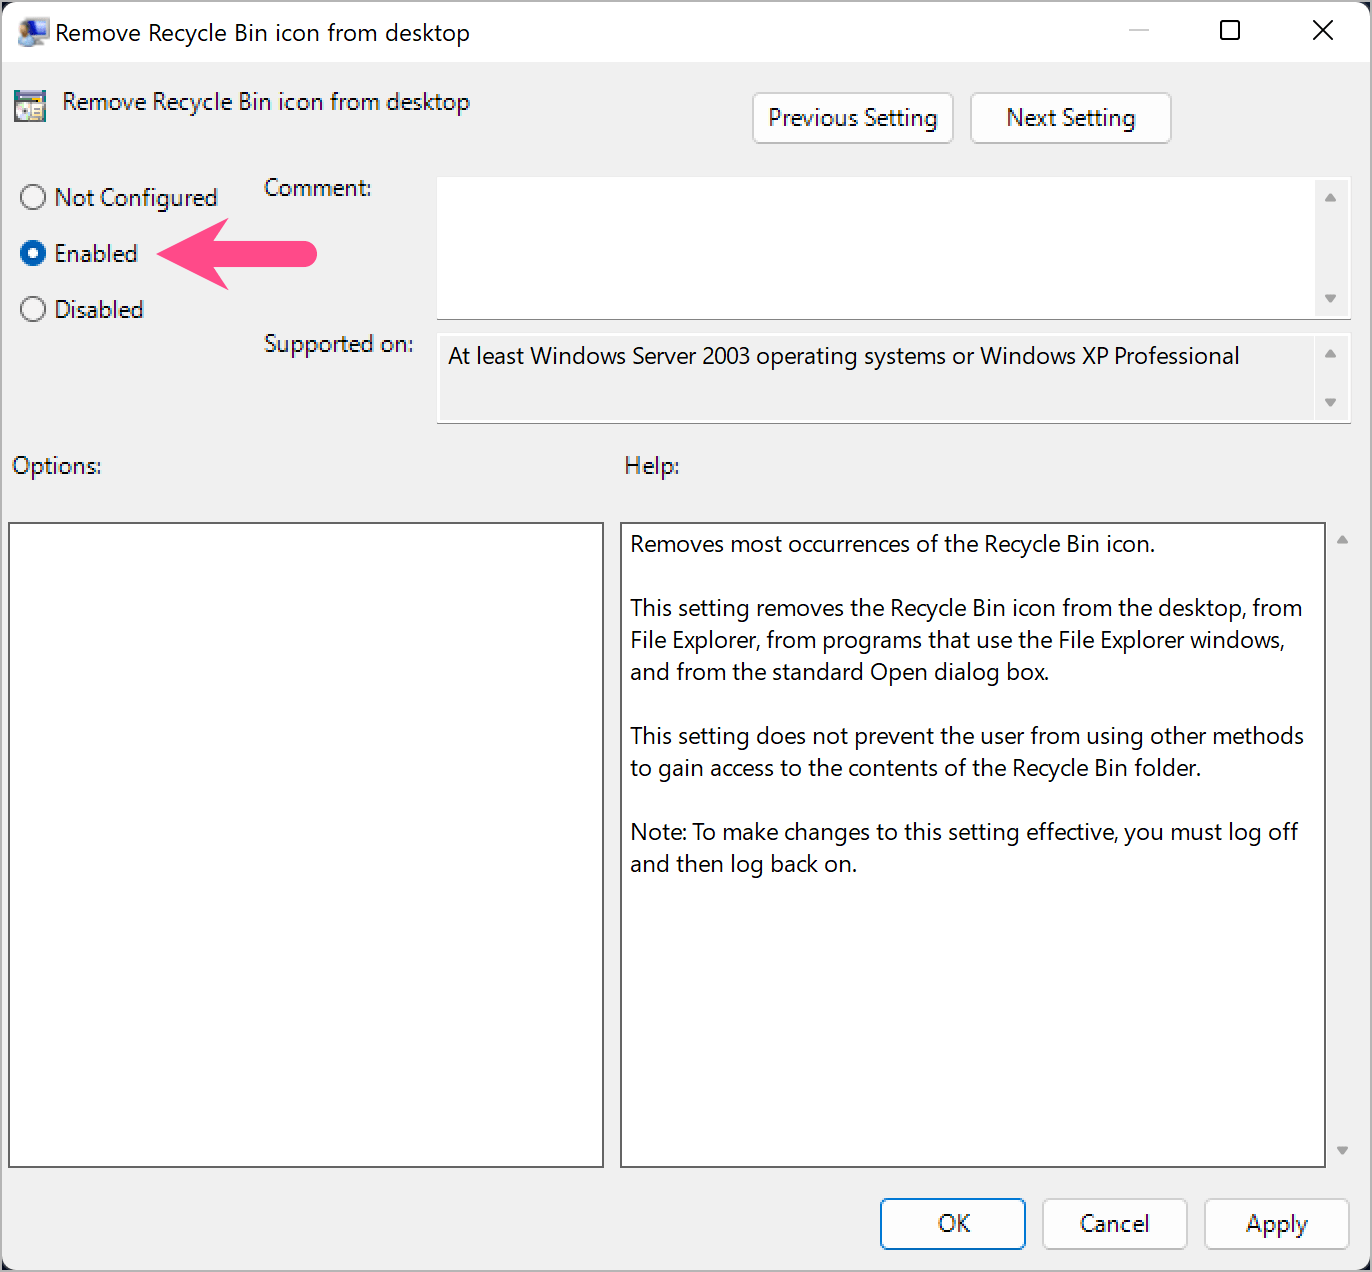
- Select the ‘Enabled‘ option. Then hit ‘Apply’ and select ‘OK’.
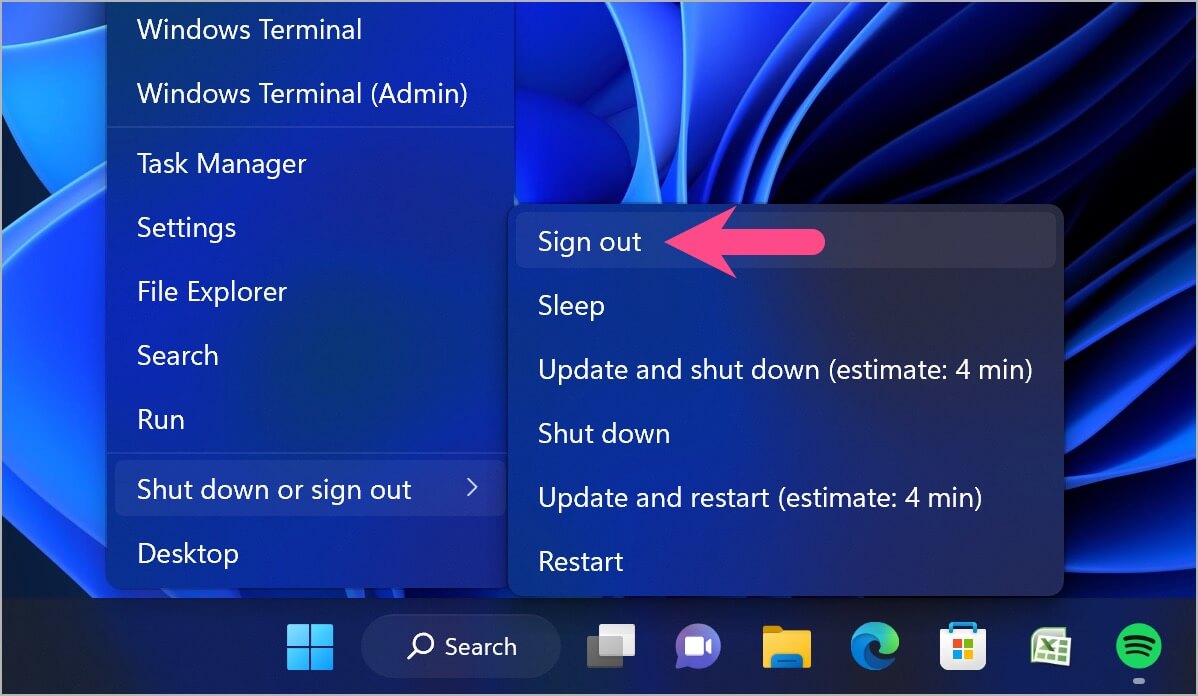
- Sign out or restart your computer for the changes to take effect.
To bring back the Recycle Bin icon on the desktop, simply open Group Policy Editor and select the ‘Not Configured’ or ‘Disabled’ option instead.
NOTE: Deleting the recycle bin icon won’t delete any of its data and it will continue to function normally. You just won’t be able to access it directly from the desktop.
P.S. We’ve tried the above steps on Windows 11 Pro (Version 21H2) but they should also work on Windows 10 or earlier.
How to Access the Hidden Recycle Bin Folder?
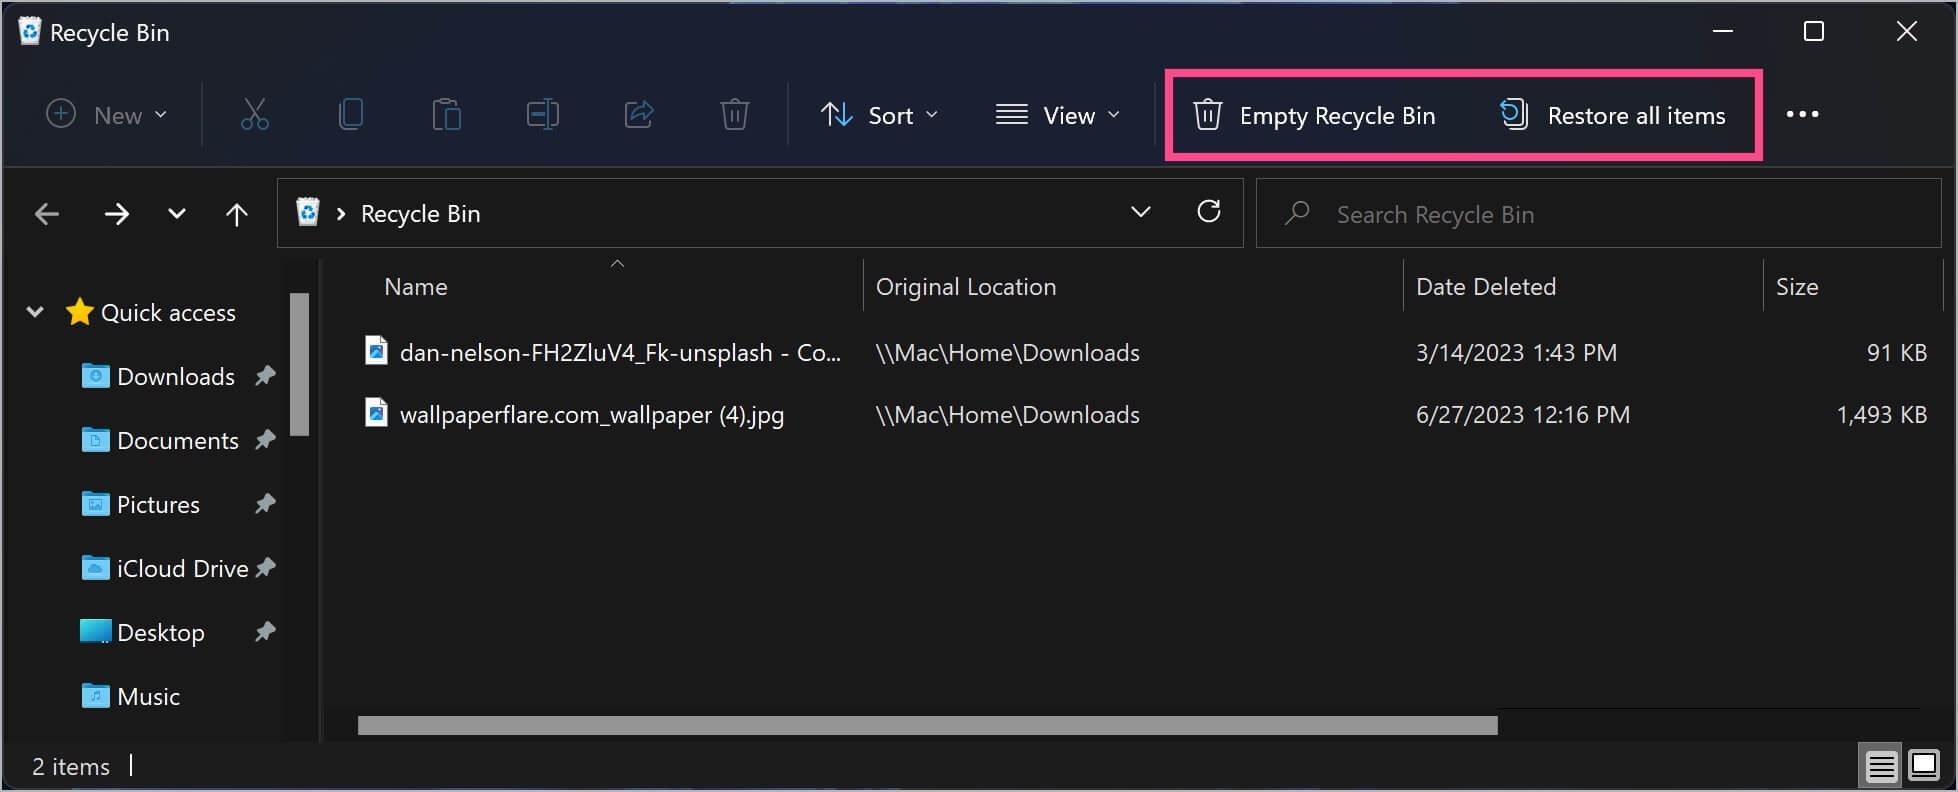
Now that you’ve hidden the Recycle Bin directory from the desktop, you might want to view your deleted files to delete them permanently, restore files, or empty the recycle bin.
Here’s how you can access Recycle Bin when the icon is not on the desktop.
Using Search
- Click the Windows Search bar in the taskbar or click the Start menu icon.
- Search for the term ‘Recycle bin’.
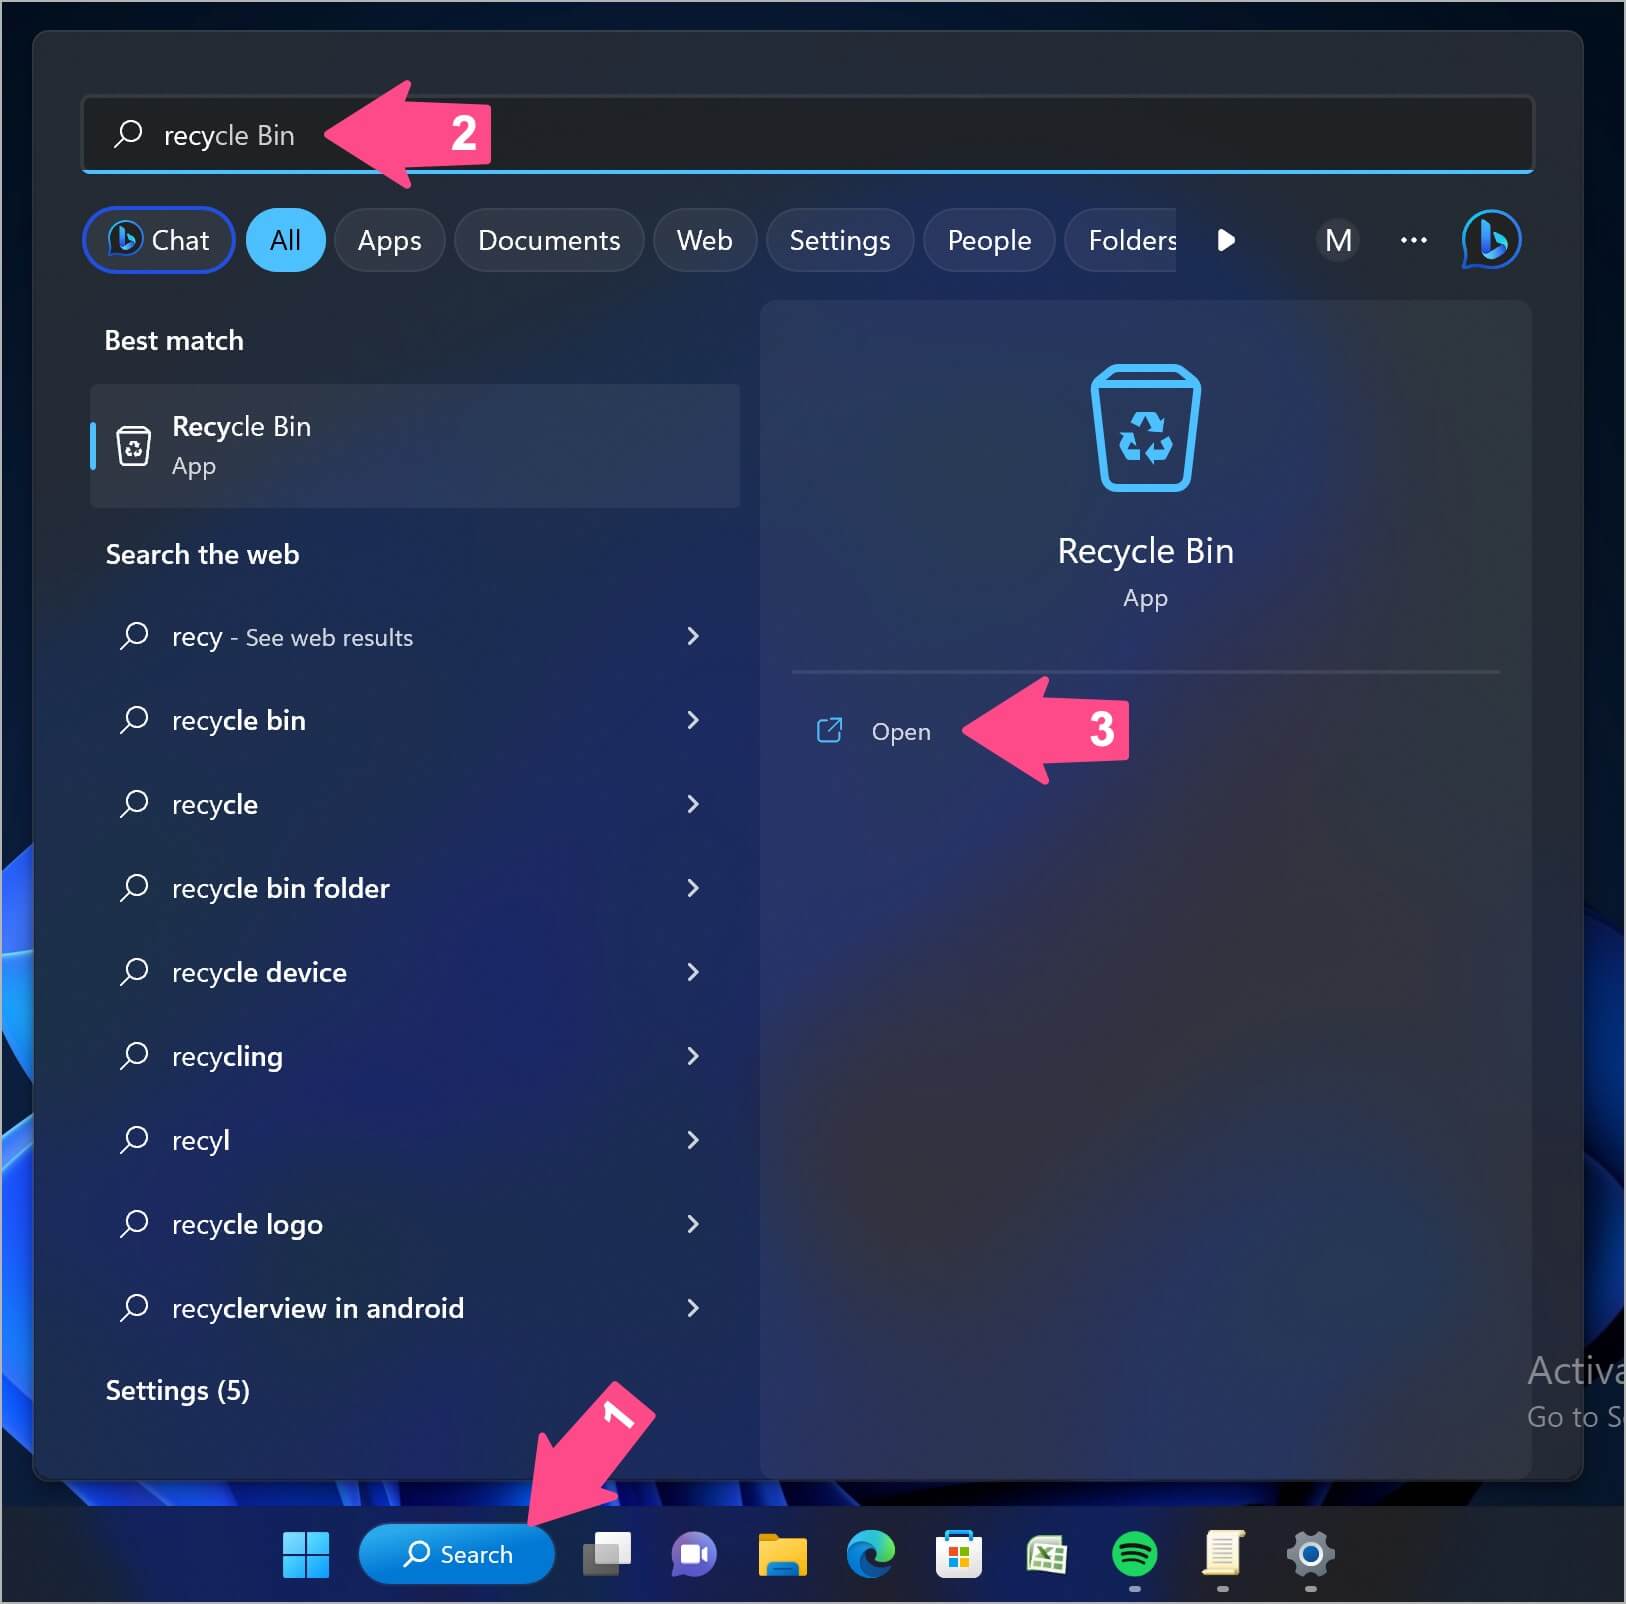
- Open the Recycle Bin app to see all your deleted stuff.
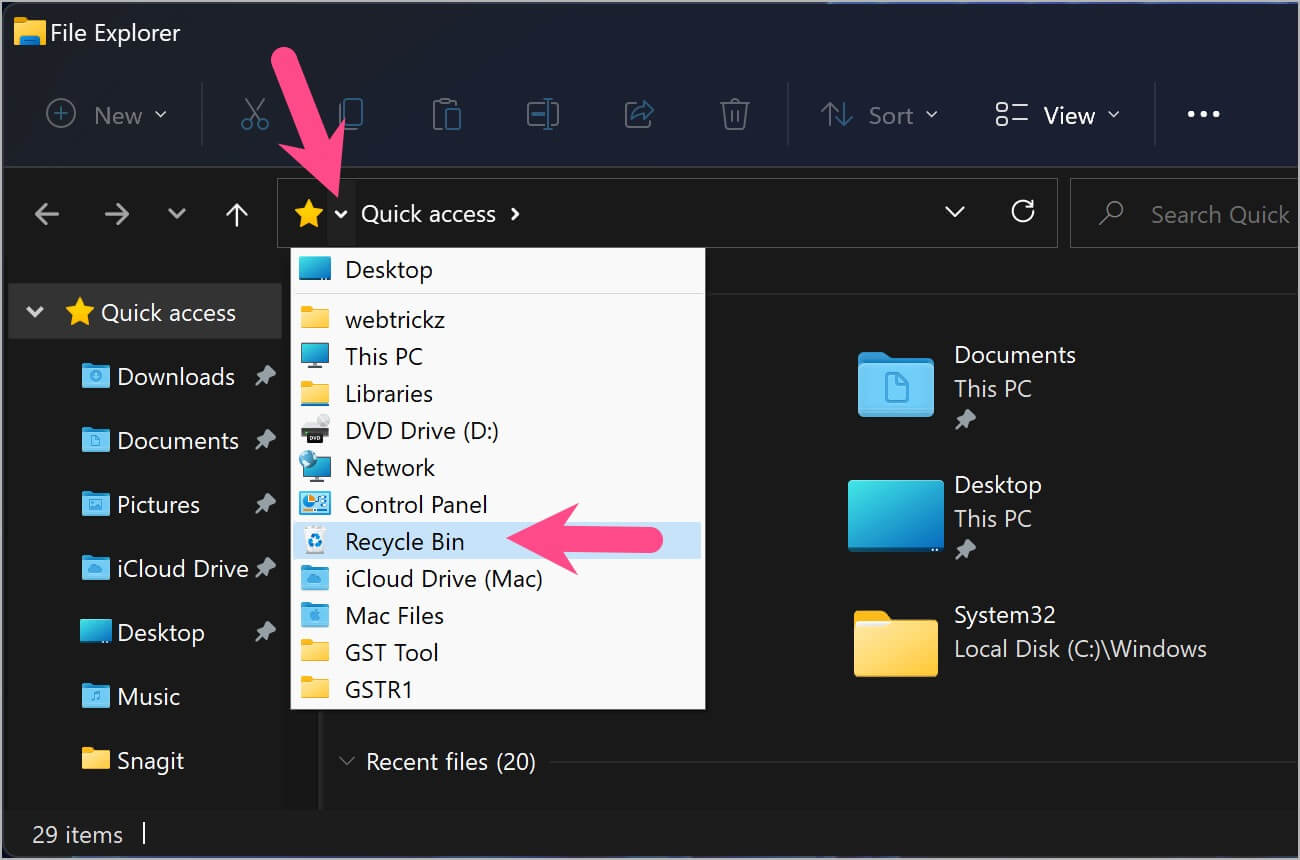
From File Explorer
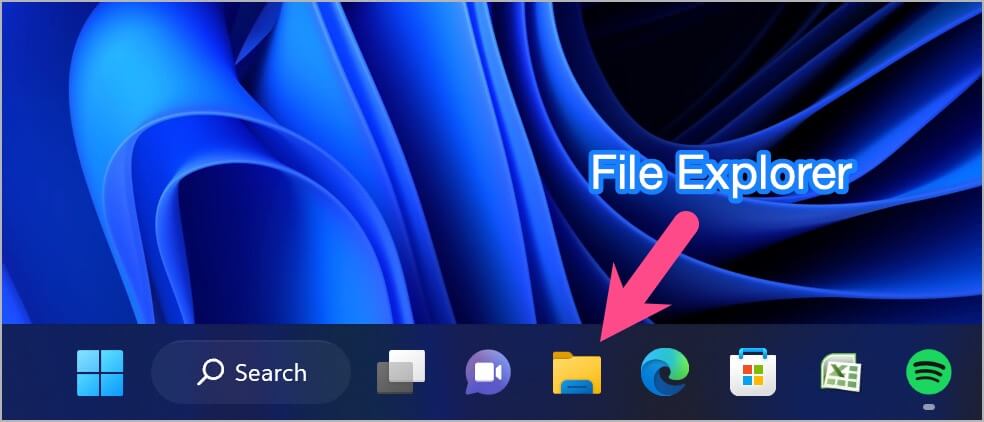
- Click the File Explorer icon in the taskbar or search for the ‘File Explorer’ app.
- Then click the right-arrow dropdown icon before the ‘Quick access’ or ‘This PC’ field in the address bar.
- Select ‘Recycle Bin’ from the list.
TIP: Quickly Hide or Show All Desktop Icons
You can temporarily hide all the desktop icons directly from the right-click context menu of the Windows desktop. This way you can quickly hide the Recycle Bin icon and restore it anytime.
To show or hide all the icons from the desktop on Windows 11, 10, 8.1, and 7, right-click the desktop, go to View, and select ‘Show desktop icons’. To restore all the icons, perform the same step again.
![]()


