If you have a newer iPhone with Face ID then you may agree with how easy it is to accidentally pull down the notification bar while in a game. This usually happens when you use 3-finger, 4-finger, or 6-finger claw while playing PUBG or Fortnite.
The unintentional taps and swipe down during gameplay on iPhone or iPad are indeed annoying. Users often get killed and lose games many times due to this issue. Besides, most users tend to exit the game when they swipe up from the bottom of the screen by mistake.
What if you can completely disable the various swipe gestures while playing games on iPhone 11, XR, XS, and X?
While there is no setting in iOS to lock notification bar and the iPhone doesn’t come with a gaming mode either. However, we have figured out an easy workaround that you can use to add a game mode in iOS.
To get this working, we will be using “Guided Access“, one of the best Accessibility features built into iOS.
With the help of Guided Access, you can lock your iPhone’s screen to a single app or game. It works like a Kid Mode, thus letting you restrict access to all other settings and functions of the device. This feature is the best way to avoid accidental gestures and focus on a specific app.
Moreover, you can customize the Guided Access settings for each game. Now let’s see what happens when you enable Guided Access on iPhone and iPad.
What happens when Guided Access is active?
- Notifications are entirely disabled and you cannot opt out of this setting. A bonus actually to avoid distraction while enjoying your favorite games.
- Incoming calls notification appear briefly and you cannot accept or reject the calls.
- Not possible to take screenshots and record the screen. (Tip – Start screen recording before enabling Guided Access to record videos of gameplay.)
- You can’t access the Notification Center and Control Center as the swipe-down gesture doesn’t work.
- Swipe up gesture to return to the Home screen is disabled.
- Reachability is turned off. This means you cannot swipe down on the bottom edge of the screen to reach the top.
- Multitask gesture is disabled so you cannot switch to another app.
Without further ado, let us guide you through the necessary steps.
How to lock the notification bar on iPhone
STEP 1 – Set up Guided Access
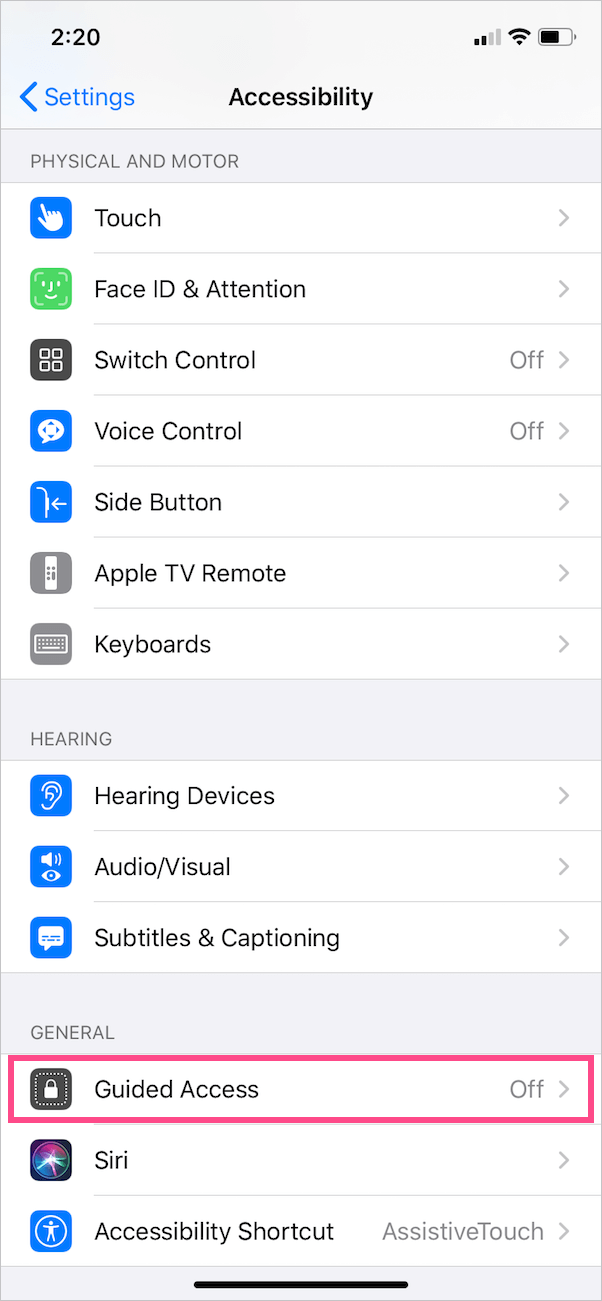
- Go to Settings > Accessibility. Swipe down to the bottom and tap “Guided Access”.
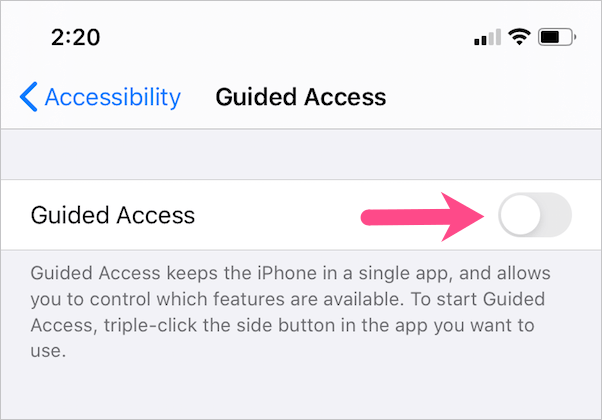
- Turn on the toggle next to Guided Access.
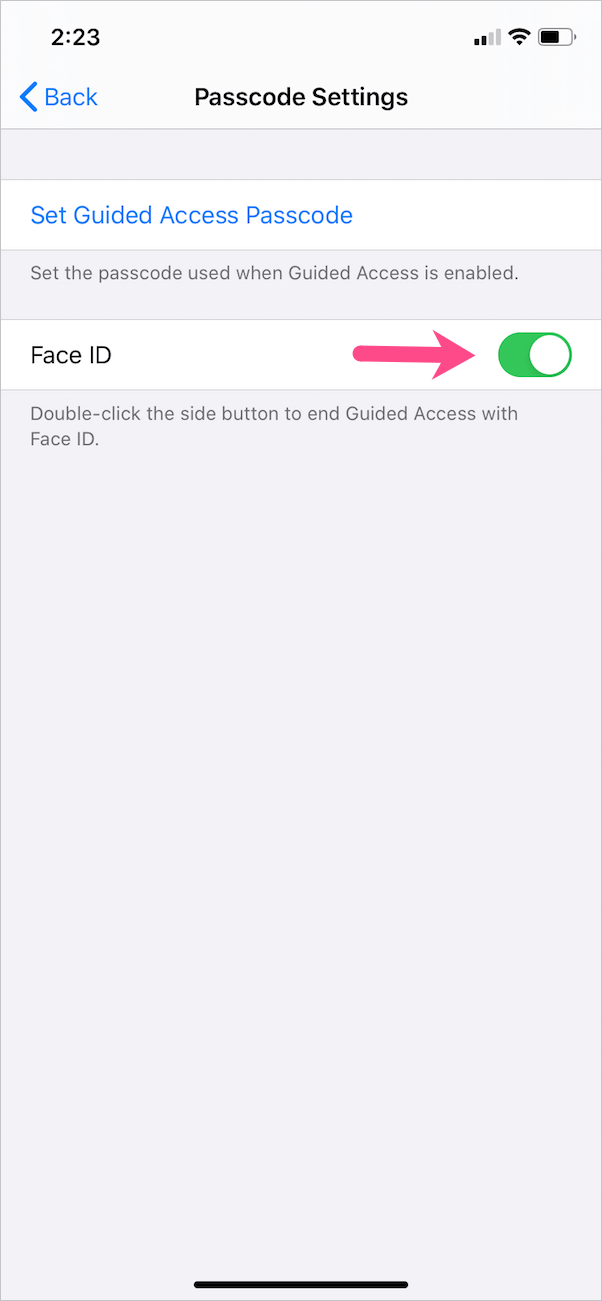
- Tap Passcode Settings > Set Guided Access Passcode. Then set a 6-digit passcode. Also, turn on Face ID or Touch ID.
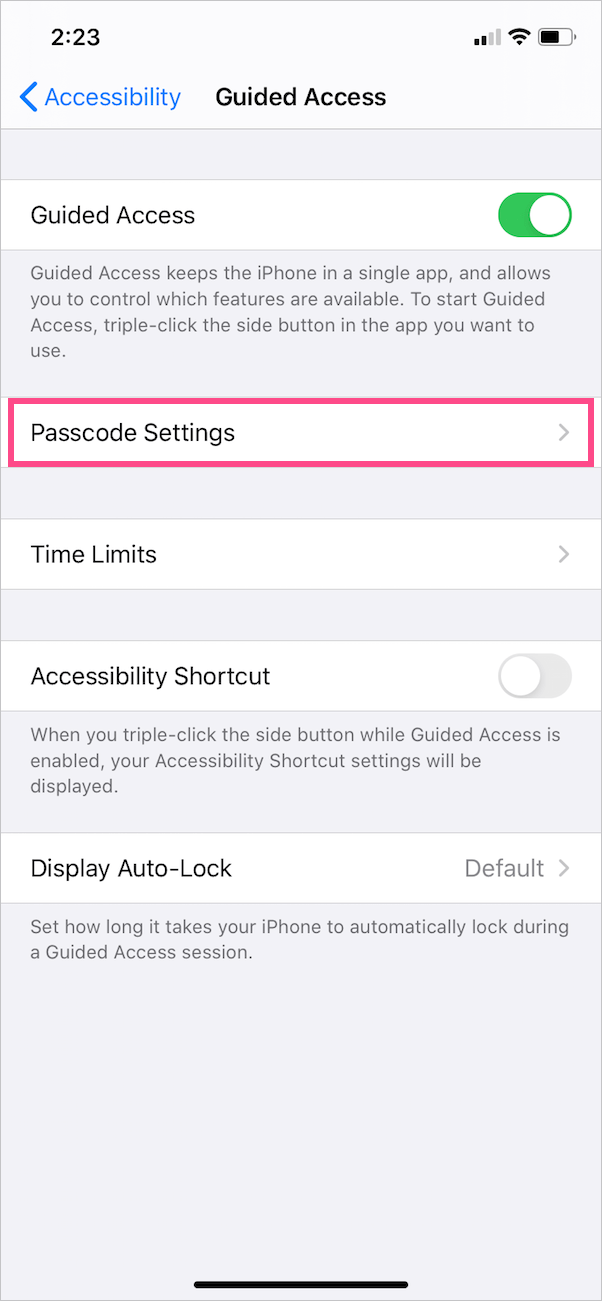
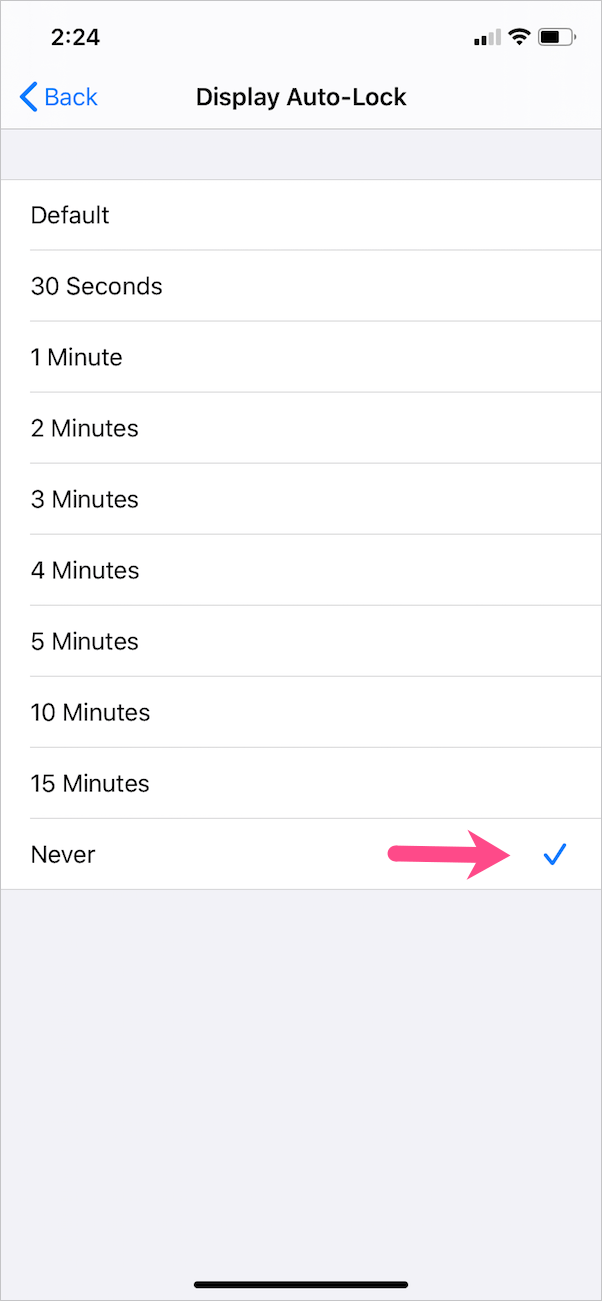
- Open the “Display Auto-Lock” option and select “Never” instead of Default.
STEP 2 – Start Guided Access when playing a game
- Open the game that you want to play.
- Triple-click the Side button on iPhone X or newer. On iPhone 8 or earlier, triple-click the Home button.
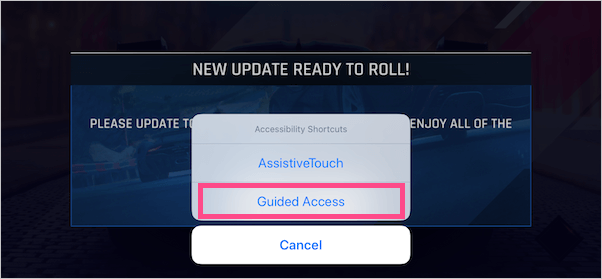
- An Accessibility Shortcuts pop-up will appear. Select “Guided Access”.
- Optional – By default, access to the Side and Volume buttons is disabled when you turn on Guided Access. If you want to enable them, tap Options at the bottom left corner. Then turn on the toggle for the ‘Side Button’ and ‘Volume Buttons’. Tap Done.

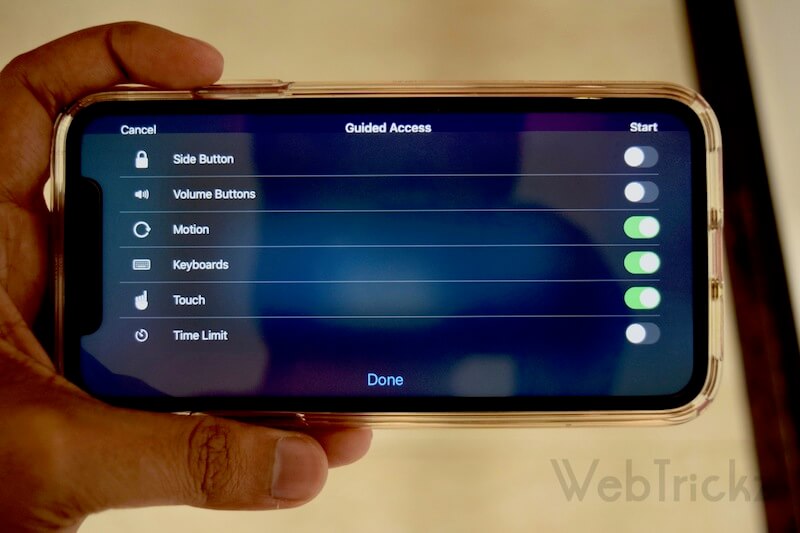
- Then tap the “Start” button at the top right to enable Guided Access.
That’s it. Now play the game without any interruption.
TIP: You can also turn on Guided Access using Siri. To do so, open the desired app or game and say “Hey Siri, turn on Guided Access.” Doing so can potentially save the Side button from abuse.
How to end Guided Access
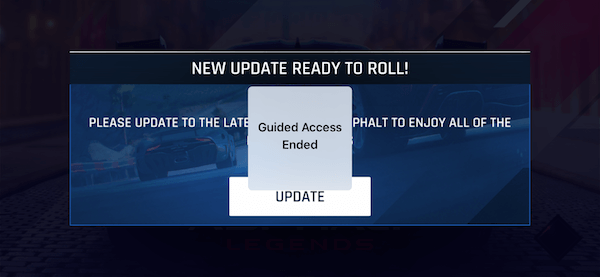
You can easily disable Guided Access while you’re in the middle of a game or once you’re done with gaming.
To turn it off, double-click the Side button (requires Face ID) or Home button (requires Touch ID). Alternatively, you can triple-click the Side or Home button, enter the passcode, and tap End.
How to configure Guided Access settings
The options to control Guided Access features appear when you start it for the first time on a certain app. After that, iOS remembers the settings that you choose initially for that specific app and automatically enables them when enabling Guided Access.
To edit the features afterward, triple-click the Side or Home button and enter your Guided Access passcode. The “Options” button should then be visible at the bottom-left corner of the screen. Tap Options and turn on the features you want for the particular app.
ALSO READ: Best iOS 13 Games with Controller Support


Great tip! Thank you so much!! Been having this problem pulling my notification screen down using 3 finger claw for months
Thank you!!!
You gents/ gals are ABSOLUTE geniuses! I owe you my life! Thanks so much for this, every time I try to use a burst or pistol weapon it always f*cked me over on 4 finger claw. I owe you guys!
You have no idea how long I’ve had this problem playing 3 finger claw on iPhone 12… Thank you
Thank you so much for the workaround.