Our earlier tutorial on Installing ADB & Fastboot Drivers for Galaxy Nexus using Galaxy Nexus Root Toolkit was certainly a bit elongated and most users weren’t successful following it. To make it easier, here is a new and 100% working way that neither requires any toolkit nor Android SDK. This step is the most crucial of all tasks if you’re planning to root, update manually, or install a custom ROM on your phone.
So, carefully follow the guide after the jump, and let us know if it works for you or not.
1. Enable USB debugging on your phone. (Settings > Developer options > USB Debugging) and connect the phone to the computer.
2. Download USBDeview, extract, and open the .exe file (Run as administrator).
3. In USBDeview, carefully look for devices with Vendor IDs: ‘18d1’ or ‘04e8’. Select all such devices, right-click, and select ‘Uninstall selected devices’ to remove them.
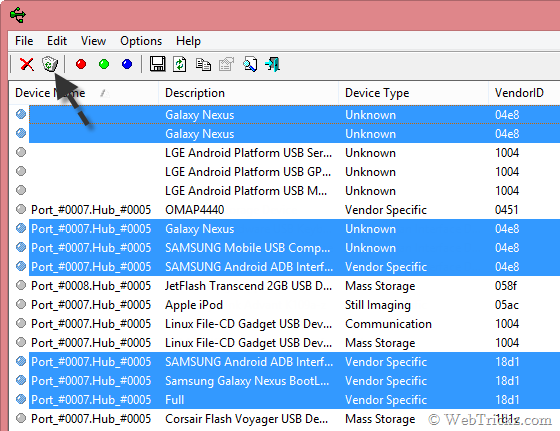
4. Now disconnect your phone from the computer.
5. Download Galaxy Nexus USB Drivers (GSM & Verizon) / (Sprint L700 Galaxy Nexus) and install the driver package.
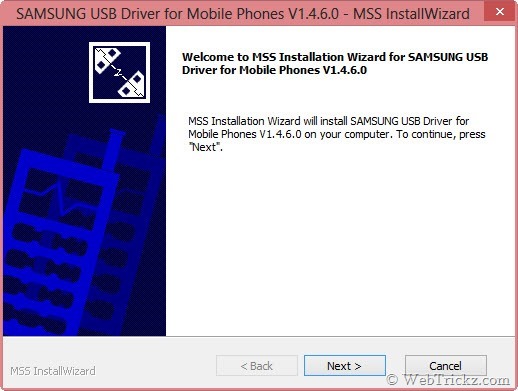
6. After installation, connect your phone to the computer and let it automatically search, download, and install the rest of the drivers. (Computer should be connected to the Internet)
In Windows 7, the driver installation will appear like this.
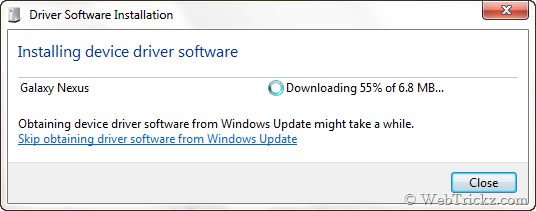
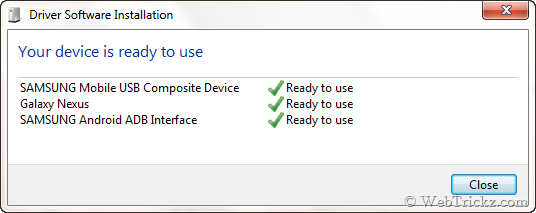
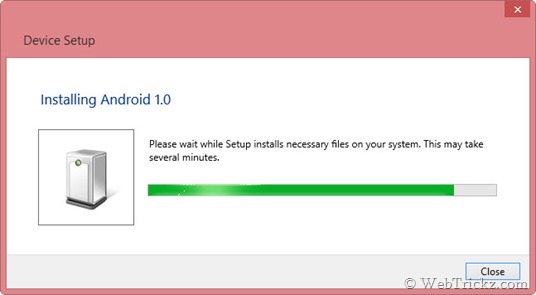
In Windows 8, the driver installation will appear like this.
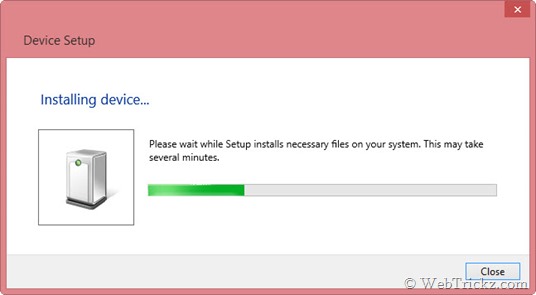
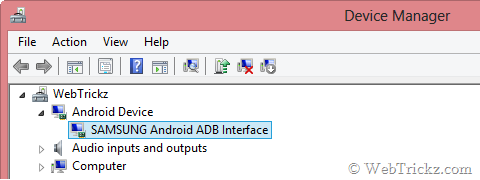
Now open Device Manager and your Galaxy Nexus should be listed as ‘Samsung Android ADB Interface’ in USB Debugging mode on both Windows 7 & 8. That means ADB drivers for your phone are working properly.
Installing Fastboot Drivers for Galaxy Nexus –
Boot the phone into fastboot aka Bootloader mode – First power off the phone, then turn it on by ‘Holding down both volume up + volume down buttons and the power button simultaneously.’ While in Fastboot mode, connect the phone to the computer.
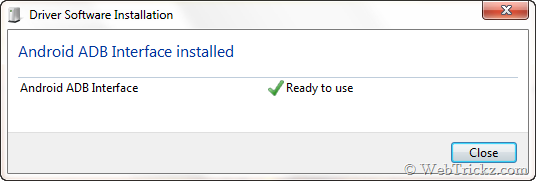
Windows 7 will automatically recognize and install the right drivers for fastboot. You should see the below message and the same will appear in the device manager.
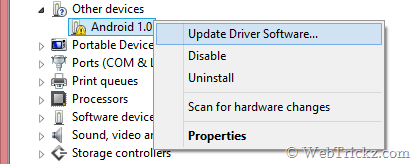
Windows 8 – However, you need to manually install the fastboot drivers in Windows 8, for your phone listed as Android 1.0 in the device manager. Follow the steps below:
1. Go to device manager, right-click Android 1.0, and click ‘Update driver software’.
2. Select the option ‘Browse my computer for driver software’.
3. Click on ‘Let me pick from a list of device drivers on my computer’.
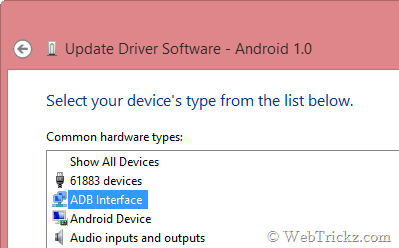
4. Select device type as ‘ADB Interface’, and click Next.
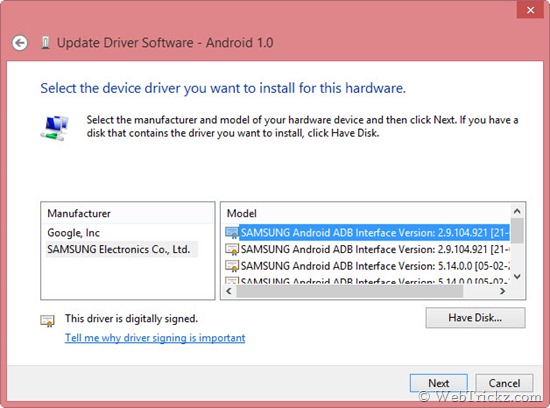
5. Select the Manufacturer as ‘SAMSUNG Electronics’ and the model as ‘Samsung Android ADB Interface version: 2.9.104.921’ as shown below. Then click Next.
6. ‘Update Driver Warning’ message will appear. Click Yes to install.
7. That’s it. Your Fastboot drivers are now successfully installed on Windows 8.
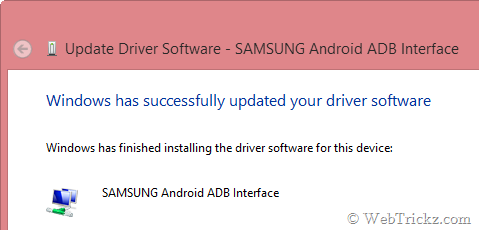
To confirm that Fastboot drivers are installed properly, open the device manager and it should list your device as ‘Samsung Android ADB Interface’ while in Fastboot mode.
~ We’ve tried the above procedure on the 32-bit version of Windows 7 and Windows 8.
Don’t forget to explore our Galaxy Nexus section for quality guides and tips.




Hello, I have the maguro version, which usb drivers should I install, I want to convert my phone to yakju.(Very new to Android)
Help will be appreciated.
Hi,
Did this on Windows 7 x64. Only difference was my version of windows didn’t automatically install the driver for bootloader. I followed the windows 8 steps but instead of choosing ADB interface I chose Android phone (as ADB interface wasn’t listed). Everything else worked fine. Am hoping Samsung drivers work okay… My country wasn’t list on the list it had when I was installing. Shall see!
I also had the same issue though I needed to select ‘Samsung Android Phone’ in the driver list, fastboot is now working.
Are the above mentioned steps same for Windows XP?
so i only need to download the factory image, usbdeview and samsung usb driver for mobile phones, right?
You are genius man!!!! very perfect, awesome, easy, helpful …. etc. article and steps 🙂
MANY MANY MANY … till infinity THAAAAAAAAAAAAAANKS DUDE 😉
hey, please help, when i installed usbDeview, i could only see ‘04e8′ vendor apps, couldnot see ’18d1’ in any. i deleted whatever 04e8 ports, and closed it. but when i started installing, it first asked, the usg port for samsang mobiles is already installed, want to continue anyway?,……. i clicked yes, it got installed, but when i again connected my mobile, it didnot download any file, and started working directly by connecting my galaxy nexus as media device and debug mode…….
does that mean i didnt delete some port in usbdeview? is my adb and fastboot drivers correctly installed????? i am very scared to continue? please help at the earliest…
i figured it out… thank you….
I had exactly same problem with the guy above, anybody care to explain how to the problem?
Don’t forget to Run the usbDeview in Administrator Mode. I could not see ’18d1′ vendors otherwise.
Tried on Windows 8 64-bit.
Thanks
Hi I’m having problems. I have followed the instructions, deleted the files as instructed, disconnected, downloaded the “GSM & Verizone file” to my PC and installed it and I’m now on instr. 6.
But nothing happens when I reconnect my phone to the PC, i.e. it does not search for drivers and I cant find out how to make it search. No use to try to force system update on the phone. How can I make it search and install the driver?? Pls. advice!
(using W7 64bit PC) phone GNexus yakjuxw – maguro
Try following the steps in this Nexus 7 drivers guide. http://webtrickz.com/how-to-install-adb-and-fastboot-drivers-for-nexus-7-on-windows-7-windows-8 You might need to configure the drivers manually as described there.
Thx problem solved 🙂
Thx problem solved 🙂
One thing, when I restored the Apps that I had paid for, they did not restore only the free apps..does anyone know why that could happen?
Make sure you’re signed into Google a/c that you’ve earlier used to buy those apps. You can re-install them from Google Play without paying again.
Should i download the usb drivers package named as verizon for gsm galaxy nexus???? Pls reply
Yes
will it work in the same way on windows xp??????
when i select the things you have mentioned to uninstall in step 3,they don’t get removed from the list. Are they still there or removed?
Sorted..i didnt use usbdeview as an administrator
HI Mayur,
There’s some issue while Installing Fastboot Drivers..Could you pls add me in Gtalk and help me with the process?
After the UAC popup for the Samsung Drivers, nothing happens… can anyone help me? I am on Windows 8 64bit
I have tried this in Windows 7 64bit.
Everything was going as per given. When i switch on phone in FASTBOOT MODE and connected the phone to PC.. Its say driver not found. I tried the steps of Windows 8 but coudnt find ADB interface option is not there in the list
Hey guys, need a little help.
My GSM Galaxy Nexus is running 4.2.1. It’s got an unlocked bootloader and flashed with stock Android – yakju. Yesterday my device got stuck in a boot-loop. Unfortunately, my computer was formatted and I don’t have all the drivers installed on the computer anymore.
Since this tutorial requires enabling USB-debugging, which I can’t do, since the phone won’t boot up, how do I install the drivers for my Galaxy Nexus??
Thanks for the help.
You don’t need to enable USB debugging for fastboot mode, that’s only required for ADB interface. Just follow up with the fastboot drivers installation.
Done. Thanks!
i just ran the driver update and while Windows 7 was automatically retrieving drivers, an error came back saying device not recognized (disappeared before i could open it but it said something about contacting manufacturer). the update continued and then i got a confirmation but it only listed:
Mobile USB Composite Device
Android ADB Interface
It didn’t include Galaxy Nexus. Is it okay to continue or is there a something i should do to start over?
also using 64bit version of driver update.
just tried loading fastboot drivers and got a message saying the same 2 drivers were installed but for Android 1.0 no driver could be found
After Completed Step 6, before Installing Fastboot Drivers for Galaxy Nexus…
i turned off my GN. then it can’t be turn on anymore.
what can I do??? Please help…
fixed. Thanks for your tutorial
I’m on Windows 7 64 bit and when I want to install the fastboot drivers it tells me Android 1.0 like on Windows 8, so I followed the steps until step 5: I can’t find ‘2.9.104.921’
What shall I do?
I love you. Mere words can not express the gratitude I am feeling right now. Thank you so much. The crazy thing is that I’d just installed the Samsung updates a few weeks ago and still had to go through this. Many, many thanks!!!!
I have faced a problem in installing Fastboot drivers… when computer automatically searched them it has shown that your device is locked… how to overcome it
Thank you for this, it was very helpful for me.
I deleted all existing drivers with those 2 id’s but then after I disconnect my phone and run the new drivers from the download file you provided(GSM Nexus) then the program fails to run. The first time I ran it it said that ‘the program might have not installed correctly due to compatibility issues’. This might be cause I’m running Windows 8.1. What should I do?
Try running the program in compatibility mode with Windows 7/8 and as an administrator.
downloaded drivers. All was well. booted into fastboot and connected to cpu but there were no drivers found for phone while in fastboot mode. please help!
thanks guy, it’s working with win7 64bit an nexus2 maguro with android 4.3.
please help .. i’ve done every step perfectly until i fastboot my phone .. instead of automatically recognising and installing the right drivers for fastboot .. it told no driver was found or something like that .. i unplugged the usb then replugged it .. and now it says the device is not recognizable .. please help me what should i do ?
ok i was able to turn off the fastboot mode .. tried the last step again (turning on fastboot mode) i waited for it to automatically recognise and install the right drivers for it .. but then it says it couldn’t install drivers.. how can i fix that? i’m using windows 7.
I tried for hours to get the fastboot driver to work. No luck. the common theme seems to be that this is a problem for 64-bit win7.
Finally, I found this, and it worked immediately. It\’s usually not a good idea to download stuff from un-trusted sources, but it was desperate times.
http://www.mydroidworld.com/topic/9794-galaxy-nexus-windows-7-fastboot-drivers/
It also works for windows 10 64 bit! Great!!!