WebTrickz
TRENDING
  • How to See Your Liked Posts on Instagram 2022
No Result
View All Result
  • News
  • Reviews
  • Social Media
    • Facebook
    • Twitter
    • YouTube
    • Messenger
    • Instagram
    • Snapchat
    • WhatsApp
    • TikTok
  • Apps
  • How To’s
  • Apple
  • iPhone
  • Google
  • Android
  • Mac
SUBSCRIBE
  • News
  • Reviews
  • Social Media
    • Facebook
    • Twitter
    • YouTube
    • Messenger
    • Instagram
    • Snapchat
    • WhatsApp
    • TikTok
  • Apps
  • How To’s
  • Apple
  • iPhone
  • Google
  • Android
  • Mac
No Result
View All Result
WebTrickz
No Result
View All Result
Home Apps

How to Allow Camera Access to Snapchat in iOS 13 on iPhone

Mayur Agarwal by Mayur Agarwal
January 15, 2022
in How To's, iPhone, Snapchat

Snapchat asks for permission to access the camera when you open it for the first time on the iPhone. Similarly, the app asks to send you push notifications, access your microphone and photos. By chance, if you select “Don’t Allow” then Snapchat won’t work and will continue to show a pop-up saying that “you’ll need to allow camera access in Settings.” Now let’s see how you can allow Snapchat to access the camera and photos on your iPhone running iOS 13 or later.

Firstly, make sure to update Snapchat to the latest version. [Refer: How to update apps in iOS 14 on iPhone] That’s because the older version of Snapchat had some glitch that prevented it from accessing the iPhone camera.

Enable Camera Access on Snapchat
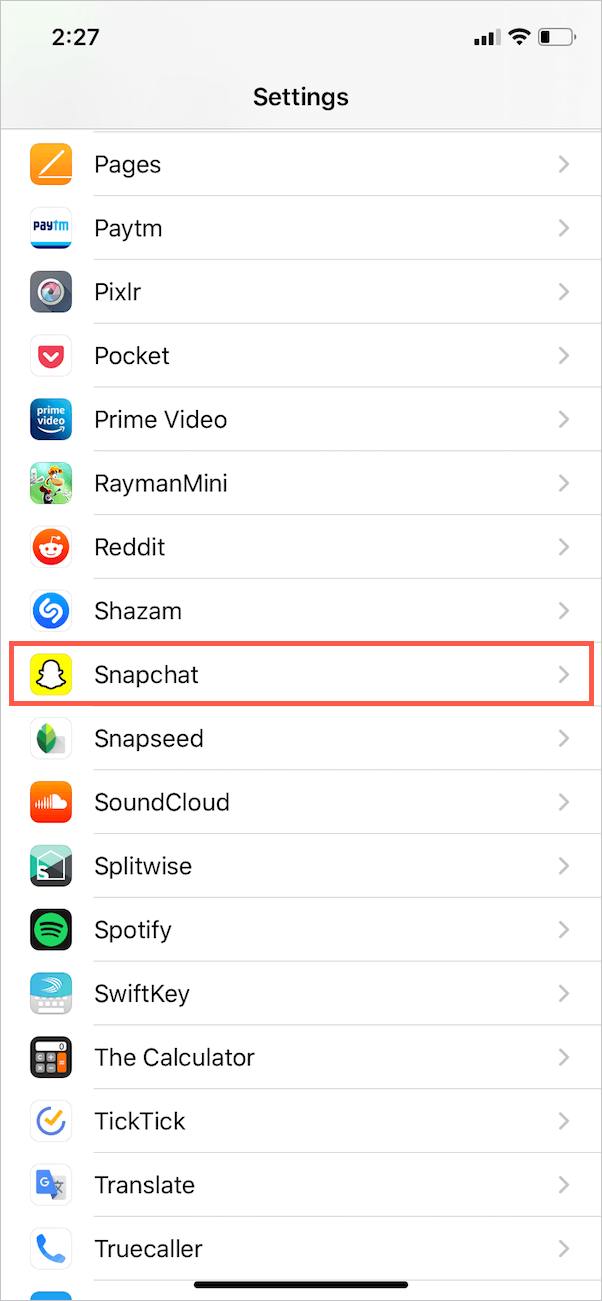
  1. Go to Settings.
  2. Scroll down to the near bottom of the screen and look for Snapchat. iphone settings menu
  3. Open Snapchat.
  4. Now turn on the toggle button for “Camera”. enable camera access for snapchat in ios 13
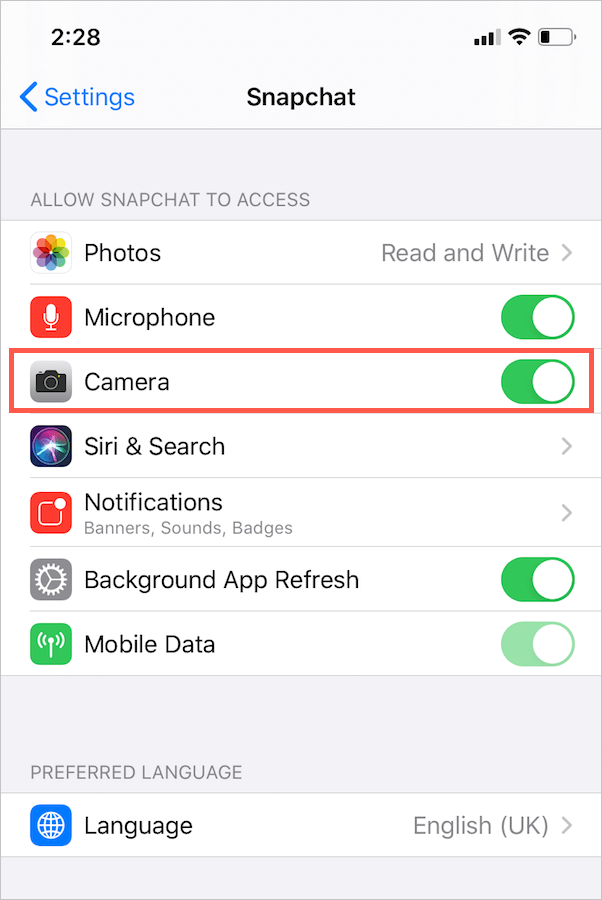
  5. That’s it. Open Snapchat and you should now be able to take Snaps.

Enable Photo Access in Snapchat App

enable photos access for snapchat on iphone

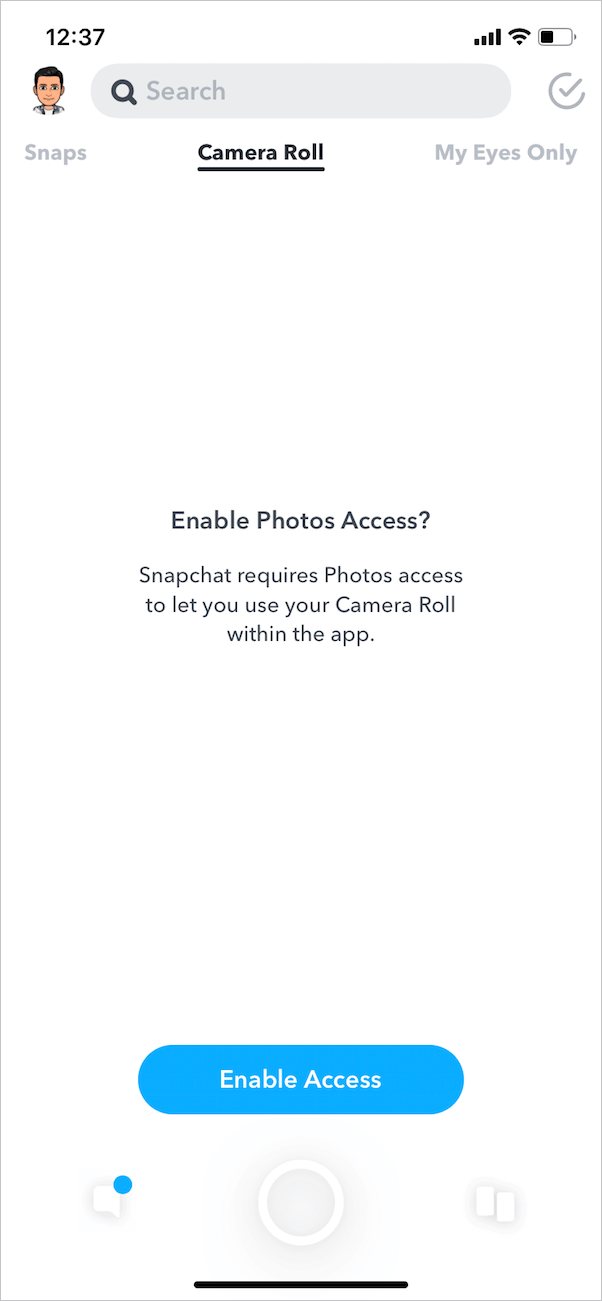
You need to allow photos access to Snapchat to use the Camera Roll within the app and to save Snaps directly to your iPhone. Here’s how you can enable this permission if you restricted it in the first place.

Method 1

  1. Go to Settings and open Snapchat.
  2. Tap on Photos and select the “Read and Write” option.
    photos permissions on snapchat for iphone
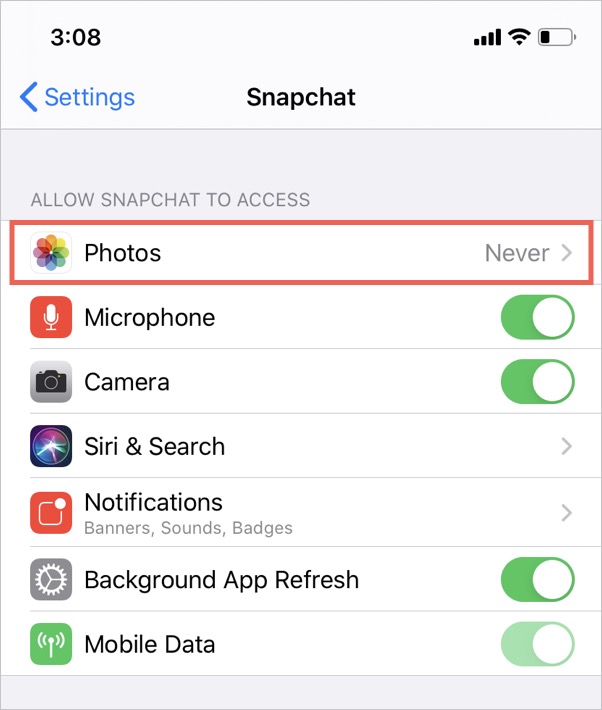
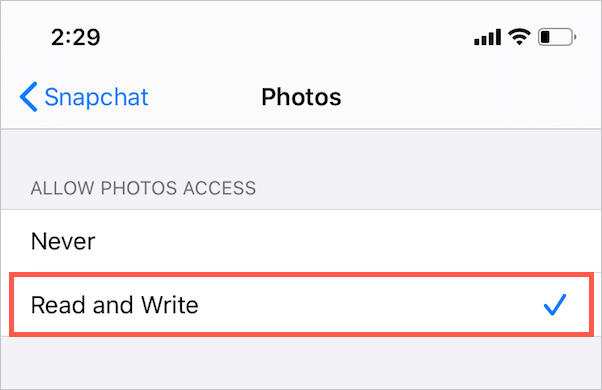
  3. Now open Snapchat and navigate to Camera Roll. Here you will see all your photos stored locally.

Method 2

Use this method instead if the first method doesn’t work for you. The steps are applicable to iOS 13.3.
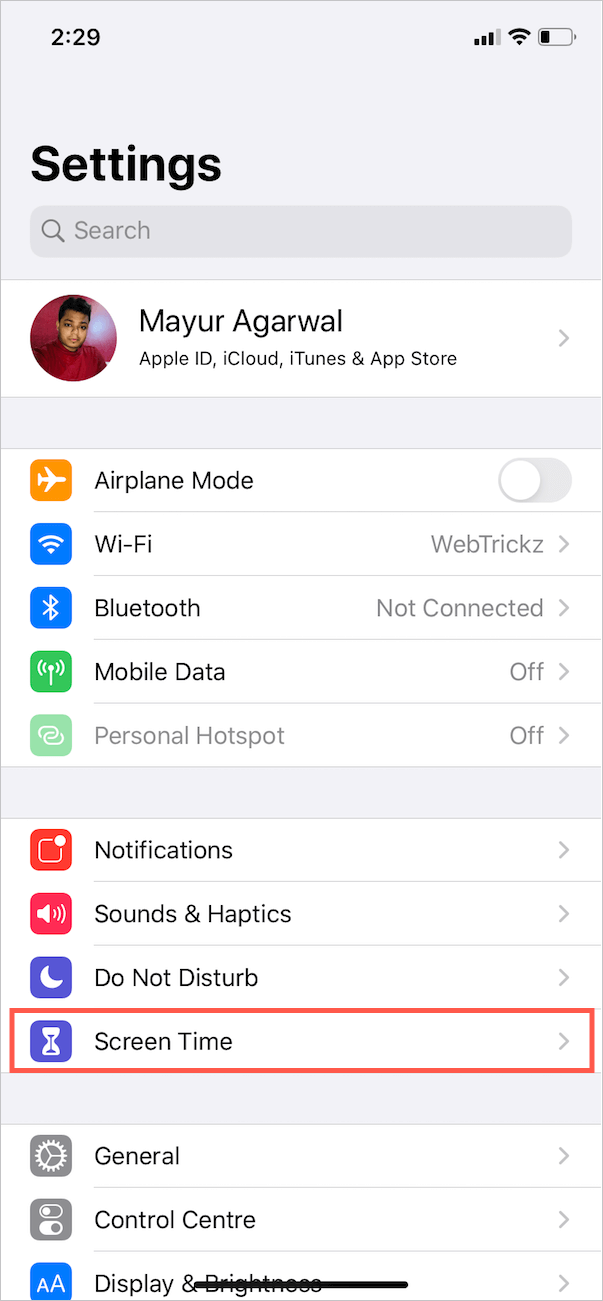
  1. Go to Settings.
  2. Open “Screen Time” and select “Content & Privacy Restrictions”.
    screen time in ios 13
    content and privacy restrictions in ios
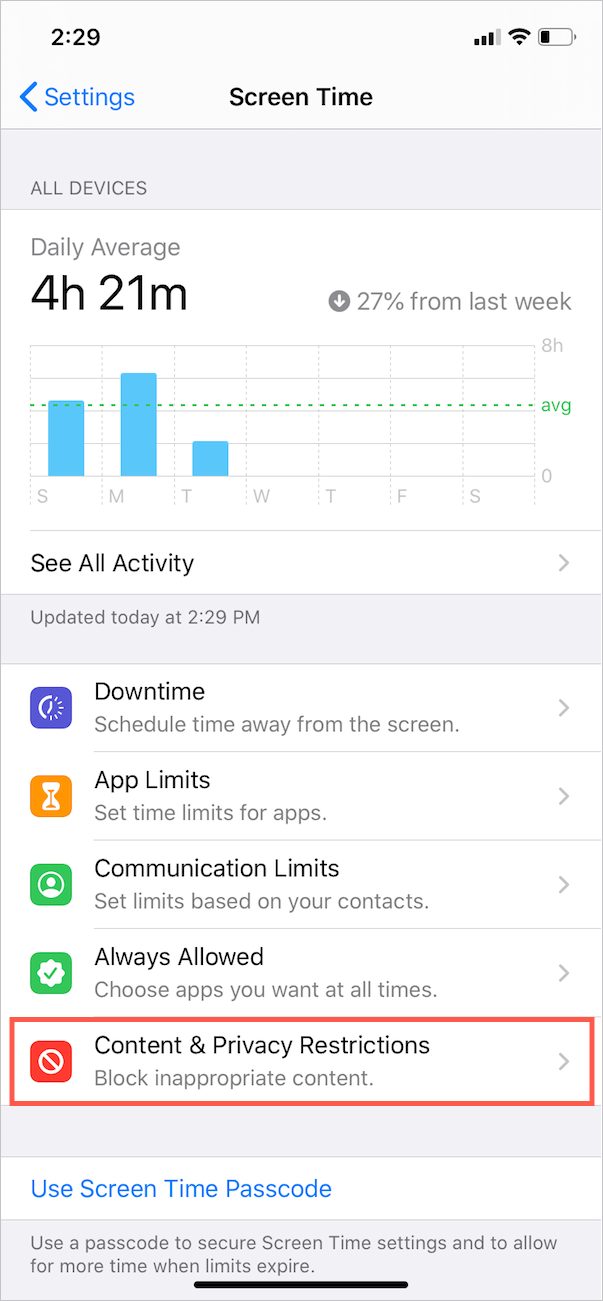
  3. Turn on the toggle for Content & Privacy Restrictions if it isn’t enabled already.
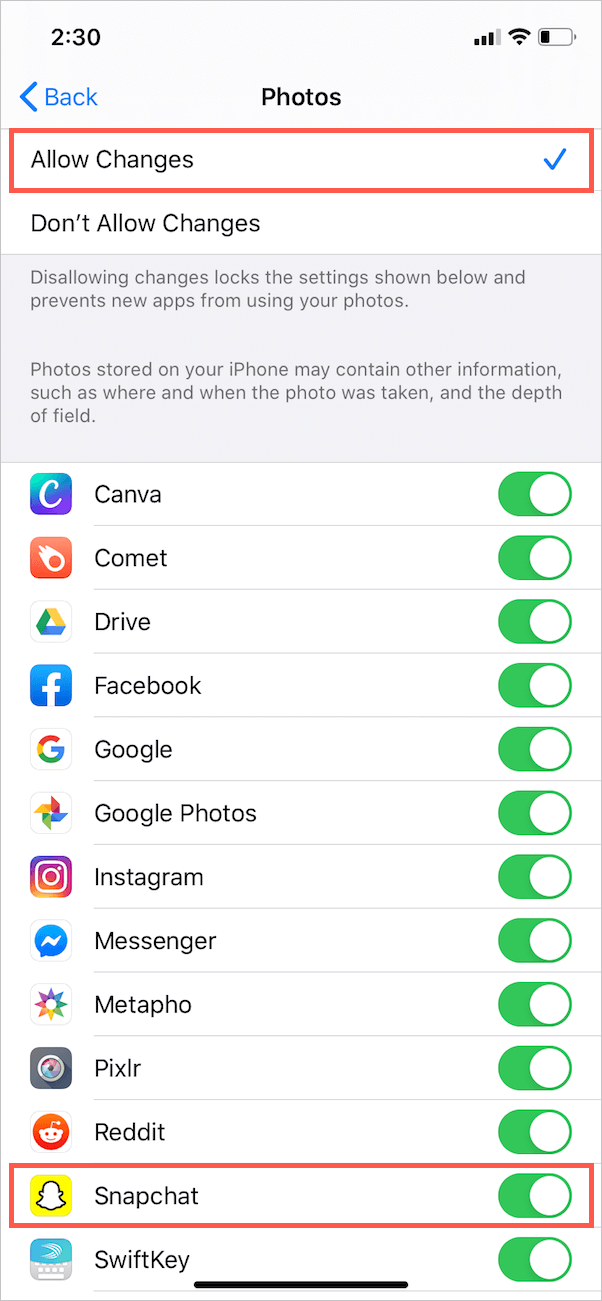
  4. Tap “Photos” under Privacy and then select “Allow Changes”. Content & Privacy Restrictions for photos on iphone
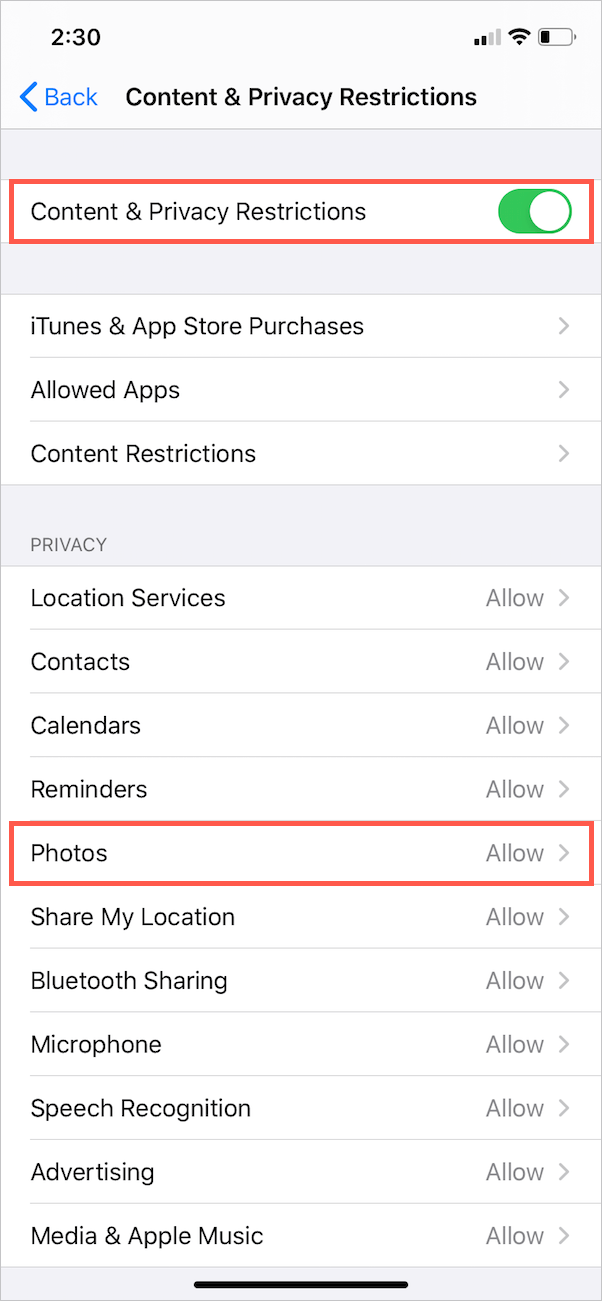
  5. Turn on the toggle for Snapchat. allow photos access to snapchat on iphone

ALSO READ: Here’s how to find out when you joined Snapchat

TIP: How to save Snaps to Photos on iPhone

By default, Snaps are saved to Memories and you can only view them using Snapchat.  If you wish to save your snaps to Memories as well as on your iPhone storage then follow the steps below.

  1. Open the Snapchat app.
  2. Tap your profile picture at the top left.
  3. Tap the gear icon at the top right and look for “Memories”.
    snapchat settings
    settings menu in snapchat
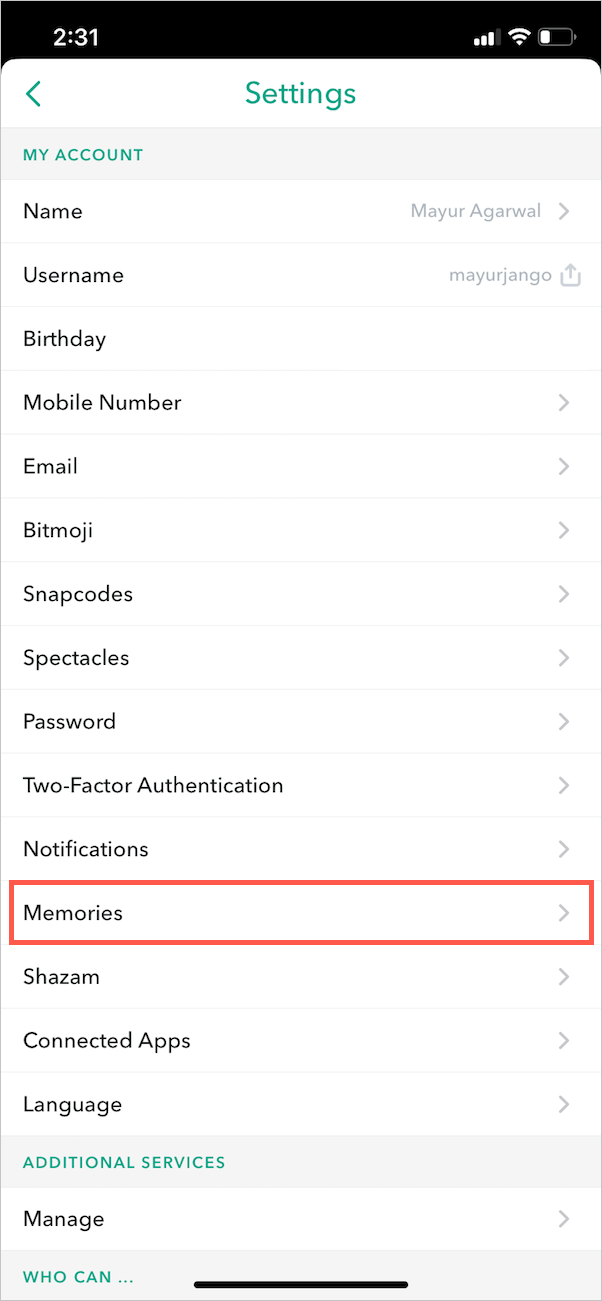
  4. Under save destinations, tap on “Save Button”. memories save location on snapchat
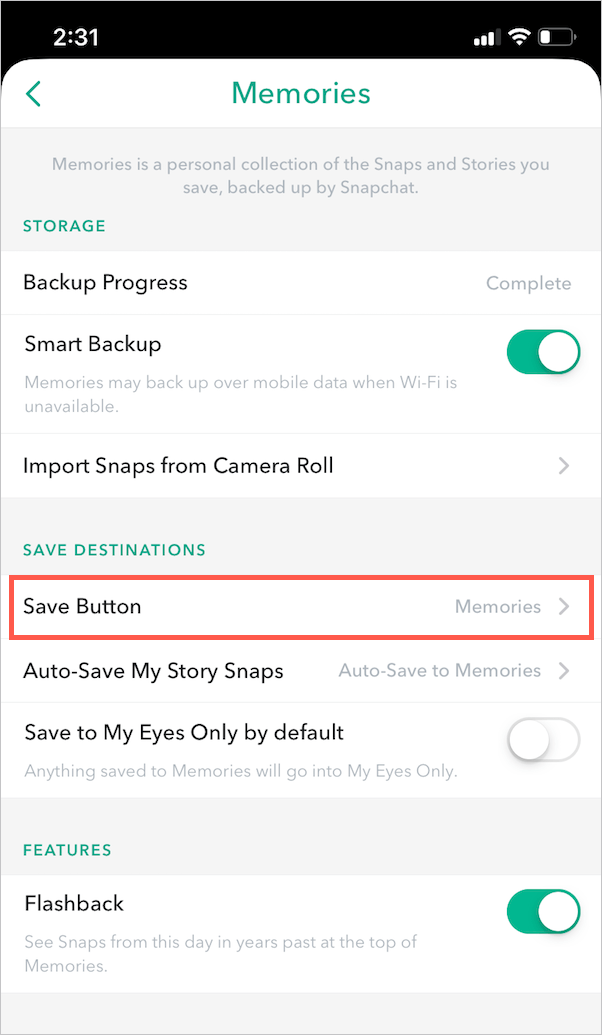
  5. Now select “Memories & Camera Roll” to save your Snaps to both these location. save snapchat snaps to camera roll

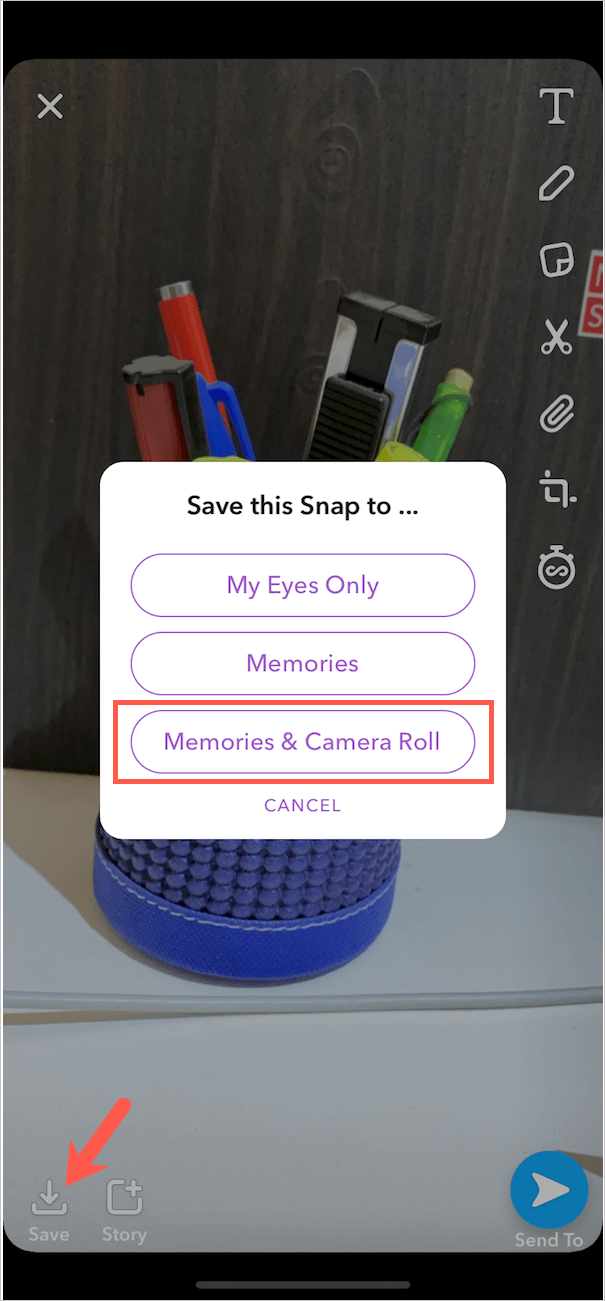
Alternatively, you can choose to save specific Snaps to both the Memories and camera roll.

To do so, take a snap and long-tap on the “Save” button at the bottom left. Now select “Memories & Camera Roll” and the particular snap will be saved to your iPhone.

save snap menu in snapchat

Note: If the above steps don’t work for some reason then restart your iPhone and follow them again.

ALSO READ: How to turn off Portrait mode on Snapchat in iOS 15

Tags: App PermissionsAppsiOS 13iPhoneSnapchatTips
ShareTweetSend
Previous Post

Easiest Way to Check Photo Properties on iPhone running iOS 13

Next Post

How to Send Live Photos on Facebook Messenger

Mayur Agarwal

Mayur Agarwal

Mayur Agarwal is the founder and editor-in-chief of WebTrickz. As a Technology enthusiast and an Internet addict, he loves sharing useful How To’s and Tips & Tricks.

Next Post
send live photos on messenger

How to Send Live Photos on Facebook Messenger

Leave a Reply Cancel reply

Your email address will not be published. Required fields are marked *

Latest Stories

Facebook app on iPhone

How to Find Block List on Facebook App [2023]

January 20, 2023

AimerLab MobiGo Review 2023: An effective Location Changer for iOS

January 14, 2023
whatsapp logo

How to Restore Deleted WhatsApp Messages Without Backup

December 30, 2022
story comments on facebook

How to Turn Off Story Comments on Facebook

December 3, 2022
Photo by Alwin Kroon on Unsplash

How to Turn Vibrate On or Off in iOS 16 on iPhone 

November 25, 2022
reels on Instagram and Facebook

Here’s how you can See Reels Views on Facebook

November 23, 2022

7 Best Free Online Puzzles To Enjoy At Home

November 21, 2022

TRENDING

  • Facebook saved reels

    How to Find Your Saved and Liked Reels on Facebook

  • How to Reply to a Specific Message on Instagram 2022

  • How to Mute the Original Sound on Instagram Reels

  • How to Make Spotify Album Art Bigger on iOS 16 Lock Screen

  • How to Send Files and Documents on Messenger for Android

Popular Tags

Google Android Chrome

Twitter Dark Mode OnePlus

iPhone Apple Apps Mac

Facebook Messenger Security

Instagram Tutorials Photos

  • About
  • Advertise
  • Contact
  • Privacy Policy

© 2023 WebTrickz. All Rights Reserved.

No Result
View All Result
  • News
  • Reviews
  • Apps
  • How To’s
  • Android
  • Google
  • iPhone
  • Mac
  • Contact Us

© 2023 WebTrickz. All Rights Reserved.