Even if you don’t work from home and your whole life doesn’t revolve around your Mac, you still entrust its sizable chunk to the device. From vacation pictures to favorite tunes to that fanfic novel, you’ve been meaning to finish for ages, your Mac stores a ton of valuable data.
Are your personal files secure on a Mac? No, unless you take steps to protect them. Fortunately, it does not take much effort to set up your Mac for security and you can do it in one sitting. Set aside some time for protecting your digital life and let’s get started.
Restrict Access Permissions for Files and Folders
macOS offers extensive access permissions for controlling who can access your files and what they can do with them. Specifically, you can assign the following permissions to Mac users and groups: Read & Write, Ready only, Write only, and No access.
Here’s how to restrict access permissions on a Mac:
- Select a file or folder and click “File”.
- Select the “Get Info” option.
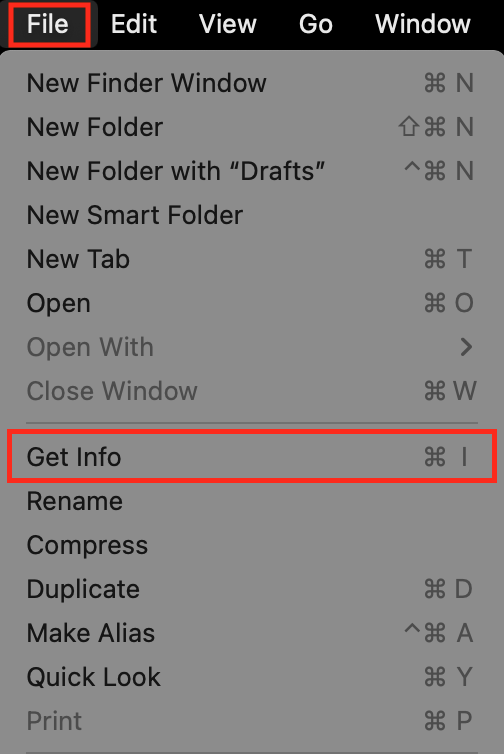
- Click a padlock icon at the bottom and enter your administrator login details.
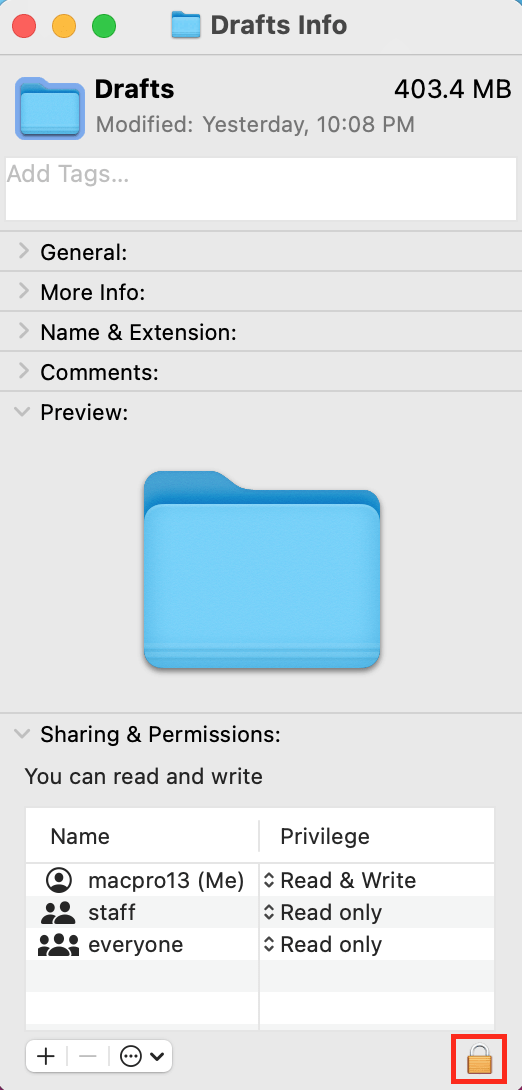
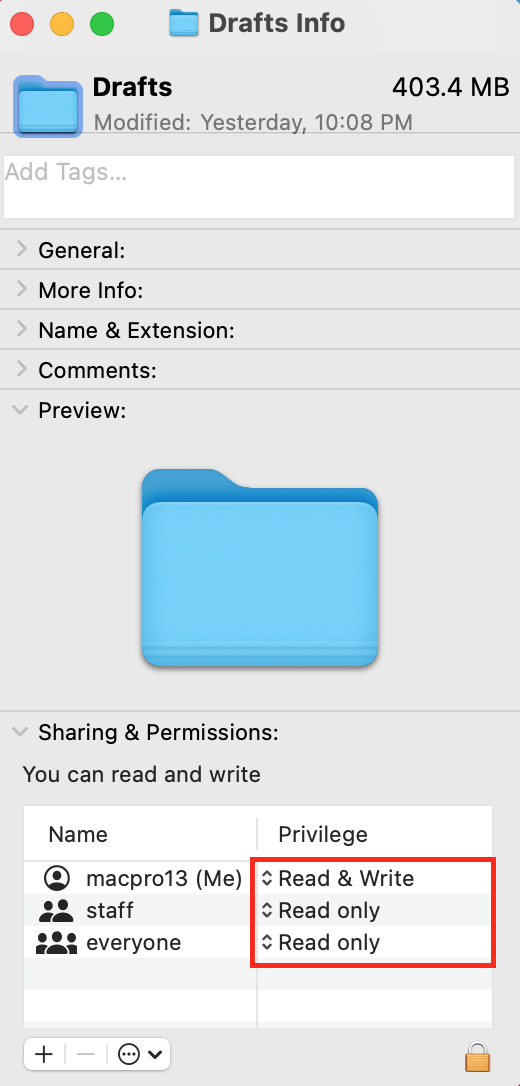
- In the Sharing & Permissions section, set access permissions for users and groups.
Hide Files and Folder on Mac
A reliable way to ensure no one sees or tampers with your files is to hide them. To this end, you have to use Terminal but worry not, it’s not that difficult.
Here’s how to hide your files and folders on Mac:
- Press “Command + spacebar”, type Terminal in the search bar, and hit “Enter”.
- In the Terminal, type chflags hidden and hit the “spacebar”.
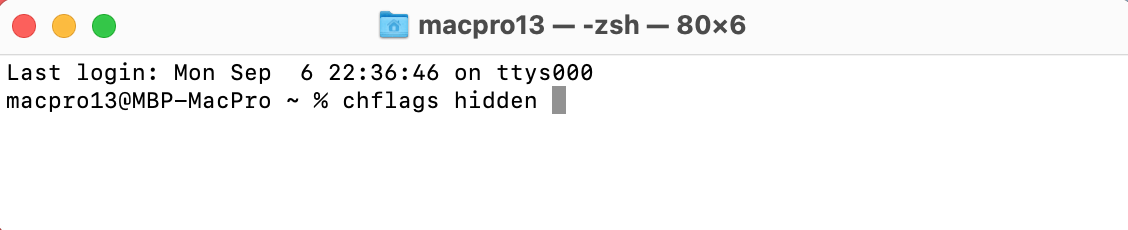
- Drag and drop a file or folder into the Terminal and hit “Enter”.

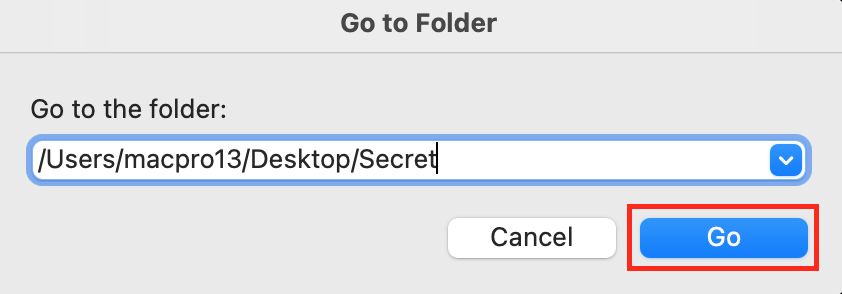
- To access the hidden folder, copy its path in the Terminal.
- In the Finder, click “Go” and select “Go to Folder”.
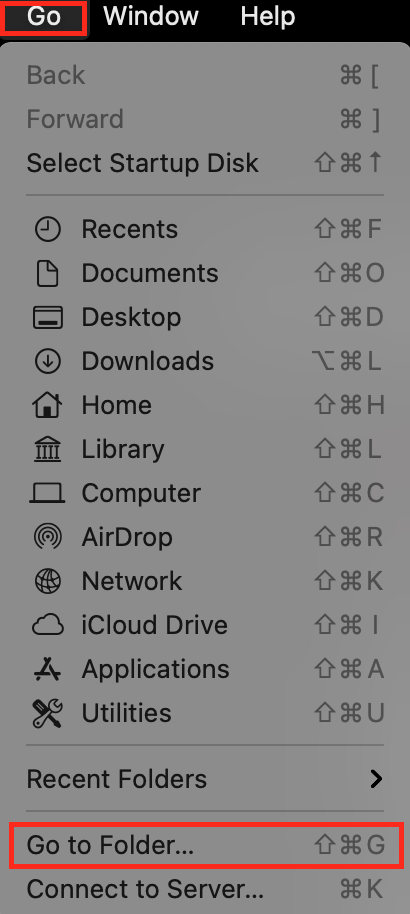
- Enter the path in the search bar and hit “Enter”.
RELATED: Create a Shortcut to Show/Hide hidden files in macOS
Prevent Unauthorized Access to Your Mac
Just as you lock doors to restrict access to your house, you should protect your Mac with a password to prevent people from poking around. To this end, disable automatic login and set up new users.
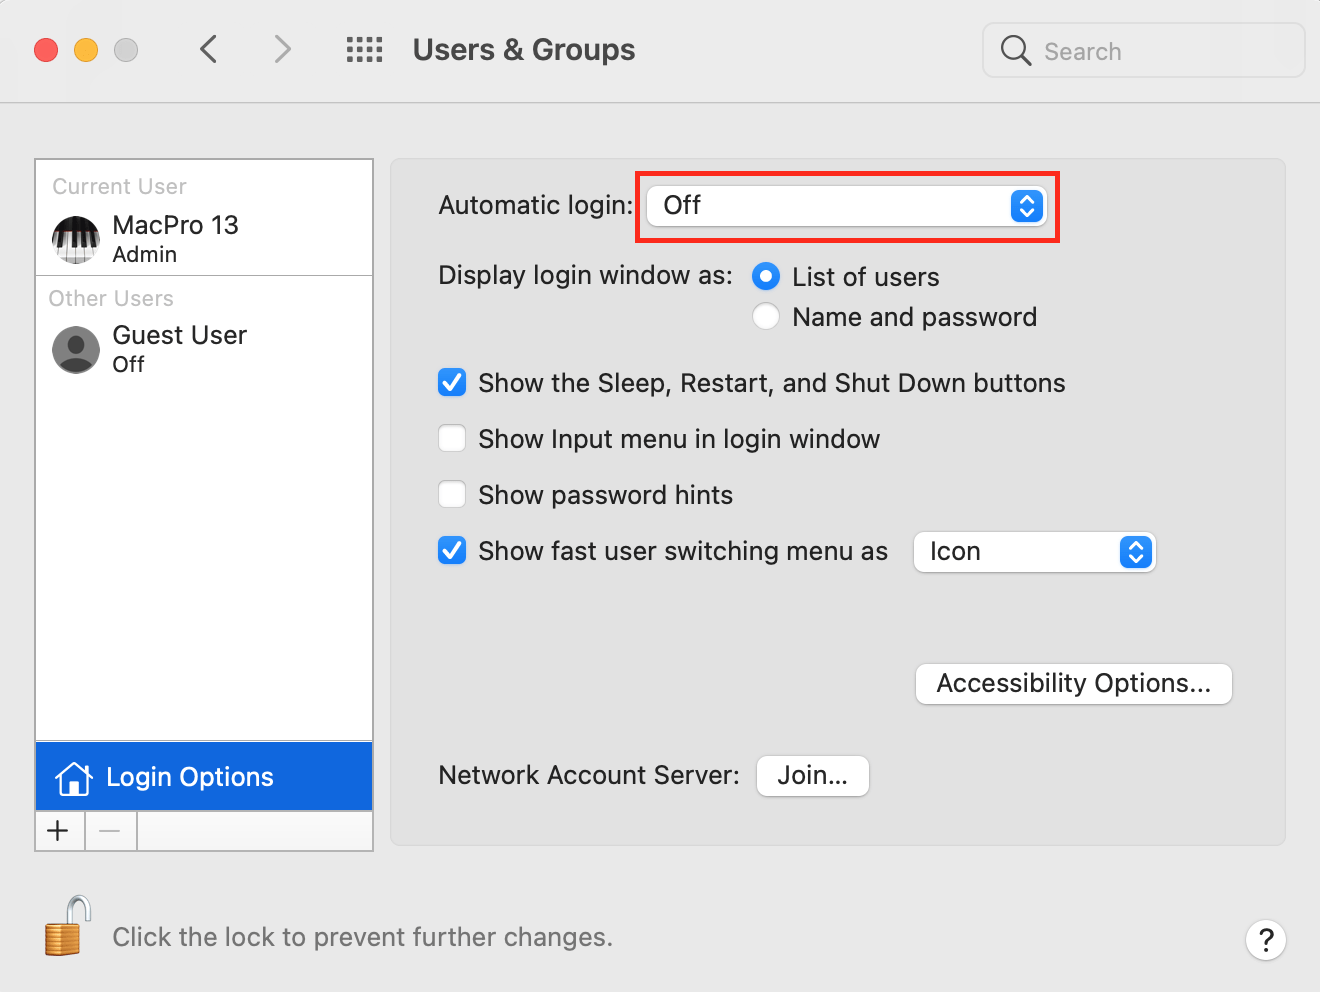
How to disable automatic login
To ensure that no one can access your files without login and details, disable automatic login.
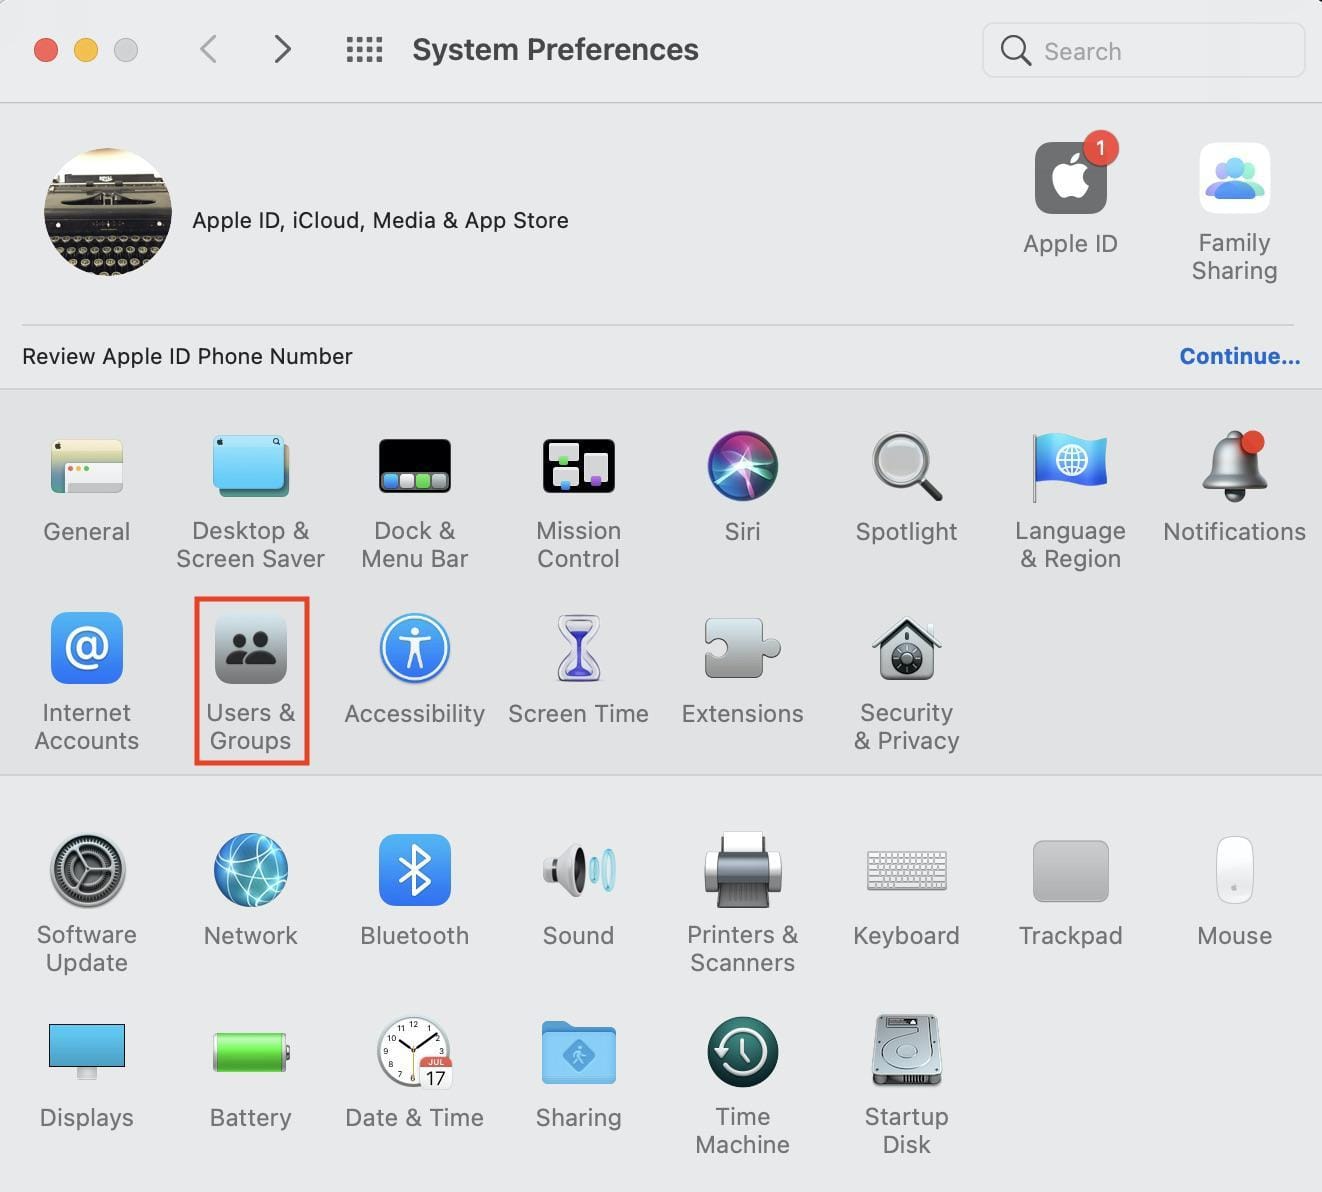
- In System Preferences, click “Users & Groups”.
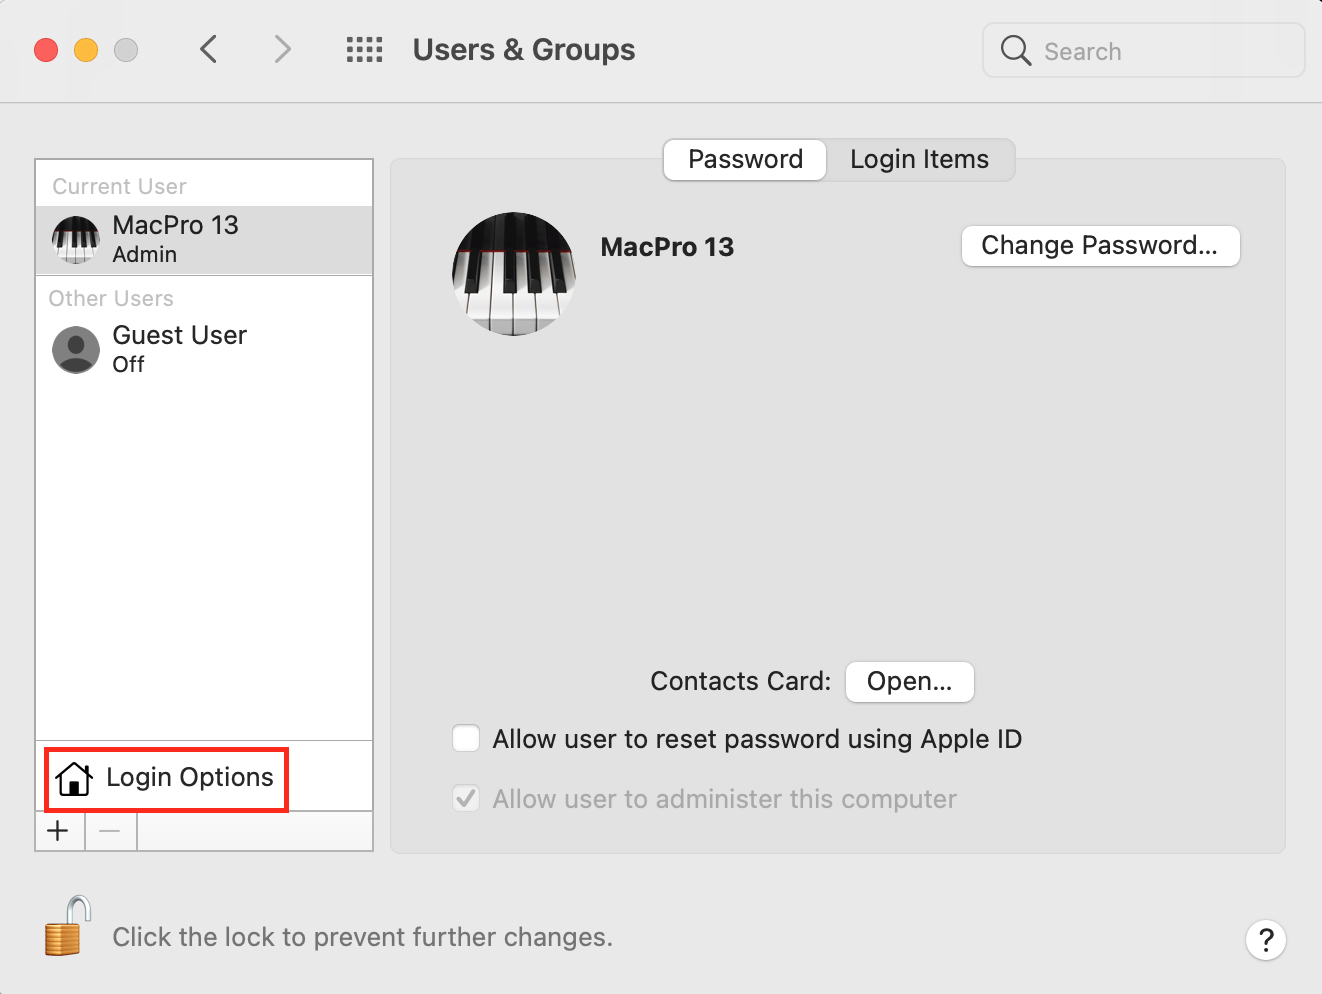
- At the bottom left, click the padlock icon and enter your administrator login details.

- Click “Login Options”.
- In the Automatic login menu, select the “Off” option.
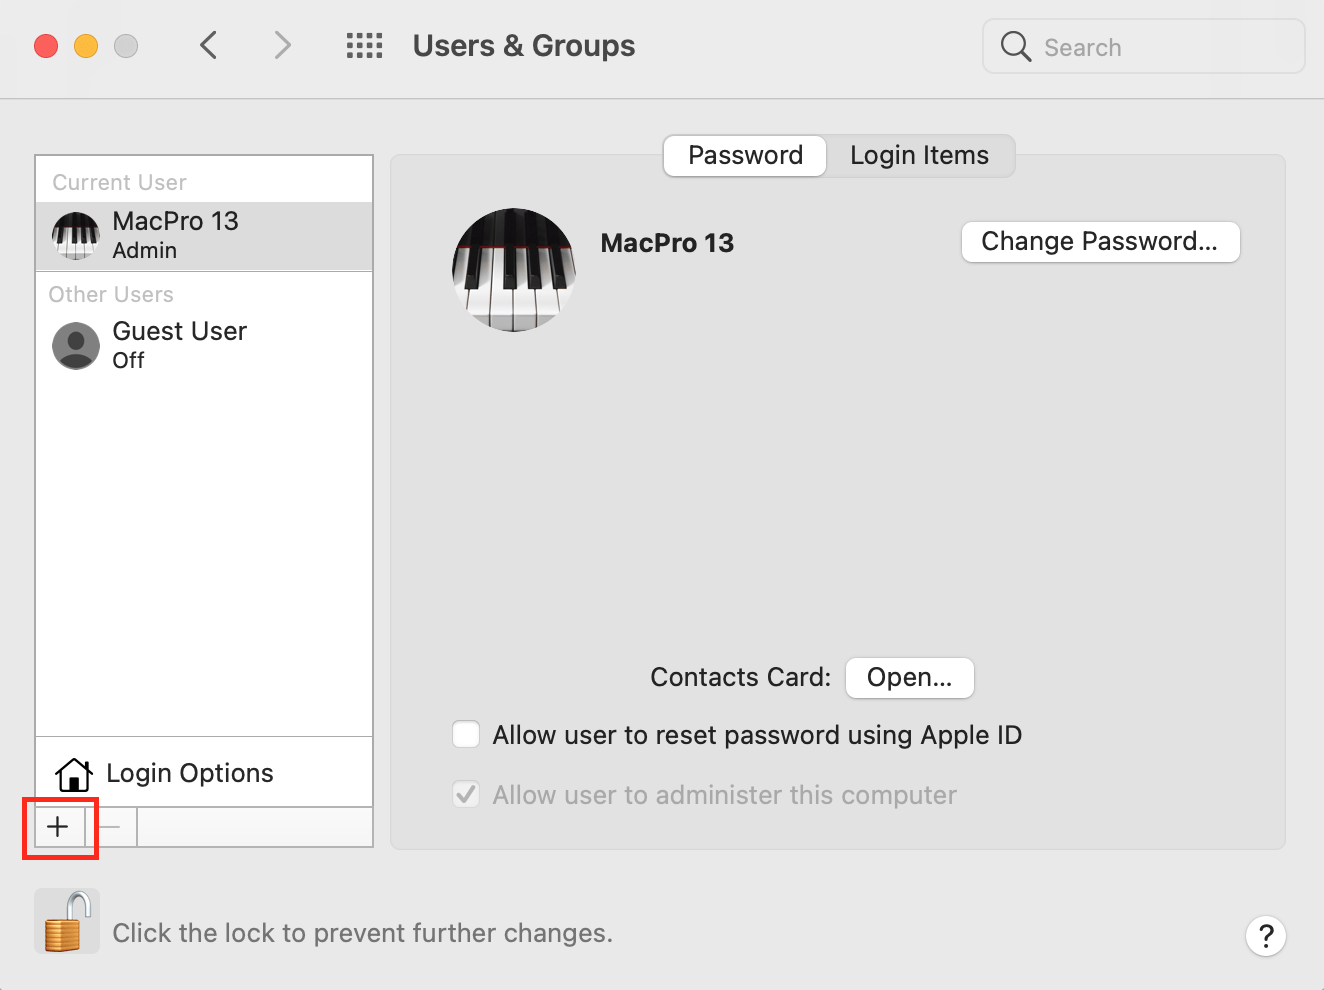
How to set up a new user
If you want someone to use your Mac without accessing your files, create a new user.
- Follow steps 1 and 2 from the section above.
- At the bottom left, click the plus sign.
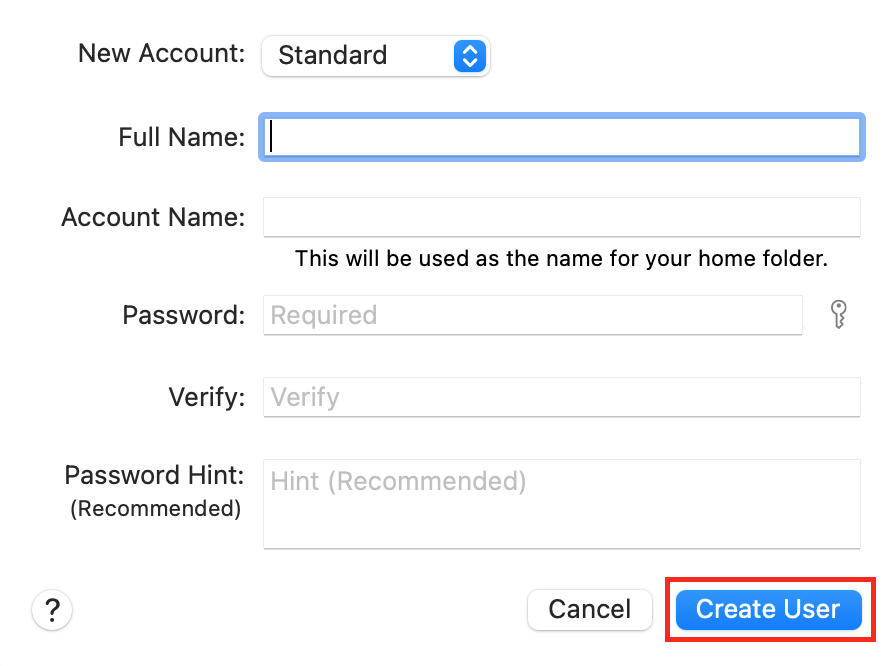
- Enter the user details and click “Create User”.
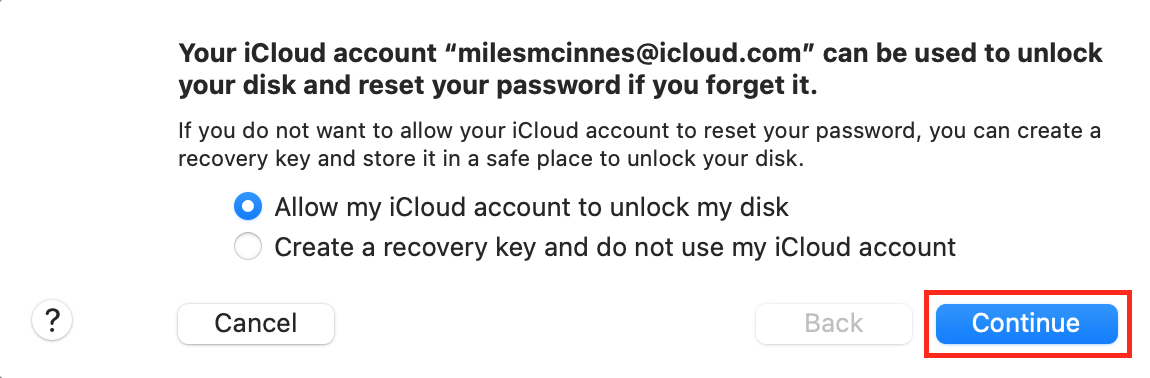
Encrypt Your Files with FileVault
To add an additional layer of security to the personal files stored on your Mac, encrypt them with Apple’s native encryption feature — FileVault. Once encrypted, the files cannot be opened and read without a decryption password.
Here’s how to encrypt Mac’s data:
- In System Preferences, click “Security & Privacy”.
- Open FileVault.
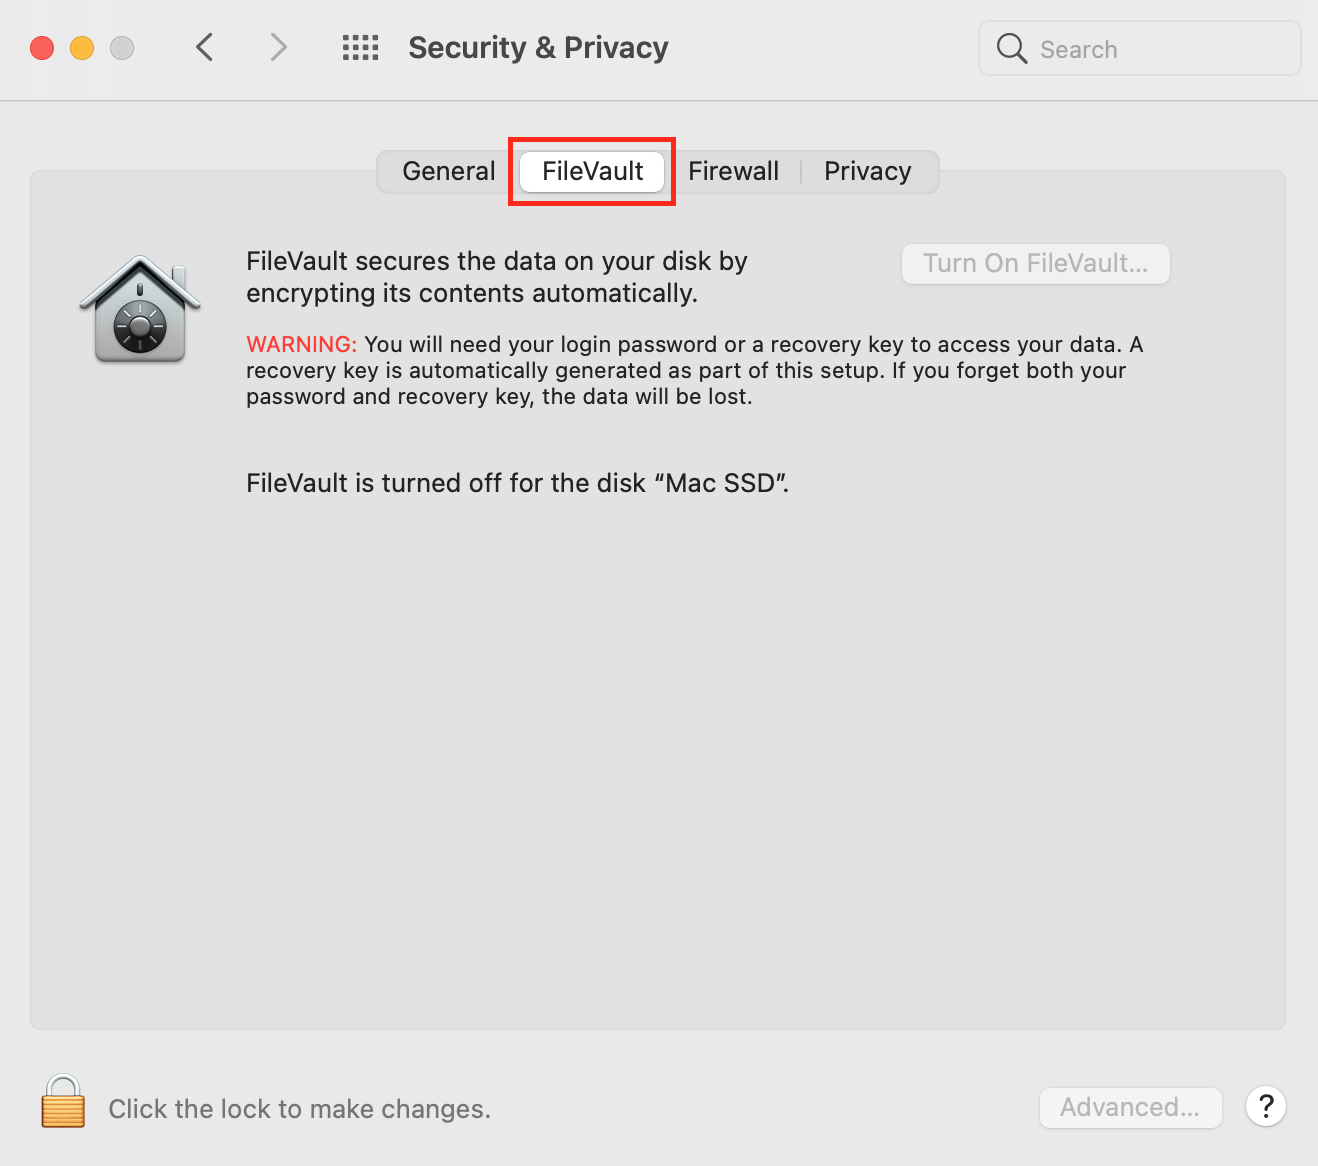
- At the bottom left, click the padlock icon and enter your administrator login details.
- Click “Turn On FileVault”.

- Choose a password recovery option and click “Continue”.
ALSO READ: How to unlock Notes using Touch ID on Mac
Keep Your macOS Up to Date
Apple regularly introduces security updates and eliminates vulnerabilities in macOS. Make sure to always keep your macOS up to date to remove security gaps that can be used by cybercriminals to access your files.
To update macOS follow the steps below:
- In System Preferences, click Software Update.
- Click “Update Now,” “Upgrade Now” or “Restart Now”.
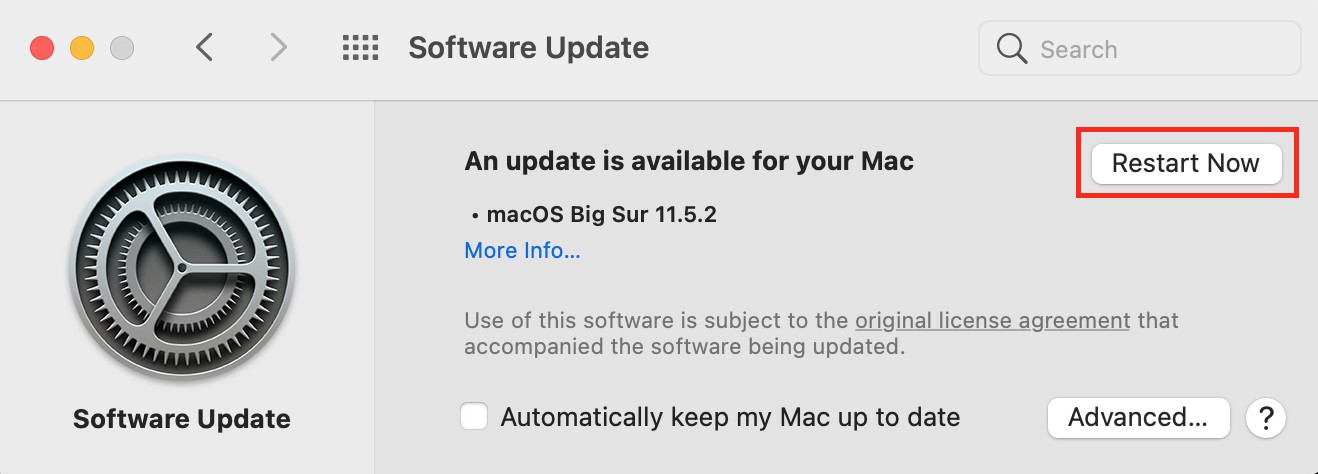
- Wait for the update to install.
Backup Your Data
Regular backups are an indispensable data protection method. If your other data protection measures fail and someone manages to access and delete or modify your files, backups are the only way to restore them. Also, there’s no excuse to forgo backups given how easy it is to run them on a Mac.
Here’s how to back up your files:
- Connect an external drive to your Mac.
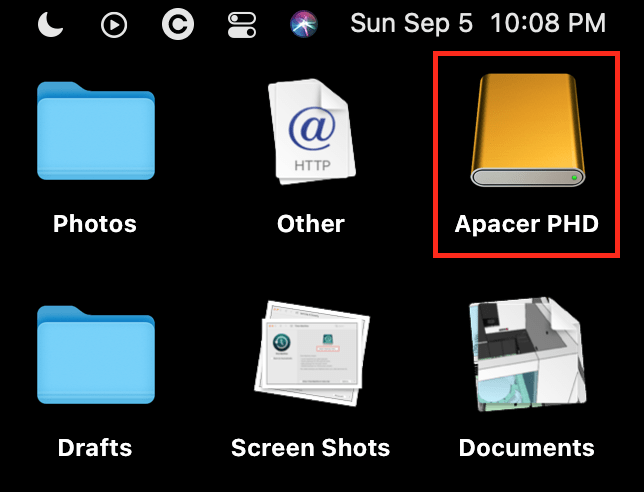
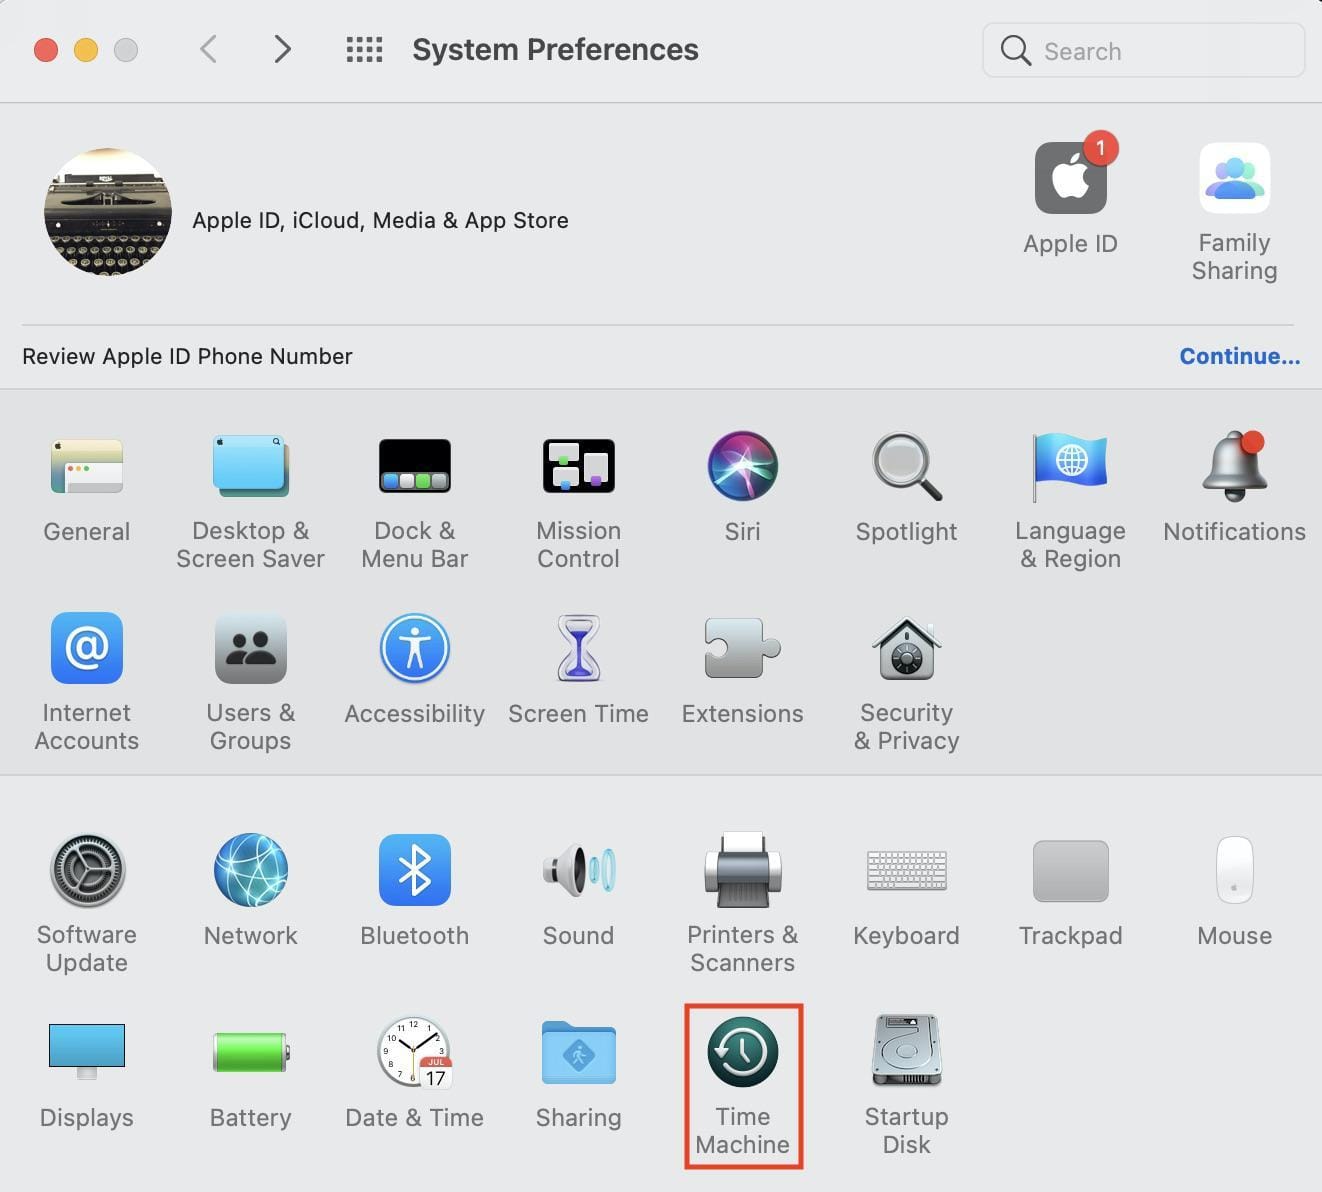
- In System Preferences, click “Time Machine”.
- Click “Select Backup Disk”.
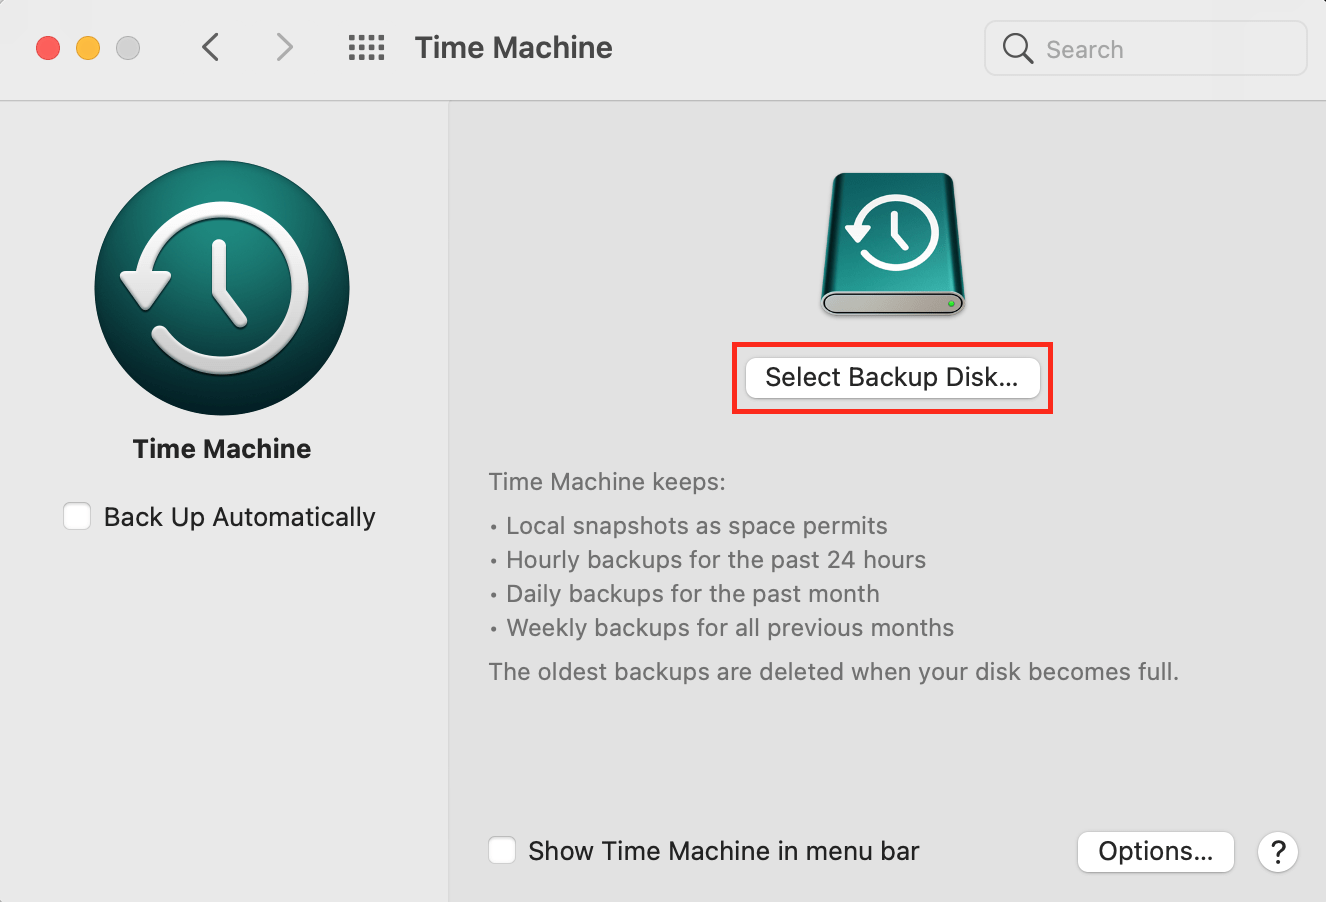
That’s it. After the selection of a backup disk, the Mac will automatically run the first backup, copying the entirety of your data. After that it will only copy data that has changed since the previous backup, thereby saving storage space on your external drive.
Enable the Find My Mac Feature
Your files are only as safe as the Mac they are stored on. Needless to say, if you lose your Mac, your cherished files will disappear along with it. To reduce the likelihood of losing your Mac, enable the Find My Mac feature.
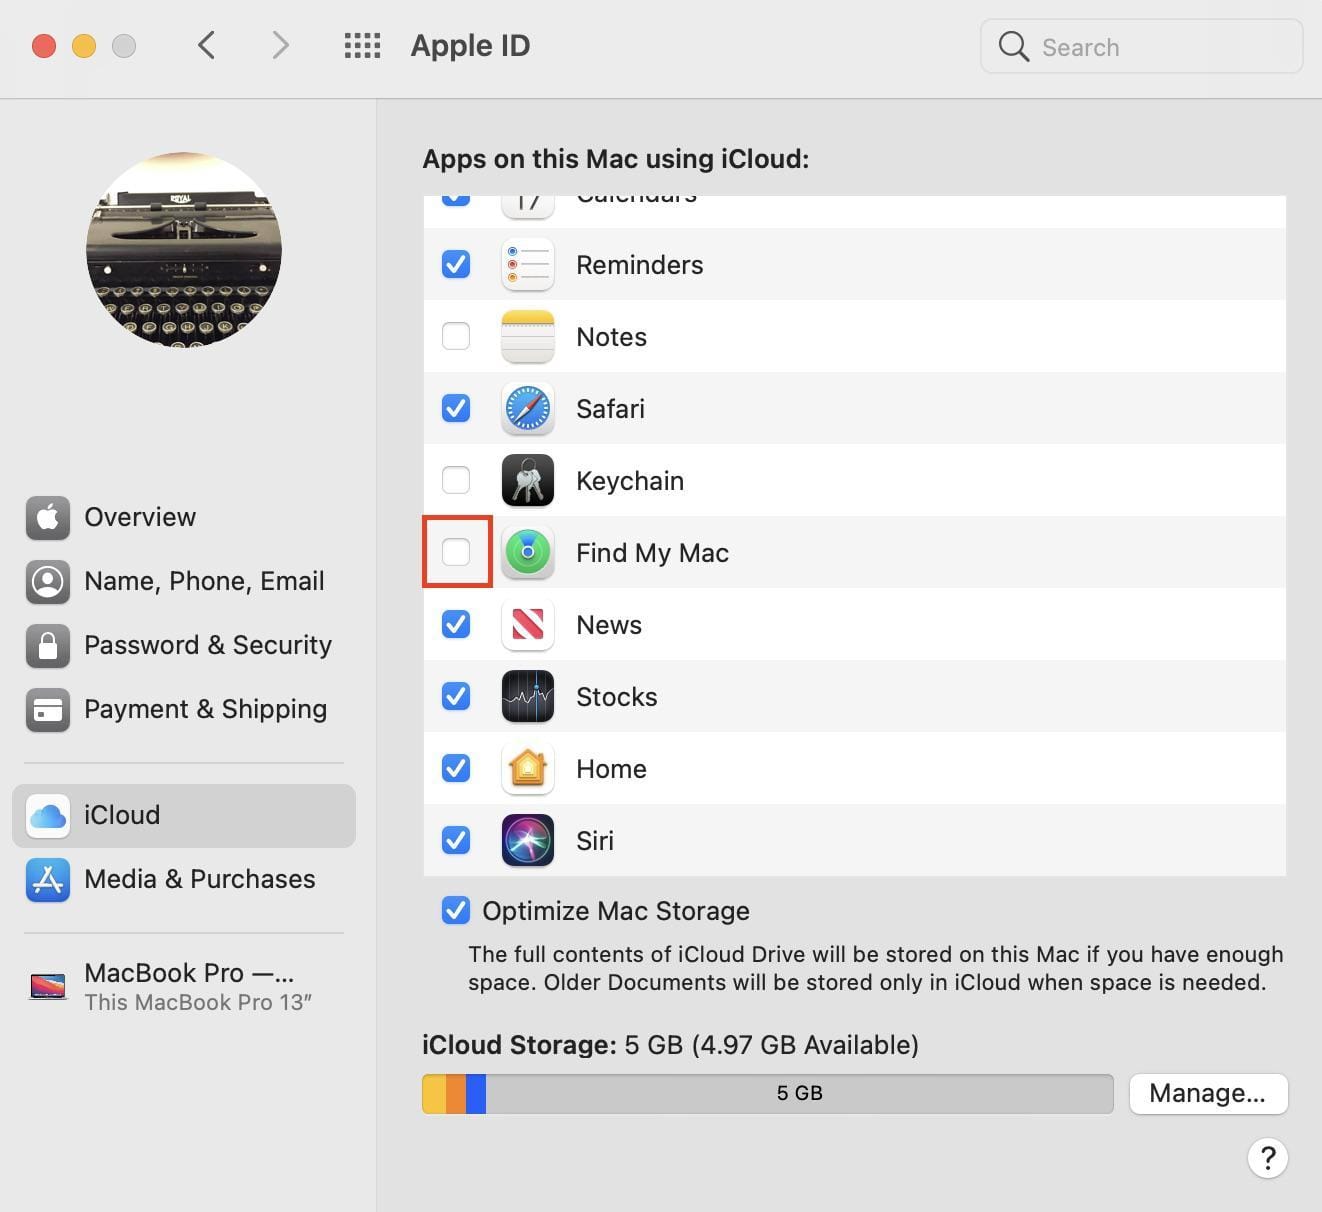
To set up the Find My Mac feature, do the following:
- Go to System Preferences and click “Apple ID”.
- In the sidebar, click “iCloud”.
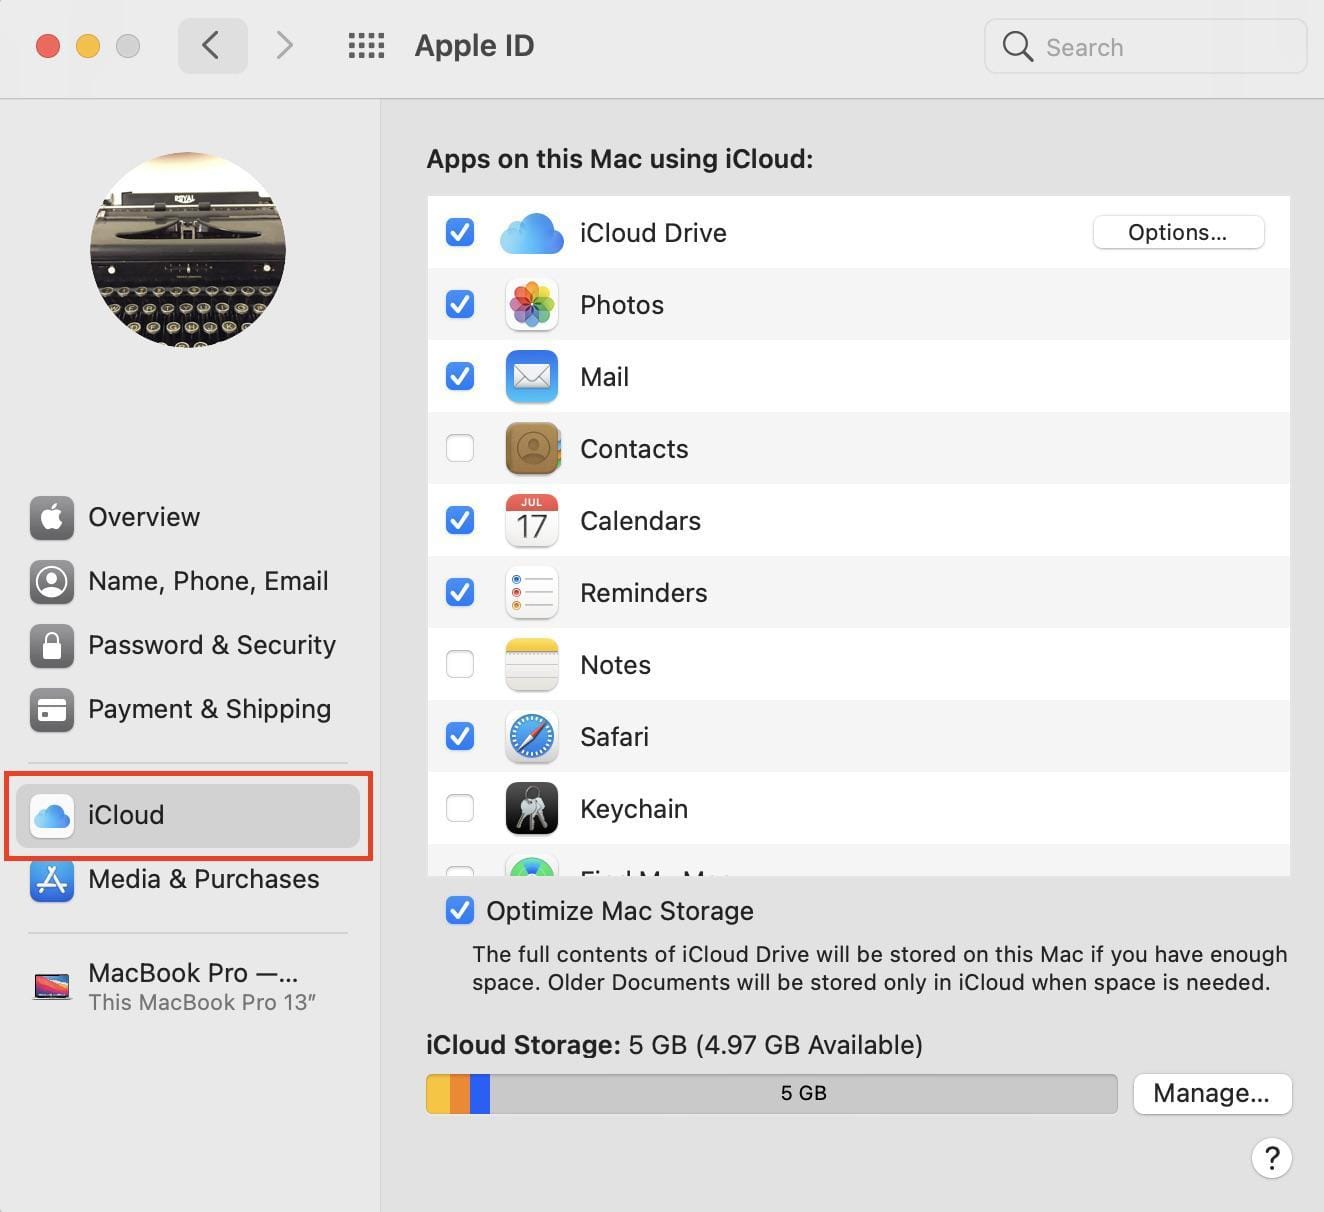
- In the list of apps, check the “Find My Mac” checkbox.
- Click “Allow”.
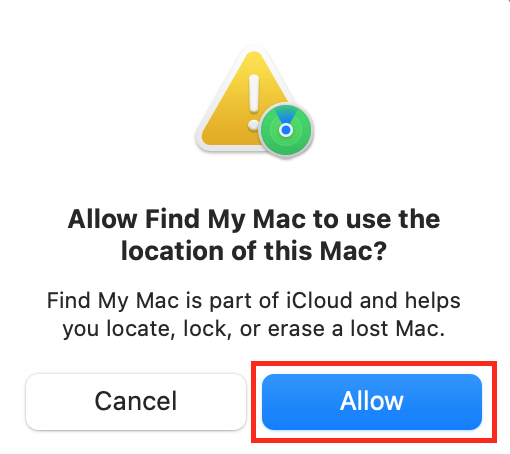
Once enabled, the Find My Mac feature allows locating your Mac and locking it, if needed. Thus, if you don’t return your device, at least nobody will be able to access your files.
Parting Thoughts
Apple goes out of its way to protect your Mac and the data it stores. However, this doesn’t mean you shouldn’t take a few steps to make it even safer. Hopefully, our advice has helped boost the security of your Mac and make it the safest place for storing your files.


