WebTrickz
TRENDING
  • How to Turn Off and Restart iPhone 15
No Result
View All Result
  • Reviews
  • Editorials
  • Social Media
    • Facebook
    • Twitter
    • YouTube
    • Messenger
    • Instagram
    • Snapchat
    • WhatsApp
    • TikTok
  • Apps
  • How To’s
  • Apple
  • iPhone
  • Google
  • Android
  • Mac
  • Security
  • About Us
    • About Us
    • Contact Us
    • Privacy Policy
No Result
View All Result
WebTrickz
No Result
View All Result
Home Snapchat

How to Set Up My Eyes Only on Snapchat for Android

Also learn how to change the passcode of My Eyes Only on Snapchat

Mayur Agarwal by Mayur Agarwal
March 18, 2024
in How To's, Snapchat

If you are a Snapchat user then you might have heard about the “My Eyes Only” feature. As the name suggests, My Eyes Only allows you to keep your snaps in a private vault on Snapchat. The snaps or stories you move to My Eyes Only are stored privately and do not appear in your Snapchat Memories. It’s only you who can access them after entering the correct passcode. It is indeed a handy feature for users who wish to hide their personal photos from prying eyes.

In the new version of Snapchat for Android, you may not be able to find the My Eyes Only option in Memories though. That’s because Snapchat has slightly changed the settings to set it up. Don’t worry, simply follow the steps below to get My Eyes Only on Snapchat.

How to set up My Eyes Only on Snapchat

  1. Make sure at least one snap or story is saved to Memories.
  2. Swipe up from Snapchat’s main screen to open memories.
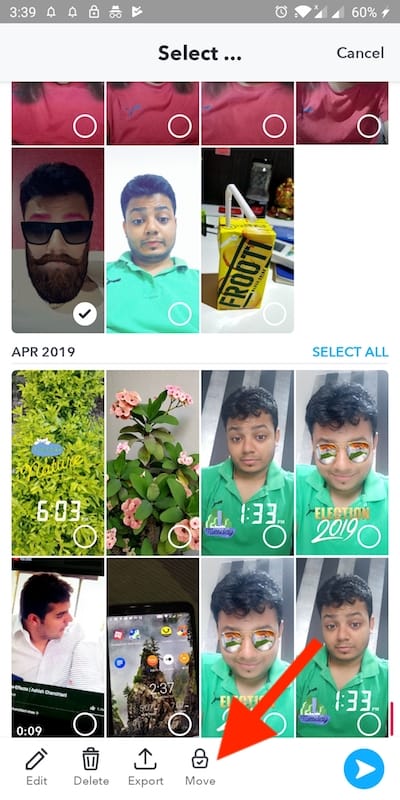
  3. Under Snaps, press and hold a snap.
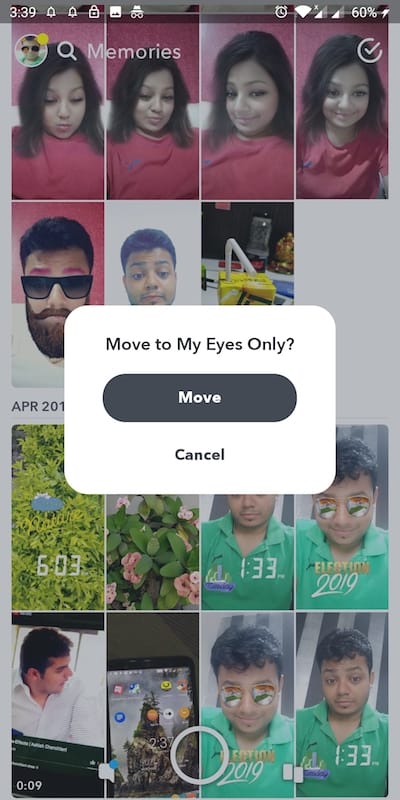
  4. Tap the Move option at the bottom and select “Move”.
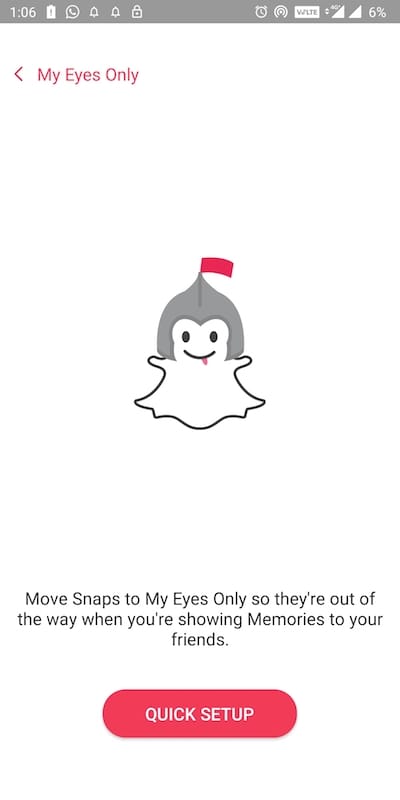
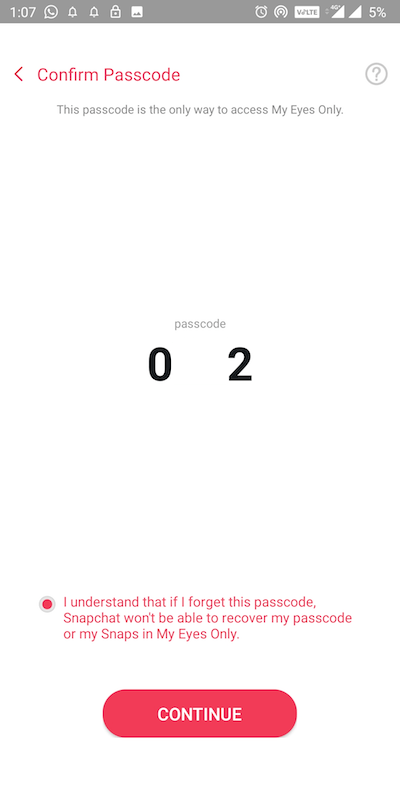
  5. Tap on Quick Setup and enter a 4-digit passcode.
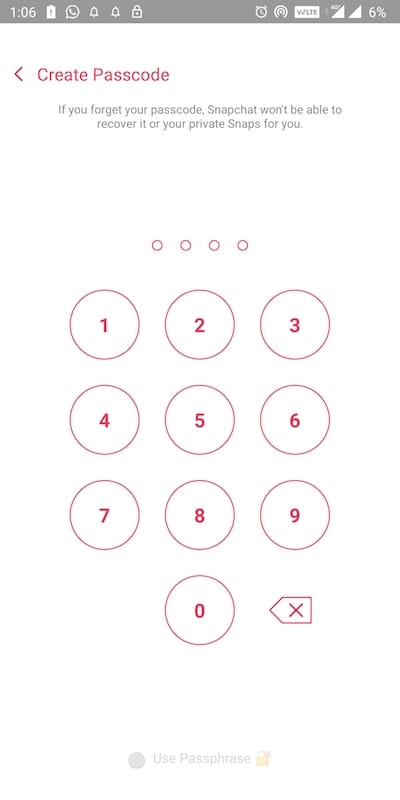
  6. Optional – Tap the “Use passphrase” option at the bottom to set a strong password.
  7. Accept the condition and tap on continue.
  8. Tap Finish and the setup will be complete.

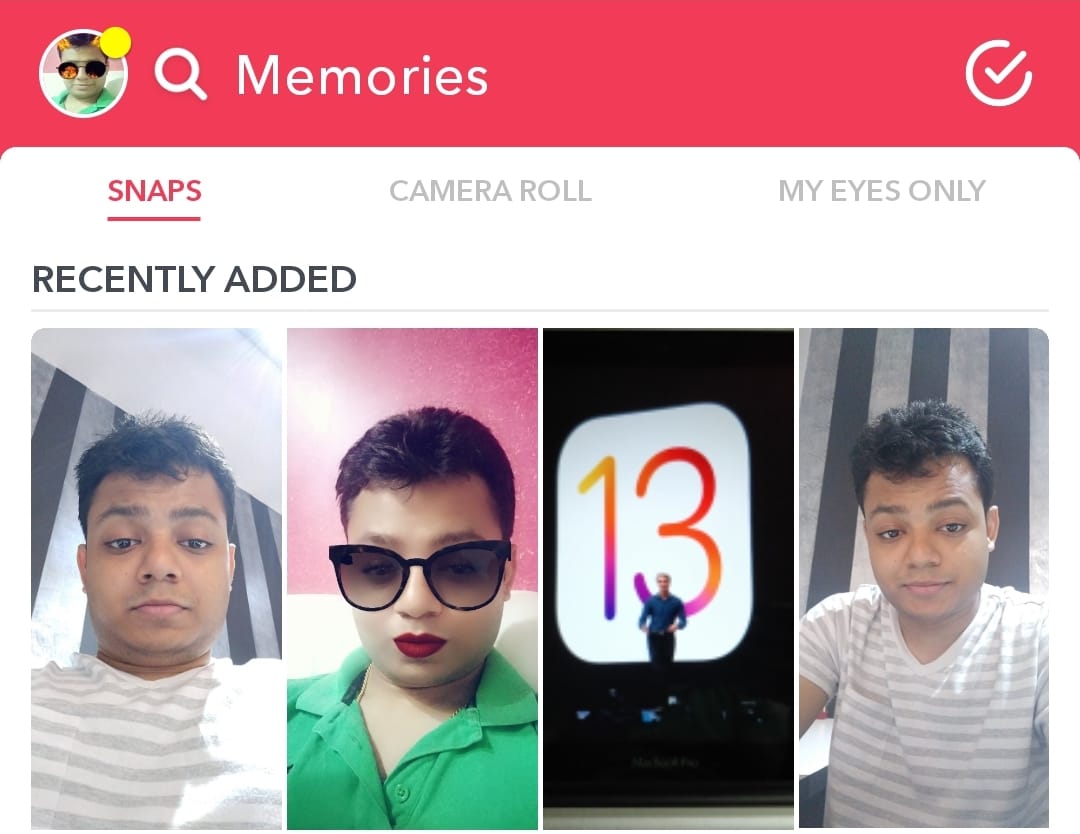
You will now see a new “My Eyes Only” tab in the Memories section alongside the Snaps and Camera Roll.

To move snaps to My Eyes Only, long-press and select all the desired snaps from Memories, tap move, and again select Move. The selected snaps or stories will then be moved from memories to the private vault.

NOTE: The passcode is the only way to access the My Eyes Only directory. In case you forget your passcode, Snapchat won’t be able to recover your passcode or your private snaps for you. Though you can reset the passcode using your Snapchat account password if you have forgotten it. However, resetting the passcode will permanently delete everything saved to My Eyes Only.

ALSO READ: How to Save Stories on Snapchat

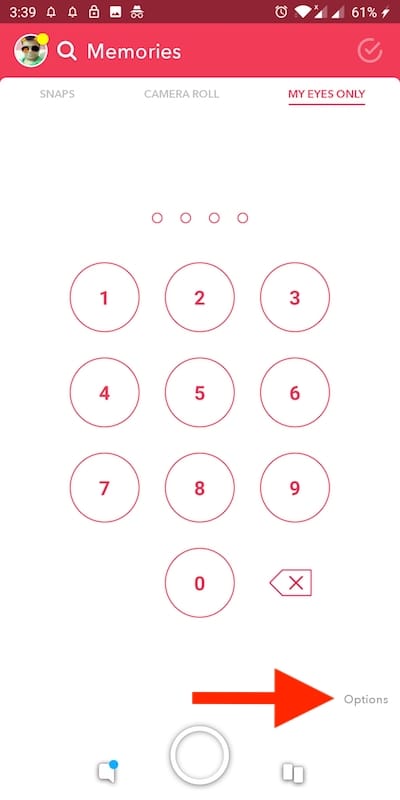
To access My Eyes Only on Snapchat, swipe up from the camera screen to go to Memories. Then tap the My Eyes Only tab at the top right and enter the passcode or passphrase. You can now see all the snaps and stories stored privately. To move snaps back to Memories, long-tap on a snap or multiple snaps and tap the Move option.

Change My Eyes Only password on Snapchat

Check the steps below if you want to change the passcode of My Eyes Only.

  1. Go to Memories in Snapchat by swiping up from the camera screen.
  2. Under Memories, tap the My Eyes Only tab from the top right.
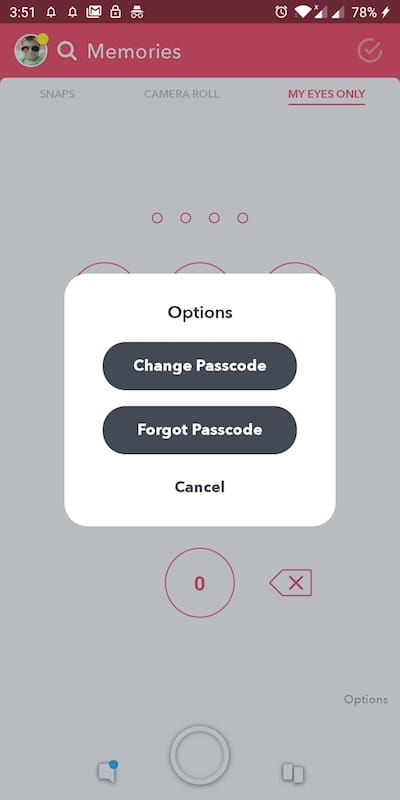
  3. Tap Options at the bottom right.
  4. Select Change Passcode.
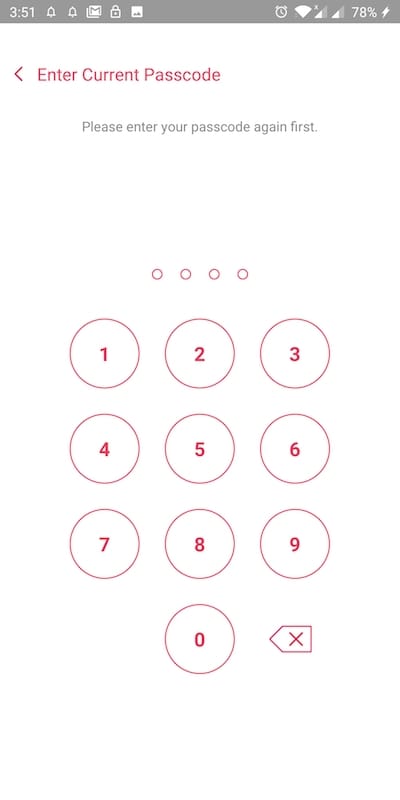
  5. Enter your current passcode.
  6. Now enter a new passcode you want to set.
  7. Confirm passcode and tap continue.
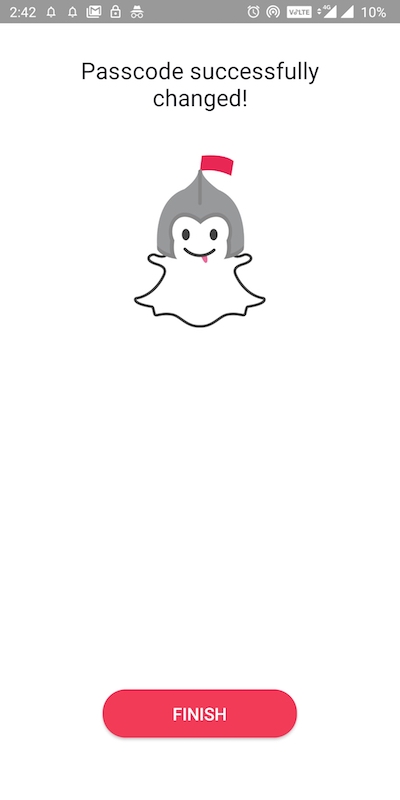
  8. Your passcode will be changed now.

ALSO READ: How to Get Transparent Colors on Snapchat

Tags: AndroidAppsPrivacySnapchat
ShareTweetSend
Previous Post

Five Apps Every Small Business Should Be Using

Next Post

5KPlayer Review: A Powerful 4K Media Player for Windows

Mayur Agarwal

Mayur Agarwal

Mayur Agarwal, the founder and editor of WebTrickz, is a tech enthusiast with a Bachelor's degree in Computer Applications and over a decade of writing experience. His passion for technology and gadgets inspires him to create insightful How To's and troubleshooting guides.

Next Post

5KPlayer Review: A Powerful 4K Media Player for Windows

Leave a Reply Cancel reply

Your email address will not be published. Required fields are marked *

Latest Stories

ios 18

iOS 18: How to Add Screen Record to Control Center on iPhone

March 30, 2025
ios photos logo

iOS 18: How to Clear Recently Viewed Photos on iPhone

December 27, 2024
ios photos logo

How to Find Your Favorite Photos in iOS 18 on iPhone

December 30, 2024
ios 18

How to Reset Control Center to Default in iOS 18.1 on iPhone

April 2, 2025
iphone 16 pro max always-on display

How to Turn Off Always-On Display on iPhone 16 Pro & 16 Pro Max

November 11, 2024
ios 18

How to Find Recently Deleted Photos in iOS 18 on iPhone

December 30, 2024
apple iphone 16 pro

How to Close Apps on iPhone 16, 16 Pro, and 16 Pro Max

October 22, 2024

Trending Stories

  • Apple iphone 16

    How to Turn Off and Restart iPhone 16, 16 Pro, and 16 Pro Max

  • How to Put Your iPhone 16 on Vibrate or Silent Mode

  • How to Turn Off & Restart iPhone 15, 15 Pro, and 15 Pro Max

  • How to Turn Off Most Relevant Comments on Facebook

  • 4 Ways to Remove the Floating Home Button on iPhone

  • About Us
  • Contact Us
  • Privacy Policy
  • Advertise

© 2025 WebTrickz. All Rights Reserved.

No Result
View All Result
  • Reviews
  • Apps
  • How To’s
  • Android
  • Google
  • iPhone
  • Mac
  • About Us
  • Contact Us
  • Privacy Policy

© 2025 WebTrickz. All Rights Reserved.