The latest MacBook Pro and MacBook Air feature Touch ID that you can use to unlock your Mac, make purchases using Apple Pay, and more. Fingerprint authentication is a convenient way to lock and unlock stuff as you don’t need to remember the password. Unlike passwords, you can simply place your finger over the Touch ID sensor, thus making the overall process simpler and quicker.
That said, Touch ID on macOS isn’t enabled by default for certain apps such as Notes. In case you want to lock notes with Touch ID on Mac, you need to enable a setting first. It is generally a good idea to lock notes if you used them to store your private information and passwords. With Touch ID enabled, one can simply lock a note or unlock all locked notes at once.
Now let’s see how you can use Touch ID or fingerprint to view locked notes on macOS Big Sur.
How to enable Touch ID for Notes app on Mac
Before proceeding, make sure you have set up Touch ID on your MacBook and it is ready for use. To turn on Touch ID functionality for notes,
- Open the Notes app from the dock or use the Spotlight search to locate it.
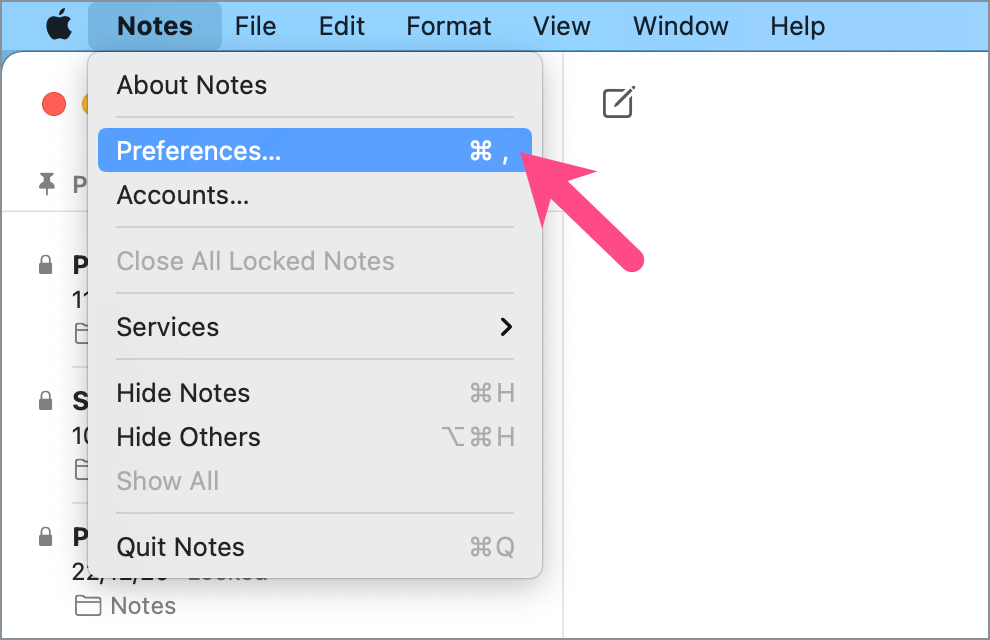
- Tap the “Notes” tab in the menu bar at the top and open Preferences.
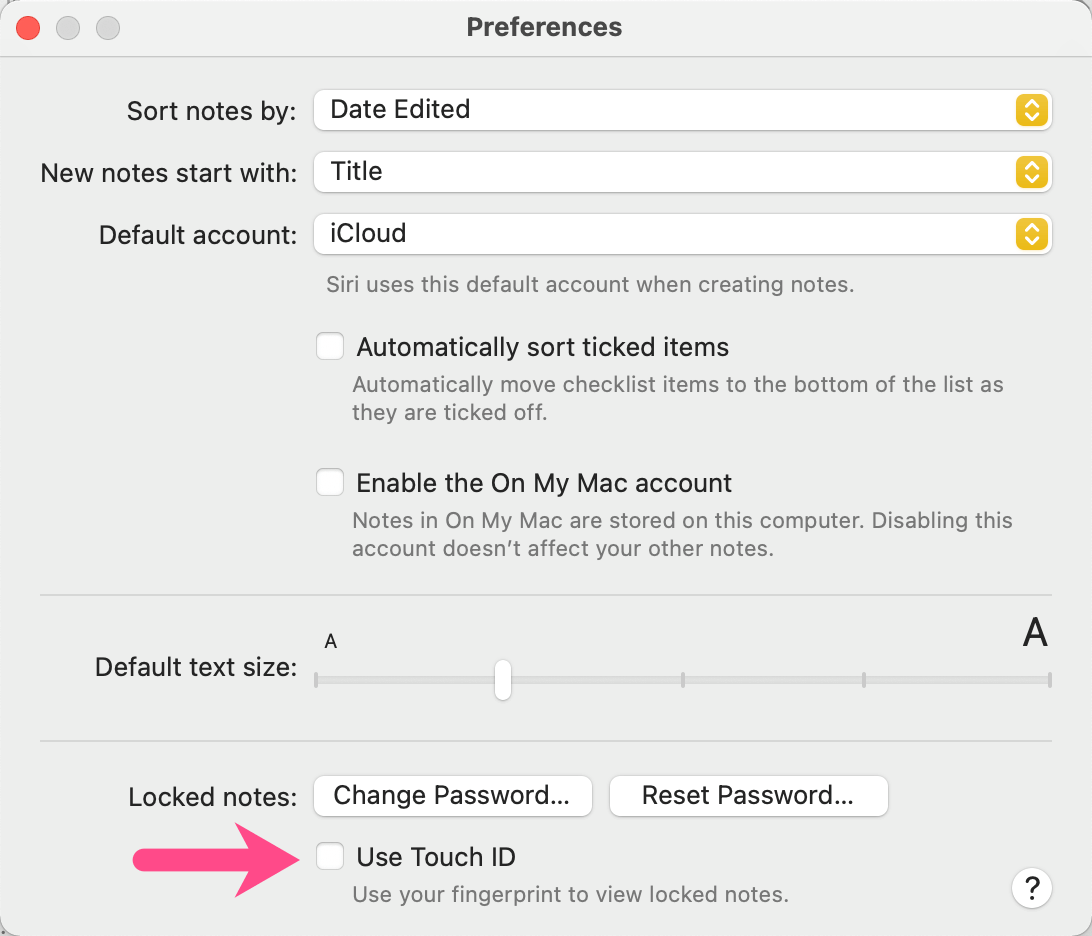
- Enable the “Use Touch ID” setting.
- Enter the password that you used to lock your notes.
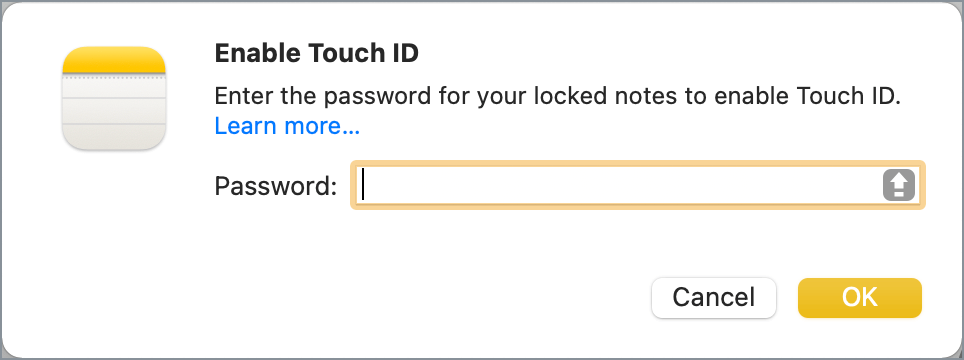
- You can now use your fingerprint to unlock notes on your MacBook.
TIP: The Touch ID sensor is placed at the top-right corner of the keyboard. On MacBook Pro, you can find it next to the Touch Bar. Whereas on MacBook Air, it is on the extreme right of the function keys row.
Note: If you have more than one iCloud account added then select the applicable iCloud account under Default account in Notes preferences.
How to lock all notes at once on Mac
Once you are done viewing the contents of the password-protected notes, it is advisable to relock all the notes for security reasons. To do so,
- Open the Notes app.
- Make sure the Notes toolbar is turned on. In case it is hidden, go to the View tab and click “Show Toolbar”.

- Click the “Lock” button in the Notes toolbar at the top and select “Close All Locked Notes”.

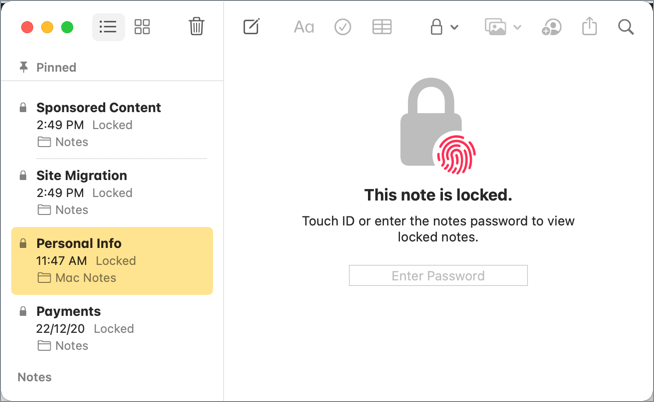
That’s it. Doing so will relock all the notes having Touch ID or password-protection. You can confirm the same by checking the lock icon next to the notes.
Alternatively, right-click the Notes app in the dock and select “Quit” to lock all opened notes at once.
How to remove lock from a specific note
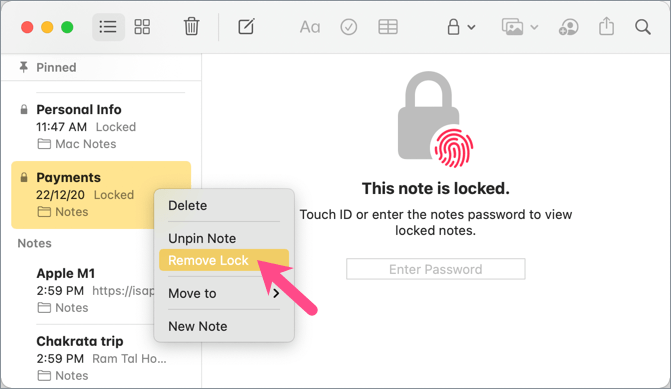
If you want to remove lock or password from a particular note in the Notes app then that’s possible.
To do so, right-click the desired note from the sidebar and select “Remove Lock”. Alternatively, click the lock icon in the toolbar to remove the lock. Now use Touch ID or enter the notes password to remove the lock from an individual note.
In a similar way, you can lock a single note using Touch ID or Notes app password.
What if I forgot the Notes password?
If you can’t remember the password for locked notes then you can only view a locked note by using Touch ID (or Face ID on iPhone). That’s why Apple strongly recommends adding a hint when creating a password for the Notes app. The hint is shown only after two failed attempts.
ALSO READ: How to stop your Mac from going to sleep on macOS Big Sur


