A significant change can be seen in the new Files app that comes with iOS 13 and iPadOS. The updated Files app includes native support for creating zip files on iPhone and iPad, thus eliminating the need to use any third-party apps. Earlier, the app could just unzip files or uncompress a zip archive.
Speaking of a ZIP file, it lets you combine multiple files such as photos, videos, and PDFs into a single zipped file. You can easily share the compressed zip file over email and make it easier for the recipient to download several attachments in one go. Moreover, compression usually helps in reducing the original file size, though we didn’t notice a significant reduction in the size of files compressed using the Files app.
In this article, we will guide you through the steps to make a zip file of photos on your iOS device.
NOTE: For this, your device should be running iOS 13 or iPadOS 13 and later.
How to create a ZIP file of multiple photos on iPhone
Follow the steps below if you want to archive a collection of pictures, videos, or screenshots in a single .zip file:
- Open the Photos app on your iPhone or iPad.
- Go to the “Library” tab and select “All Photos” to view all your photos. Alternatively, you can go to “Albums” to quickly access your Videos, Selfies, Live Photos, Screenshots, and Screen Recordings under “Media Types”.
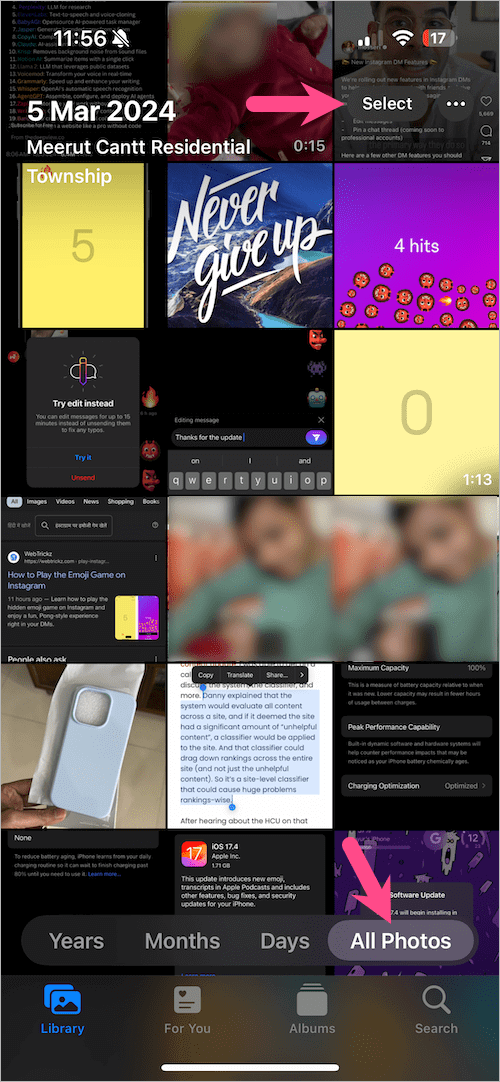
- Tap the “Select” option from the top-right corner and select all the photos you want to compress in Zip format.
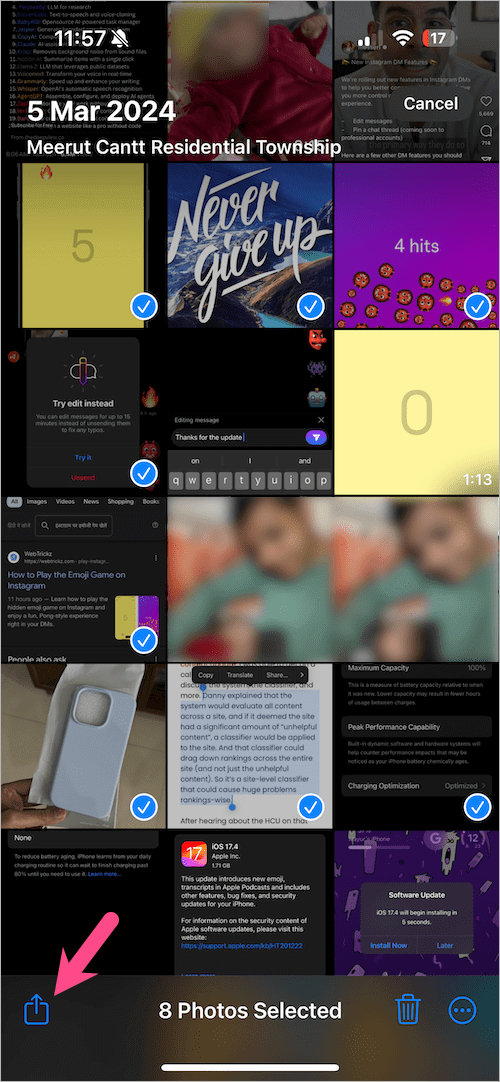
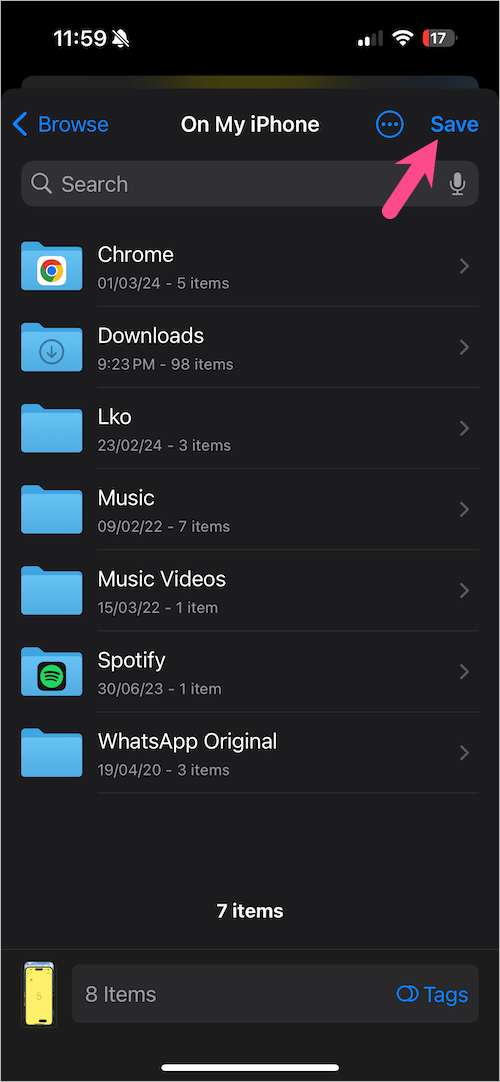
- Tap the “Share” option, scroll down the share menu, and select “Save to Files“.
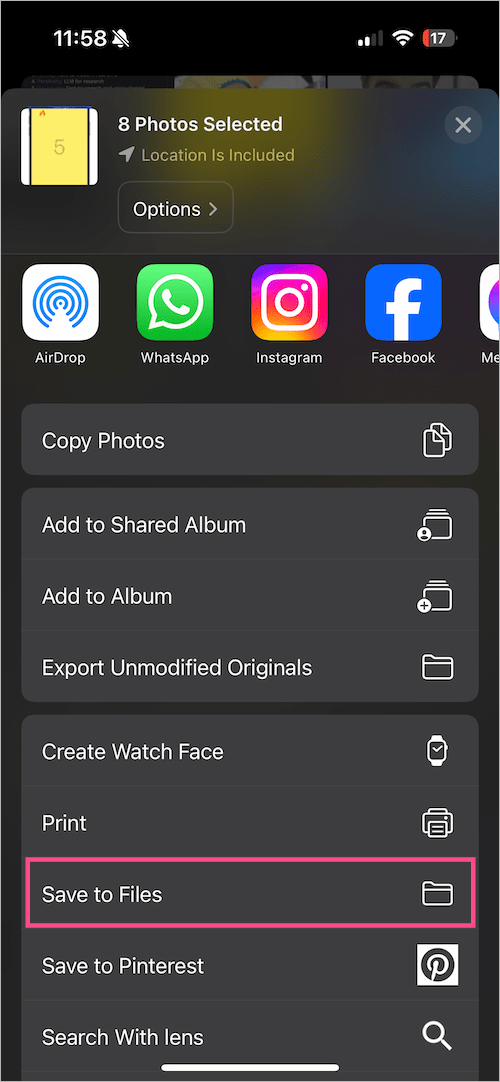
- Choose the Save location – Tap “On My iPhone” and select a directory where you want to save the selected items. If you prefer to save the zip file on iCloud then choose “iCloud Drive” instead. Then hit “Save“. Tip: You can also create a new folder when saving items to the Files app.
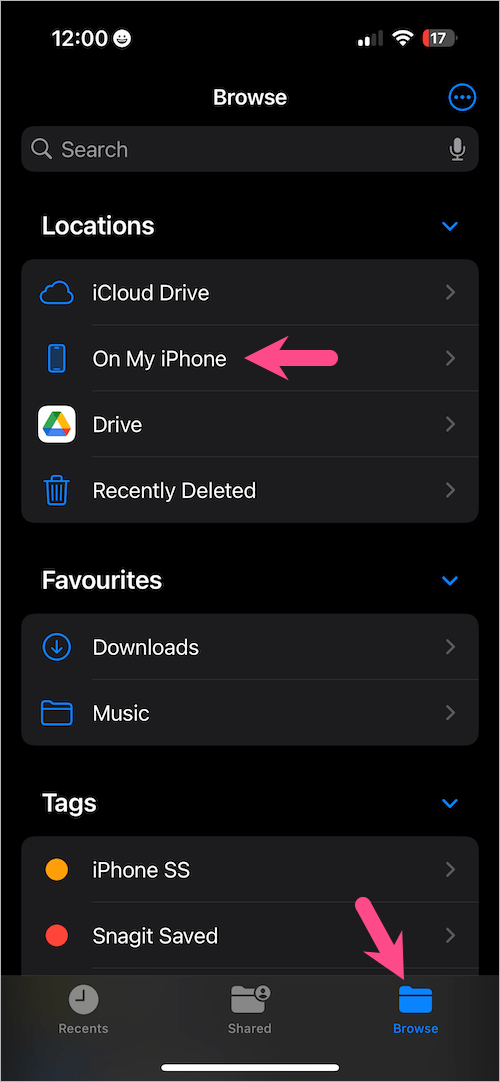
- Open the “Files” app.
- Tap on “Browse” and navigate to the location and exact directory where you saved the photos.
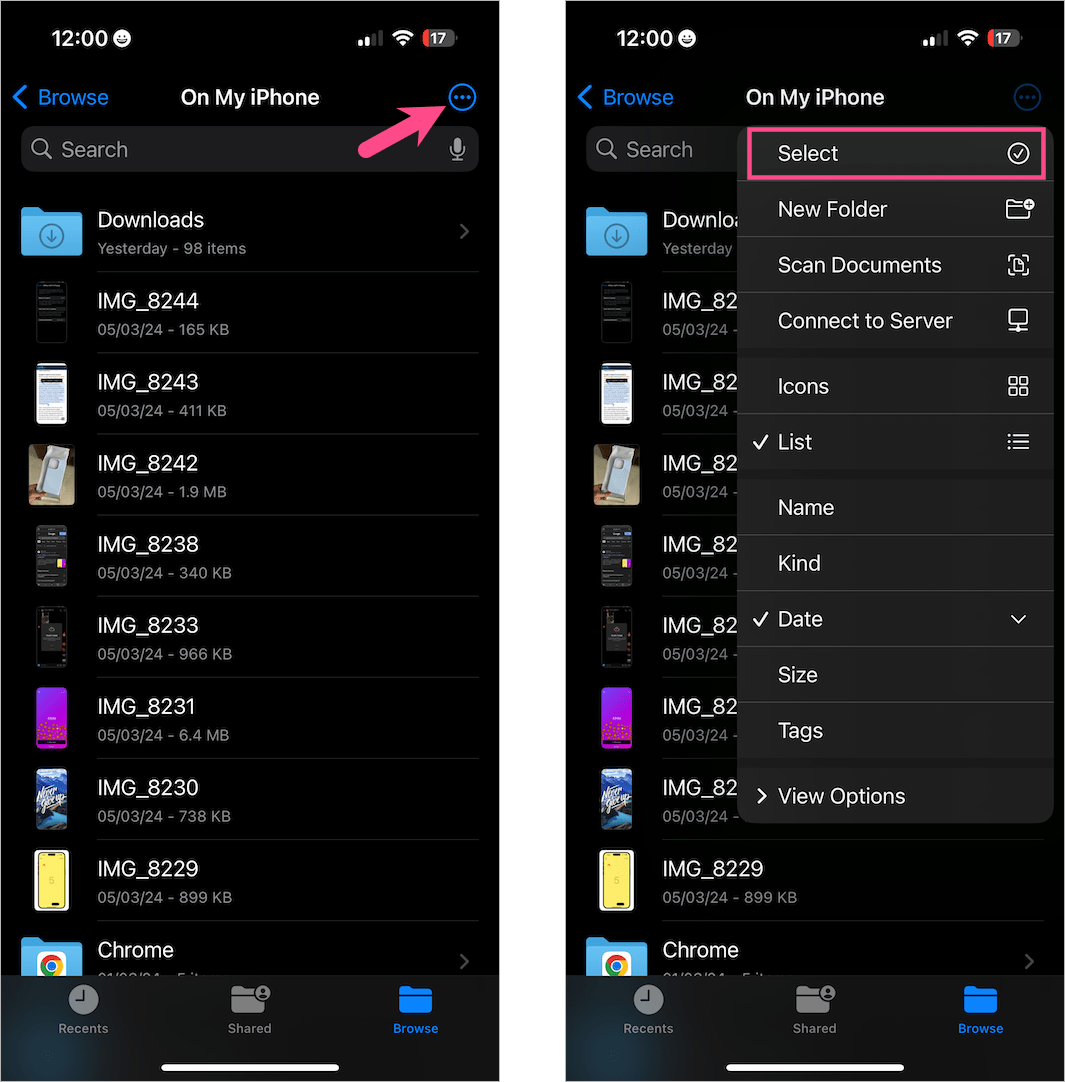
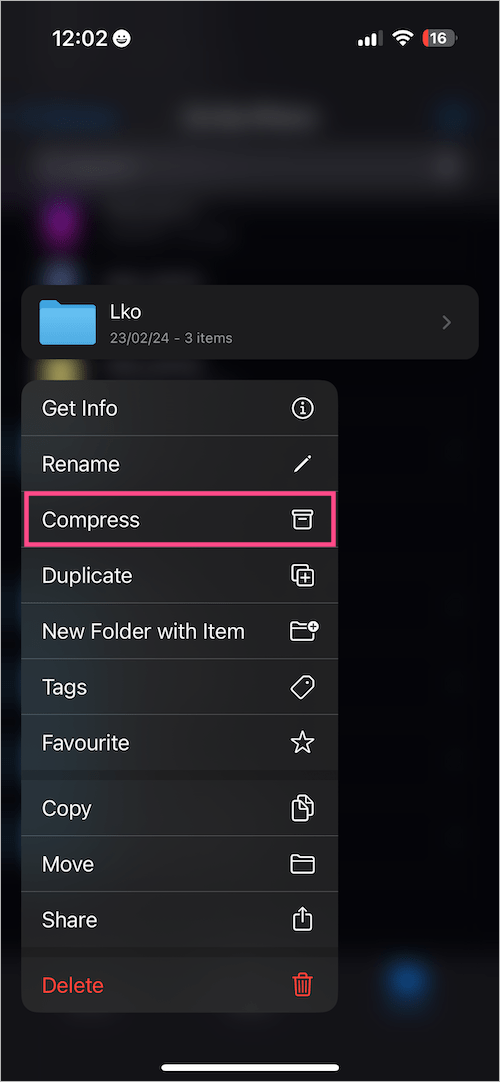
- Tap the ellipsis button (3 dots) from the top-right corner and choose ‘Select‘. Now select the desired photos or a complete folder.
- Tap the 3-dots icon at the bottom-right corner and select “Compress“.
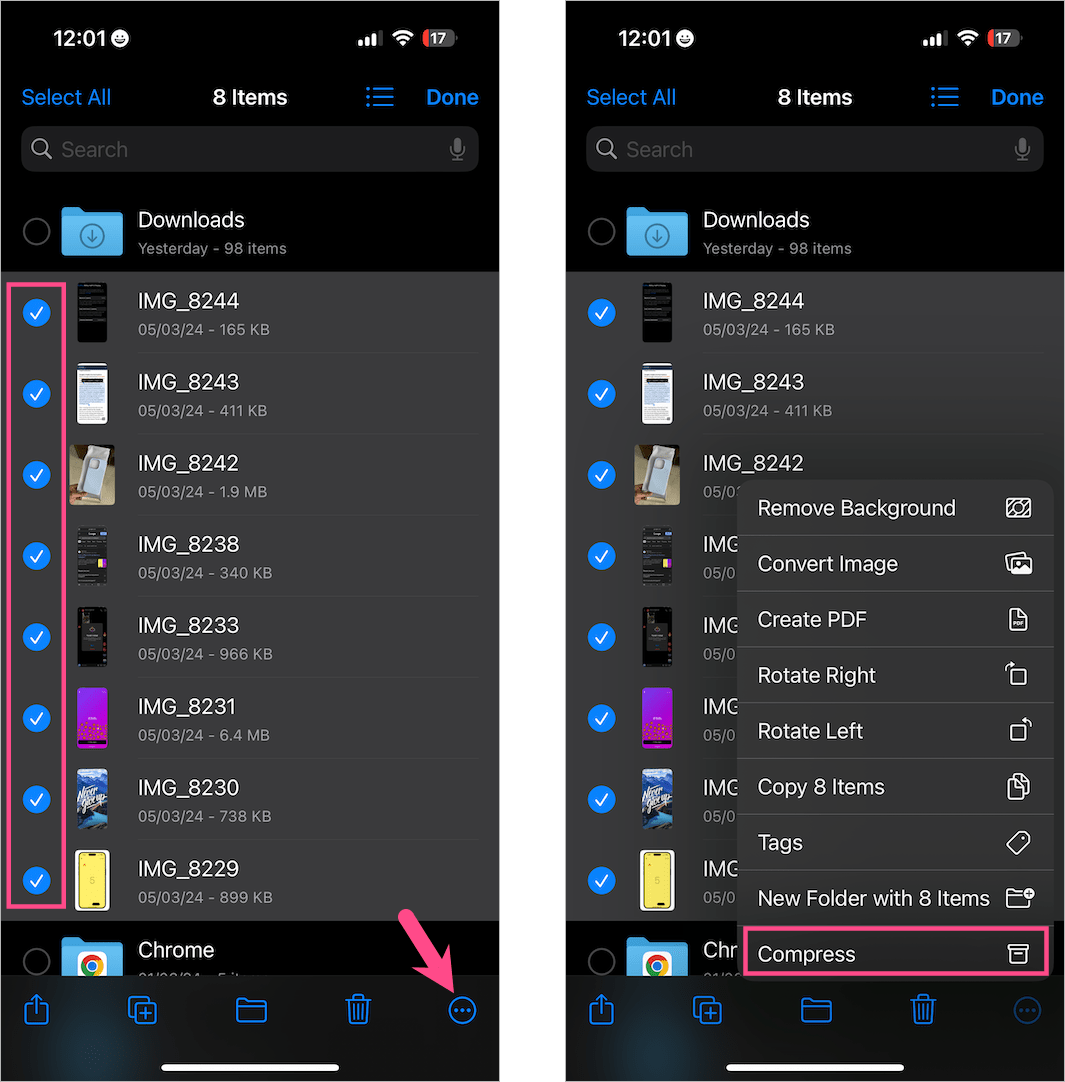
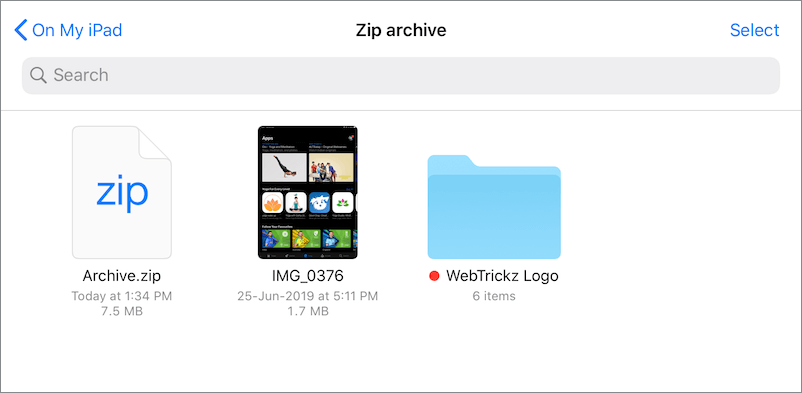
- That’s it! An “Archive.zip” file will be created in the same location.
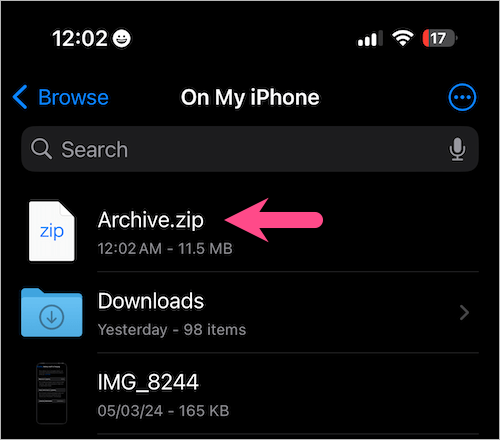
TIP: To quickly compress a single file or folder, tap and hold the particular file and select “Compress” from the menu. Doing so will create a ZIP archive of the file in the same directory.
ALSO READ: Scan documents on iPhone and iPad with the Files app
Opening ZIP files on iPhone
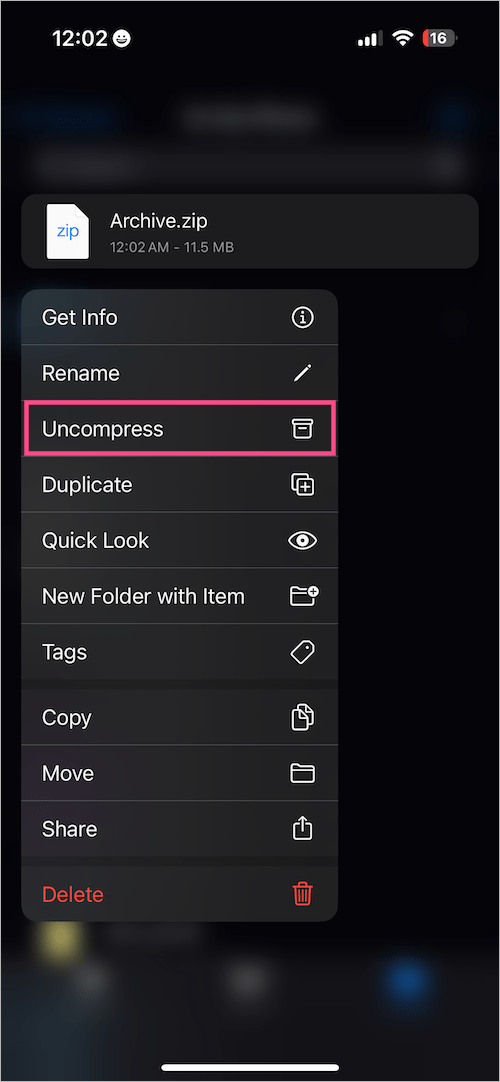
If you want to view the contents of a zip file on your iPhone then you first need to unzip it. You can open a zip file using the Files app itself and in a single tap.
To do so, open the Files app and navigate to the location where the Zip file is stored. Now tap the zip file or folder, doing so will extract it in the same location. Alternatively, you can tap and hold a .zip file and select “Uncompress“.
We hope you found this article helpful.
ALSO READ: How to Download Files from Google Drive App to your iPhone


Extremely helpful, easy, and concise.
Thank you very much!