While you can’t change your system font, iOS 13 and iPadOS devices still give some leeway to their users by allowing them to install third-party fonts to use for other applications such as Word or chatting apps.
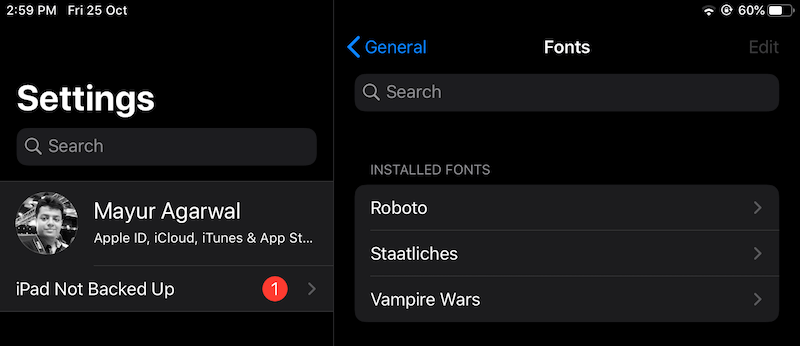
In order to do this, it can get a little tricky. Follow these steps so you can show off your distinct fonts to your friends.
Find and download a font installer app
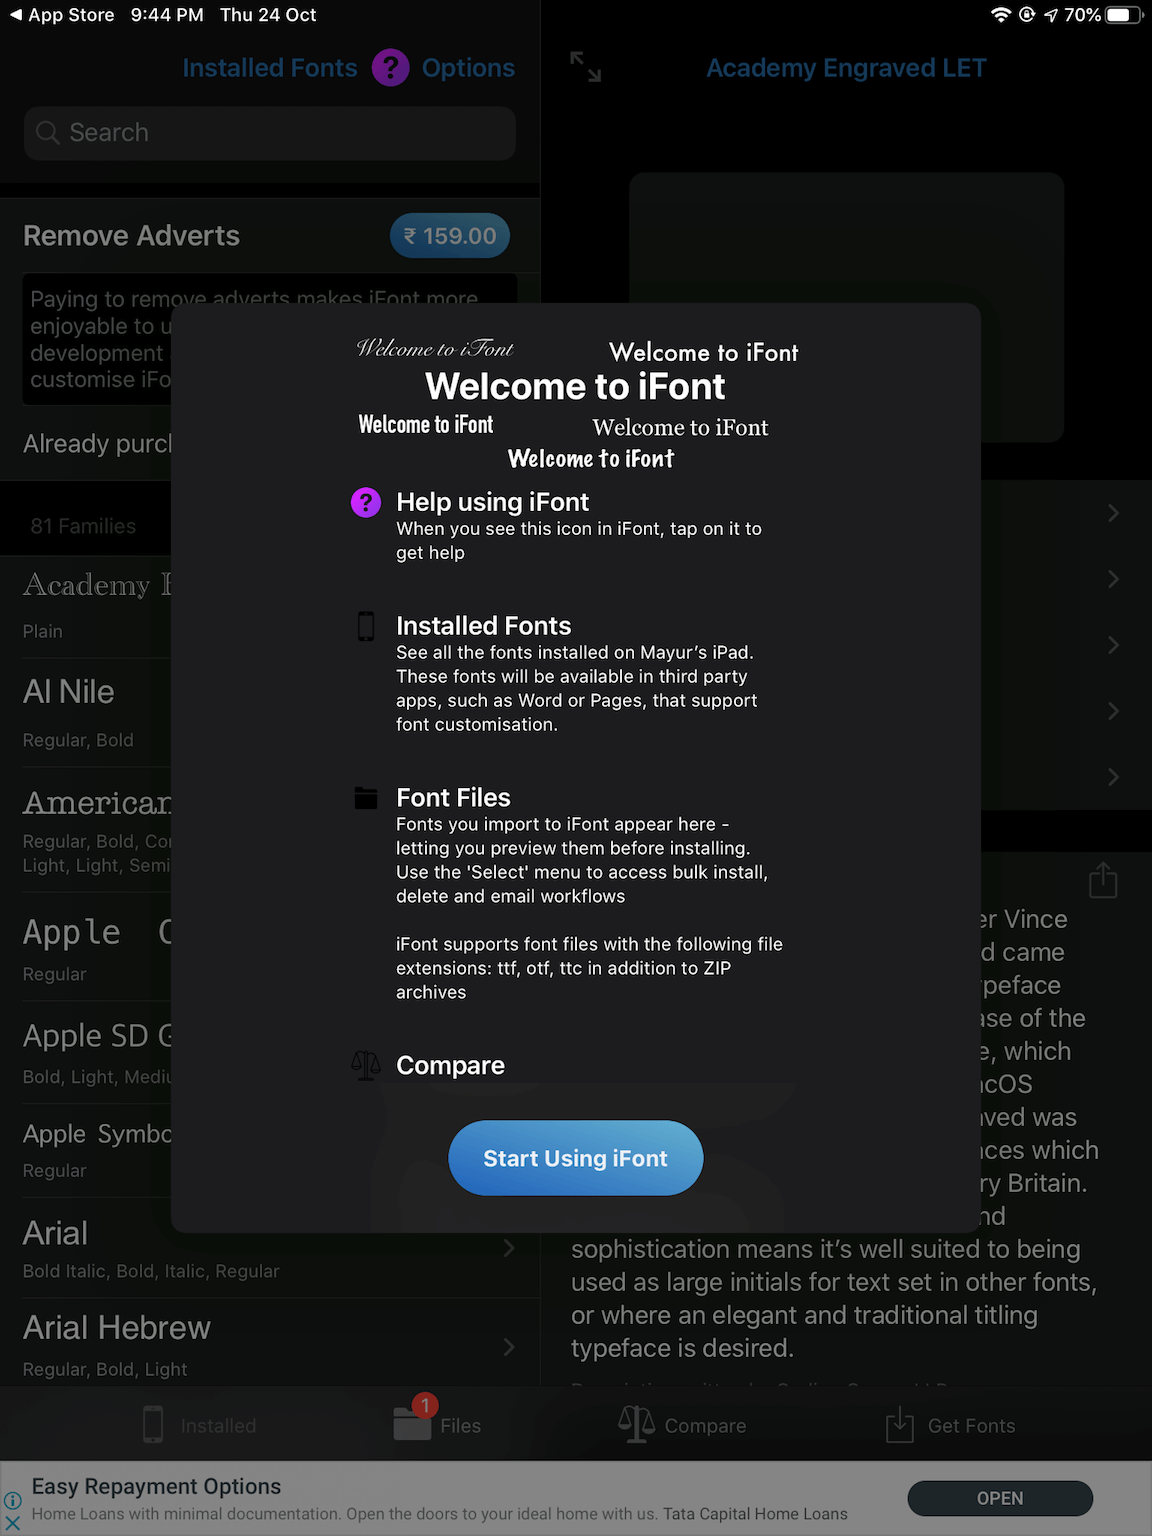
There are many great font apps available on the App Store. While some require you to pay, others let you enjoy their full service completely free. iFont is one such App, and there is an option to remove ads for $0.99.
We will focus on using iFont from here on out, as it’s the best option for most users. The processes should also be applicable if you pick another font installer app.
To start, type “iFont” on the App Store search bar and download the app. Open the app once you install it.
Get fonts from Google Fonts
Just the app alone isn’t enough, you need to download fonts you want to use. Tap the “Get fonts” button at the bottom of the app view to see a list of fonts you can use from Google Fonts library.
The search button at the top is useful if you want to find specific fonts. Tap “Get” to download the font you like. You can download as many fonts as you want.
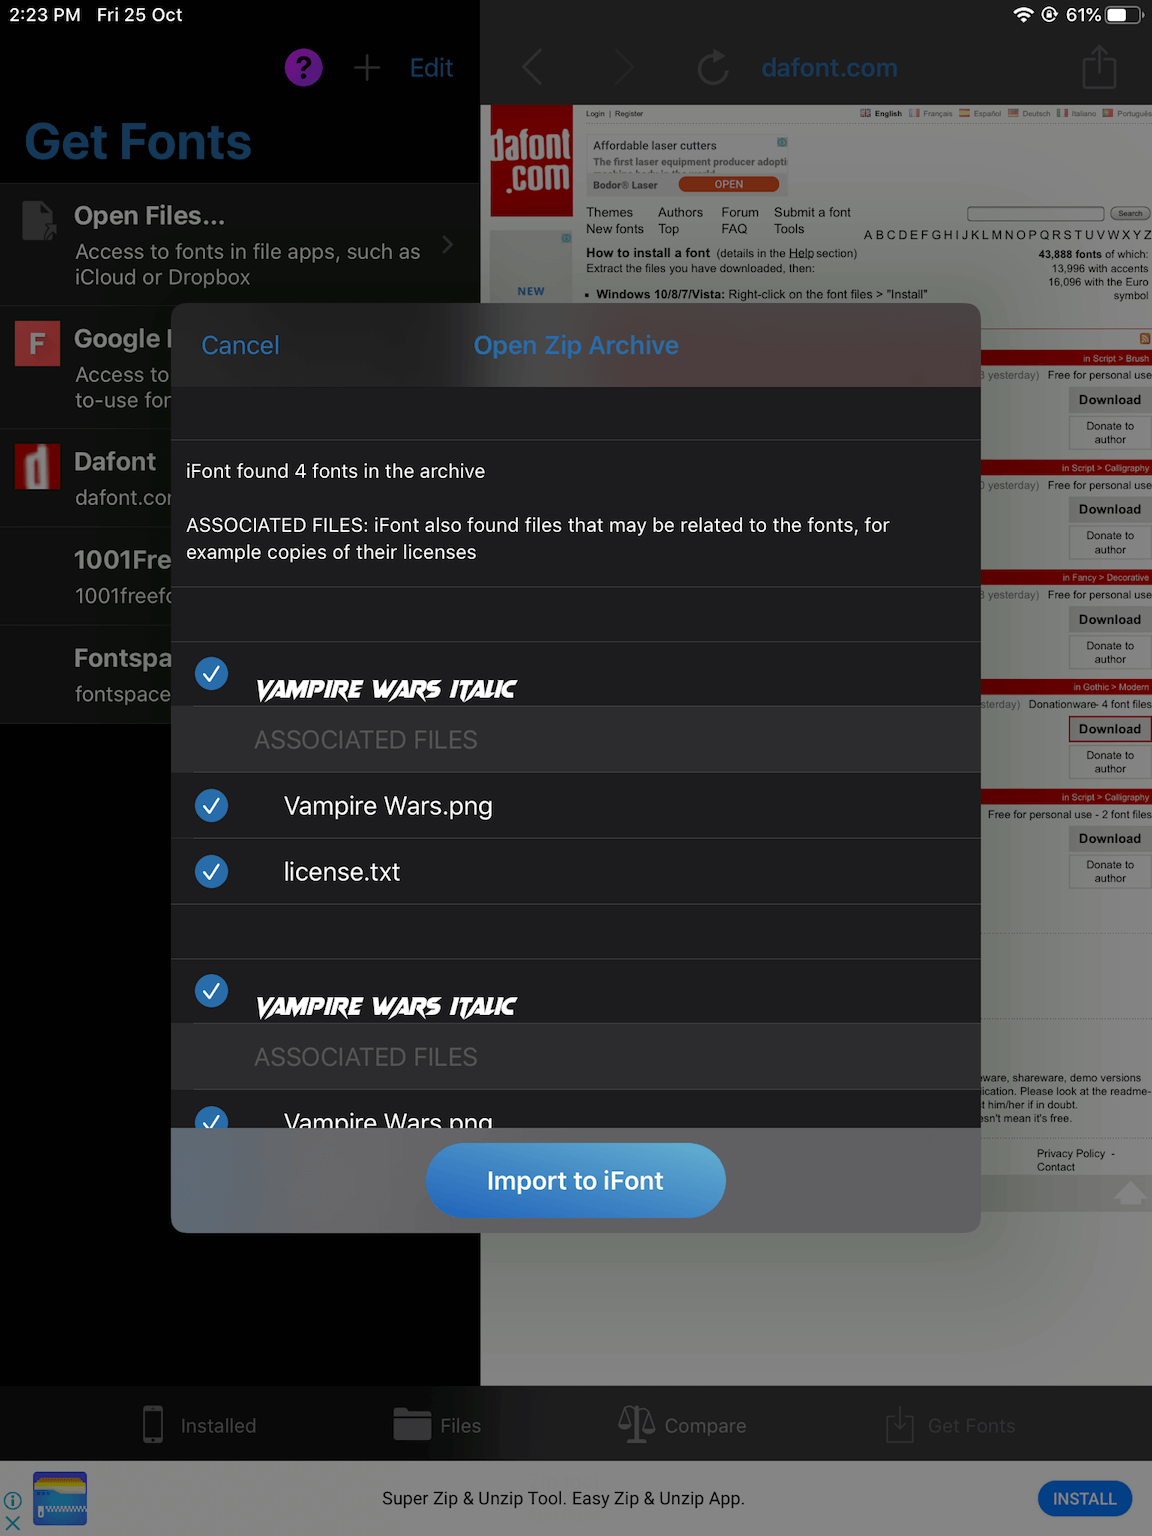
If Google Fonts doesn’t get you the font you fancy, you can search the web instead. Head to a font download website such as iOS Fonts and obtain your favorite fonts. The font is usually available as a .zip, .otf, .otf file extension. You’ll see an option to “Open in iFont” or similar once you downloaded it.
Install the Fonts
Downloaded fonts aren’t ready to be used yet. In order to use them, first, you need to install them.
For iFont, tap “Files” at the bottom of the app view and you’ll see a list of downloaded font files.
Tap one of the fonts to see the preview of the font when used. If you are satisfied with how the font looks, just tap “Install”. If you want to install multiple fonts at once, tap “Select All”.
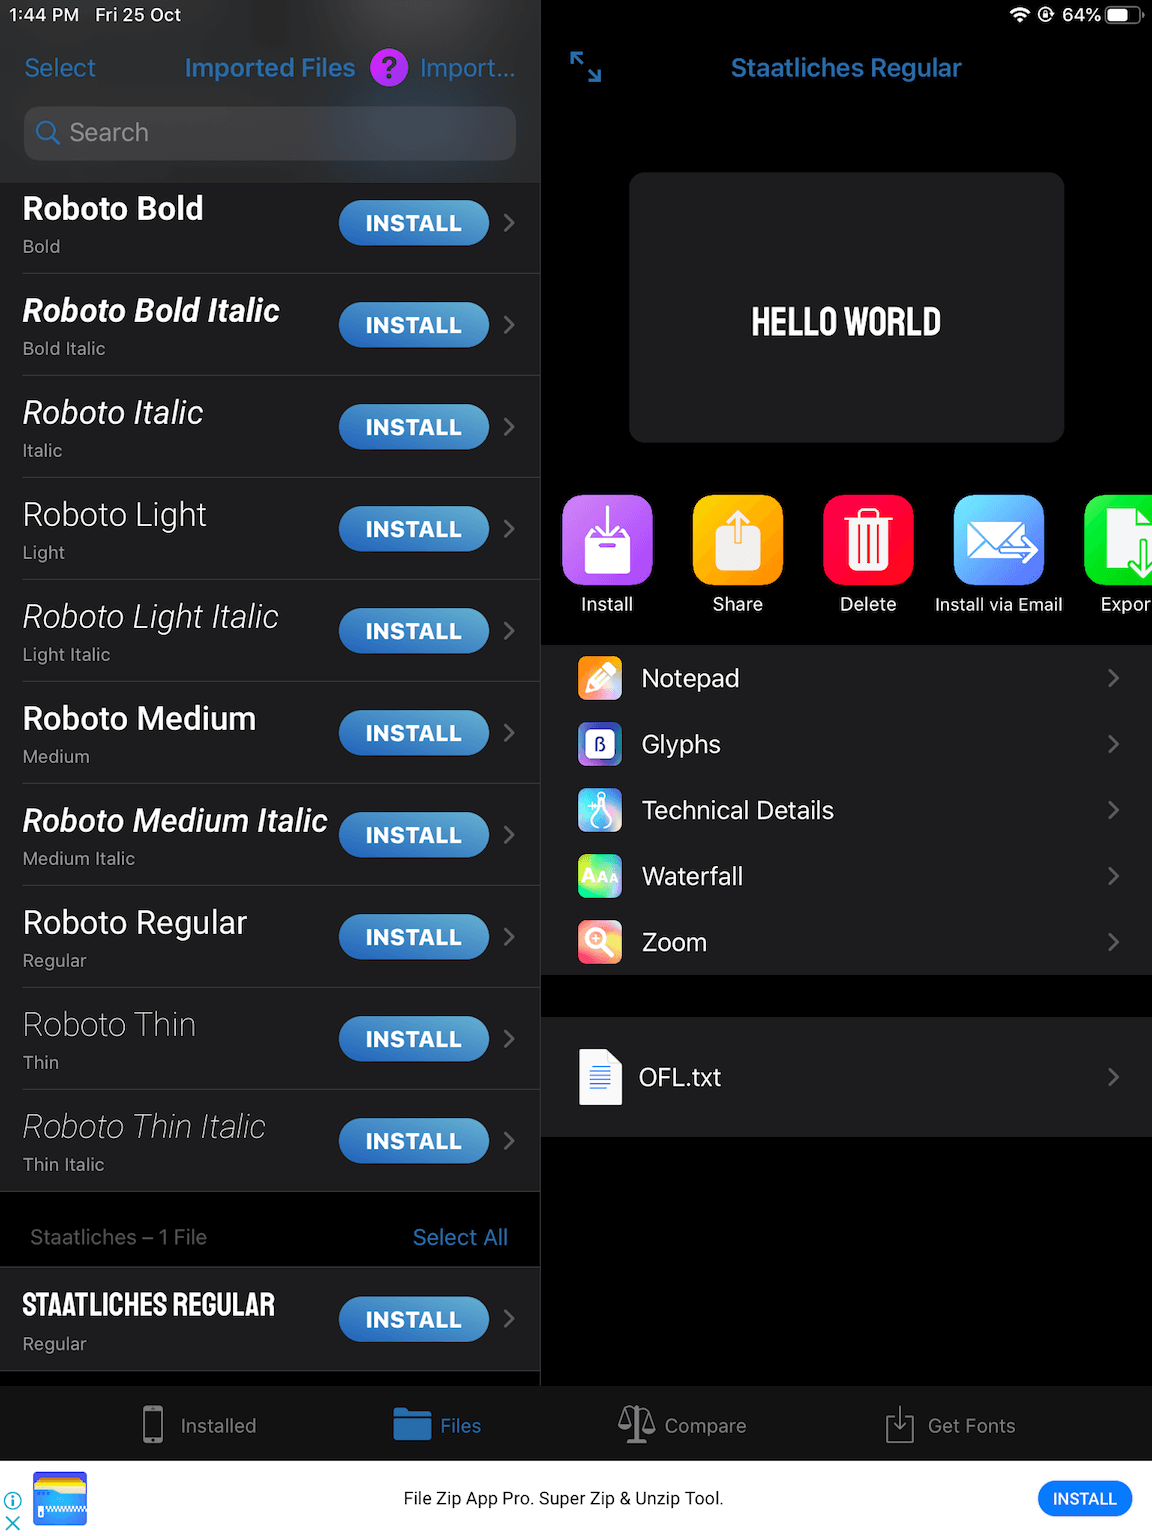
You will now see a dialog box. Simply tap the “Install Font” button and select “Allow” in the alert.
Your font isn’t installed yet. Now head to the Settings app on your Apple device then tap “General” > “Profiles”. Tap the font listed under the downloaded profile.
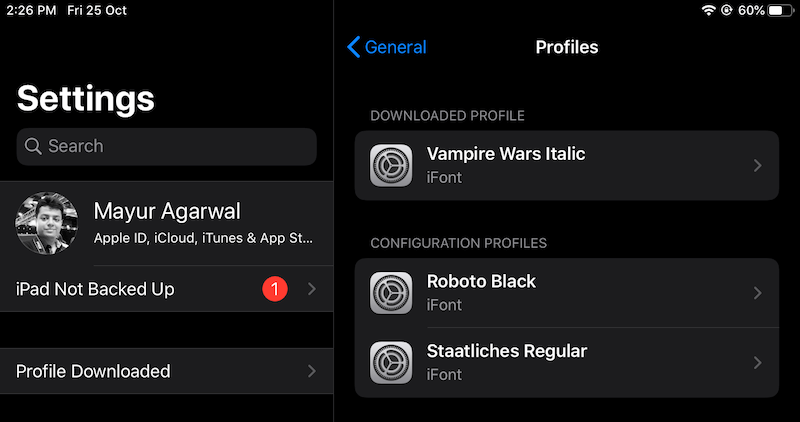
Then tap “Install” and enter your passcode to proceed. There might be a warning that the profile is not signed but that’s only because it was generated by your phone. It’s nothing to worry about.
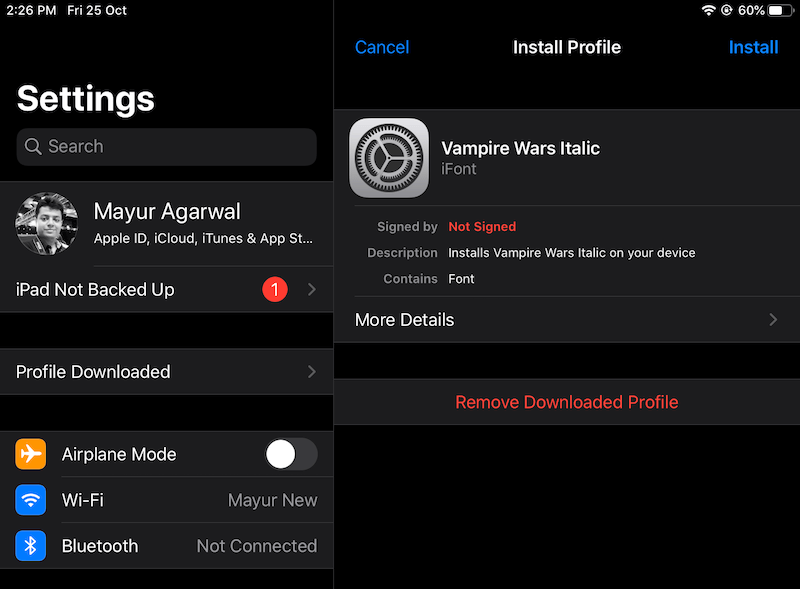
Once you’re ready, tap “Install” one more time and you’re good to go.
Finally, you can use the installed fonts!
After all the above steps are already done, your installed fonts will appear in the fonts menu of numerous apps.
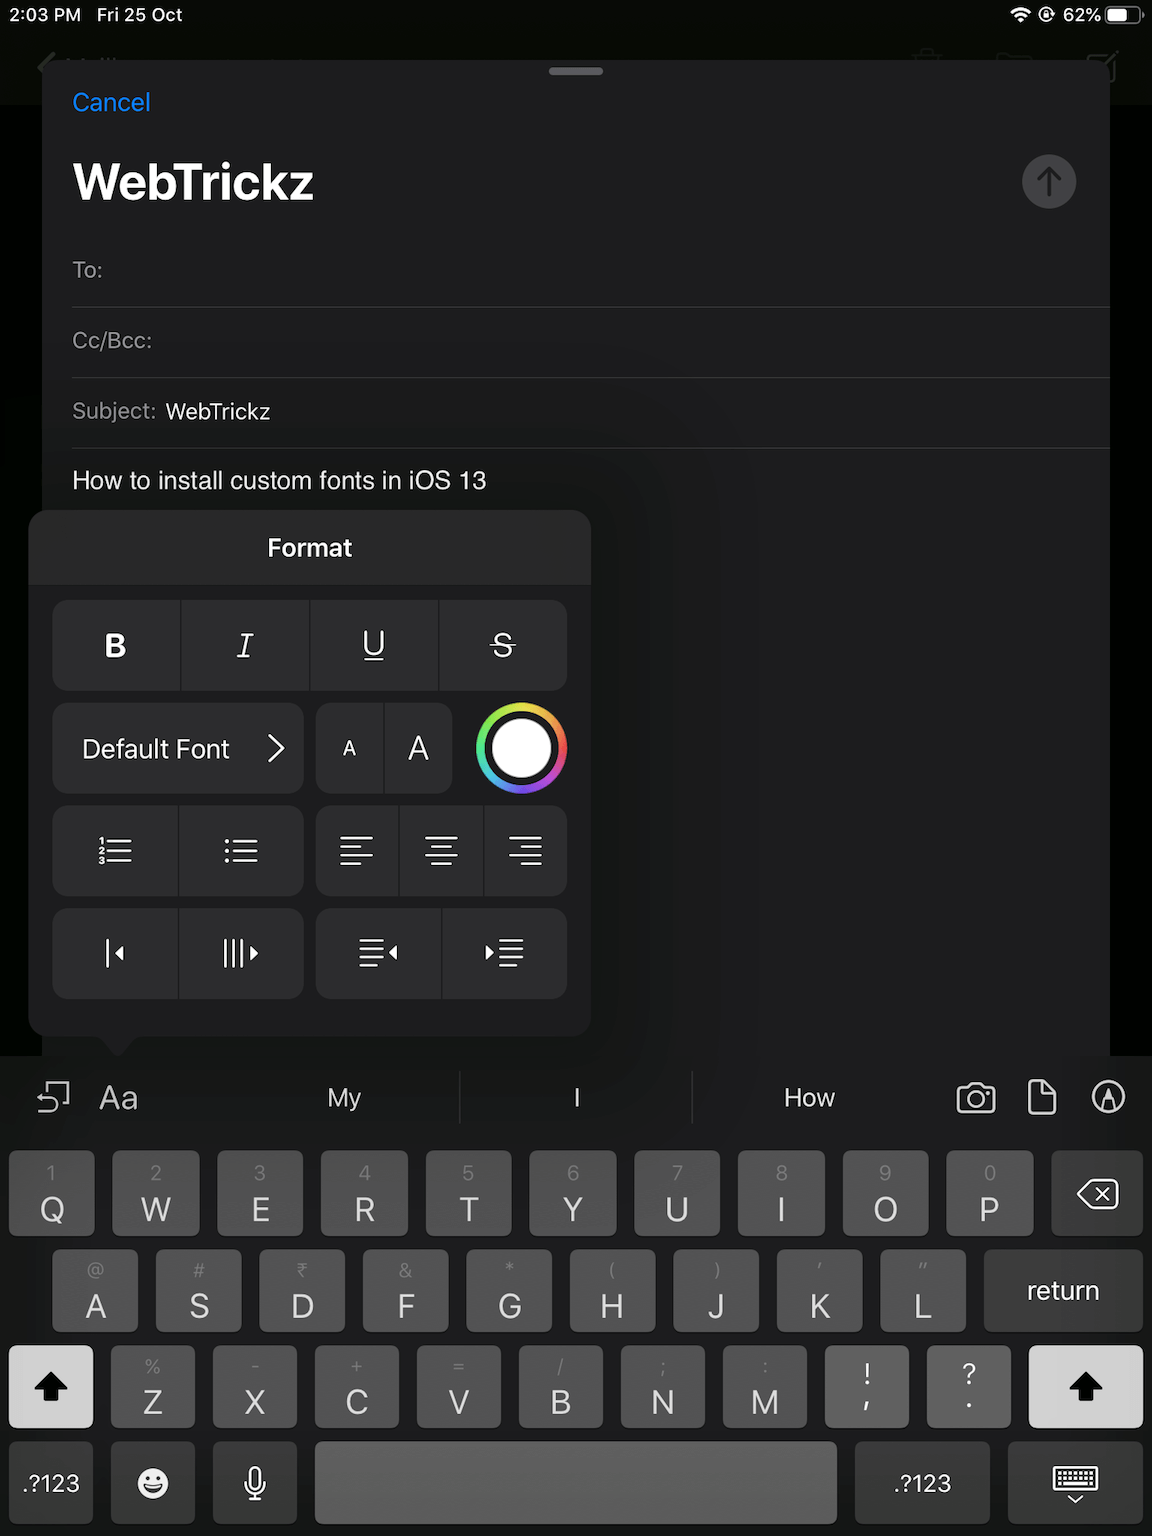
If you want to try them, open any app that lets you write text – for example, Mail. Tap the “Fonts” button at the top of the keyboard and select the font you just installed. Alternatively, there’s a “<” button on the right side of the keyboard, tap it.
Tap on the “Fonts icon (Aa)” then select “Default Font” to see the list of installed fonts along with default fonts.
Not satisfied with the fonts? You can uninstall them
If for some reason you want to uninstall your installed fonts, you can do so by going to the Settings app, tap “General” > “Profile”. You’ll see a list of font configuration profiles.
Tap one of the profile, tap “More Details”, and then tap “Remove Profile” to uninstall the font.
We hope you found this tutorial helpful.


