Bought a new printer and installed it including its drivers on Windows? Then your initial step should be to print a test page, so as to determine if everything has been set up properly. The process to print a test page is quite different in Windows 7, so let’s see how to take a test print page on a Windows 7 computer.
A test page provides visual confirmation that your printer works. It can also contain useful troubleshooting information, such as details about the printer driver.
The Test Page function sends the command directly from the printer driver and thus enables a user to determine if the problem is related to a communication issue or an actual problem with the application that is being used.
Printing a Test Page in Windows 7
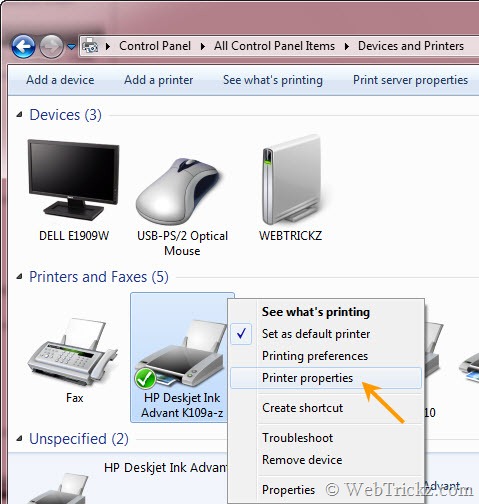
1. Open Start menu > Control Panel > Devices and Printers.
2. Under Printers and Faxes, right-click on your printer and select ‘Printer properties.’

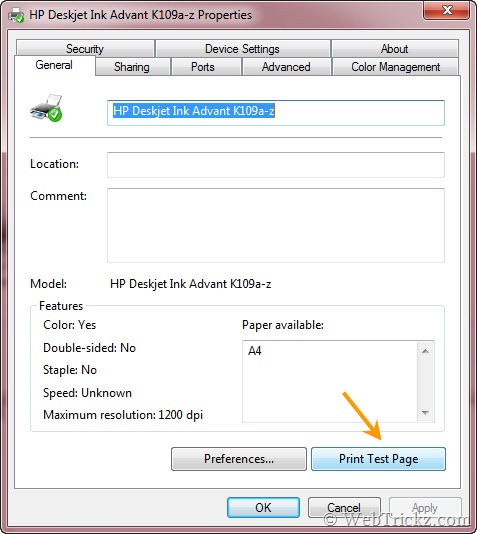
3. The Printer properties window will open, click the “Print Test Page” button listed under the General tab.

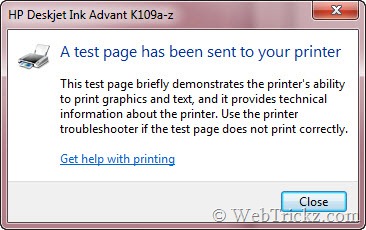
4. A dialog box will appear stating that the test page has been sent to the printer.

Now check the test print page, locate and fix the issues if there’s any problem.


I was looking for this. Thanks for sharing
You can also go to ecotestpage.com and click Print button.
No Print Test Page button in that dialog, on a Win 7 Home Premium 64-bit machine here…