Keeping the correct date, time, and time zone on your computer is essential. An incorrect system clock can cause issues like failed updates, missed notifications, syncing errors, and even problems running certain applications.
While Windows usually updates the time automatically using the internet, there are times when you may need to manually change the time on your computer.
In this guide, we’ll show you how to set your time and time zone manually in Windows 11 and Windows 10, as well as how to change your time format to 12 hours and adjust the date format.
Reasons to Set Time and Time Zone Manually
There are several scenarios where you may need to manually set the time zone and time on your Windows PC:
- Incorrect system clock: Sometimes Windows fails to sync with internet time servers, leading to wrong date or time.
- Traveling between countries: If you move to a different region, your time zone might not update automatically.
- Daylight Saving Time (DST): In some countries, clocks are adjusted for DST, and you may need to update them manually.
- App or system requirements: A correct date and time is necessary to receive Windows updates, antivirus definitions, and to use certain applications or online services.
- Network restrictions: If your PC isn’t connected to the internet, you may have to set the system clock manually.
How to Set Your Time and Time Zone in Windows Manually
Windows allows you to update the system clock manually through the Settings app.
In Windows 11
- Open Settings by pressing
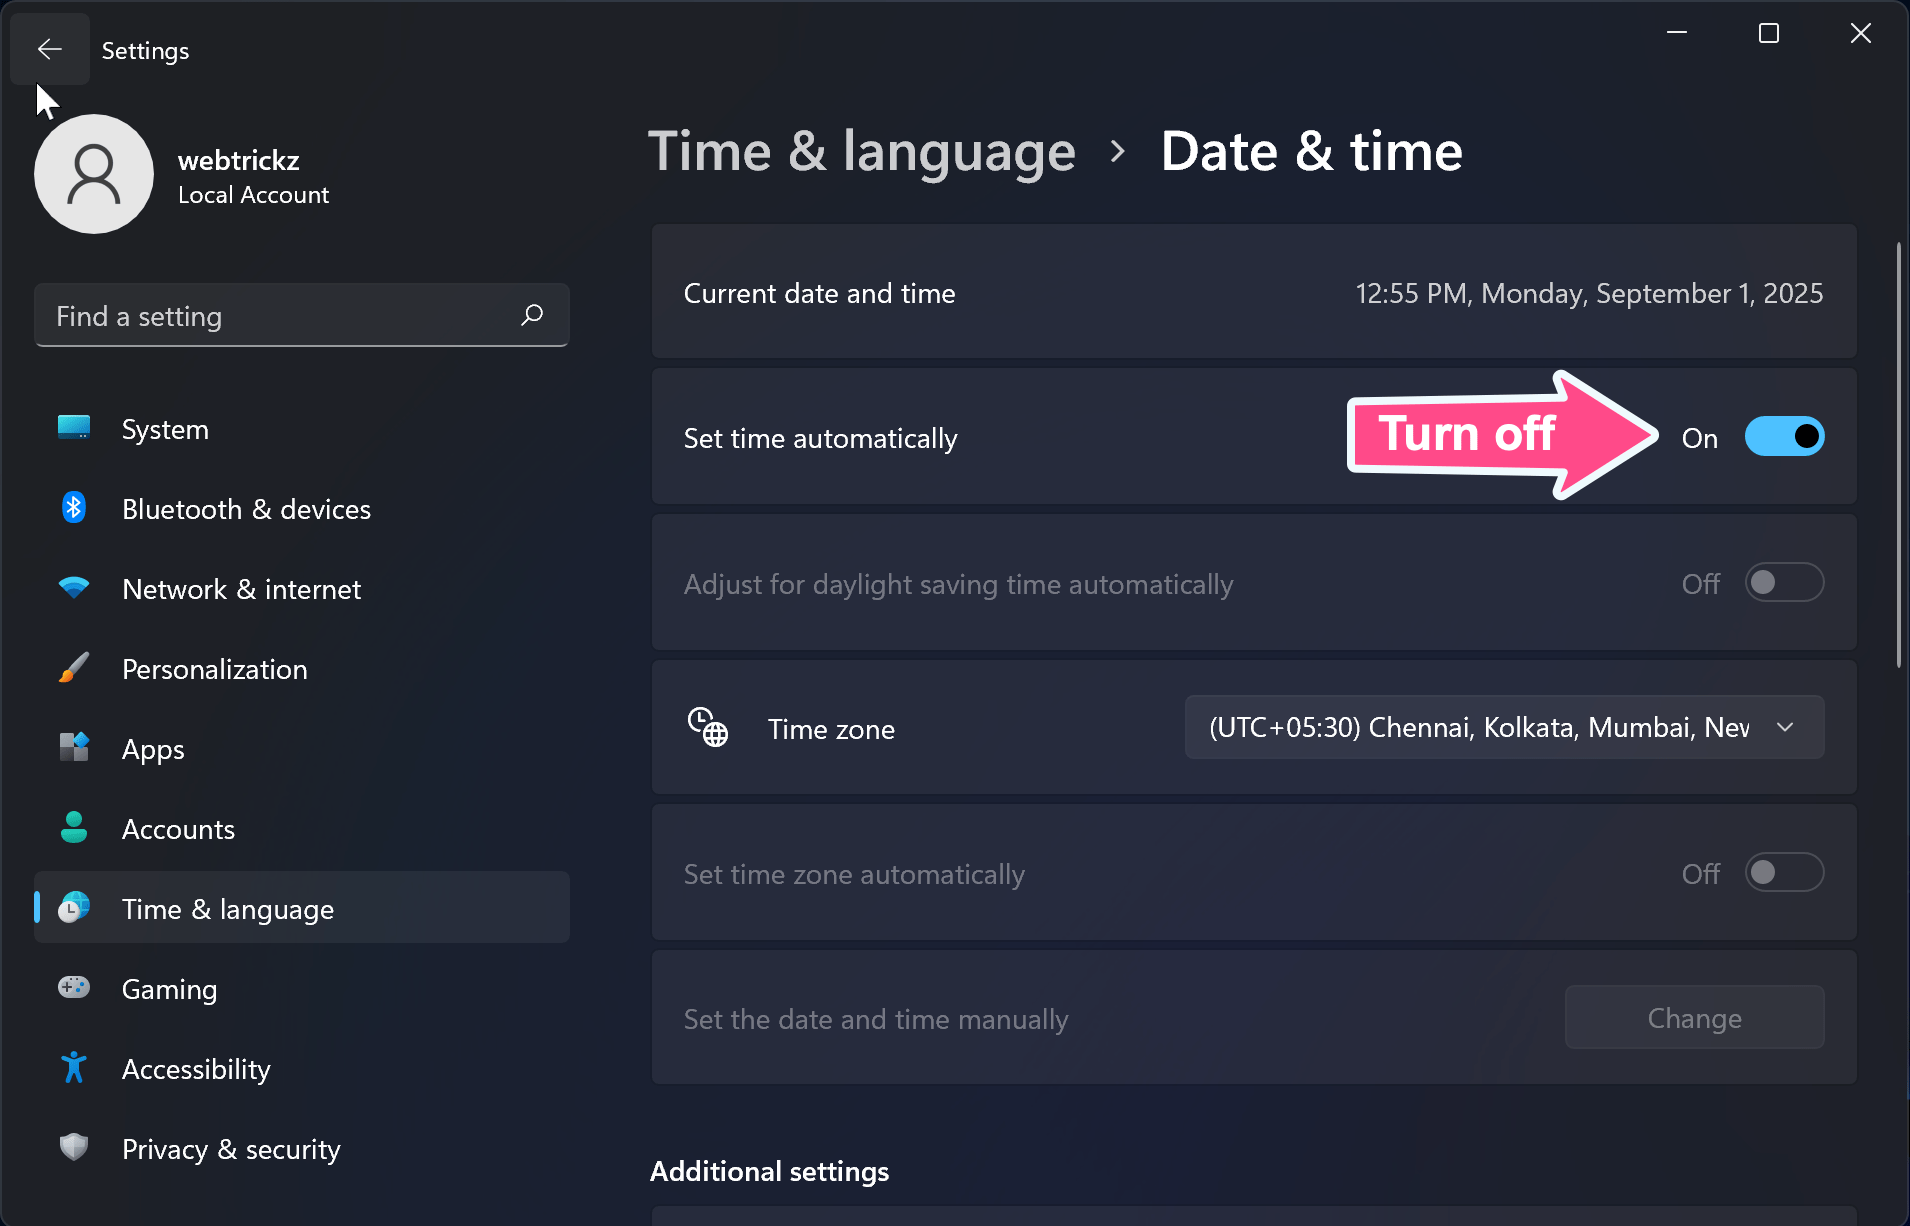
Win + I. - Go to Time & language > Date & time.

- Turn off the toggle button for Set time automatically if it’s enabled.
- Click Change next to Set the date and time manually.
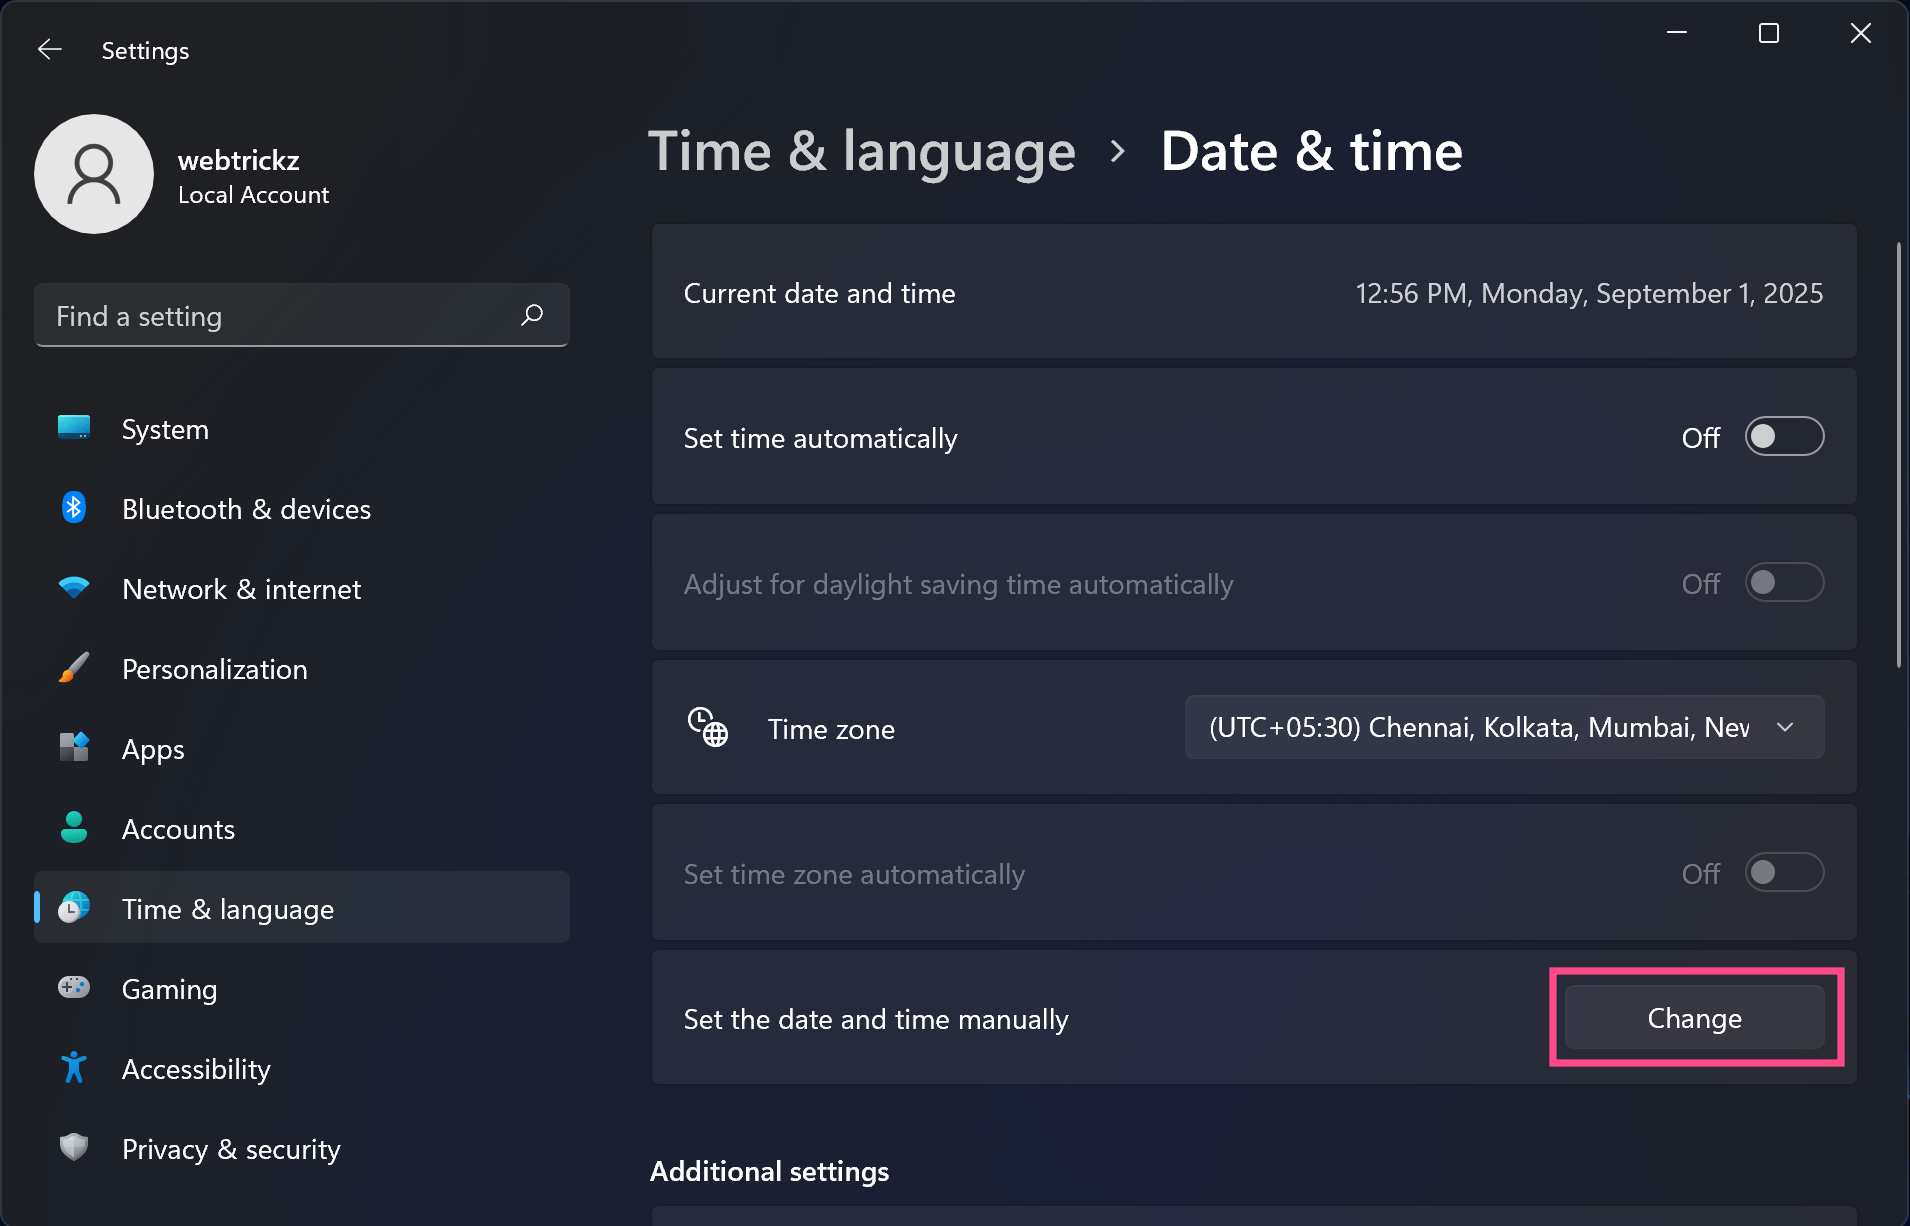
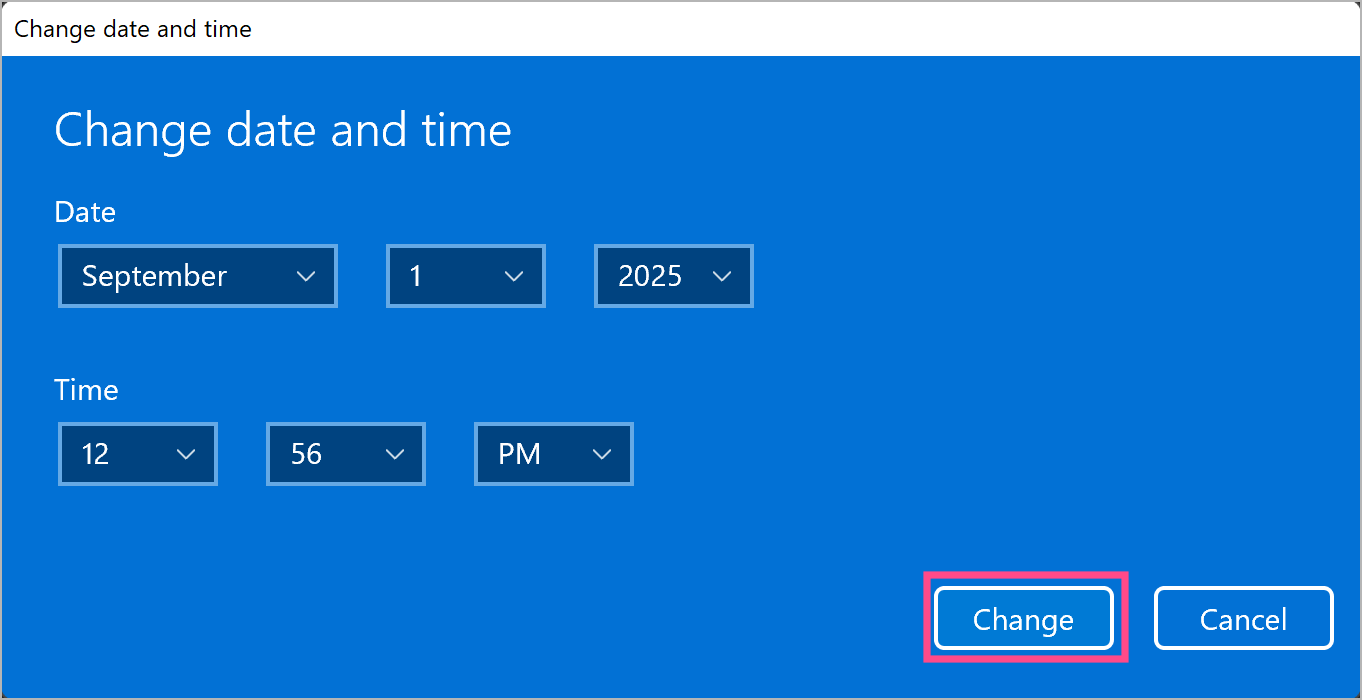
- Enter the correct date and time, then click Change.
- To change the time zone, turn off the Set time zone automatically option. Then open the drop-down under Time zone and select your region.

- If needed, enable or disable Adjust for daylight saving time automatically.
Tip: Right-click the clock in the bottom-right corner of the taskbar and select Adjust date and time to quickly open the clock settings.
In Windows 10
- Press
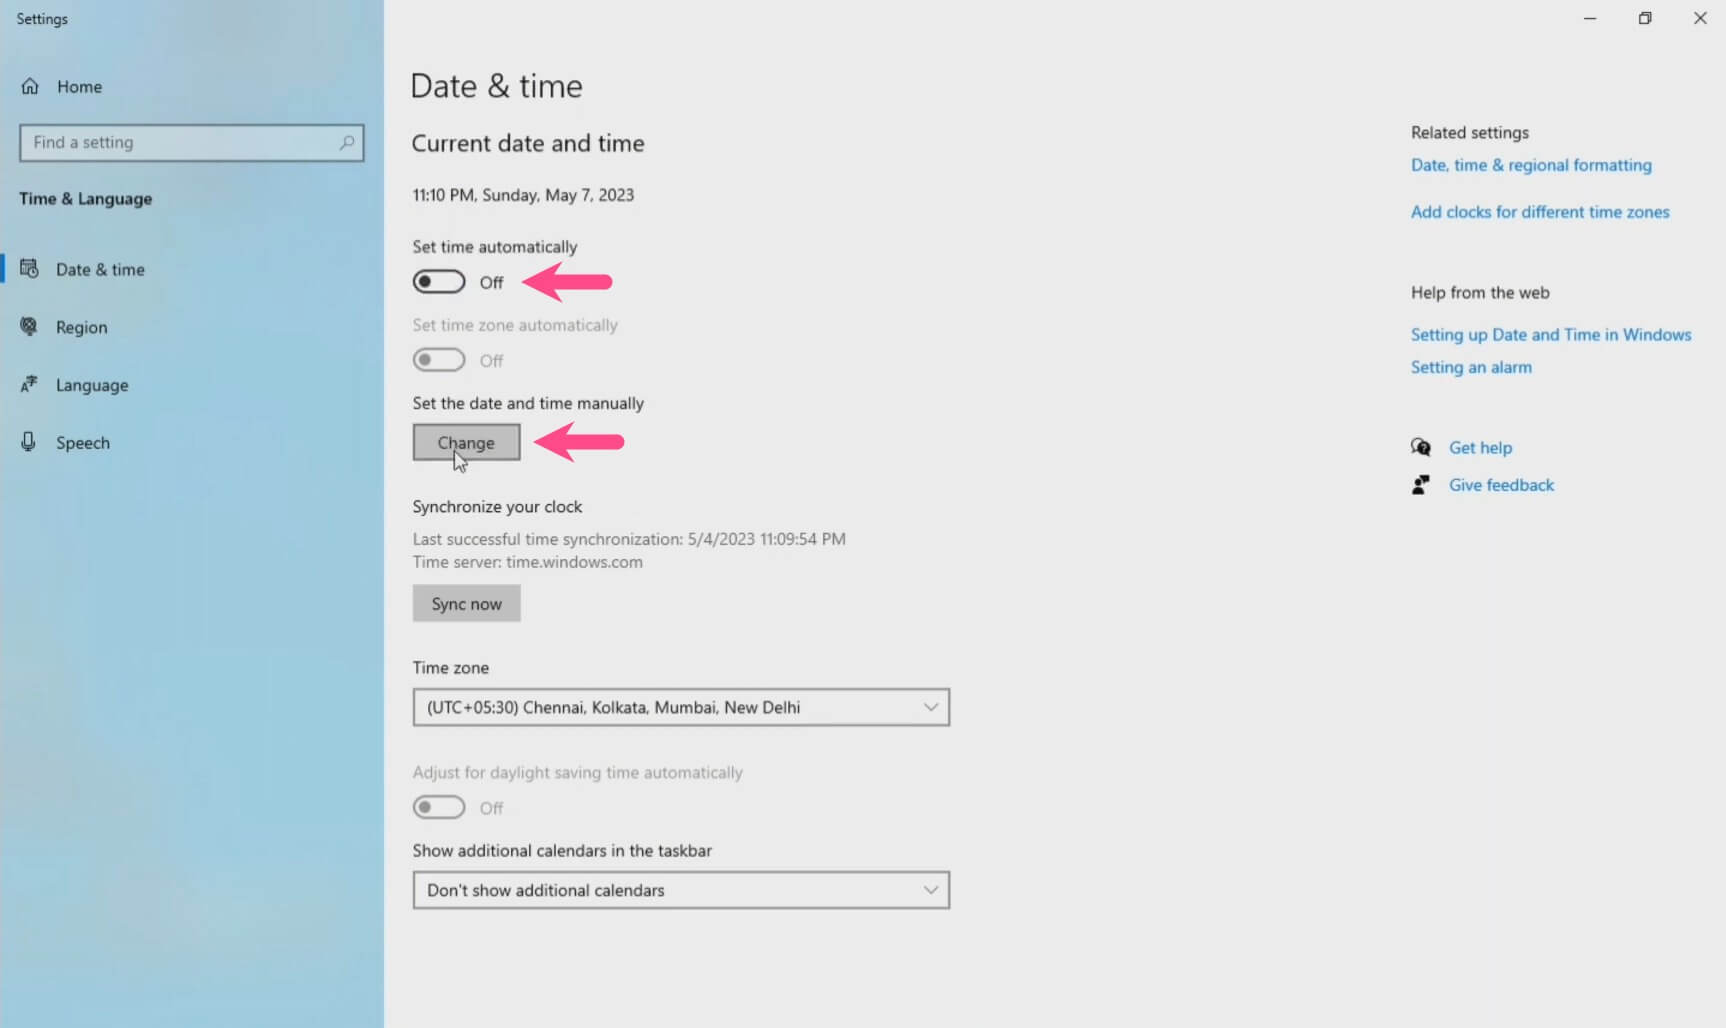
Win + Ito open Settings. - Navigate to Time & Language > Date & time.
- Turn off Set time automatically.
- Under Set the date and time manually, click Change.
- Set the date and time, then select Change.
- To update the time zone, turn off Set time zone automatically. Then choose a time zone from the Time zone drop-down menu.
- Toggle the option Adjust for daylight saving time automatically, if required.
How to Change Time Format to 12 Hours
Windows lets you switch between the 12-hour (AM/PM) format and the 24-hour format.
Here’s how you can set the time in 12-hour format in Windows 11 and 10:
- Open Settings (
Win + I). - Go to Time & language > Language & region.
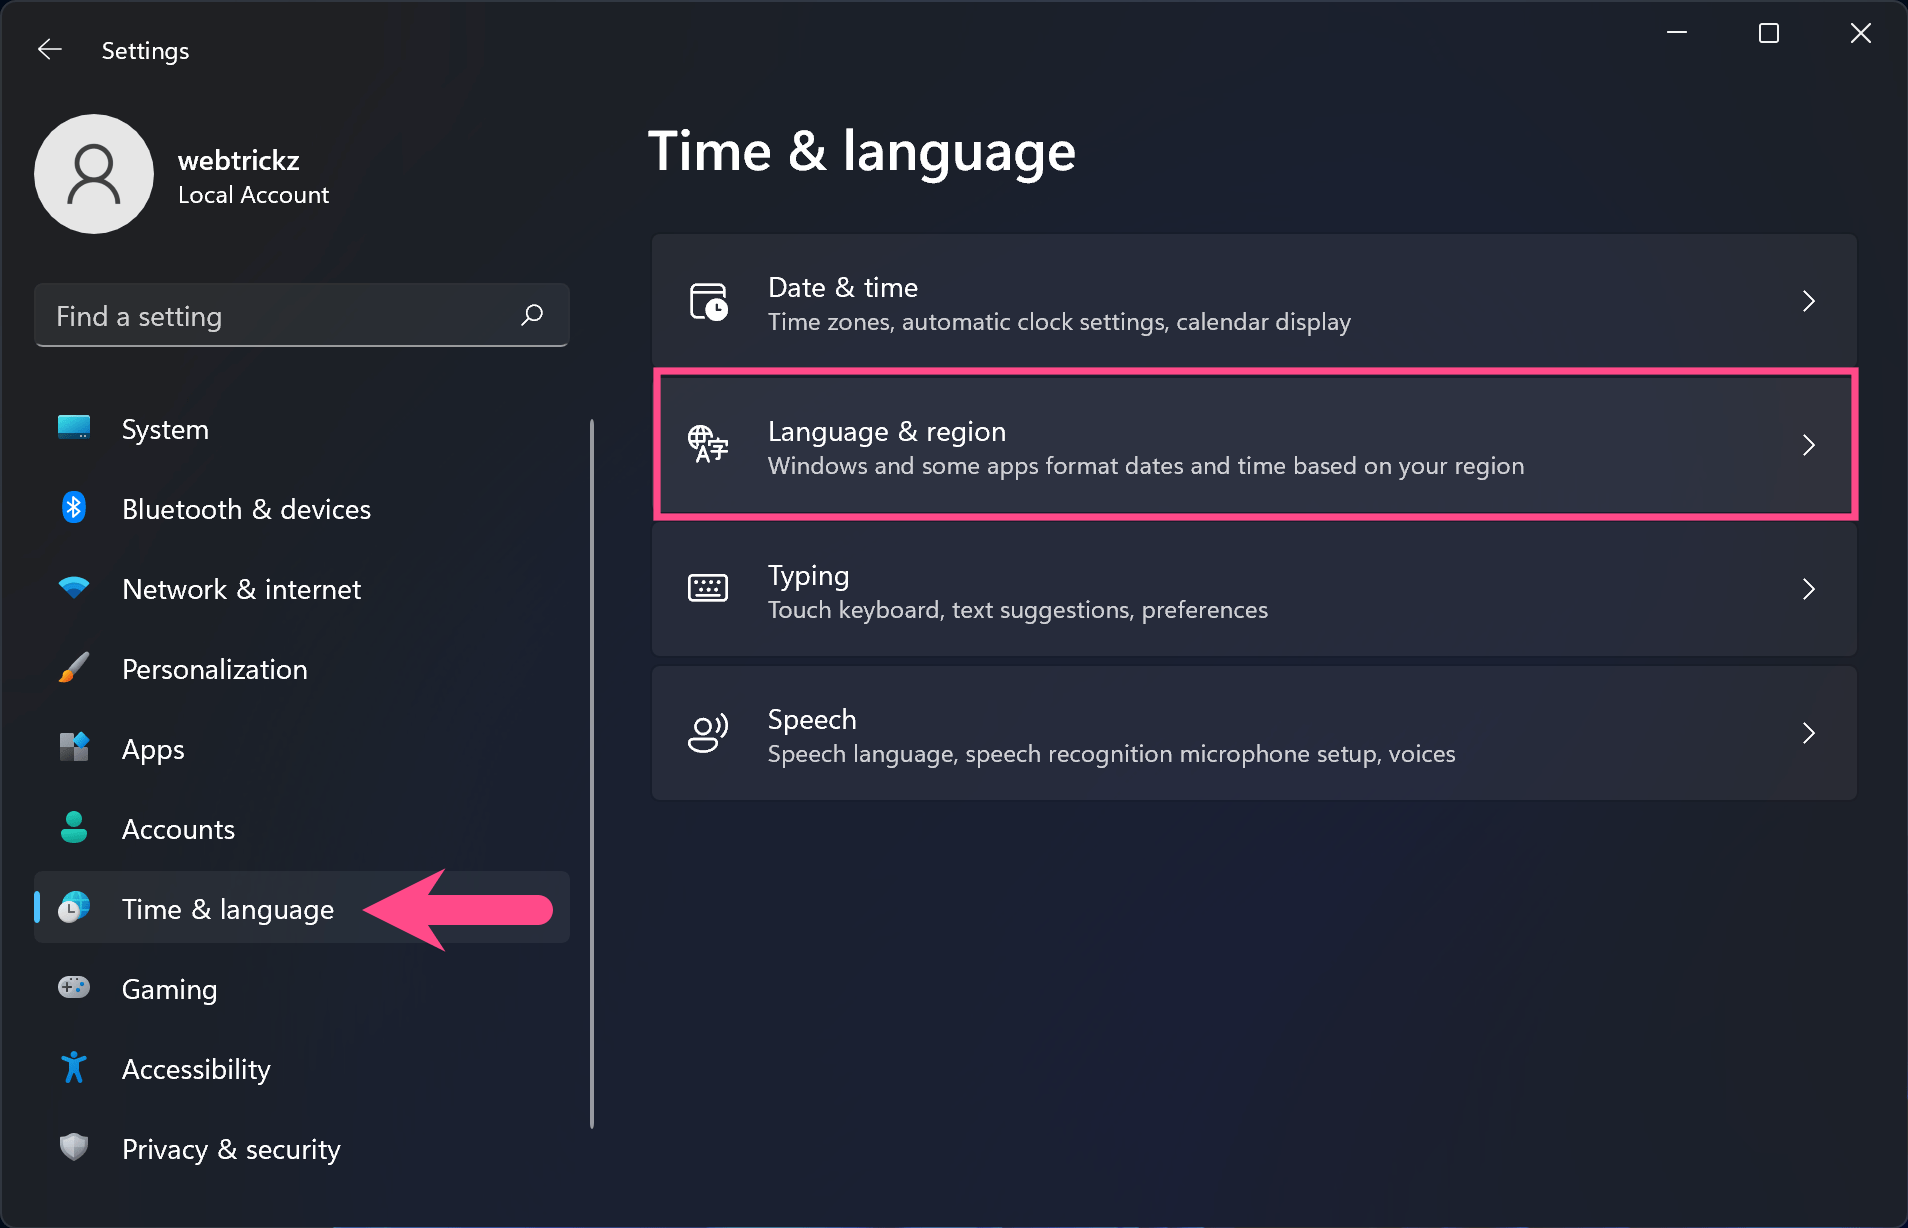
- Scroll down and click Administrative language settings (under Related settings).

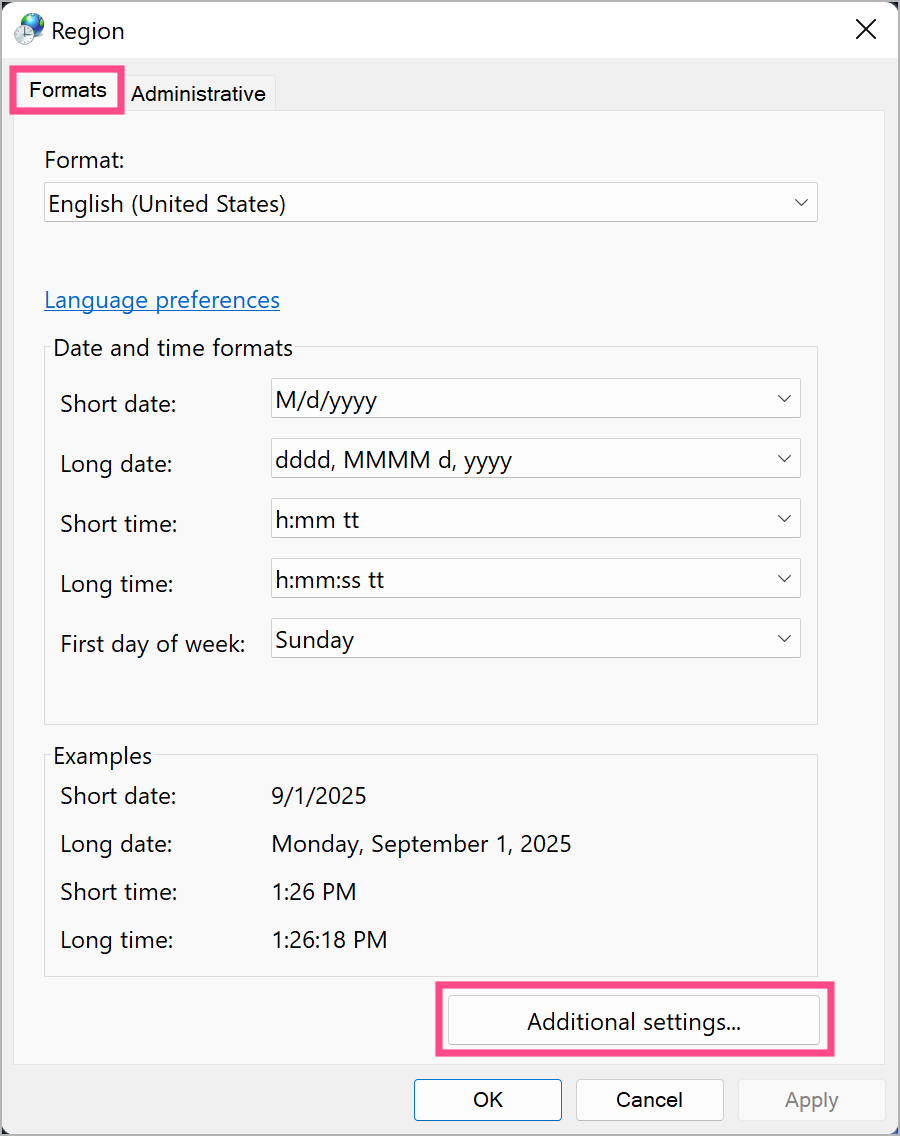
- In the pop-up, click the Formats tab. Then select Additional settings….
- Switch to the Time tab.
- Under Time formats, set Short time and Long time to:
h:mm tt(12-hour format with AM/PM)hh:mm(24-hour format)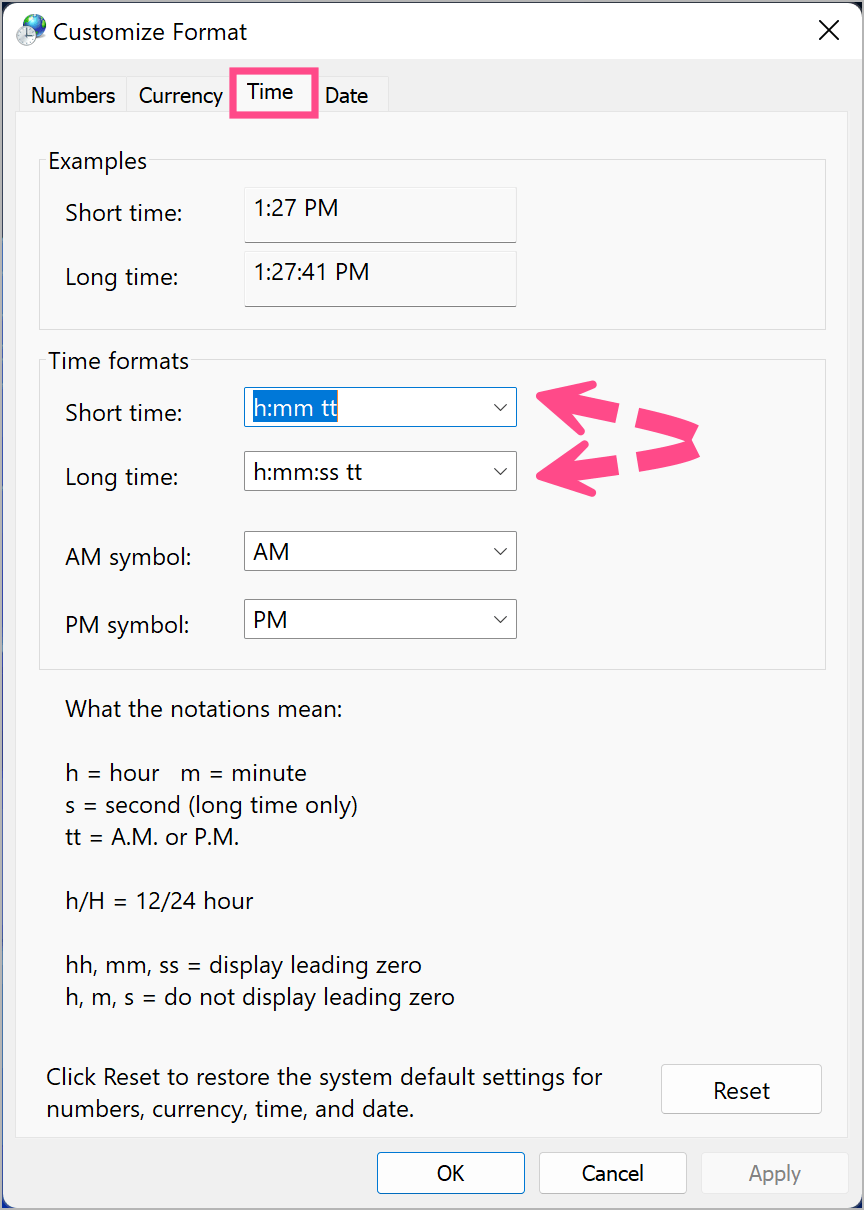
- Click Apply and then OK.
How to Change Date Format in Windows 11/10
Follow these steps to customize how the date appears on your PC (e.g., DD/MM/YYYY vs. MM/DD/YYYY):
- Open Settings (
Win + I). - Navigate to Time & language > Language & region.
- Scroll to Related settings and select Administrative language settings.
- In the dialog, open the Formats tab and go to Additional settings….
- Open the Date tab.
- Adjust Short date and Long date formats as desired (for example,
dd/MM/yyyyorMM/dd/yyyy).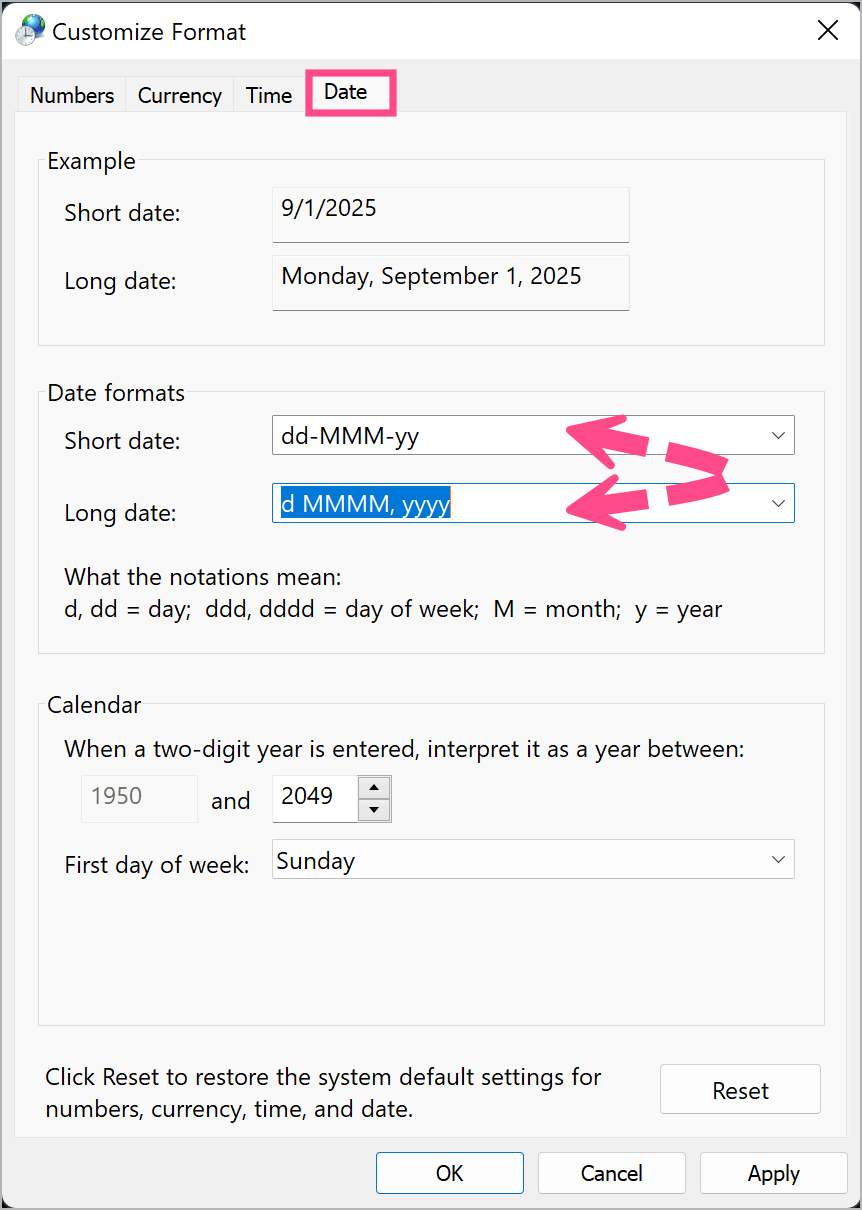
- Select Apply, then OK.
By following the steps above, you can make sure your Windows PC always displays the correct date and time in your preferred format.
ALSO READ:
- How to Disable Game Assist Widget in Windows 11
- How to Turn Off McAfee Antivirus on Windows 11 and 10
- How to Disable the Function Keys on a Windows Laptop


