Have you ever encountered the frustrating “Permission Denied” message when trying to access or modify a file or folder in Windows? This issue often arises when you don’t have the necessary permissions to perform the action.
Windows 7 and Vista implement strict security measures to protect system files and prevent users from modifying them without appropriate permissions. While taking ownership manually is possible, it can be a cumbersome and confusing process. Thankfully, a small and portable utility called “TakeOwnership” makes this task very easy.

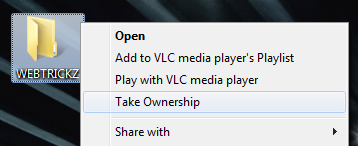
TakeOwnership adds a “Take Ownership” context menu item to all files and folders. This menu option allows users to modify discretionary access control lists (DACLs) or grant permission to modify a file or folder with just a single click. This utility simplifies the process of taking ownership, letting users easily manage their files and folders.

To take ownership in Windows 7 and Vista, follow the steps below:
- Download TakeOwnership, and extract it to a folder.
- Open the Ownership.exe file and the TakeOwnership utility will launch.
- Right-click on the file or folder you want to take ownership of. From the context menu, select “Take Ownership.”
- A confirmation dialog will appear, click ‘Yes’ to confirm.
- That’s it. You can now modify the selected file or folder.
Supported OS: Windows 7, Vista, and Windows 8/10 (32-bit and 64-bit)
via [Addictive Tips]


