Like iPhone X, newer iPhones with Face ID support don’t have a home button. As a result, the procedure to take a screenshot on iPhone 14 is entirely different than that on iPhone 8 or older. Perhaps, if you are new to iPhone then you may get stuck while trying to capture the screen on iPhone 14.
Worry not, you can still take screenshots without using the Power button and Home button. Below are different ways you can use to capture a screenshot on iPhone 14, 14 Plus, 14 Pro, or 14 Pro Max.
How to screenshot on an iPhone 14 and 14 Pro
Method 1 – Using Hardware buttons
- Open the screen or page that you want to capture.
- Press and hold the Side button (on the right side) + Volume Up button at the same time.
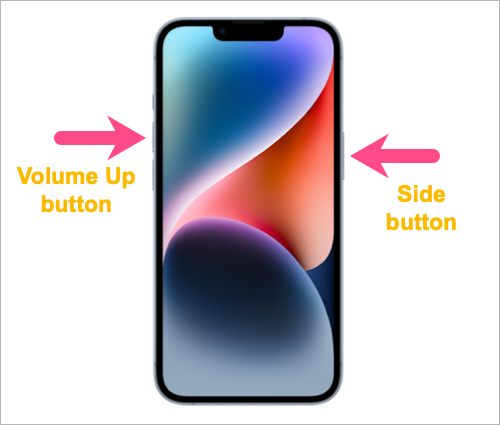
- You will hear a camera shutter sound (if the iPhone isn’t in silent mode) and the screen will flash white. This implies the screenshot is captured.
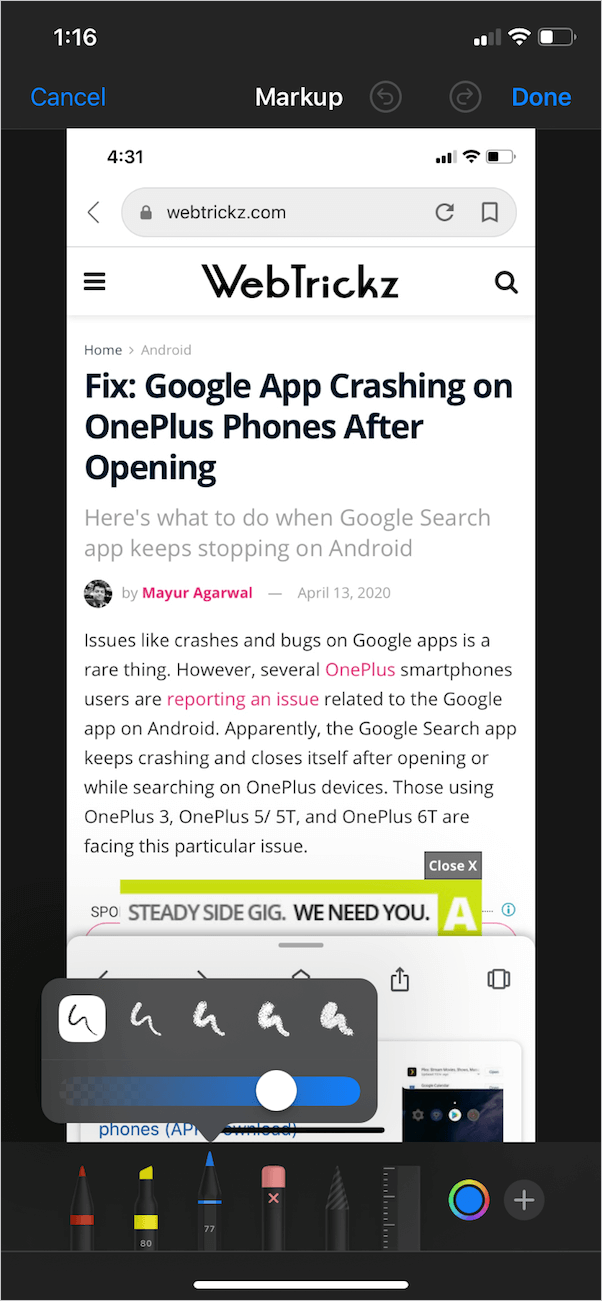
A thumbnail preview of the screenshot will now appear at the lower left of the screen. You can tap it to annotate the screenshot with a host of markup features, delete it, or share it directly.
Method 2 – Using Back Tap
On iOS 14 or later, you can quickly take screenshots by tapping the back of your iPhone. This is possible using ‘Back Tap‘, an accessibility feature that lets you initiate a back tap using either a double-tap or triple-tap gesture. Although it’s a handy feature, you may accidentally take a lot of screenshots if you aren’t careful while handling your iPhone.
To take a screenshot using Double Tap:
- Go to Settings > Accessibility.
- Under Physical and Motor, tap on ‘Touch’.
- Scroll down to the bottom and select “Back Tap”.

- Tap on ‘Double Tap’ and select Screenshot. Optionally, you can use the Triple Tap action as well.
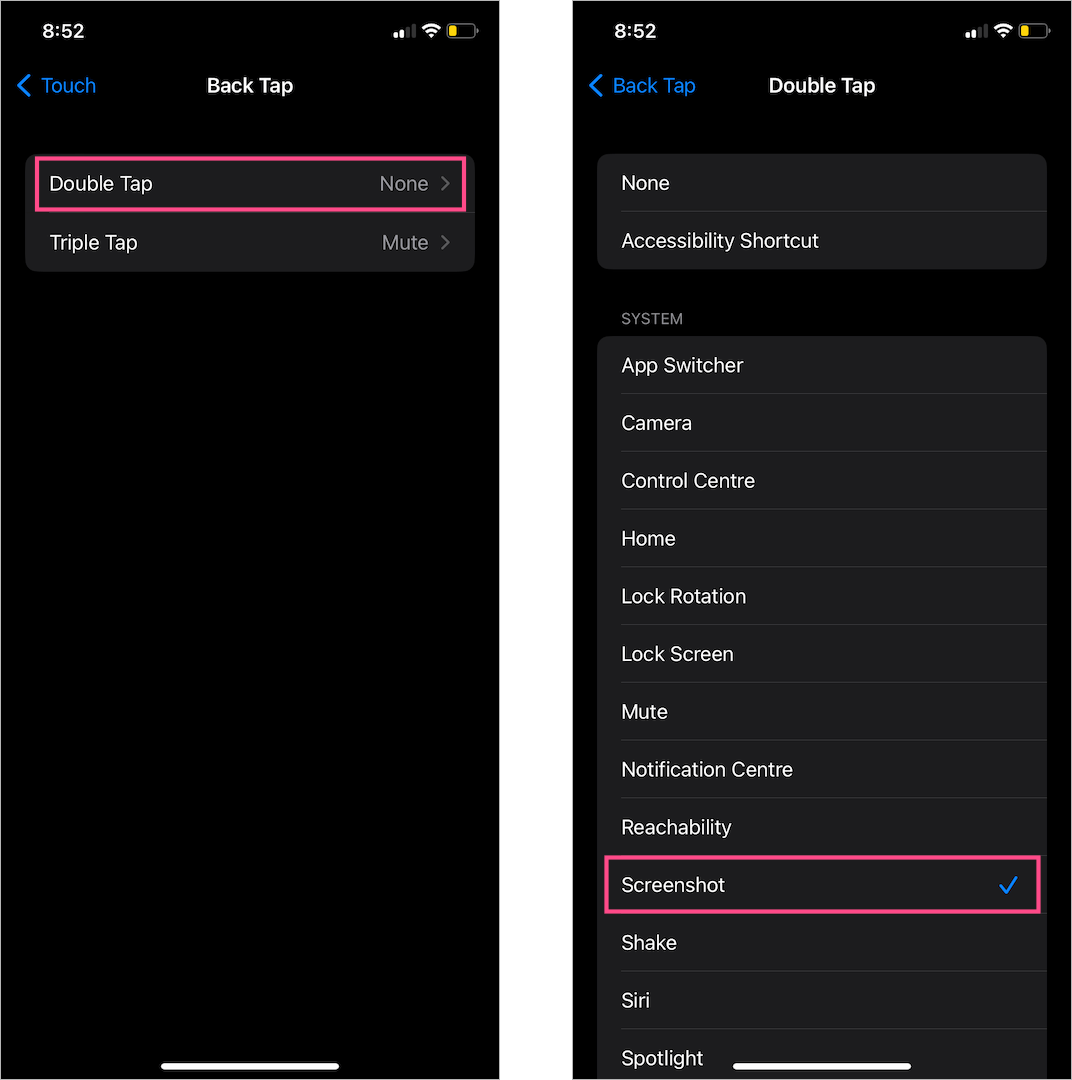
Now double-tap (or triple-tap) firmly on the back of your iPhone to take the screenshot.
Method 3 – Using Assistive Touch
You can also use Assistive Touch to take screenshots without buttons. This is a fairly easy way for people who capture their screen frequently and prefer taking screenshots without using the Side and Volume buttons.
For this, you need to enable AssistiveTouch on your iPhone if it isn’t enabled already. Here’s how you can do it:
- Go to Settings > Accessibility > Touch.
- Tap on ‘AssistiveTouch’ at the top and turn it on.
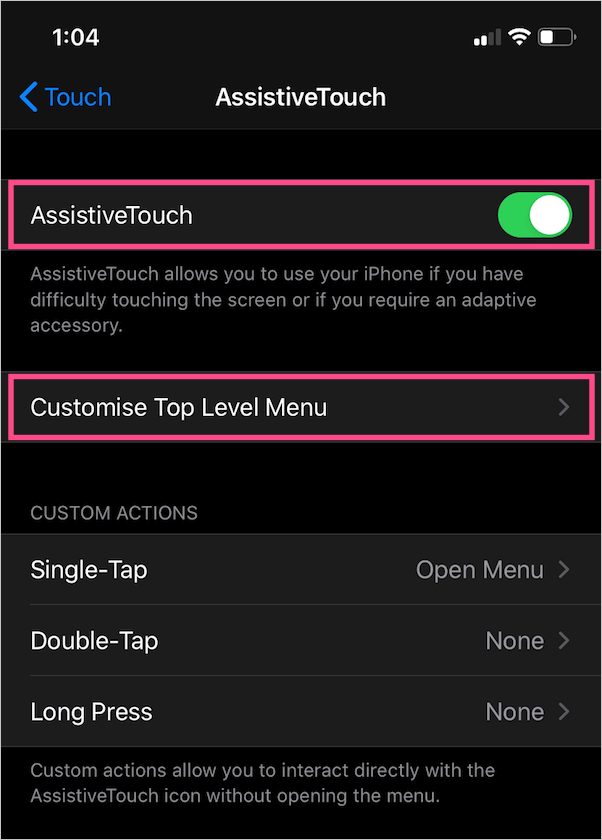
- Once AssistiveTouch is enabled, you will see a translucent button on the screen that you can drag and move.
TIP: You can also ask Siri to “Turn on AssistiveTouch.”
To take a screenshot using Assistive Touch, tap the floating button. Then navigate to Device > More and tap the ‘Screenshot’ option from the menu.
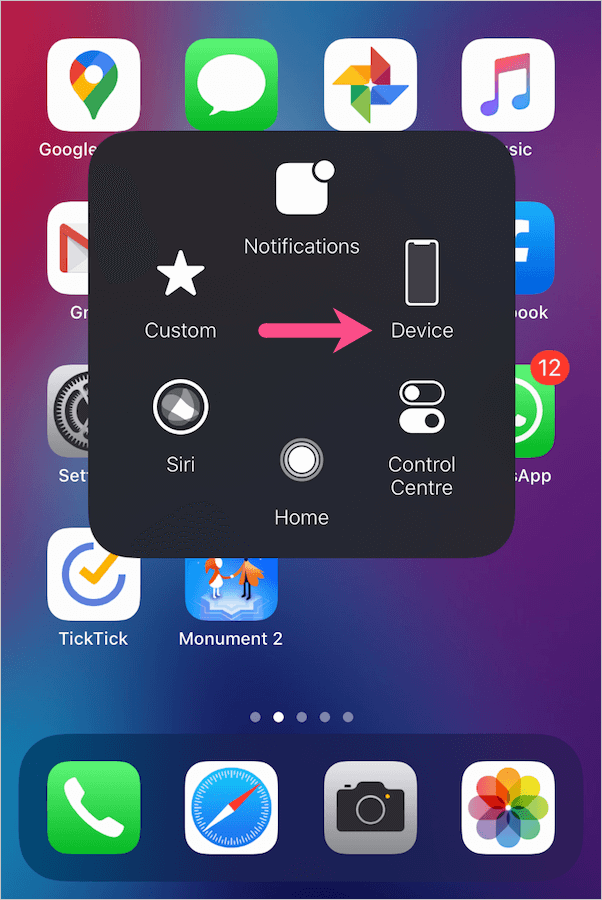
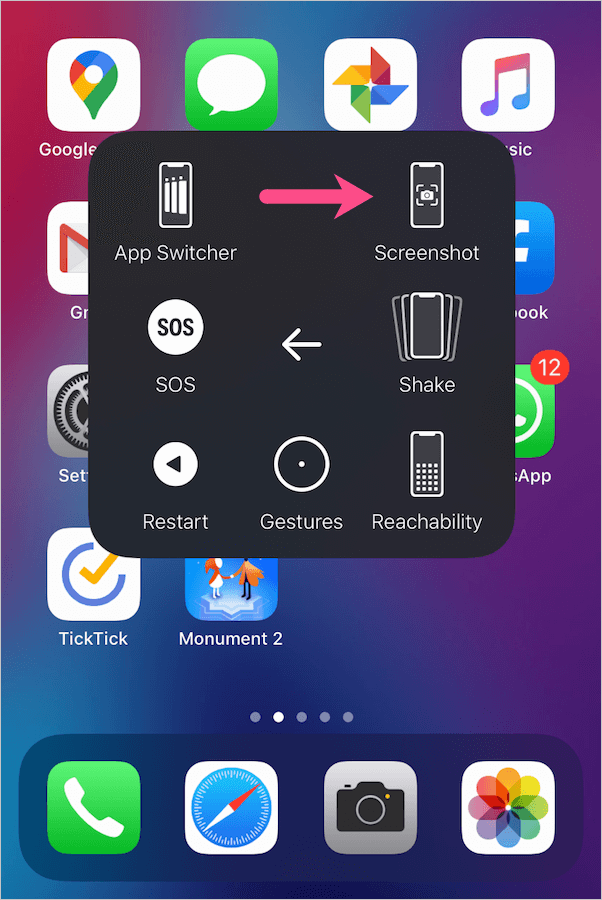
For quicker access, customise the top-level menu (from AssistiveTouch settings) and add the screenshot icon to the main menu of AssistiveTouch.
Where are screenshots saved on iPhone?
All the screenshots you take are automatically saved to the Photos app in PNG format. To view them, go to the Photos app > Albums. Then scroll down and open the ‘Screenshots‘ album under Media Types. Alternatively, you can access them under ‘All Photos’ in the Library tab.

TIP: Copy and Delete screenshots in iOS 16
iOS 16 adds a new “Copy and Delete” feature to capture a screenshot and copy it directly to your clipboard. You can then paste the screenshot image wherever you want such as in the Notes, Twitter, email, or iMessage. This prevents you from flooding your Photos library with unnecessary screenshots.
To copy and delete a screenshot on iPhone 14, simply take a screenshot and tap the preview in the lower-left corner. Then tap on “Done”. Now select the “Copy and Delete” option from the menu that pops up. The screenshot will be saved to the clipboard and the file will be deleted automatically.
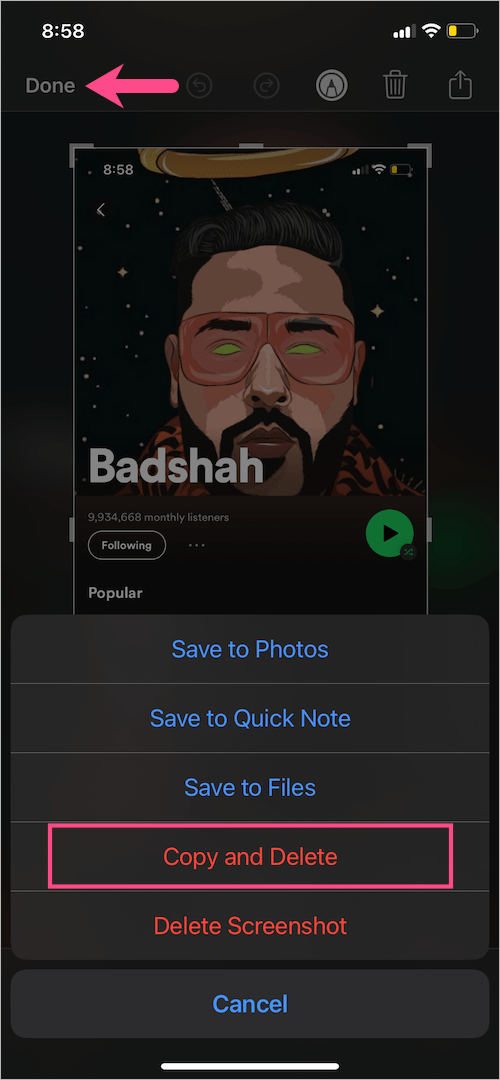
TIP: You can view or recover the deleted screenshot from the ‘Recently Deleted’ folder (within 30 days) in case you need it.
RELATED TIPS:


