Screen recording on iPhone lets you easily capture gameplay, tutorials, or video calls, with support for both internal audio and microphone input. With iOS 26, recordings now look sharper and higher quality, thanks to full-resolution screen recording for iPhone and iPad.
How Do I Record a Screen on My iPhone?
Want to capture what’s happening on your iPhone? The Screen Recording feature is built into iOS, but you won’t find it in Settings or on the home screen. It’s only available through Control Center.
In iOS 18 and iOS 26, the screen record button isn’t included in Control Center by default, and there’s no option in Settings to add it manually. Since iOS 18 introduced a redesigned Control Center, you’ll need to customize it first to enable Screen Recording.
How to Enable Screen Recording on iPhone 17, 17 Pro, or iPhone Air
If the screen recording control is missing, you’ll need to add it back to Control Center. Here’s how to do it on iPhone 17, 17 Pro, 17 Pro Max, iPhone Air, or any device running iOS 18 or later:
- Open Control Center by swiping down from the top-right corner of the screen.
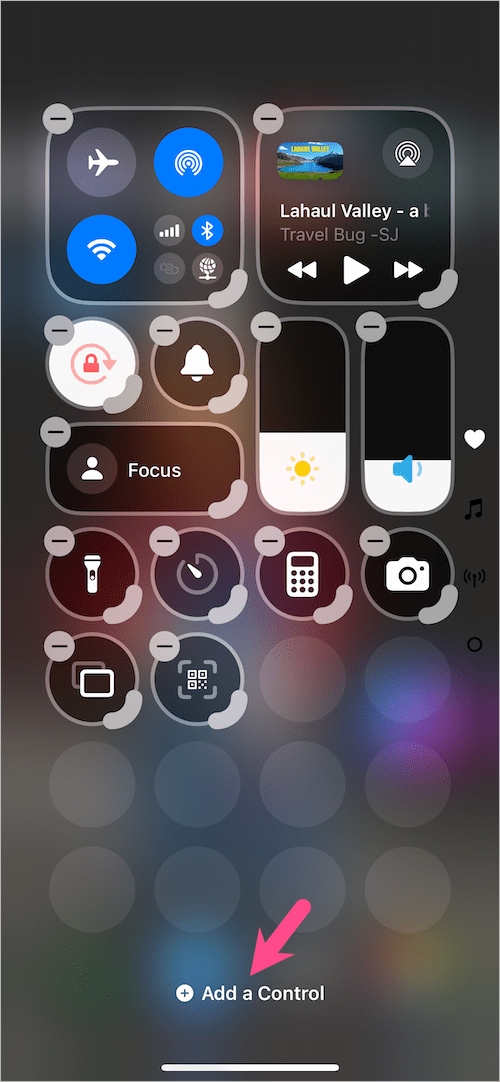
- Tap and hold (long-press) an empty area in Control Center.
- Tap Add a control at the bottom.
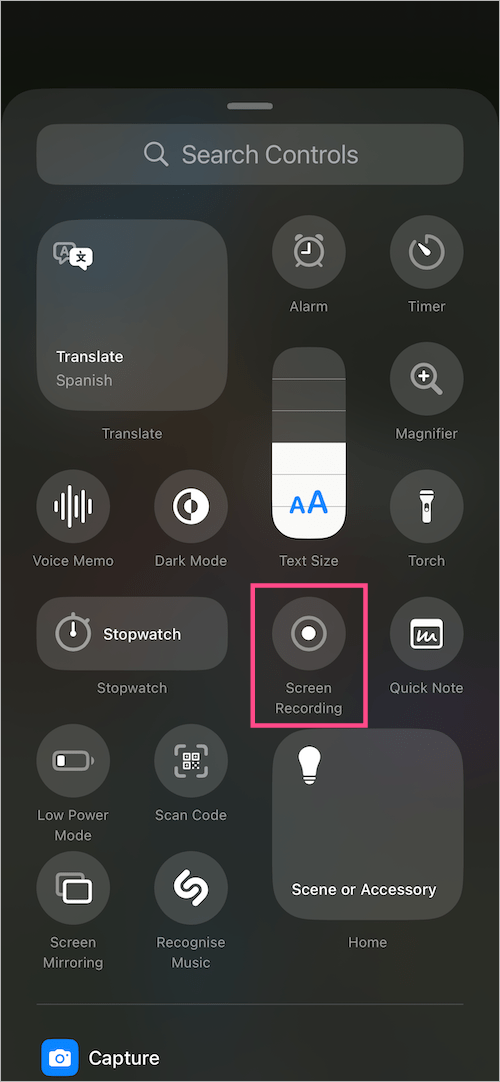
- Select the Screen Recording control to add it to Control Center.
- Optional: Hold and drag the control to rearrange its position. (Tip: Expand the control icon to show its label).
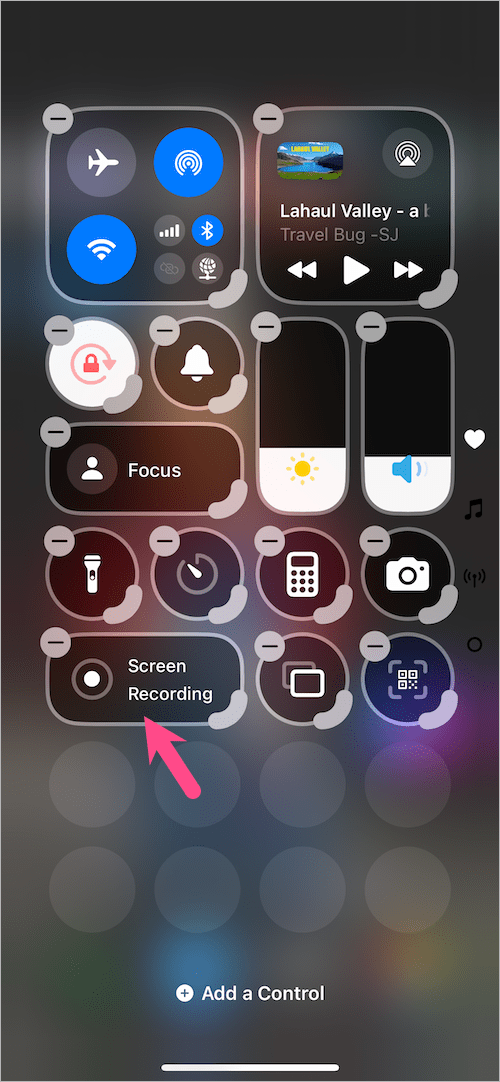
- Tap anywhere on the screen to return to Control Center.
How to Screen Record on iPhone 17, 17 Pro, or iPhone Air
Once you’ve added the control, it’s simple to screen record on your iPhone 17, 17 Pro, or iPhone Air. Here’s how:
- Open Control Center.
- To start recording, tap the Screen Recording button (a white dot within a circle). After a 3-second countdown, your iPhone will begin recording the screen.
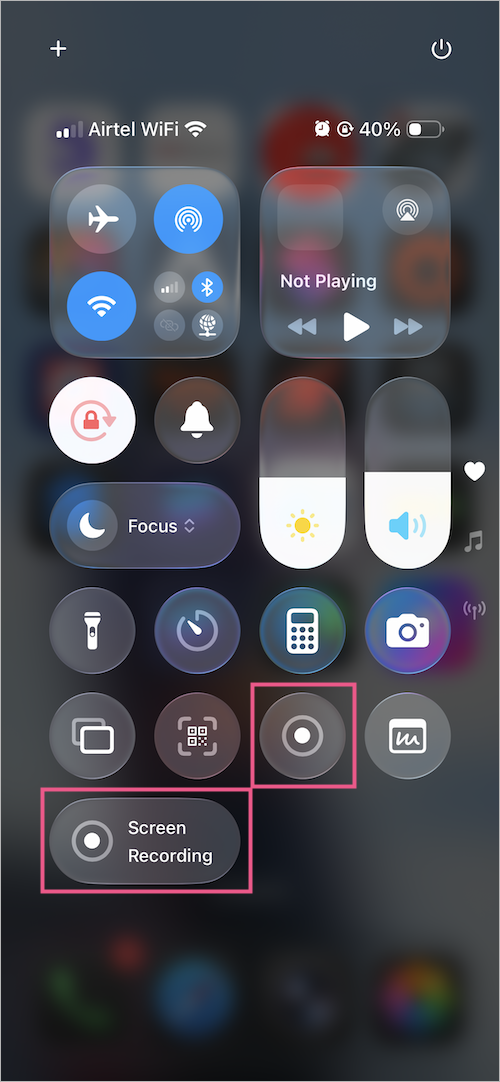
- To stop, open Control Center again and tap the Record button.

Tip: You can also tap the red dot in the Dynamic Island (at the top of your screen) and select Stop to stop recording.
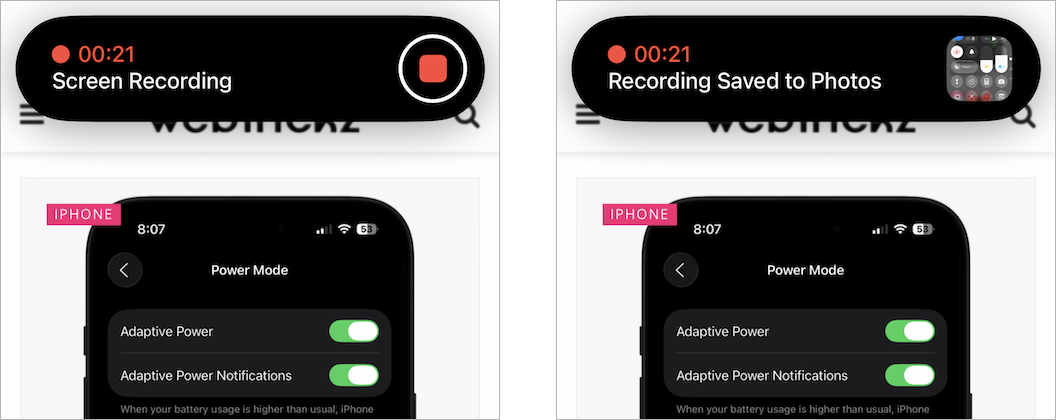
Your recording will be automatically saved to the Photos app.
How to Record Screen with Microphone Audio
Want to record your voice or audio while capturing the screen? For this:
- Open the Control Center.
- Long-press (or press and hold) the Screen Recording control.
- Tap the Microphone icon to turn it on.

- Tap Start Recording.
Now your video will include both internal audio and your microphone input.
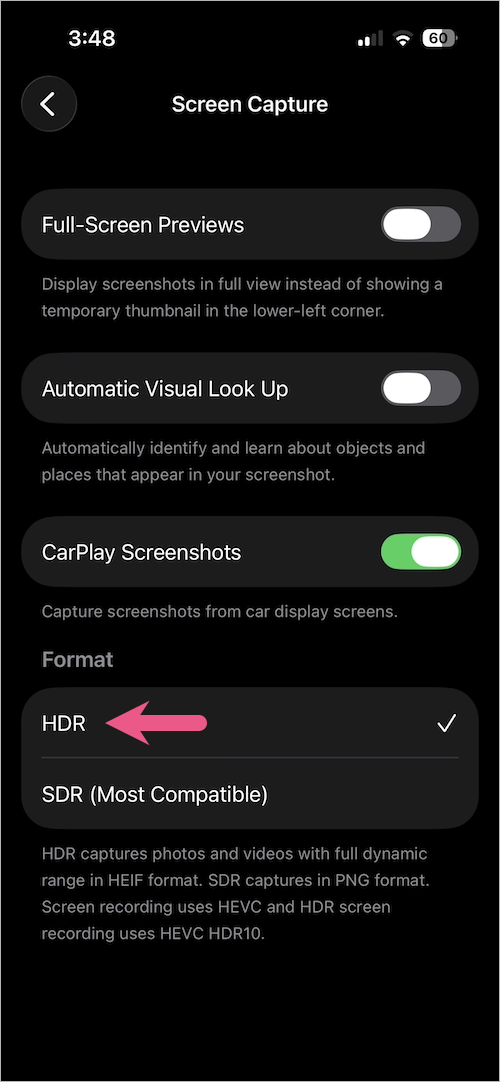
Tip: How to Enable HDR for Screen Recording
If you want more vivid colors and better contrast in your recordings, you can enable HDR screen recording on iOS 26.
To do so, go to Settings > General > Screen Capture and select the HDR format. Screen recordings will now capture in HDR (uses HEVC HDR10) for supported apps and playback.
Where Are Screen Recordings Saved on iPhone?
All your screen recordings are automatically saved to the Photos app in HEVC format.
To find them, open the Photos app and go to Collections. Scroll down to Media Types and view the Screen Recordings album. You can also quickly access them from the Library.
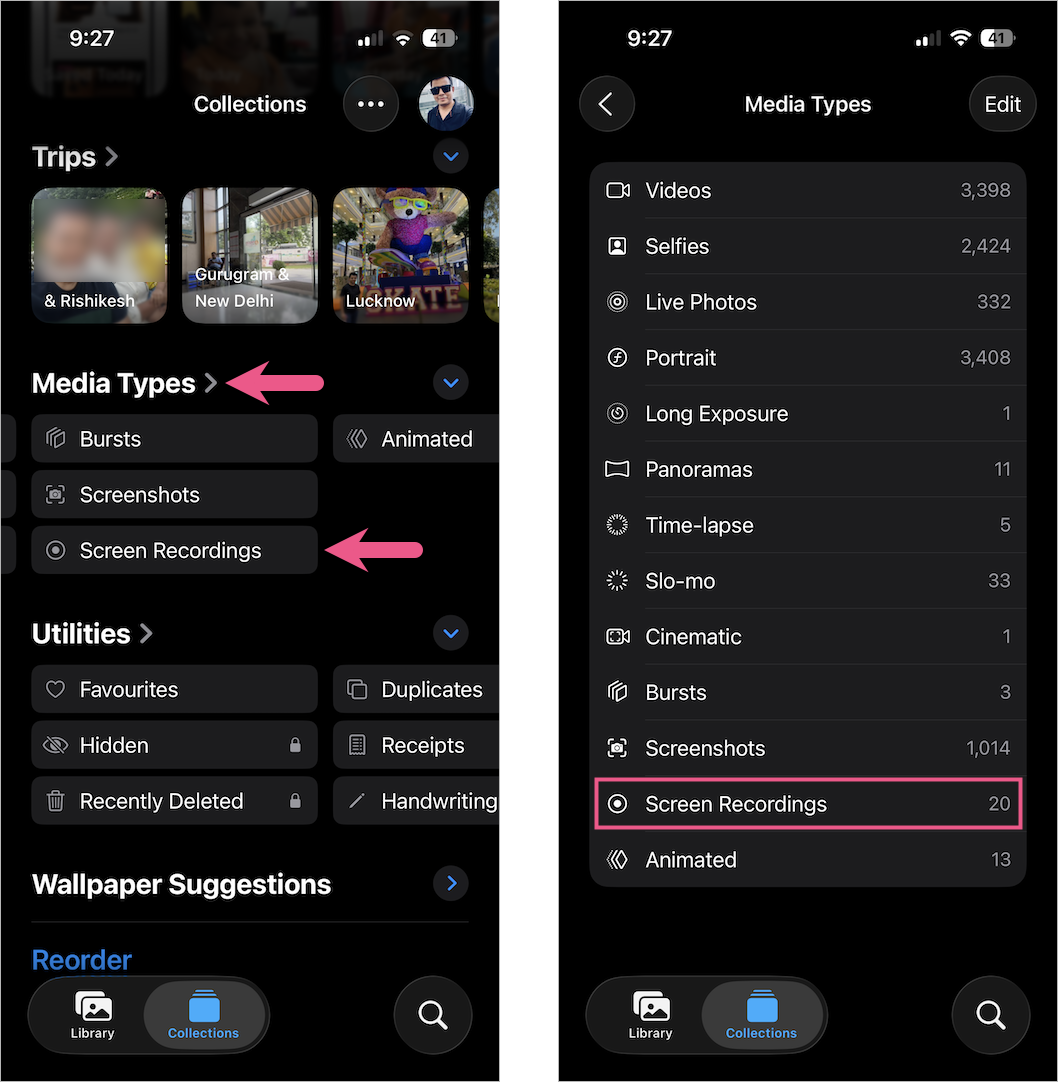
From there, you can edit, trim, or share them just like any other video.
RELATED TIPS:


