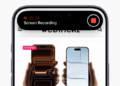
Screen recording on iPhone lets you capture gameplay, tutorials, video calls, and other activity on your screen. You can also enable the microphone to record your voice along with the screen.
On the iPhone 17, iPhone 17 Pro, iPhone 17 Pro Max, and iPhone Air, Screen Recording is accessed from Control Center. If the control isn’t already there, you can add it directly from Control Center.
These steps work on iOS 18 and later, including iOS 26 and iOS 27.
How to Add Screen Recording to Control Center
If you can’t find the Screen Recording button on your iPhone 17, you can add it directly from Control Center.
To add Screen Recording on iPhone 17, 17 Pro, 17 Pro Max, or iPhone Air:
- Open Control Center by swiping down from the top-right corner of the screen.
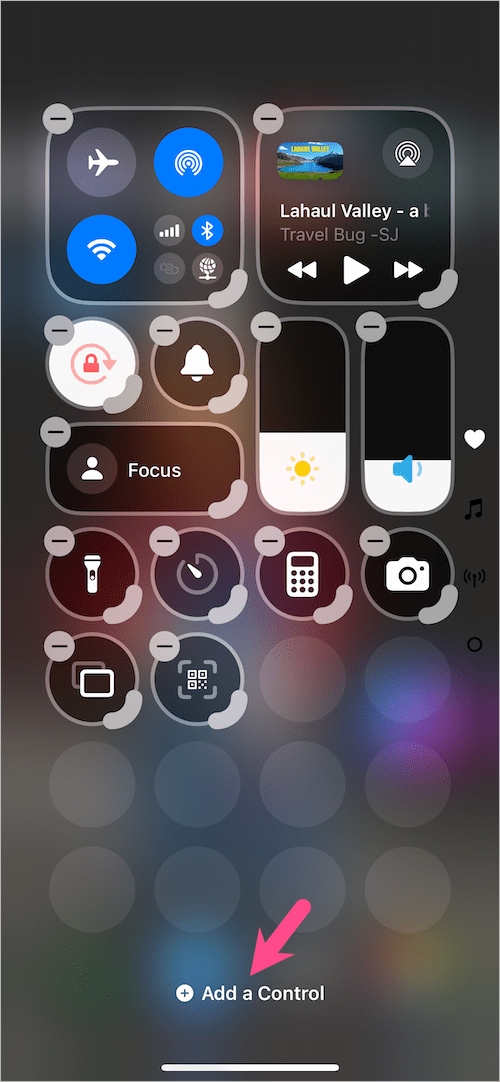
- Tap and hold an empty area in Control Center.
- Tap Add a Control at the bottom.
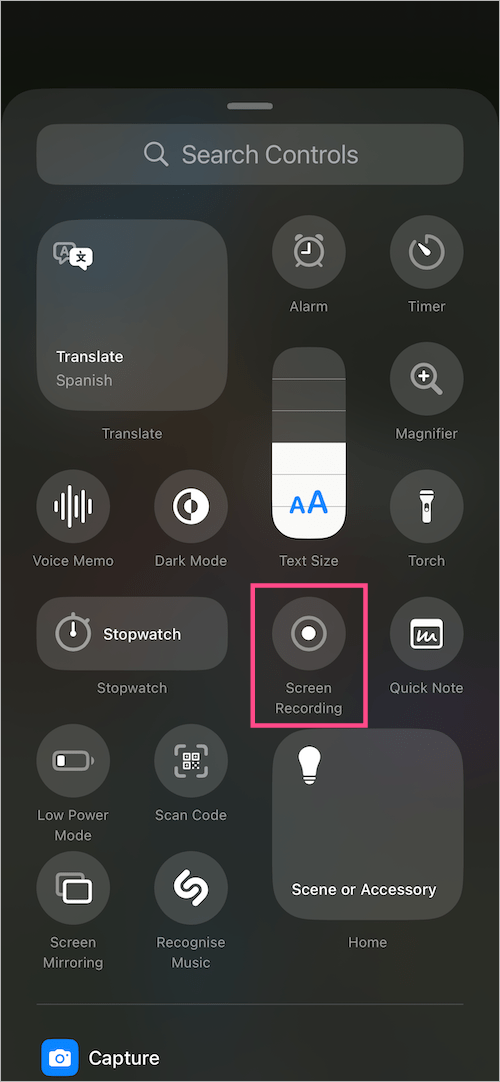
- Select Screen Recording to add the control.
- Optional: Touch and drag the control to move it to a different position in Control Center.
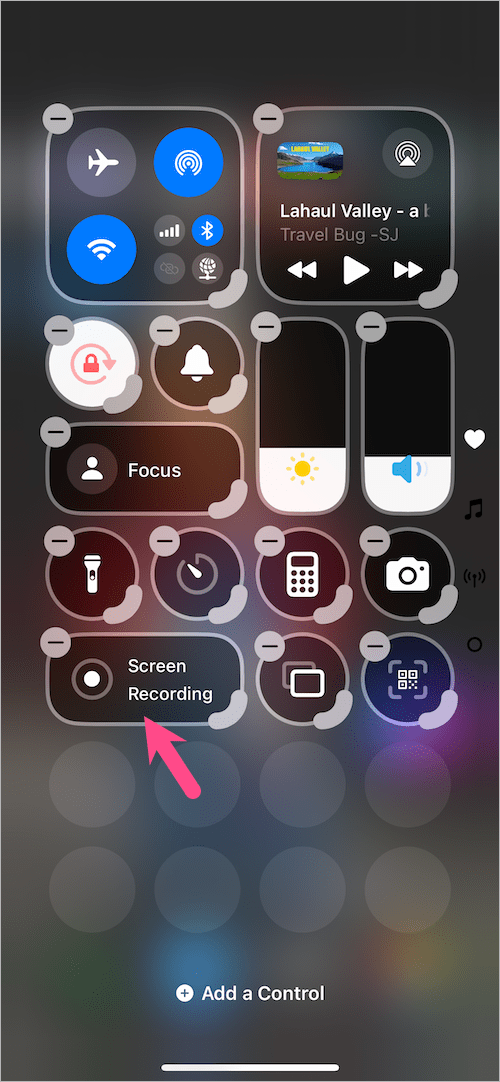
- Tap anywhere on the screen to finish.
The Screen Recording button will now appear in Control Center whenever you open it.
How to Screen Record on iPhone 17, 17 Pro, and 17 Pro Max
Once the Screen Recording control is available, you can start recording your iPhone screen in a few taps. The same steps also work on iPhone Air.
- Open Control Center by swiping down from the top-right corner.
- Tap the Screen Recording button (a white dot inside a circle). A 3-second countdown will begin before recording starts.
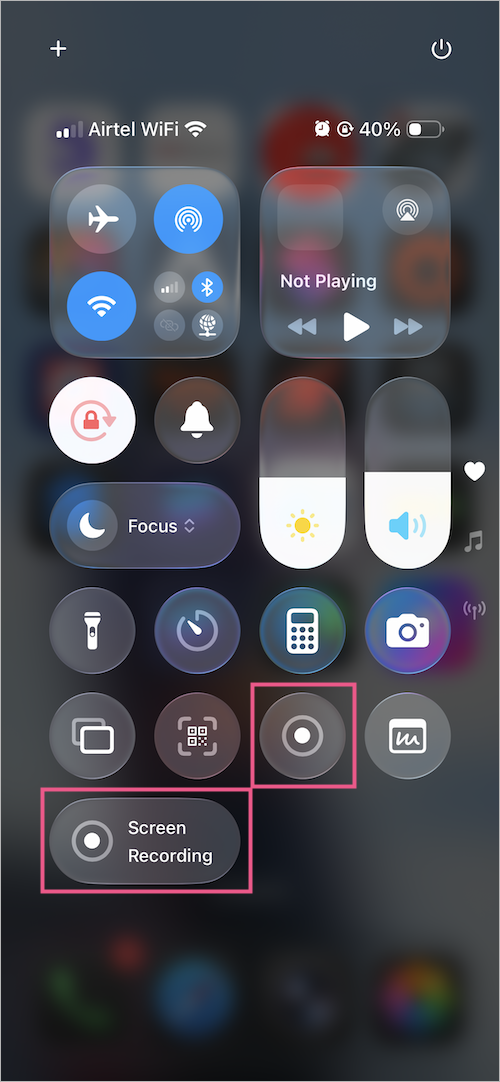
- To stop recording, open Control Center and tap the Screen Recording button again.

You can also stop the recording by tapping the red recording indicator at the top of the screen and selecting Stop.
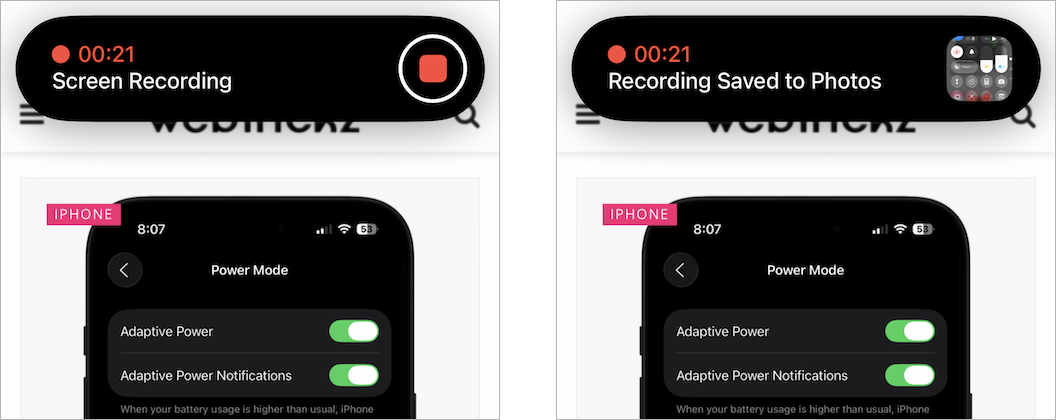
Your screen recording is automatically saved to the Photos app.
How to Screen Record with Microphone Audio
You can turn on the microphone before starting a screen recording if you want to record your voice along with the screen.
- Open Control Center.
- Touch and hold the Screen Recording control.
- Tap the Microphone icon to turn it on.

- Tap Start Recording.
Your recording will now include audio captured through the iPhone’s microphone.
Note: Some apps may not allow their audio or video to be recorded. Screen Recording also can’t be used at the same time as screen mirroring.
How to Enable HDR Screen Recording
If you want more vivid colors and higher contrast in your recordings, you can enable HDR screen recording on supported iPhones.
Go to Settings > General > Screen Capture, then select HDR as the capture format.
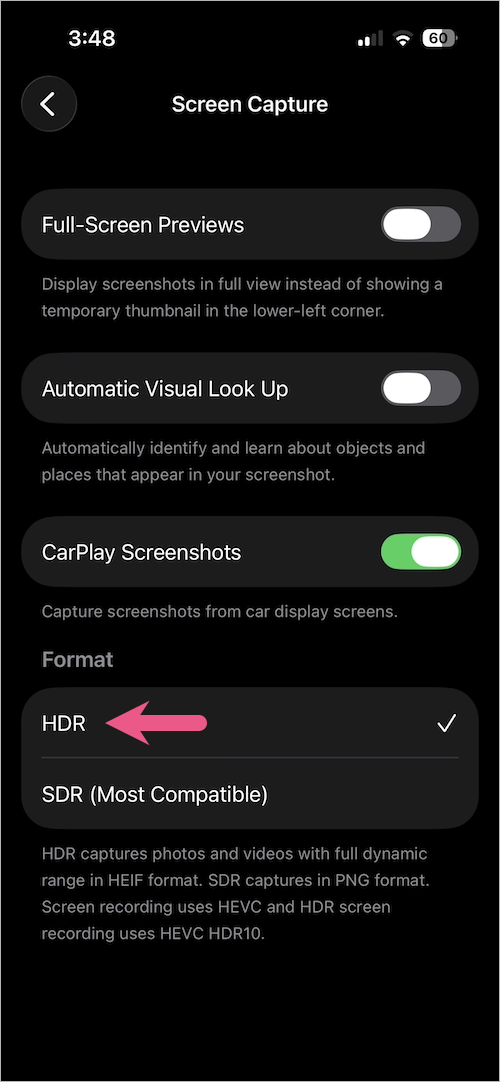
This setting is available on iOS 26 and iOS 27.
Where Are Screen Recordings Saved on iPhone?
Your screen recordings are automatically saved to the Photos app.
To find them, open Photos and go to Collections. Scroll down to Media Types, then tap Screen Recordings.
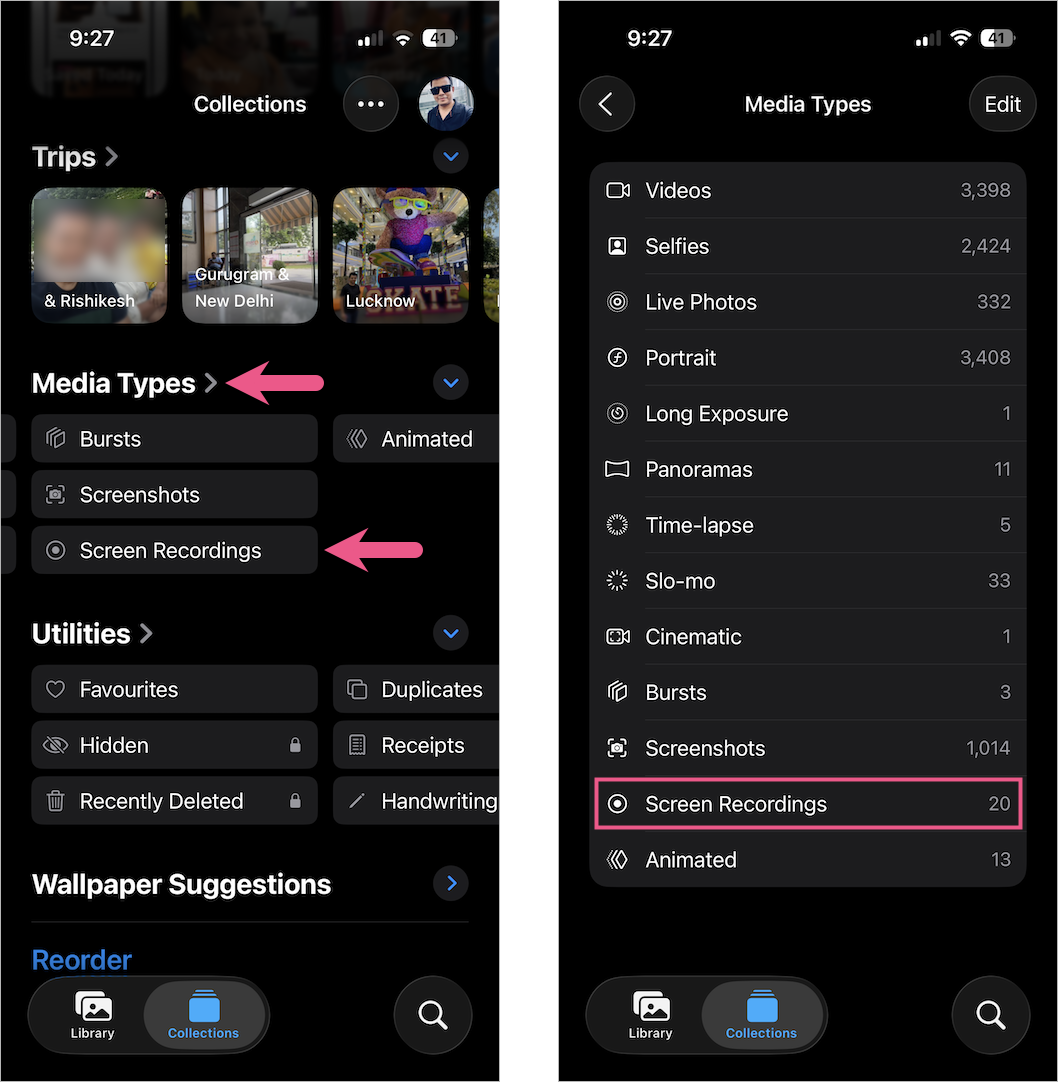
You can edit, trim, or share screen recordings from the Photos app just like other videos.
Related Tips
- How to Set a Timer on Your iPhone 17 Camera
- How to Reset Control Center to Default on iPhone 17 or Air
- How to Take a Screenshot on iPhone 17, 17 Pro, and iPhone Air
- How to Add Screen Recording to Control Center on iPhone