Pop-ups are small browser windows that appear automatically when you visit certain websites. They’re often used for logging in, completing payments, or displaying important notifications. Some examples include online banking sites, government forms, and secure payment gateways.
While pop-ups can sometimes be annoying, there are times when you actually need to allow them to proceed and complete a task. By default, Microsoft Edge blocks pop-ups to protect you from unwanted ads and spammy sites.
If you’ve ever wondered, “How do I turn off pop-ups in Microsoft Edge?”, you’re not alone. Microsoft has changed the interface of Edge multiple times, and finding the Edge popup blocker setting can be confusing in the latest versions.
This guide explains how to disable the pop-up blocker or allow pop-ups in Microsoft Edge on Windows 11, Windows 10, Mac, iPhone, and Android.
How to Turn Off or Disable Pop-Up Blocker in Edge (2026)
Depending on your device, the steps to disable the pop-up blocker in Edge differ slightly. Here’s how to turn it off on both desktop and mobile.
On Windows 11, Windows 10, and Mac
- Open Microsoft Edge on your computer.
- Click the three-dot menu in the top-right corner and select Settings.

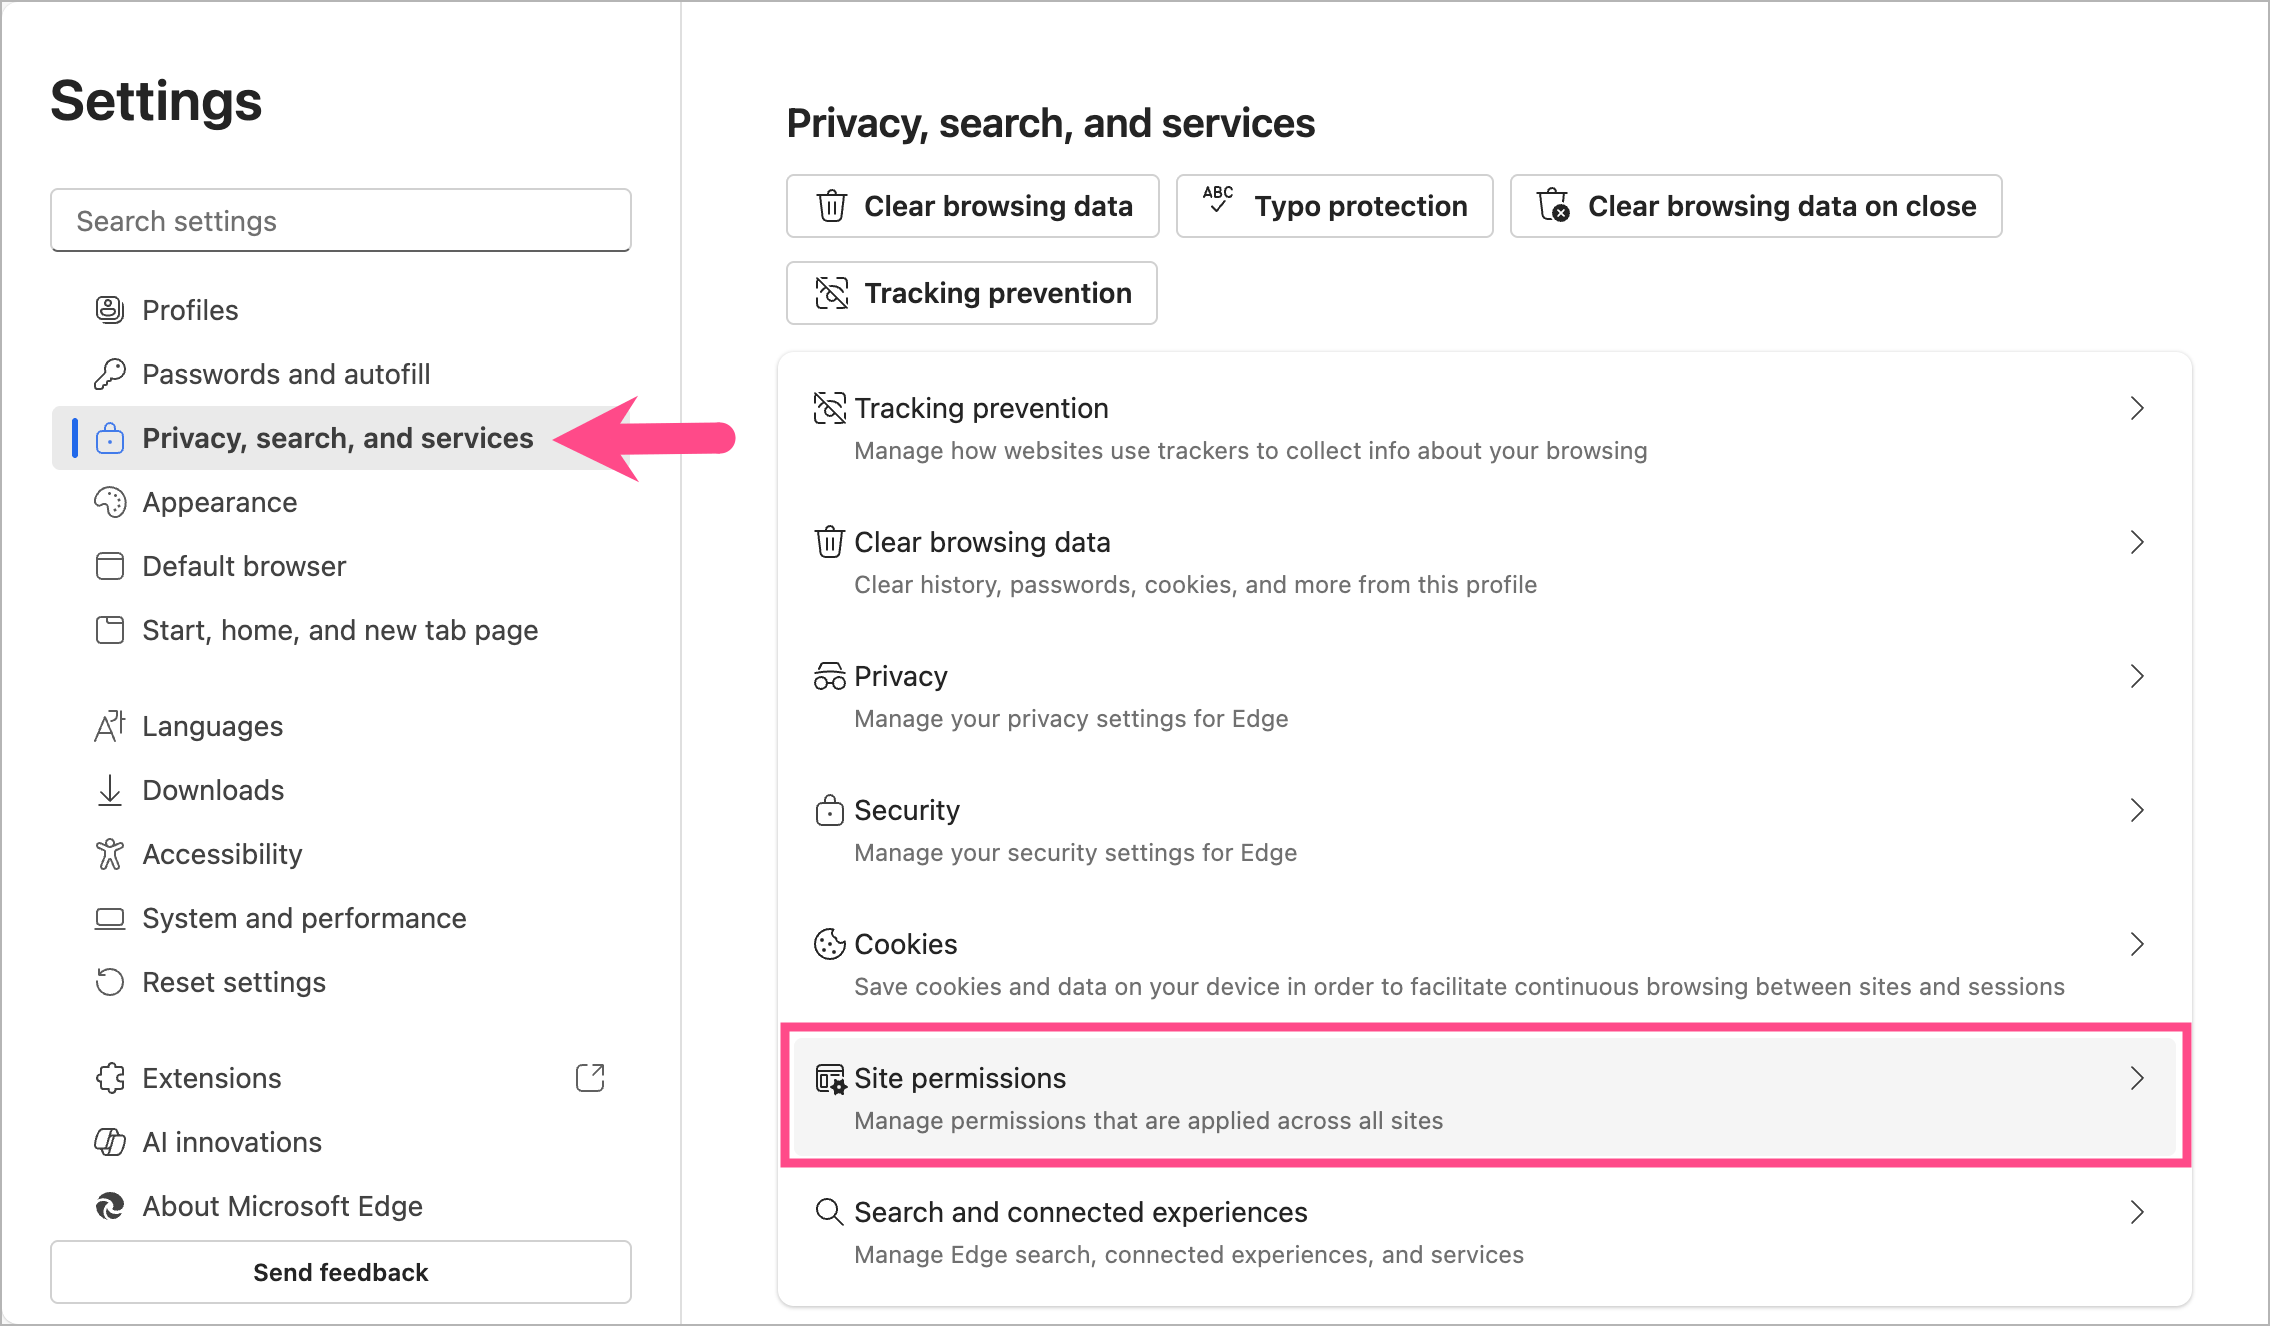
- In the left sidebar, click Privacy, search, and services, and then select Site permissions.
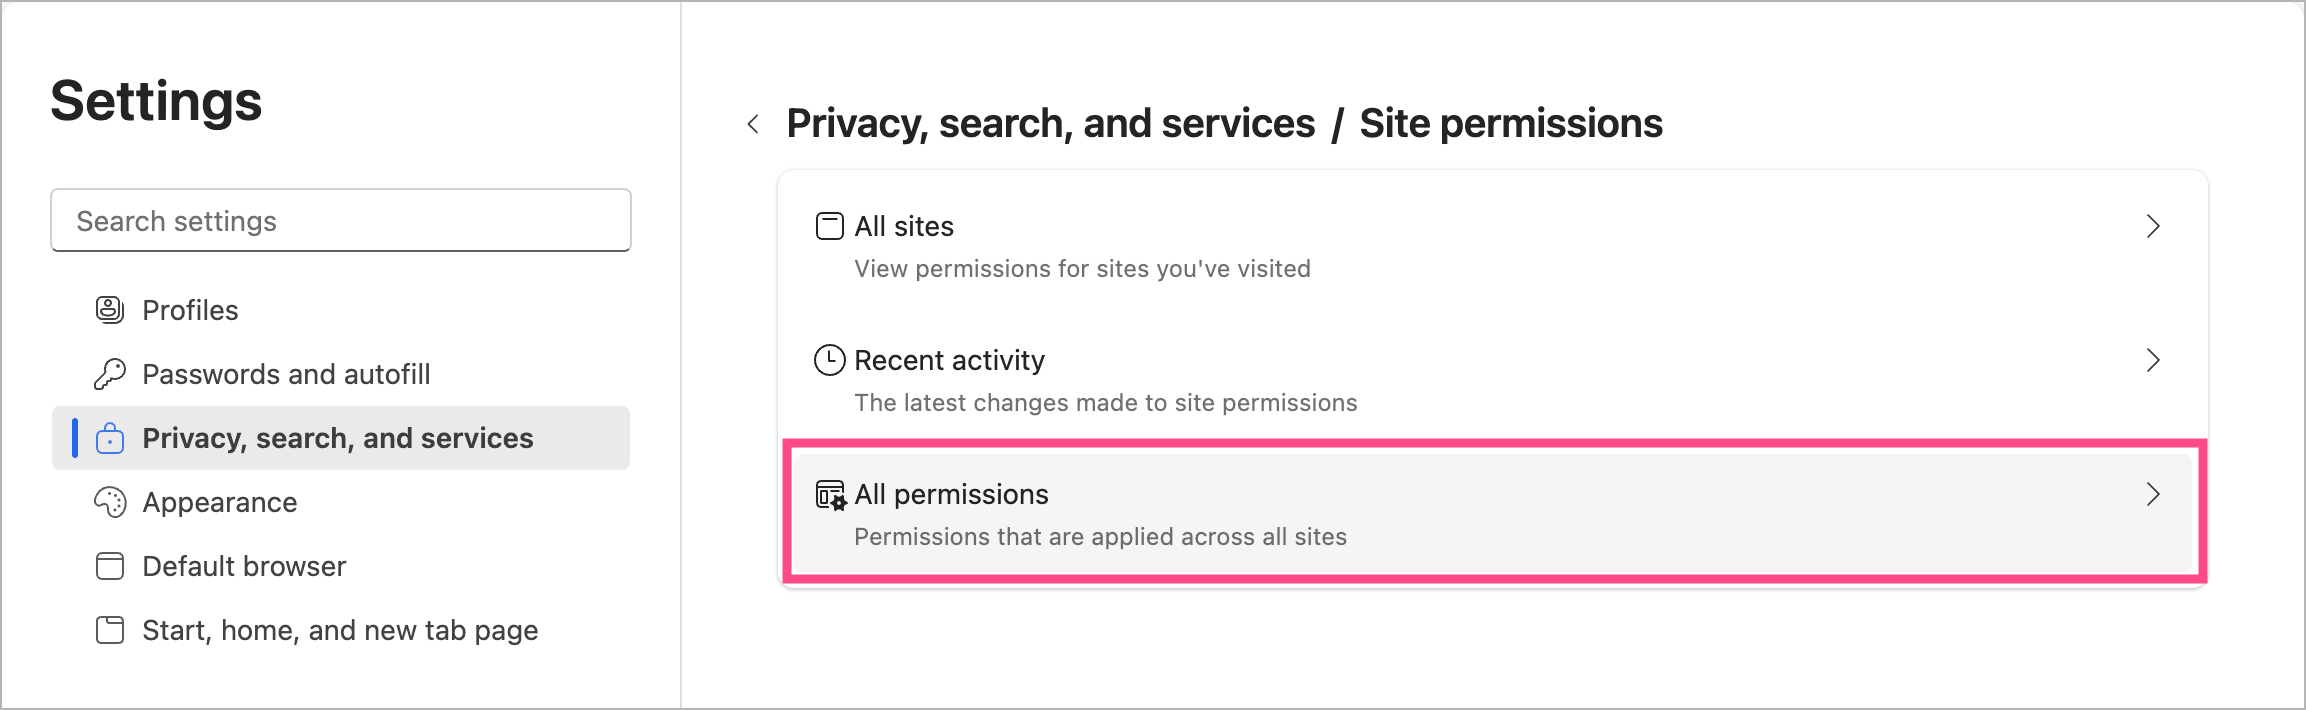
- Go to All permissions.
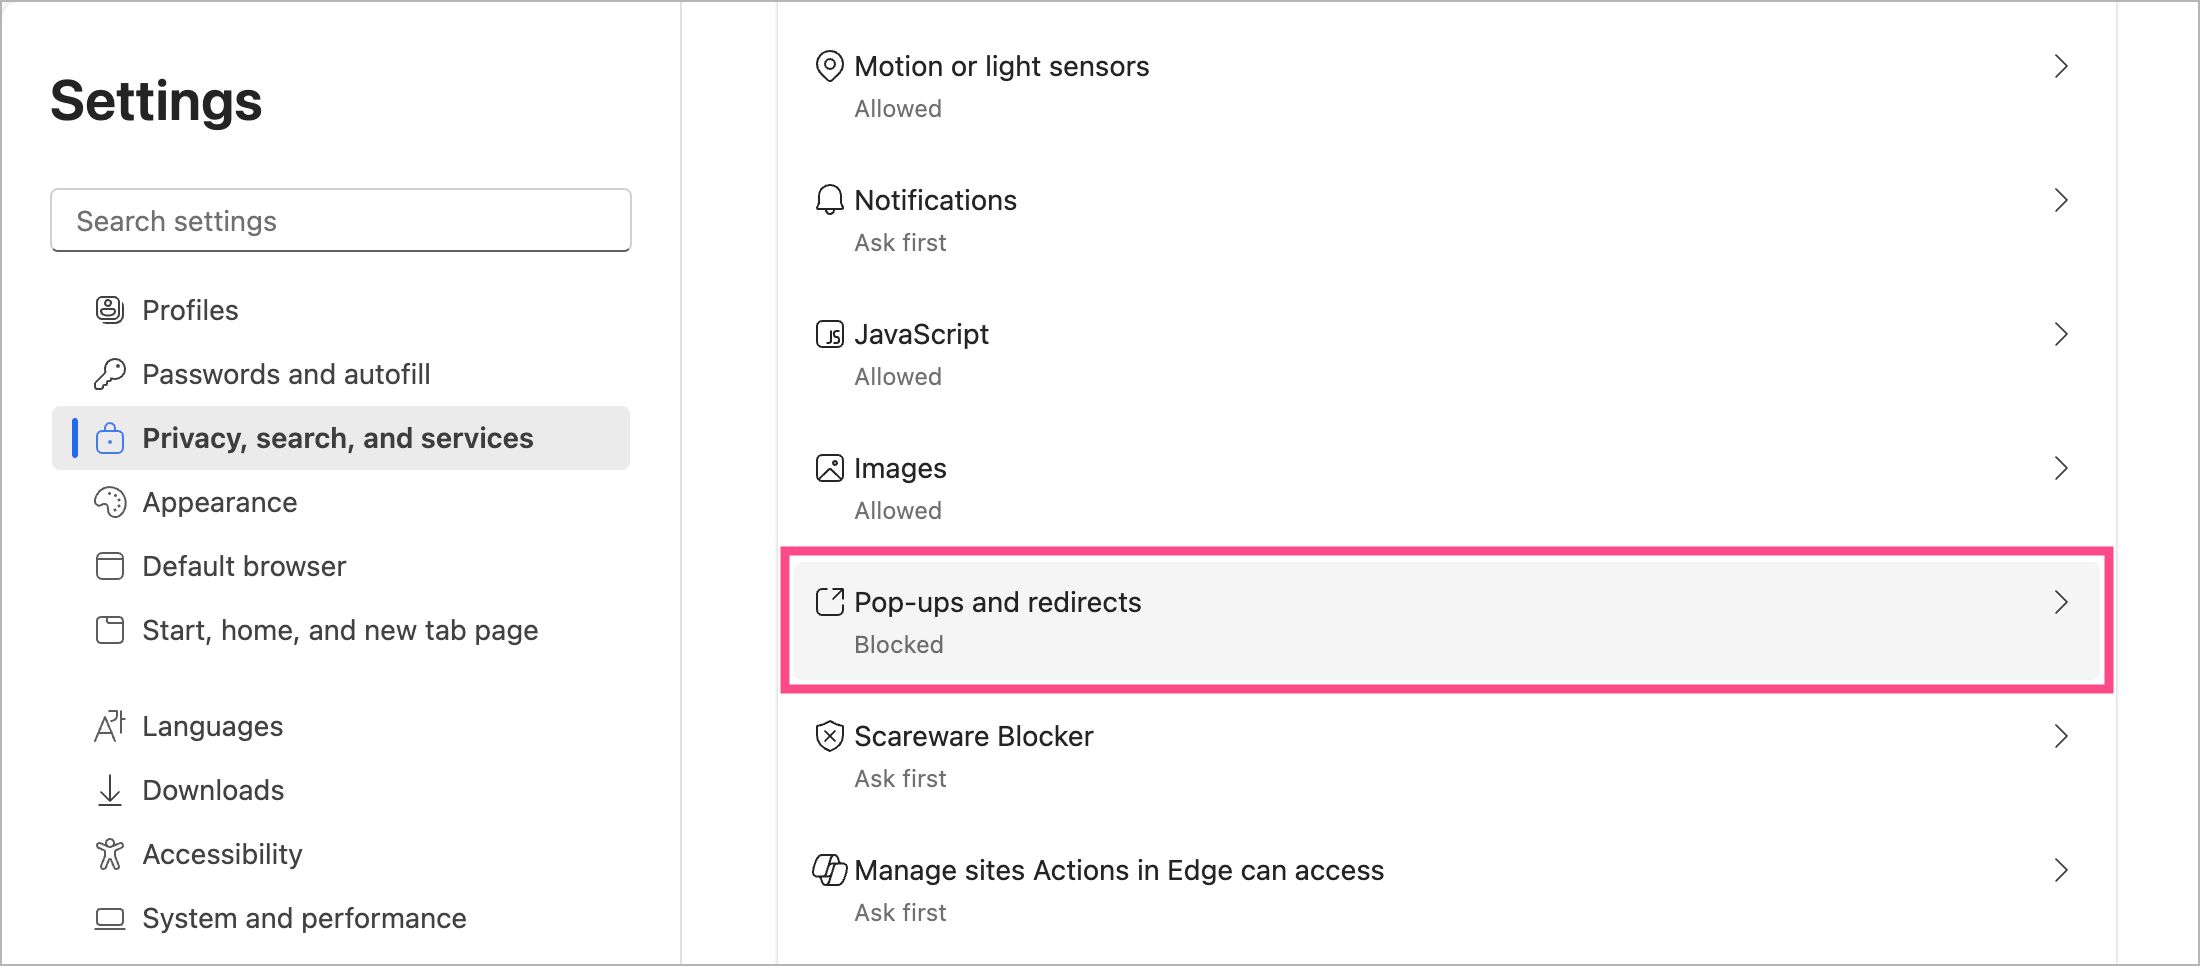
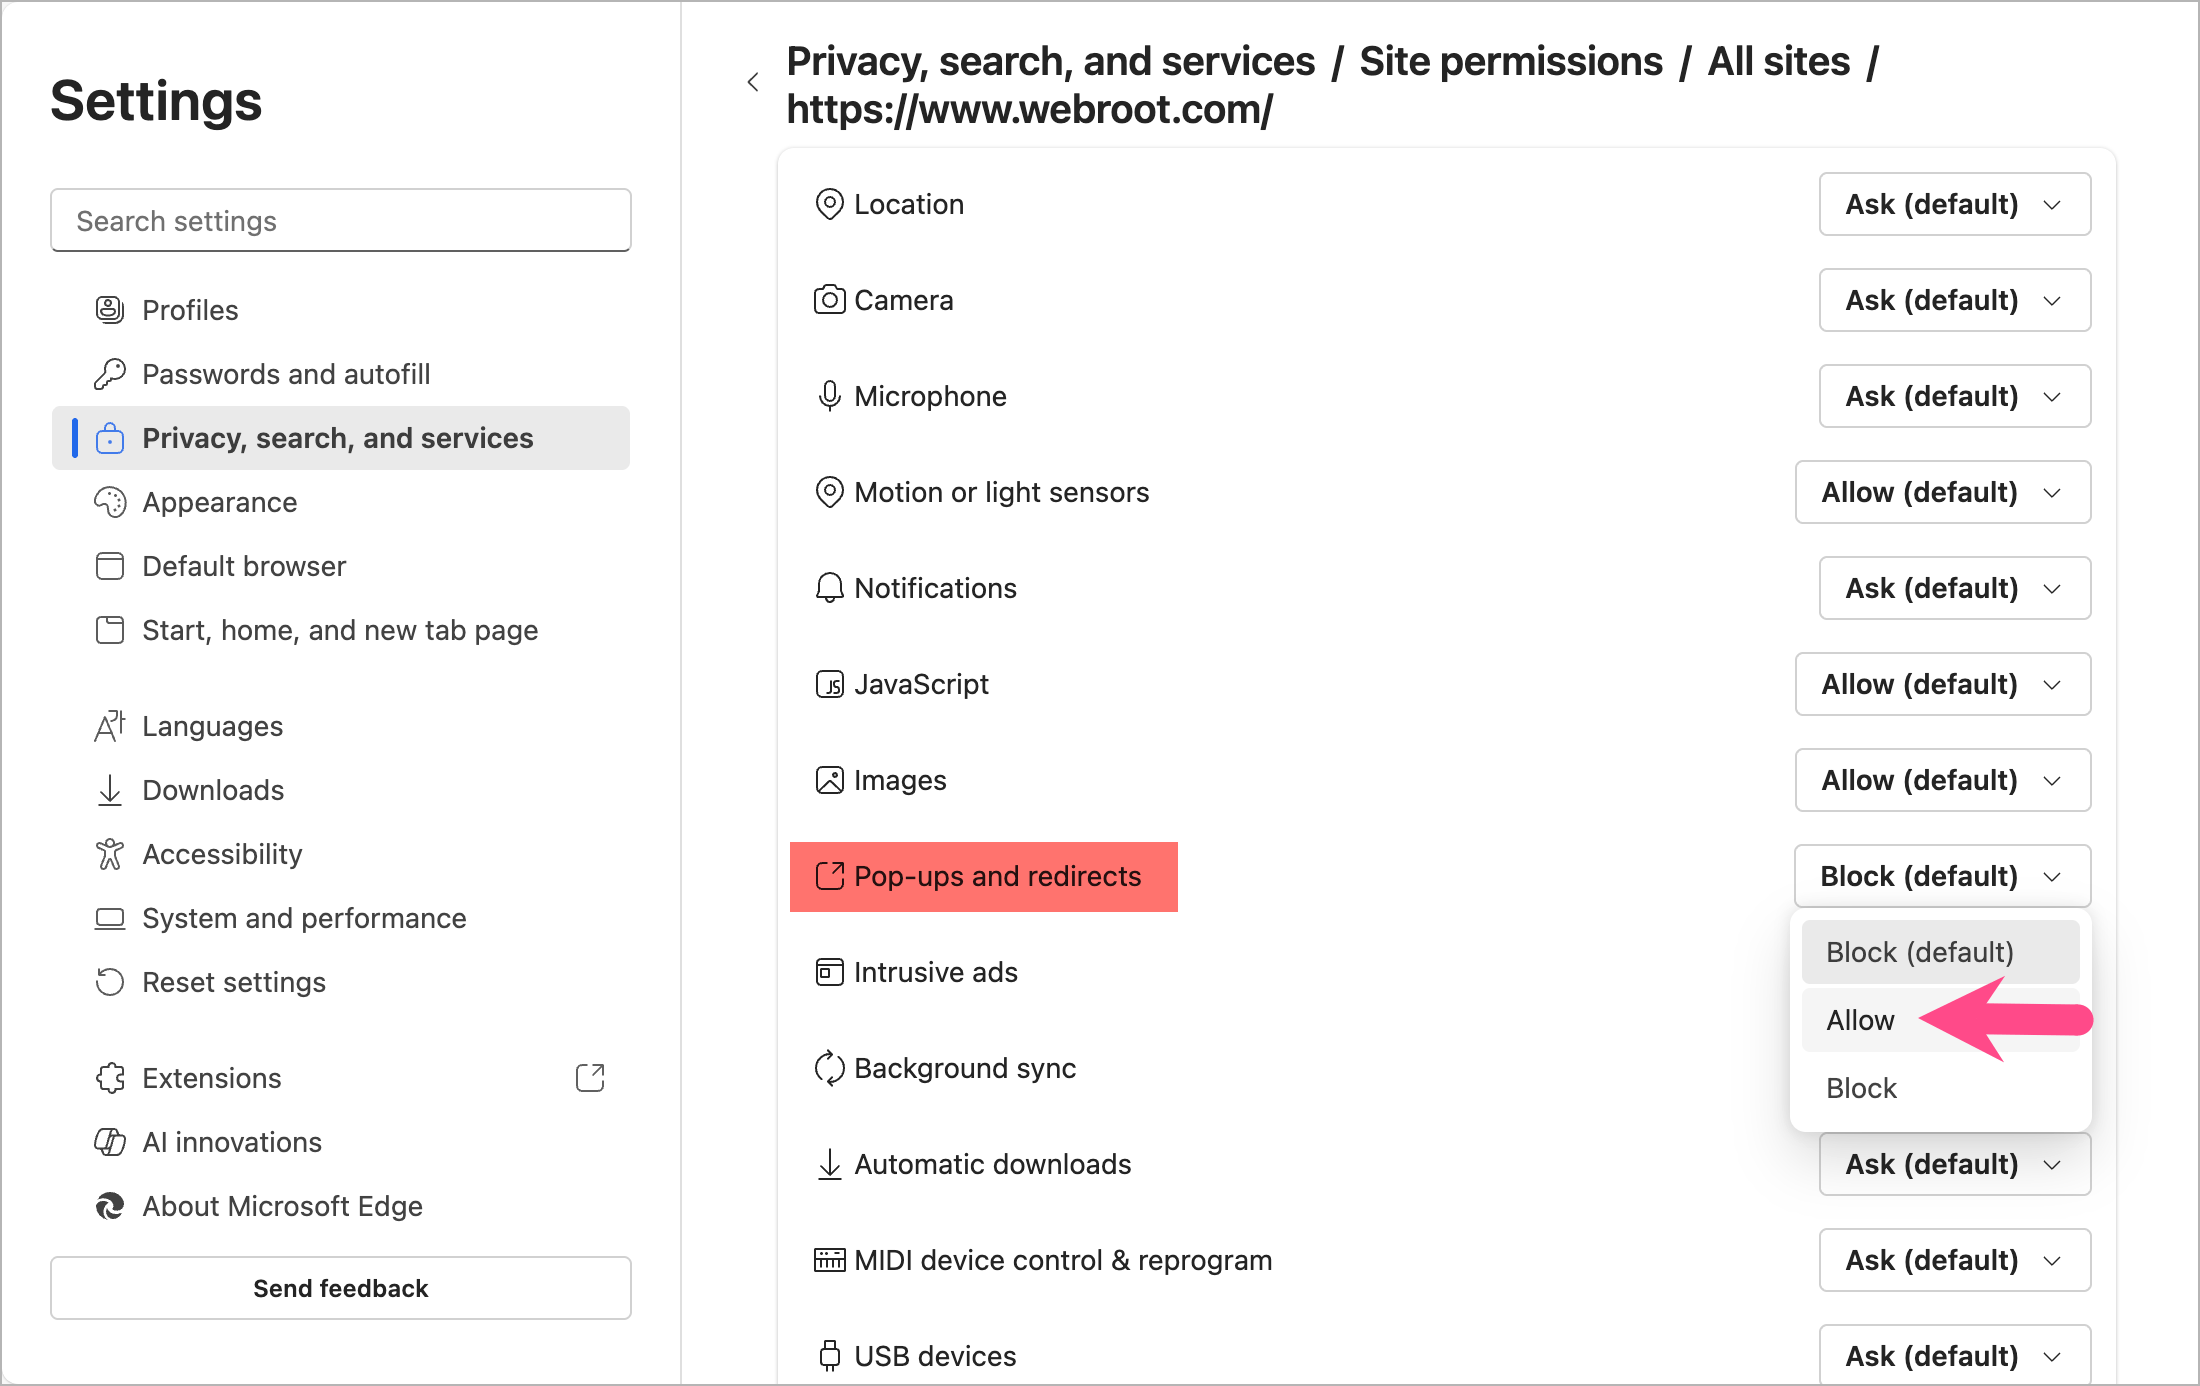
- Scroll down and click Pop-ups and redirects.
- Turn off the toggle next to “Block (recommended)” to completely disable the pop-up blocker.
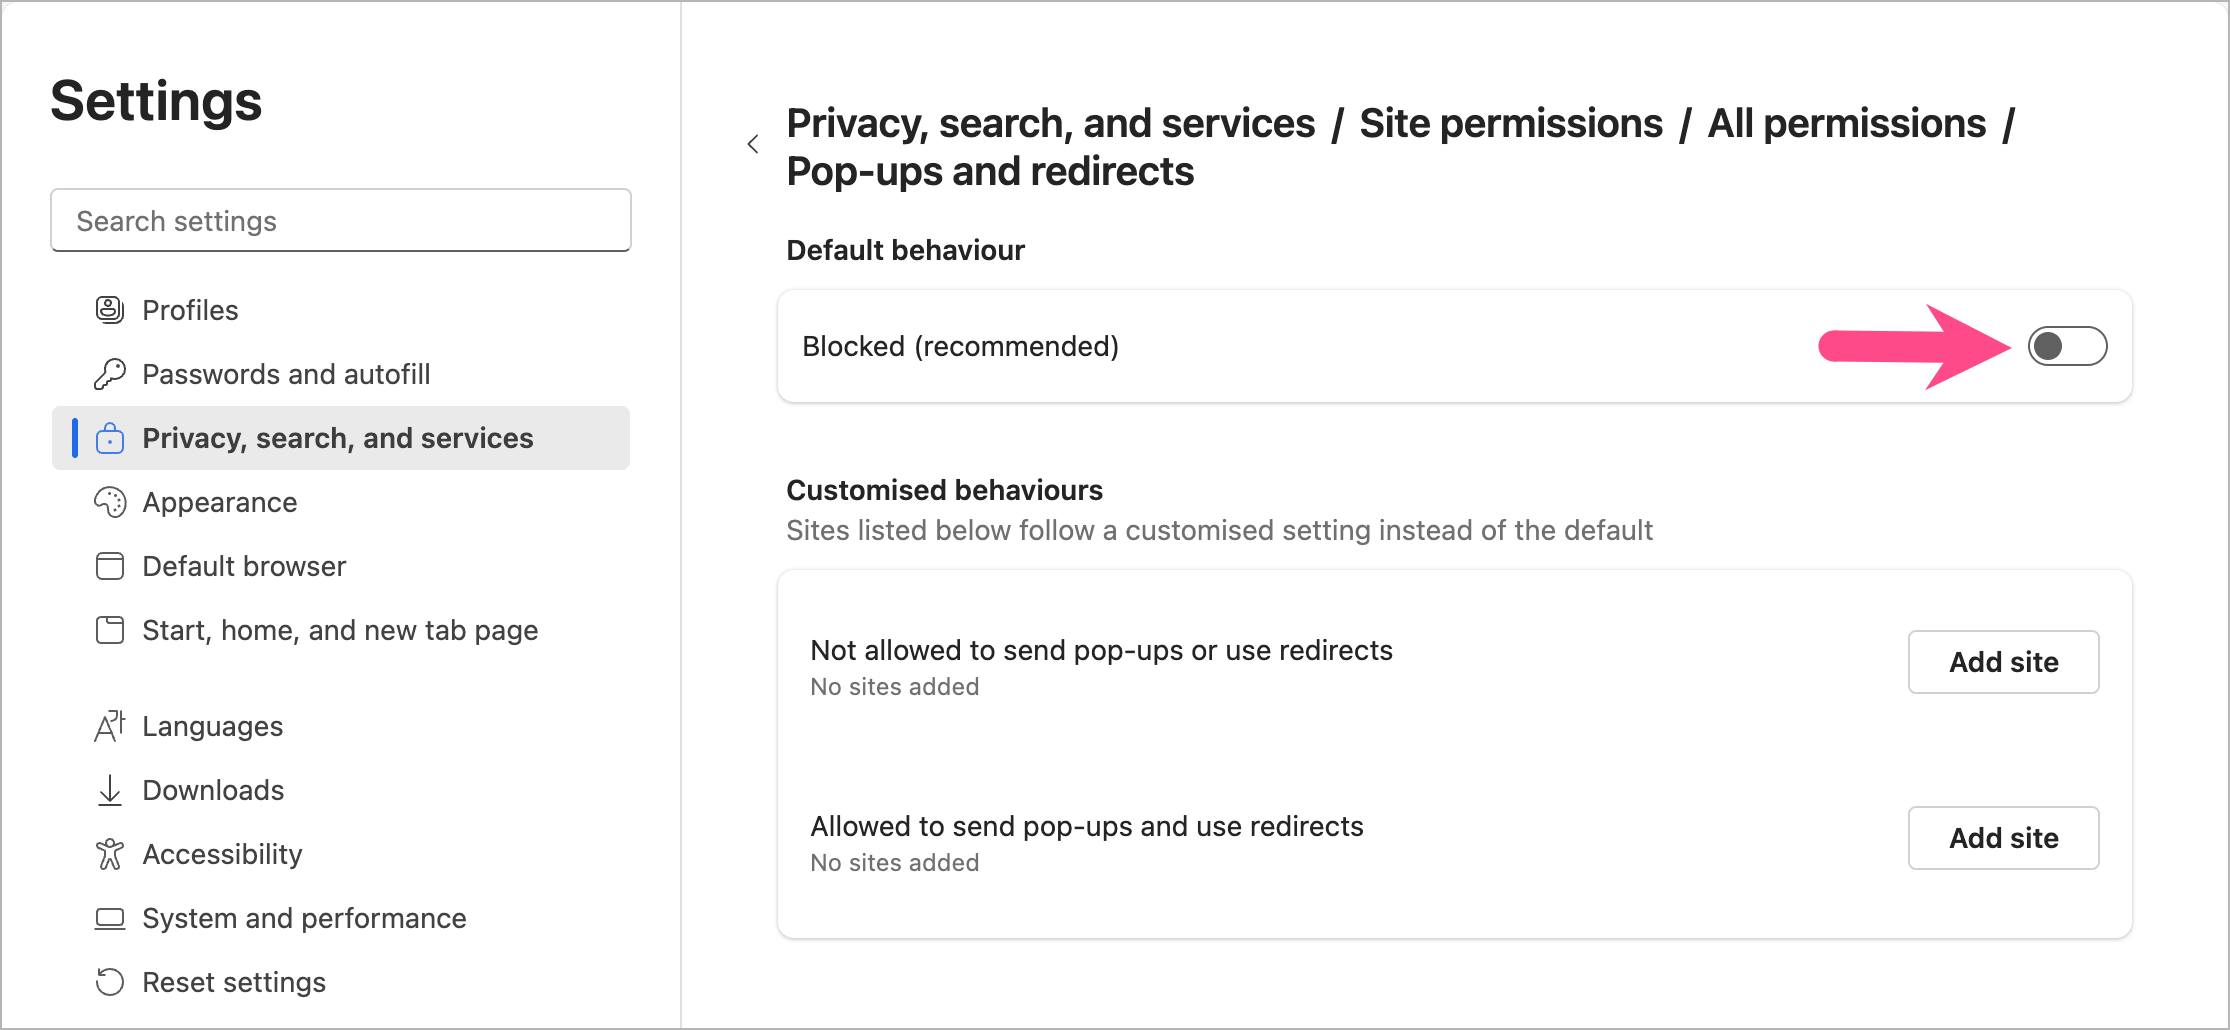
Once disabled, all websites will be able to show pop-ups without restriction.
Tip: You can also directly visit edge://settings/privacy/sitePermissions/allPermissions/popups in Edge to access pop-up blocker settings.
On iPhone
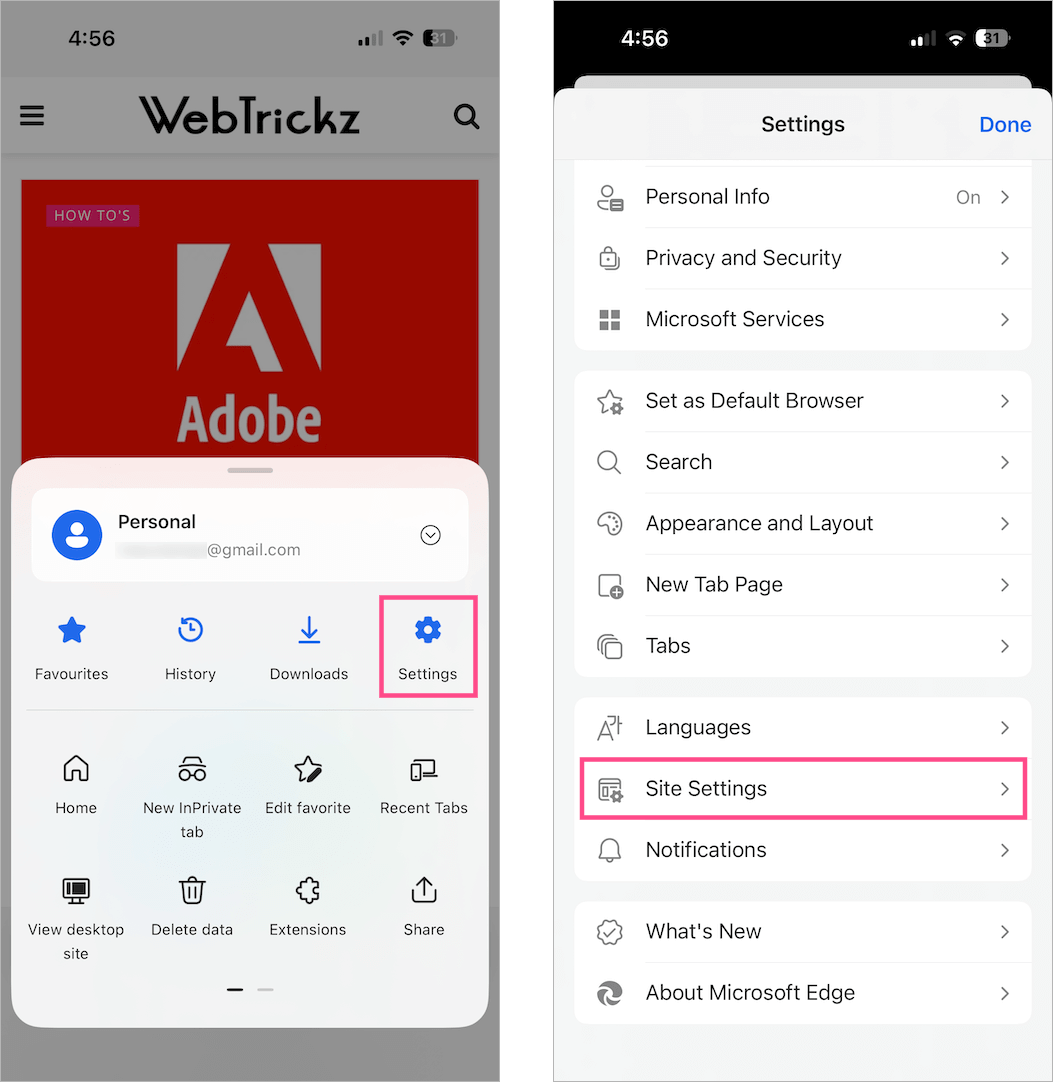
- Open the Edge app on your phone.
- Tap the Menu icon (three horizontal lines) in the bottom-right corner.
- Go to Settings, scroll down, and tap Site Settings.
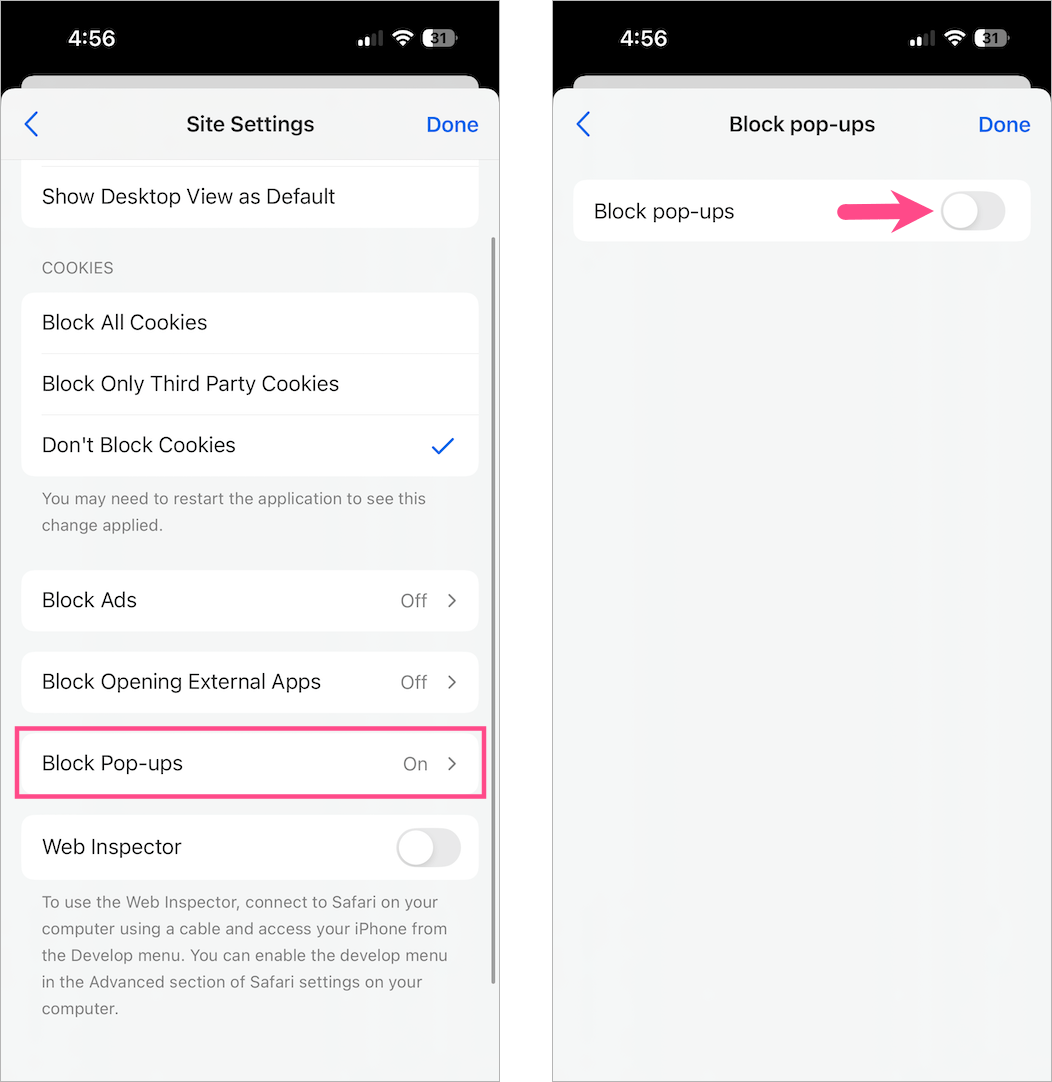
- Tap Block Pop-ups and turn off the toggle for “Block pop-ups.”
On Android
- Open the Edge app.
- Tap the Menu icon (three lines) in the bottom-right.
- Go to Settings, scroll down, and tap Site settings.
- Tap Site permissions and then tap Pop-ups and redirects (under Content).
- Turn on the toggle next to “Pop-ups and redirects”.
Now, Edge will allow pop-ups from all sites on your mobile device.
RELATED: How to turn off notifications in Edge for all or specific sites
How to Temporarily Allow Pop-Ups in Microsoft Edge
Sometimes, you don’t need to disable the pop-up blocker entirely and want to allow a pop-up for one session or page. When a pop-up is blocked, you might see a warning message:
“This page has been blocked by Microsoft Edge.” or “Pop-ups were blocked on this page.”
Here’s how to allow pop-ups in Edge temporarily:
- When you see a pop-up, click the Pop-up blocked icon in the address bar.
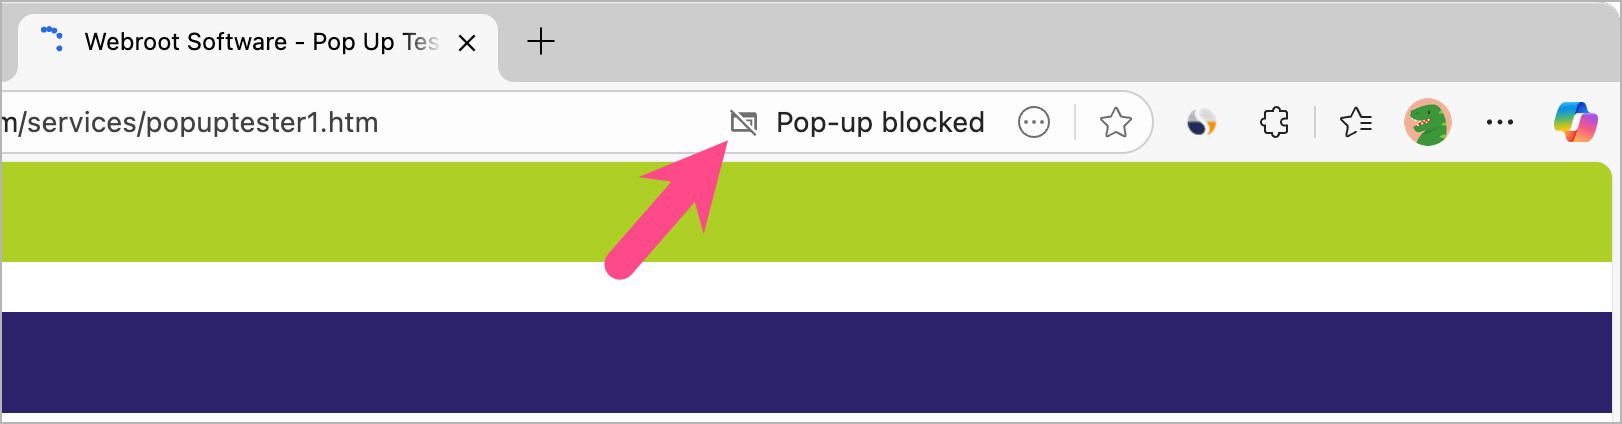
Pop-up blocked icon in Edge - Click the first option or URL in the “Pop-ups blocked” window to view the blocked popup.
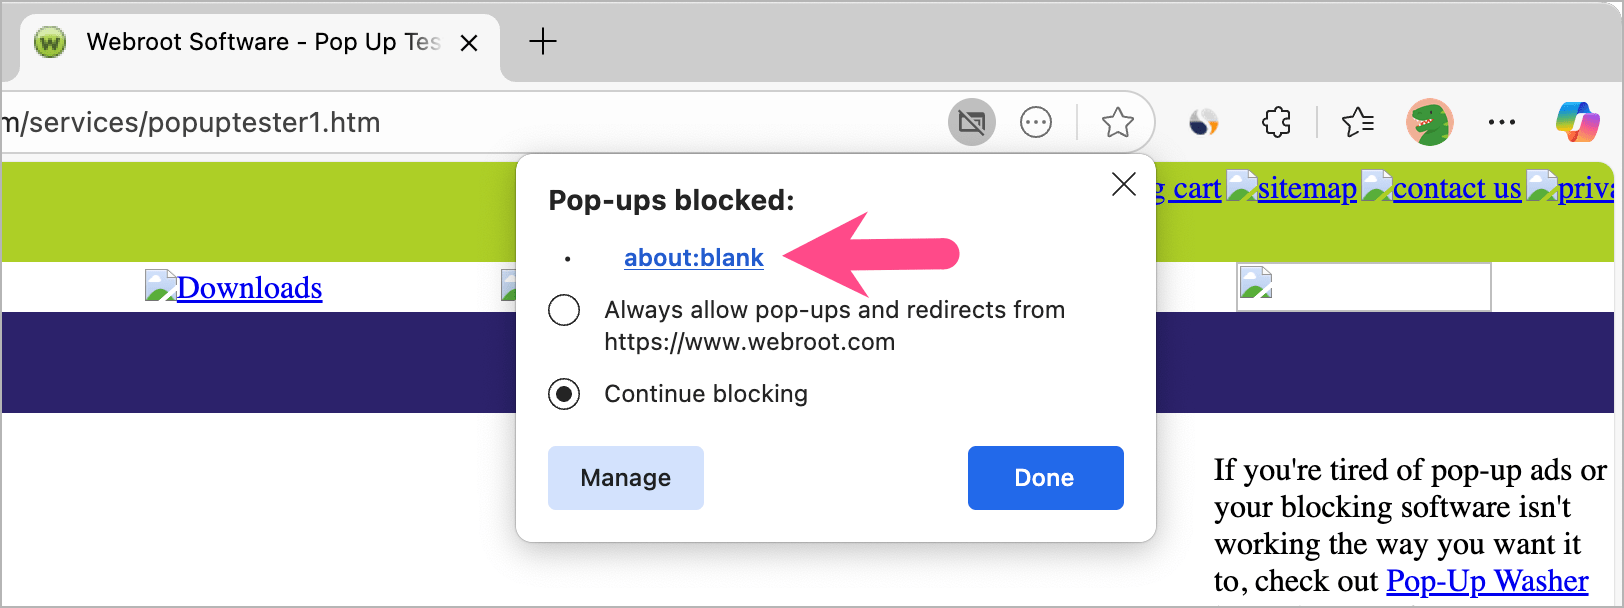
- Optional: Choose “Always allow pop-ups and redirects from [website URL]”.
- Click Done or Reload the page.
Alternatively, you can:
- Click the padlock icon next to the website URL in the address bar.
- Select Permissions for this site.
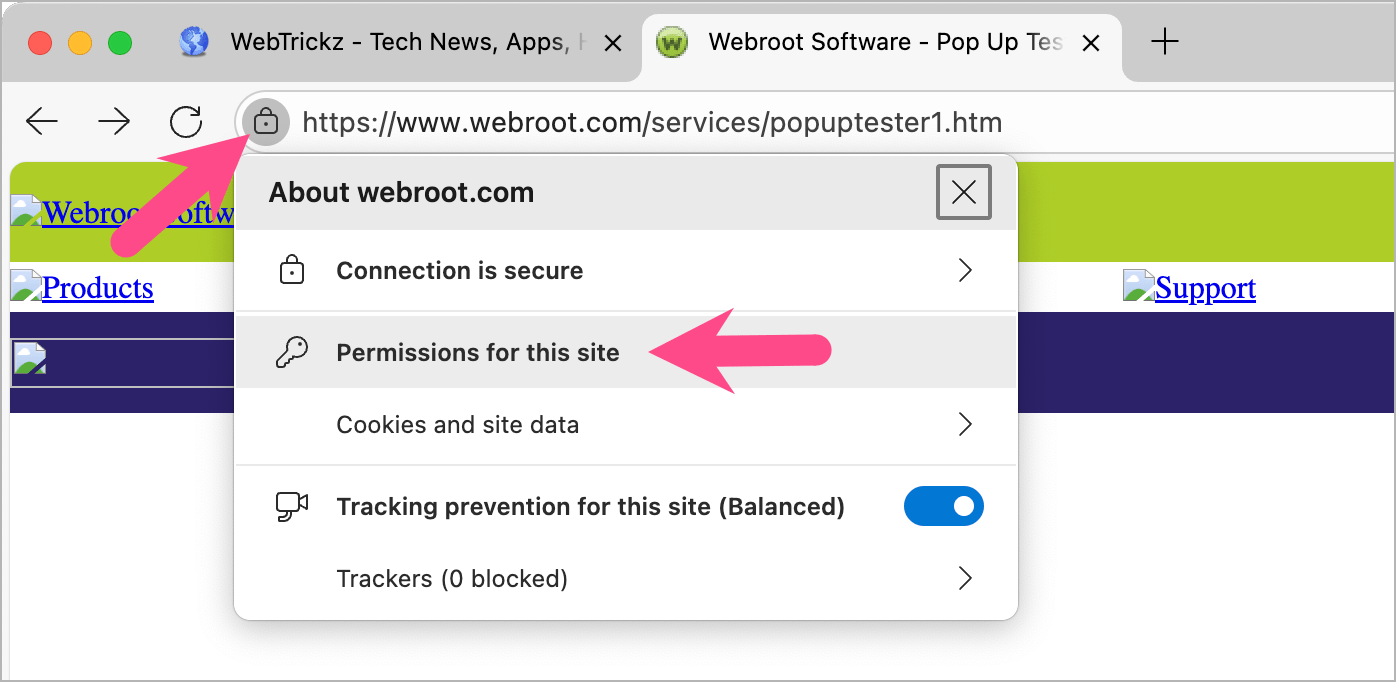
- Find Pop-ups and redirects, and set it to Allow.
The particular website will now show pop-ups without changing your global pop-up settings.
How to Allow Pop-Ups for a Specific Website in Edge
If you trust a particular website and want to allow its pop-ups permanently, you can add it manually to the exceptions list.
Here’s how to enable or allow pop-ups from a specific site in Edge on Windows or Mac:
- Open Edge Settings and go to Privacy, search, and services.
- Select Site permissions > All permissions.
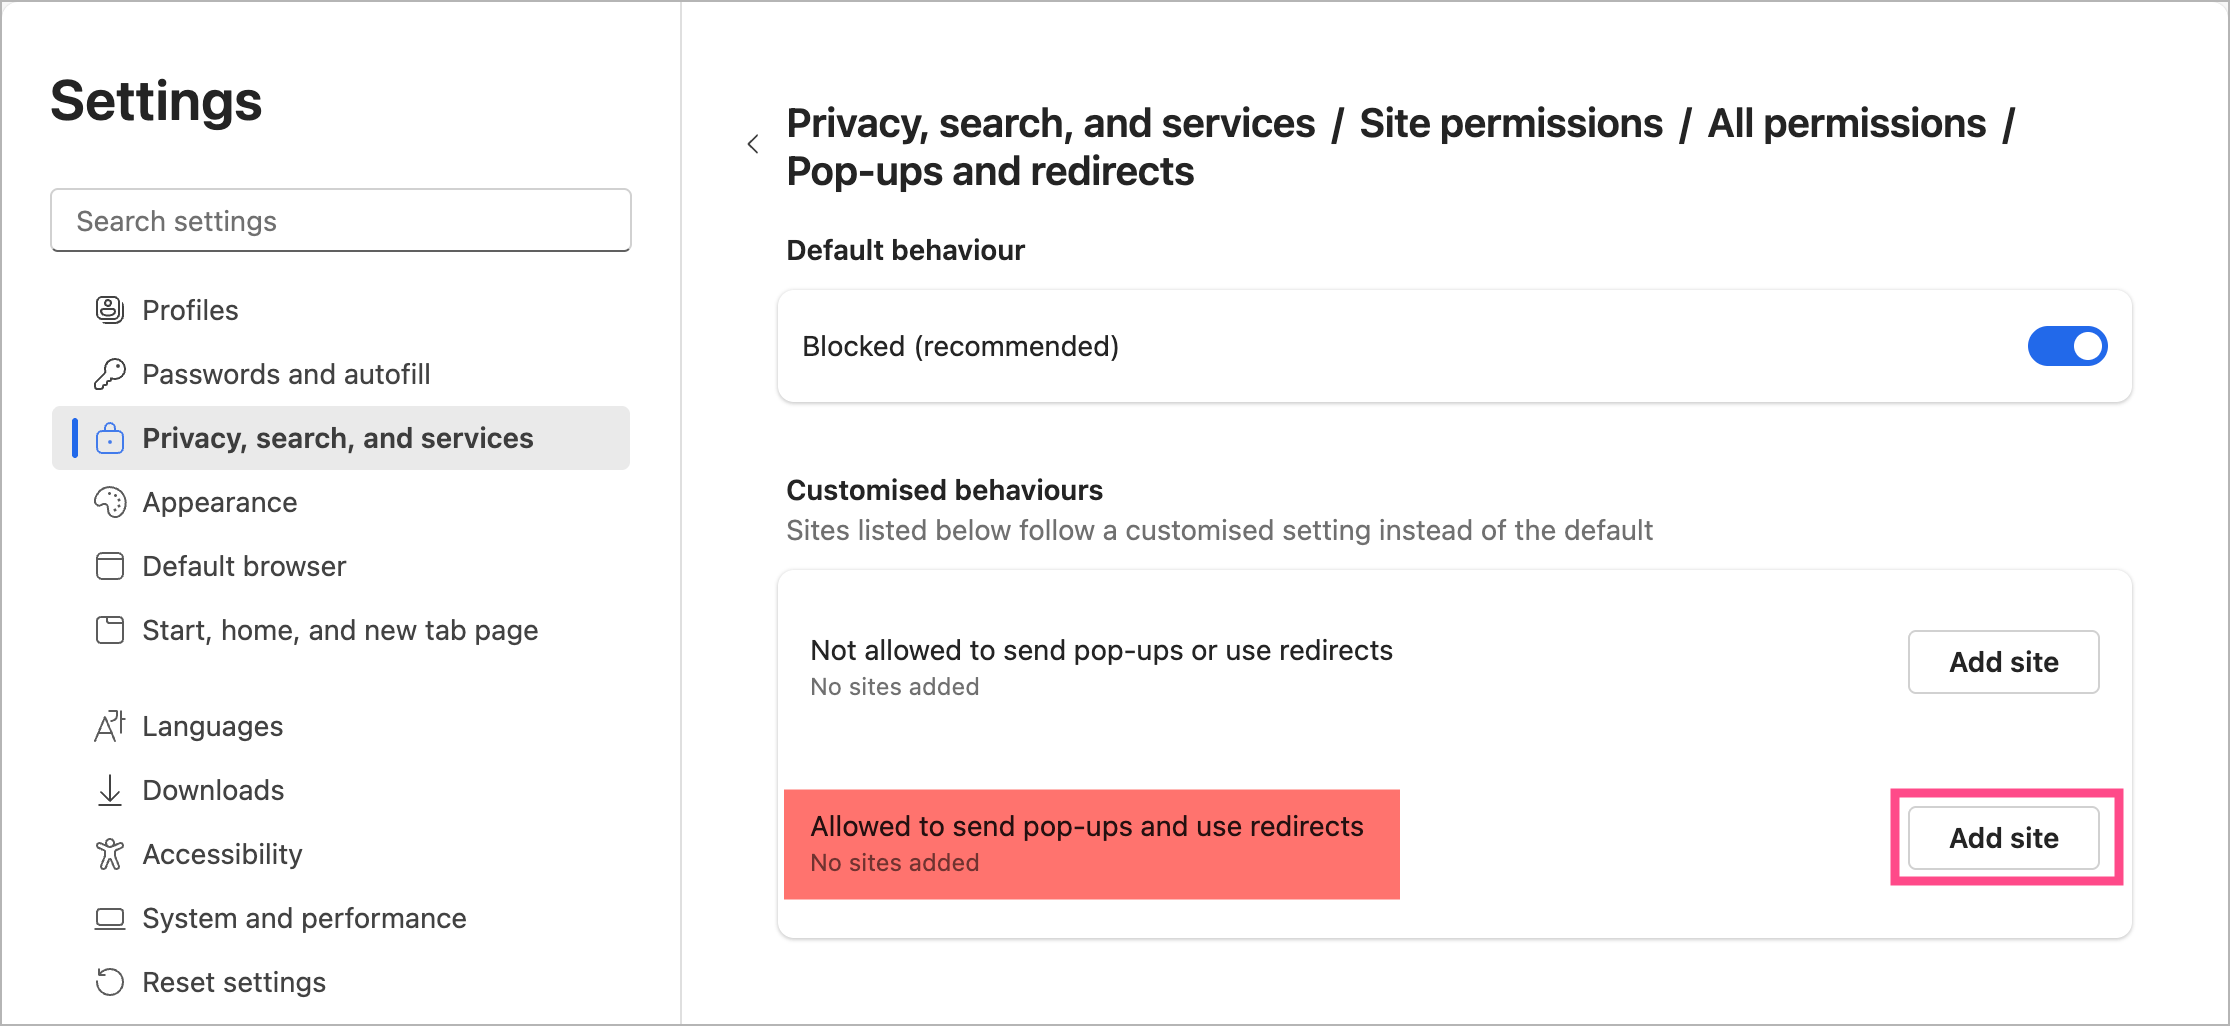
- Click Pop-ups and redirects.
- Under Customised behaviours, click the Add site button next to “Allowed to send pop-ups and use redirects”.
- Enter the full website URL (for example:
https://www.onlinesbi.com) and click Add.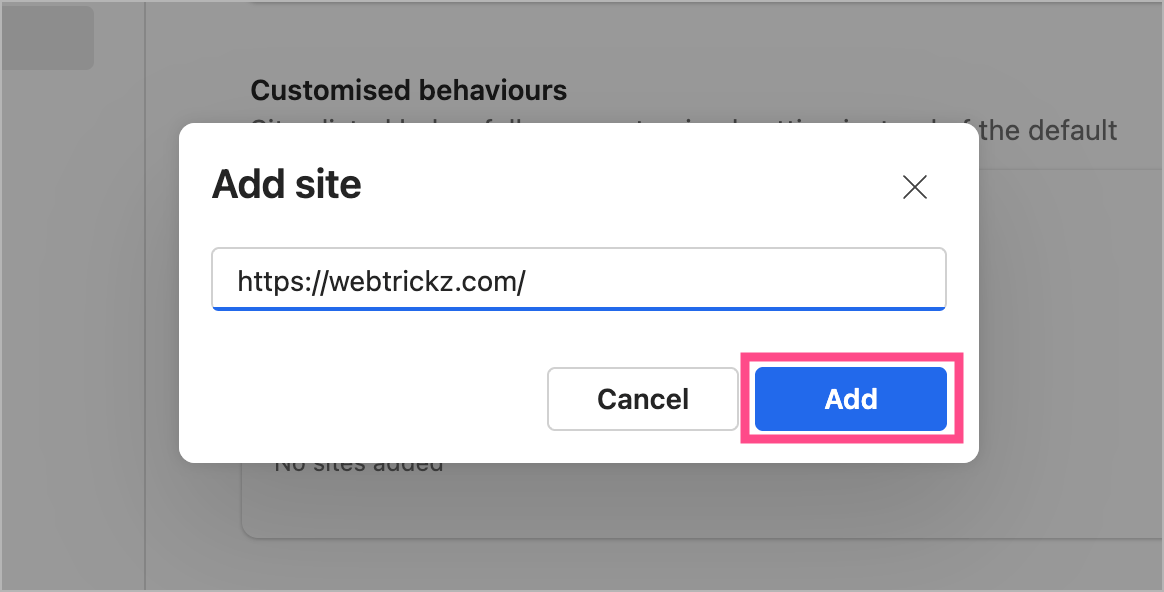
The site will now be allowed to show pop-ups even if the blocker is enabled for others.
Microsoft Edge’s pop-up blocker protects you from unwanted pop-ups, but you can easily allow or disable them when you need to access legitimate content like login pages, forms, or payment windows.
ALSO READ:
- How to Turn Off Copilot Mode in Microsoft Edge
- How to Export Edge Bookmarks to an HTML File
- How to Turn Off SafeSearch Settings in Bing


