OnePlus has finally launched its smartphones for 2019, the OnePlus 7 and the OnePlus 7 Pro. While the OnePlus 7 is the basic variant of the new series, the Pro is OnePlus’ real flagship. The OnePlus 7 Pro also comes off as the most expensive smartphone launched to date by the company. Featuring a 90Hz 2K AMOLED display, slider selfie camera, triple camera setup, and up to 12GB RAM, the Pro variant stands out at a price tag of $669. If you’re looking to buy it in the upcoming sale then you may find the need to take screenshots on the OnePlus 7 or OnePlus 7 Pro.
Well, there is more than one way to capture screenshots on OnePlus 7 running the new OxygenOS 9.5. Let’s see how to do it on your OnePlus smartphone.
How to take a screenshot on OnePlus 7
Method 1 – Using hardware buttons
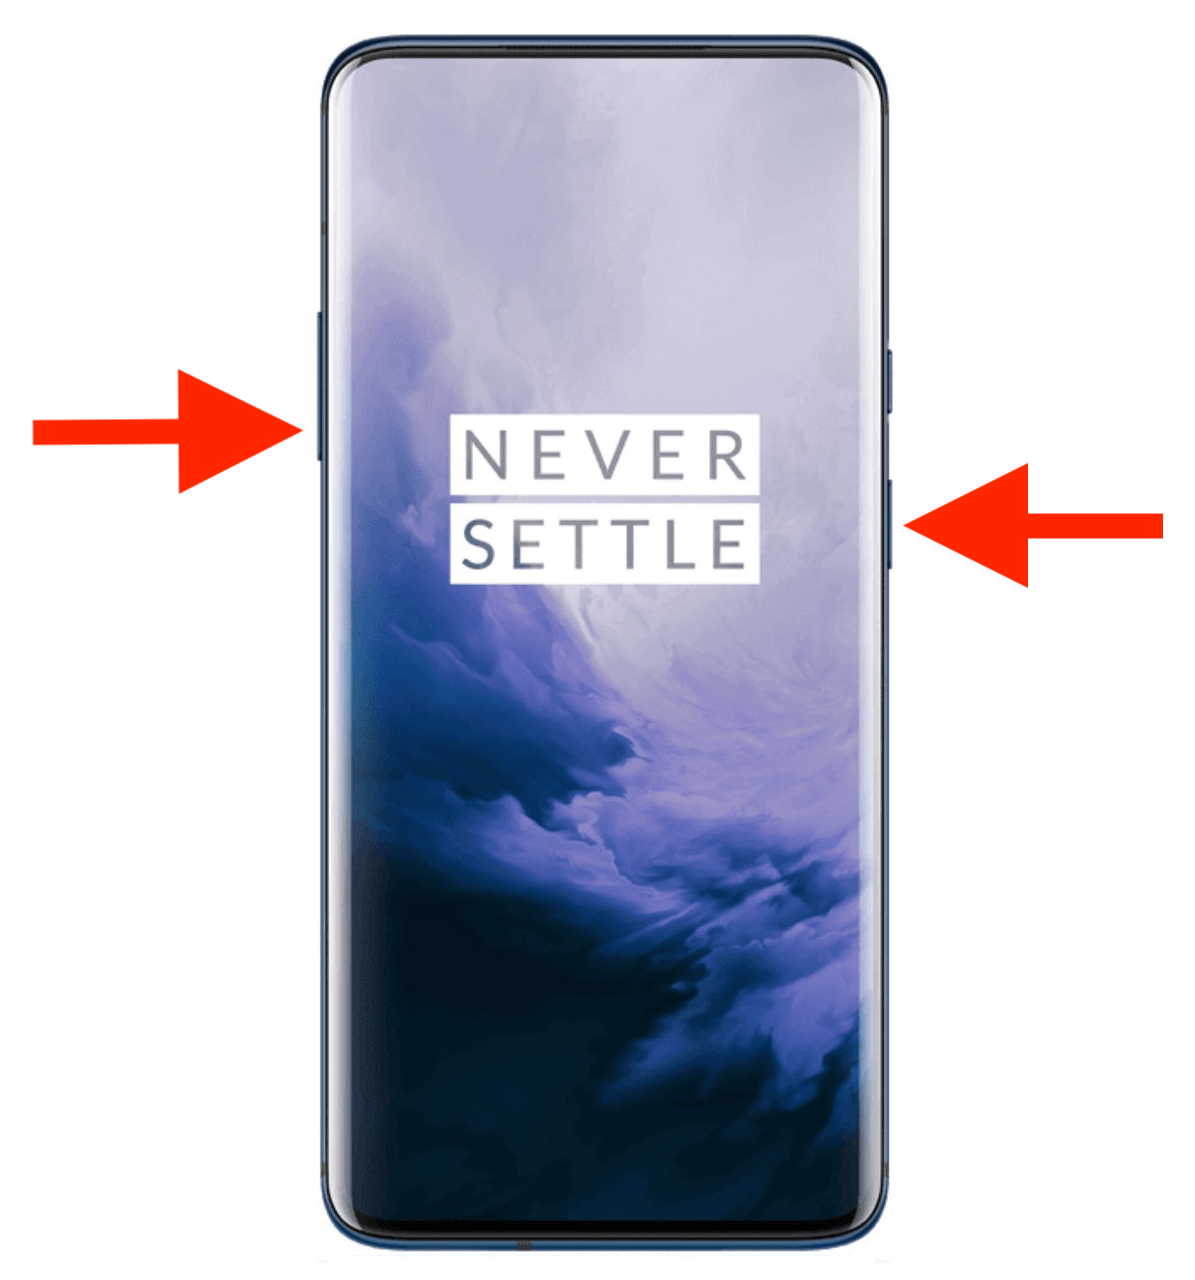
This method involves using physical buttons on the device to take a screenshot. As you may know, this is a conventional way of capturing a screenshot on an Android device, irrespective of the software or custom skin it runs on.
- Navigate to the screen you want to capture.
- Press the Power + Volume Down buttons at the same time.
- The screen will flash and you will hear a shutter sound.
- The screenshot captured will appear for a moment.
- Tap the edit, share or delete option from the bottom toolbar, if needed.
The screenshots taken can be viewed later from the “Screenshot” folder in the Gallery. Besides, a popup will appear in the notification panel to let you view, share or delete the particular screenshot.
RELATED: Here’s how to take a screenshot on OnePlus 7T
Method 2 – Using Three-finger gesture
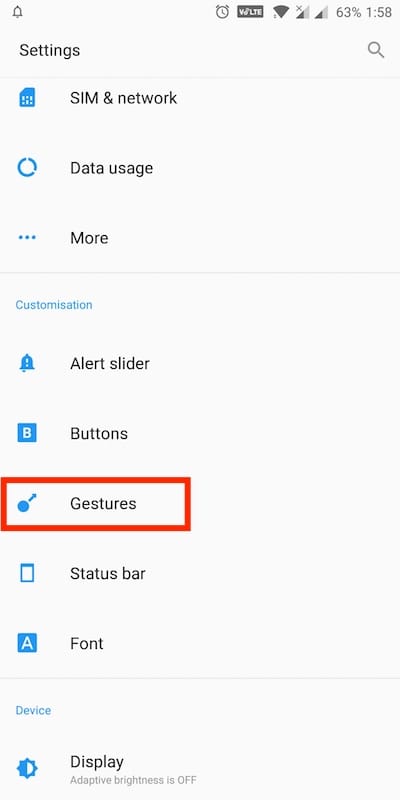
Similar to Samsung, OnePlus offers an interesting and quick way to capture screenshots using a swipe gesture. To use it, you first need to enable a certain gesture in the phone settings. To do so,
- Go to Settings > Gestures (under Customisation).
- Enable the toggle for “Three-finger screenshot”.
- Now simply swipe up or down with three fingers.
- The screen will be captured in a flick.

Besides the OnePlus 7 series, the above methods will work with the OnePlus 5, 5T, OnePlus 6, and 6T.
How to take a scrolling screenshot on OnePlus phones

In addition to standard screenshots, OxygenOS on OnePlus 7 and 7 Pro offers the ability to take a scrolling screenshot. With continuous screen capture functionality, you can take an expanded screenshot of an entire webpage or a long conversation that usually won’t fit on one screen.
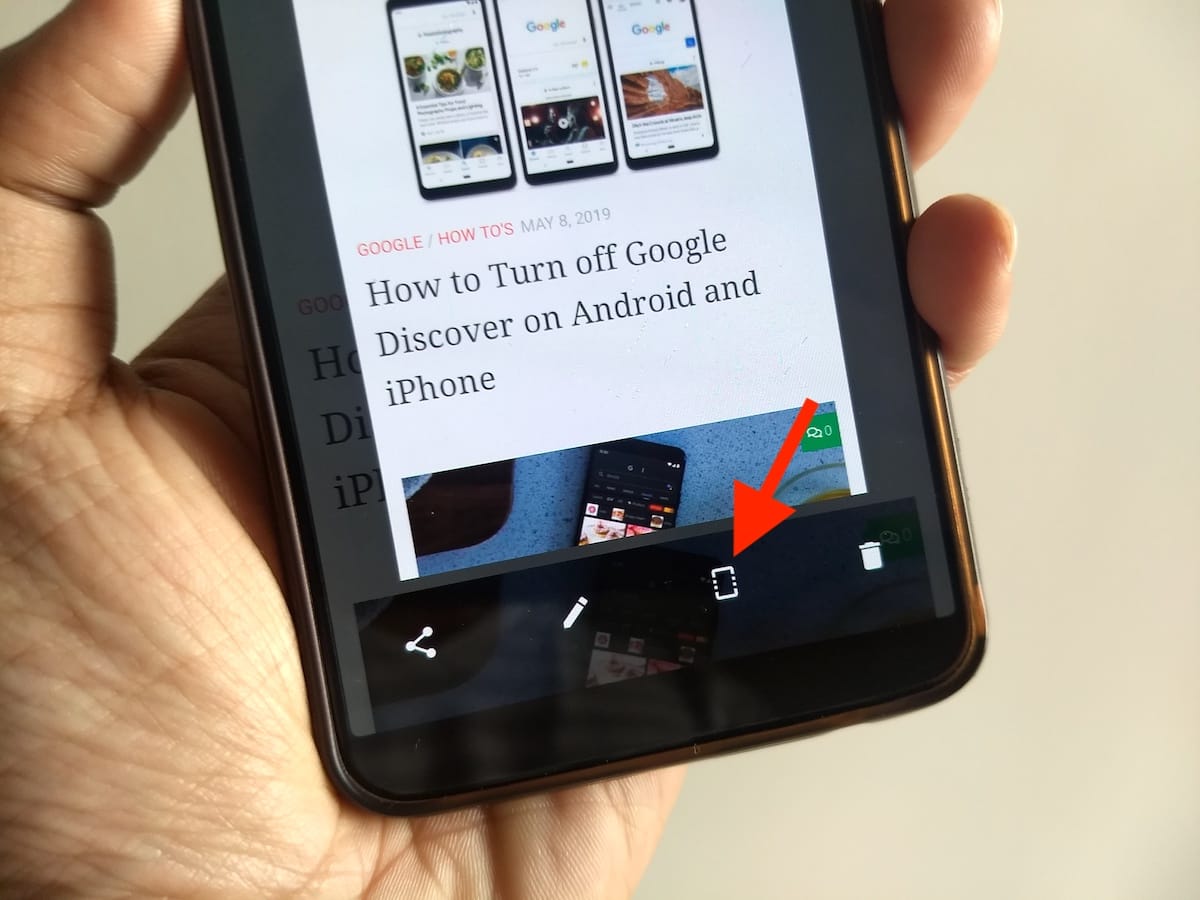
- Press and hold the Power and Volume Down button simultaneously.
- Tap the “Scrolling Screenshot” icon from the toolbar at the bottom.
- The screen will scroll automatically and take continuous screenshots.
- Tap the screen to stop scrolling and an expanded screenshot will be captured.
If you don’t stop the capture then it will continue to run until it reaches the end of the page or screen.
That’s it for now. We will be sharing more tips related to the OnePlus 7 in the near future.


